
Install Routing Director
This topic describes at a high-level the steps that you must perform to install Routing Director on a supported VM deployment platform using an OVA file.
As a system administrator, you can install Routing Director by downloading an OVA bundle. Use the OVA bundle to deploy the node virtual machines (VMs) on one or more servers. The installation is air-gapped but you need Internet access to download the OVA bundle to your computer.
To install Routing Director, you must create the node VMs using the downloaded OVA (or extracted OVF and VMDK) files. The software download files come prepackaged with the base OS and all packages required to create the VMs and deploy your Routing Director deployment cluster. The VMs have Ubuntu 24.04.4 LTS (Noble Numbat) Linux base OS.
After creating the VMs, configure each VM using the same settings and procedures. Once all VMs are configured and ready, deploy the Routing Director cluster using Deployment Shell.
If you are working from a remote machine, you can instead create a local installer VM on the target server or on another server. This installer VM can be a basic Ubuntu Desktop VM and eliminates the need to download the installation files to your remote machine and perform the installation remotely. For more information, see Download the Software Image File.
Figure 1 illustrates the Routing Director installation process at a high-level.
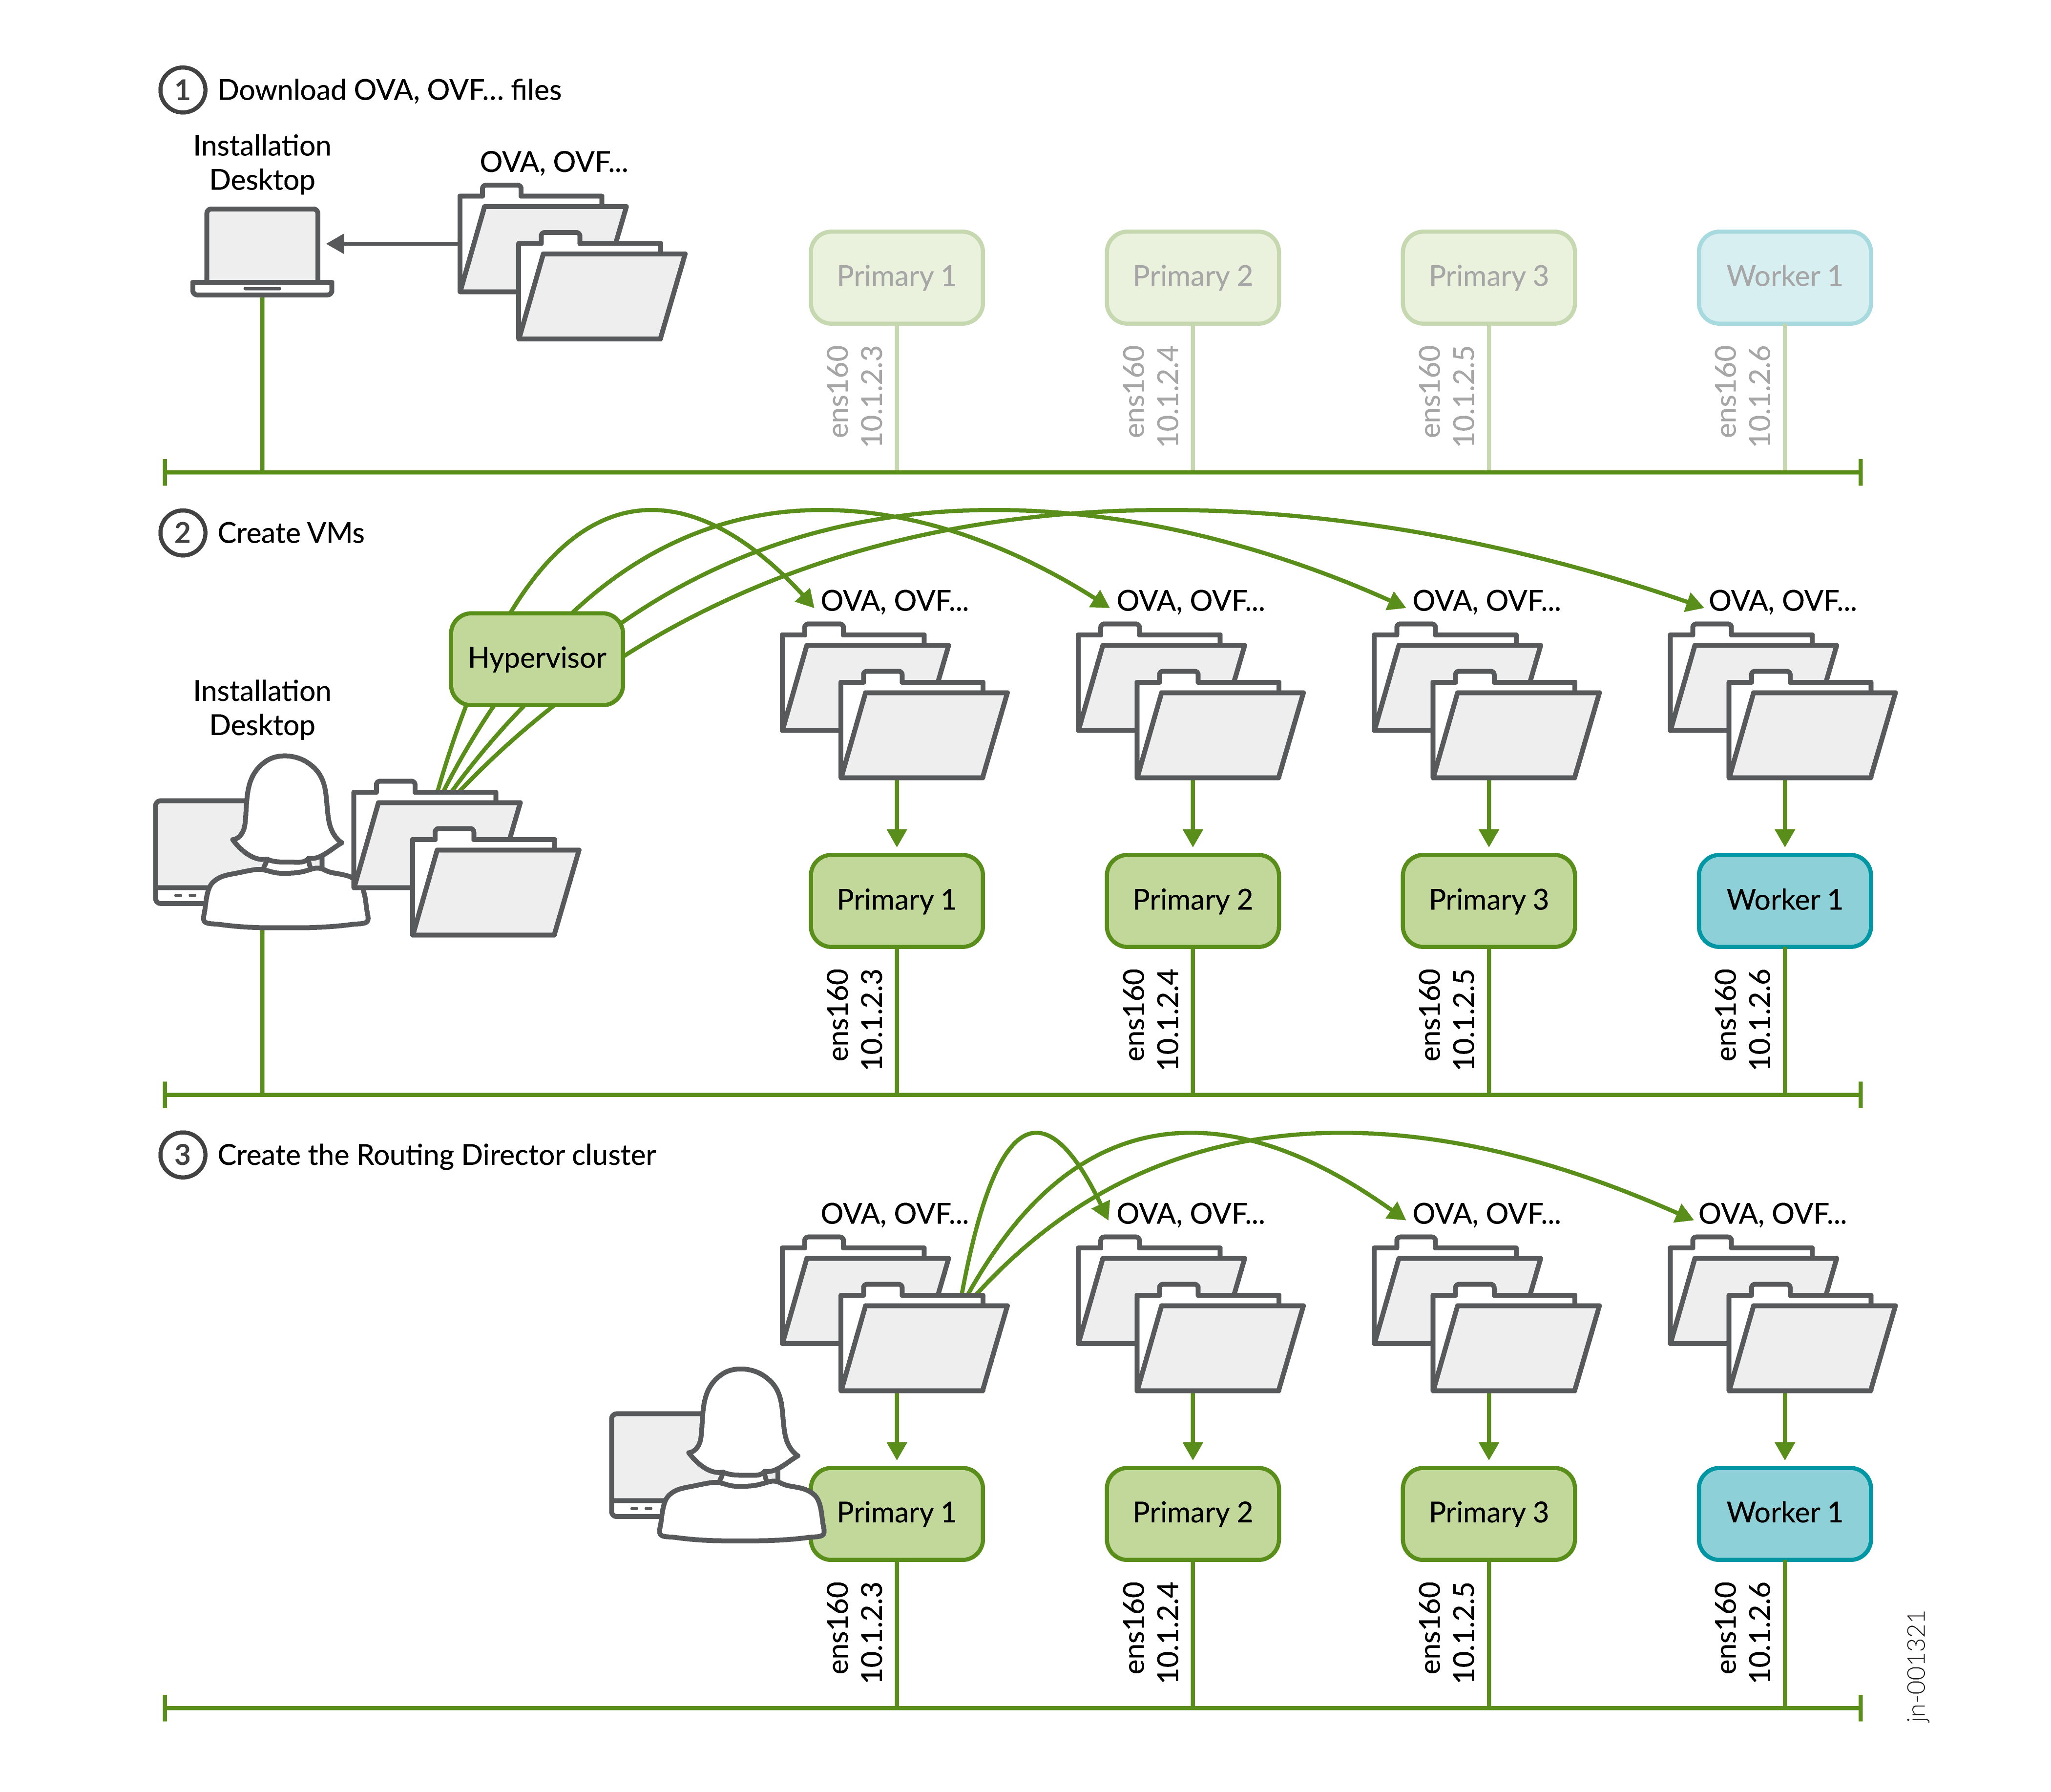
You create the VMs directly using the OVA (or OVF and VMDK) bundle. You do not need to create the VMs separately with any running software (for example, Ubuntu), or explicitly create interfaces, install Docker separately and so on. These are all automatically created and configured when you create the VMs using the OVA (or OVF and VMDK) bundle.
Install on KVM, Proxmox VE, and VMware ESXi
This section provides a high-level view of the steps that you must perform to deploy Juniper Routing Director on the listed virtualized VM deployment platforms.
To install Routing Director on the KVM, Proxmox VE, and VMware ESXi deployment platforms, perform the following steps.
Download the Software Image File—Download the OVA file and extract the OVF and VMDK files if needed.
Create the Cluster Nodes—Create the node VMs.
Configure the node VMs—Configure the node VMs for deployment.
Deploy the cluster—Deploy the cluster on the configured VMs.
Log in to the Web GUI—Verify the deployment and log in to the Web GUI.
To begin installation of Routing Director on the listed virtualized VM deployment platforms, go to Download the Software Image File.
Install on AWS
This section provides an overview of deploying Juniper Routing Director on Amazon Web Services (AWS). It outlines the installation prerequisites, required AWS permissions, and the overall workflow for installation.
Deploy Routing Director on Amazon Web Services (AWS) using Amazon Elastic Compute Cloud (Amazon EC2) instances created from the provided OVA image. This deployment model provides north-south access by using AWS Network Load Balancers (NLBs) in front of Kubernetes NodePort services.
Ensure that the administrator performing the installation is AWS Certified or has strong working knowledge of AWS.
Perform the following steps to install and deploy Routing Director on AWS:
Download the Software Image File—Download the OVA file and extract the VMDK files.
Import Routing Director Image Files to AMI—Import Routing Director VMDK image files to Amazon Machine Image (AMI).
Create the Security Groups—Create the security groups to allow traffic to and from the Routing Director cluster nodes.
Launch the EC2 VMs—Create and launch the EC2 VMs.
Create the Target Groups and Load Balancers—Create the target groups and load balancers to enable access to the Routing Director cluster and its applications.
Deploy the Cluster—Deploy the cluster on the configured VMs.
Prerequisites to deployment
Ensure that you have the following information available before you install Routing Director on AWS.
-
Login credentials to AWS with permission to create, modify, and delete VMs, security groups, load balancers, IAM roles and policies, along with access to the S3 bucket.
For information on AWS CLI settings, see https://docs.aws.amazon.com/cli/latest/userguide/cli-configure-files.html.
-
The S3 bucket must be preconfigured.
-
The
vmimportrole must be created. -
A VPC subnet that can access the Internet on any NTP server.
-
External DNS names for the following:
-
Hostname for generic ingress shared between the Routing Director Web GUI and NETCONF, and access
-
Hostname for Active Assurance test agent gateway
-
Hostname for PCE server
-
Hostname for routing observability.
-
-
Install the
aws-cliutility. -
Access + secret key to run
aws-clito upload and import images.
What's next
To start the deployment process by downloading the software installation OVA, go to Download the Software Image File.