
Download the Software Image File
Before deploying Juniper Routing Director, you must download the Routing Director installation image file (OVA) and verify its integrity. The OVA file contains the software required to create the cluster node virtual machines and serves as the foundation for the deployment process. Because the file can be large, you can download it to a local installer VM or directly to the target hypervisor, ensuring that sufficient storage is available. After downloading, you can optionally verify the file's SHA512 checksum to confirm that the image was downloaded successfully and has not been corrupted. Once the OVA file is available and validated, you can proceed with creating and configuring the cluster node VMs for your environment.
Download and verify the integrity of the OVA file.
Download the Routing Director Installation OVA file from the Juniper Routing Director software download site. The OVA is used to create the node VMs and deploy your cluster.
Note that the actual filename includes the release date in it, such as routing-director-2.10.0-build.ova.
The file is large in size, and it might take considerable time to download it and then create the VMs from your computer. So, we recommend that you create a local installer VM, which can be a basic Ubuntu desktop VM, either on the same server where you want to install Routing Director or on a different server. You must be able to download the OVA file to this local installer VM and you must have enough space on the VM to store the file. Configure connectivity to the management IP addresses of the servers as show in Figure 1.
Figure 1: Local Installer VM to download the OVA/OVF files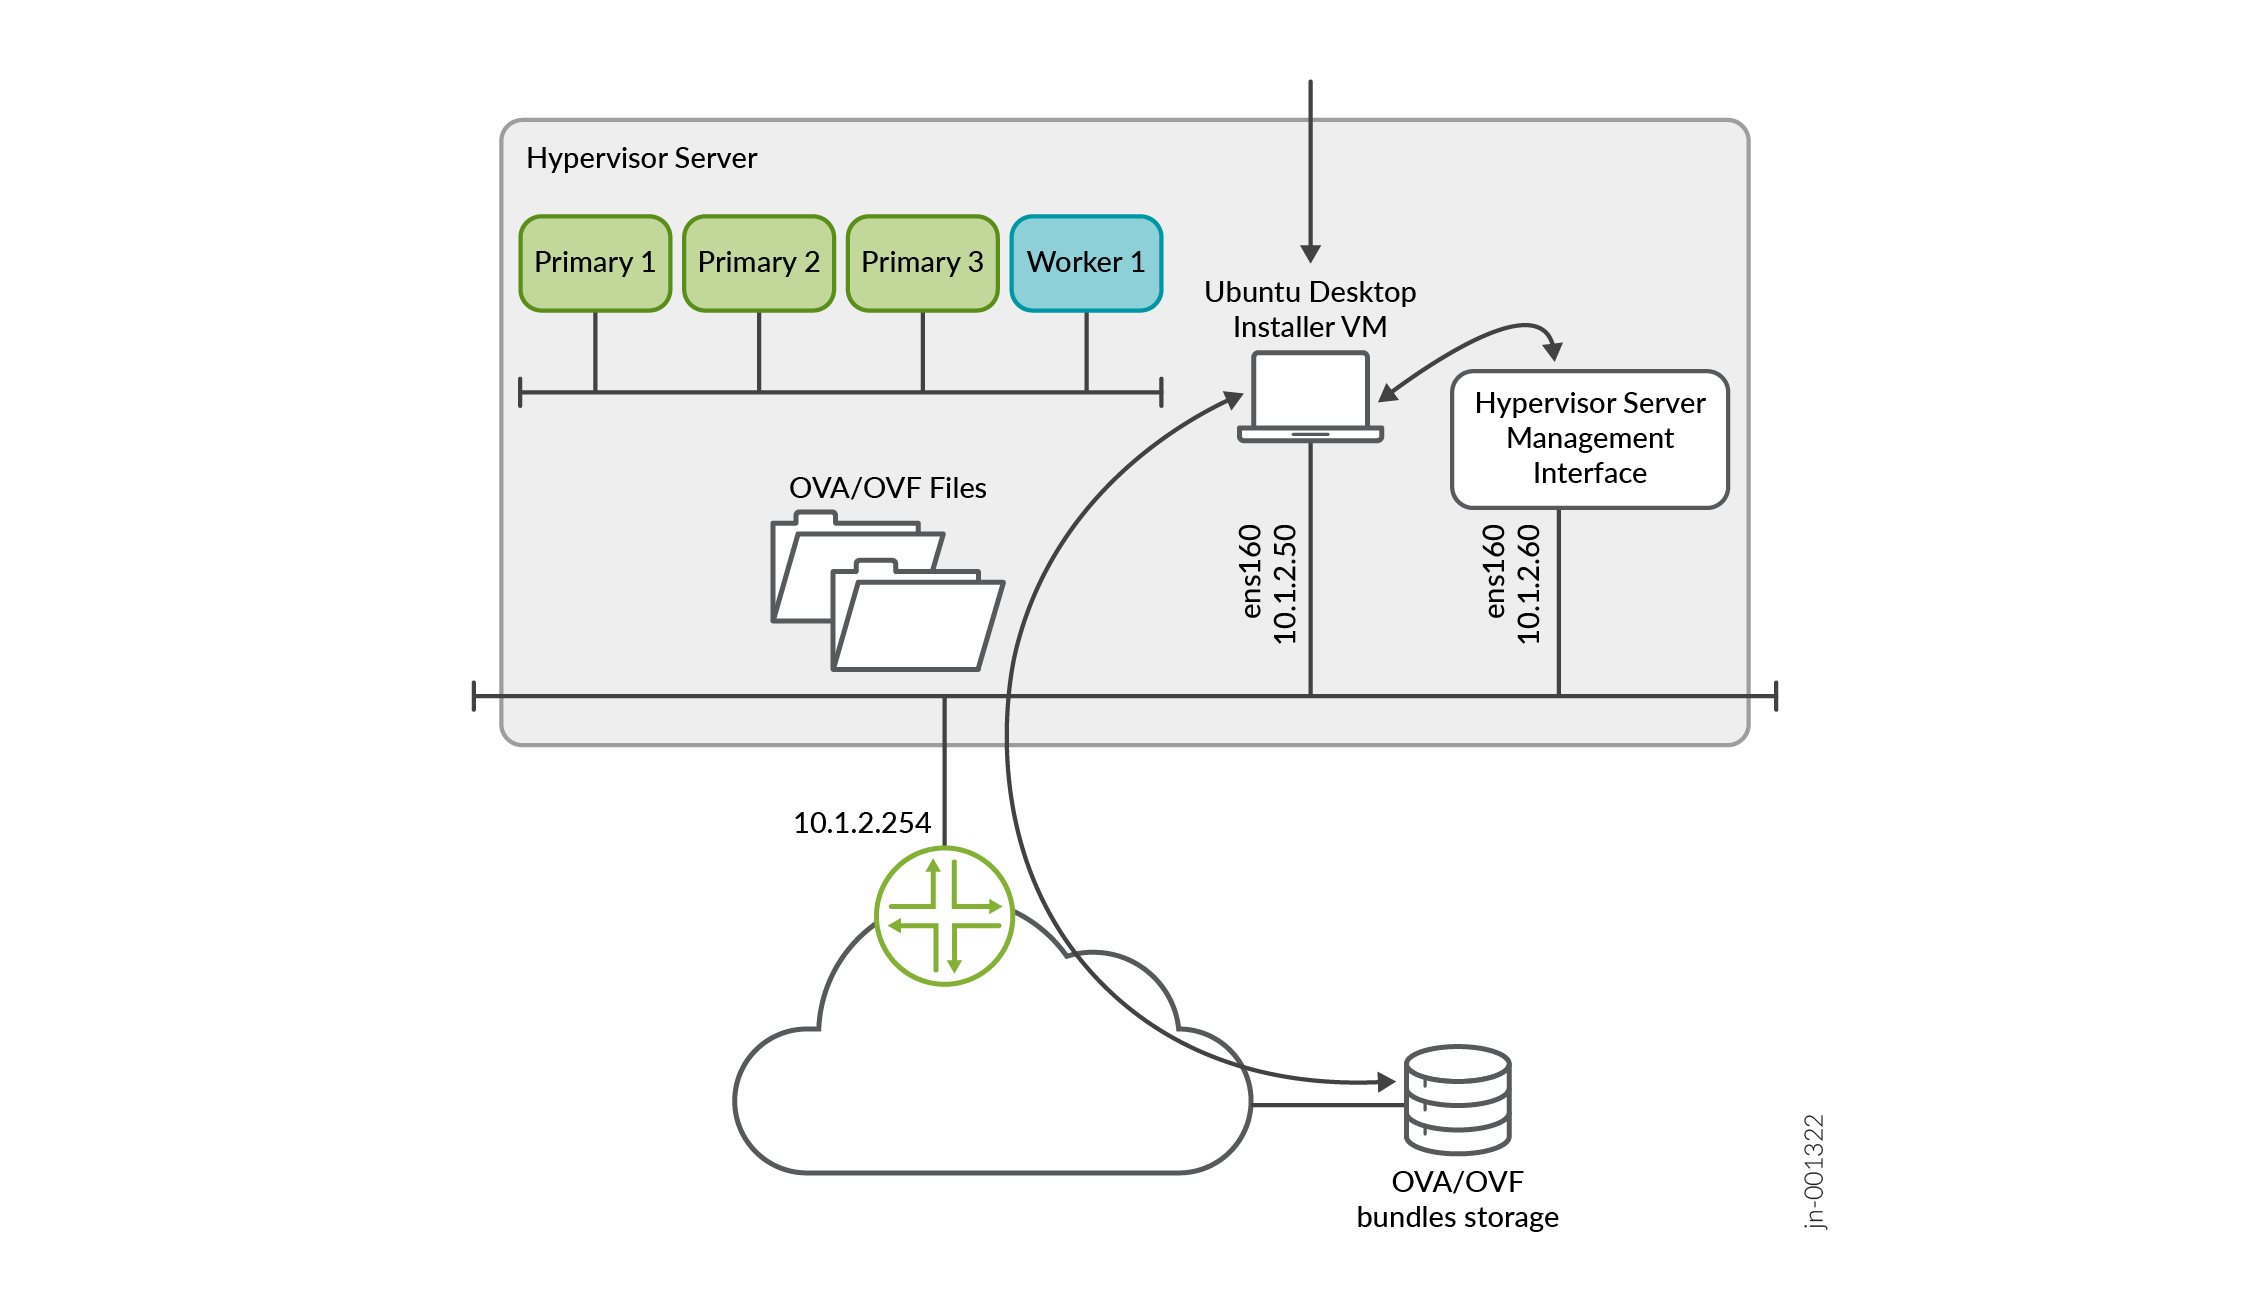
Alternatively, you can use the
wget
                "http://cdn.juniper.net/software/file-download-url/routing-director-2.10.0-build.ova"
command to download the OVA directly on to your hypervisor.(Optional) Validate the integrity of the OVA file. If you are using an Ubuntu desktop, use the following command:
root@ubuntu:~$ sha512sum routing-director-2.10.0-build.ova
7deda68aae8ba6399aa95d5365a659a8d579c5562811ebe588972cf0c5107337628370d78dcbdb56ab8ea97e73b7597f3a5ff06e9f501706bd8954b7454b86d2 routing-director-2.10.0-build.ova
Verify that the number displayed onscreen is the same as the SHA512 checksum number available on the Juniper Routing Director software download site. Click Checksums to view the valid SHA512 checksum.
Use the OVA directly, extract the OVF and VMDK files from the OVA before you create your node VMs:
On KVM and Proxmox VE
If you are using KVM, you must extract the .vmdk files from the OVA using the
tar -xvf routing-director-2.10.0-build.ovacommand.The rest of this document assumes that the OVA is downloaded to a single KVM server. If you have multiple servers, then download the files onto all the servers. The steps described in this document are general guidelines to create the VMs using the CLI method of deployment. You can also use GUI-based deployment and alter the steps to match your hypervisor requirements. Network configuration of the hypervisor is out of scope of this document.
After the software image is downloaded, go to Create the node VMs on KVM or Create the node VMs on Proxmox VE depending on your hypervisor.
On VMware ESXi
If you are using ESXi, you can use the OVA directly to create the VMs.
You can also extract and use the OVF and .vmdk files from the OVA to create your VMs. To extract the files, use the following command:
root@ubuntu:# tar -xvf routing-director-2.10.0-build.ova
routing-director-2.10.0-build-disk1.vmdk
routing-director.-2.10.0-disk2.vmdk
routing-director-2.10.0.mf
routing-director-2.10.0.ovf
If your installation desktop is running Windows, you can download and use the tar utility from https://gnuwin32.sourceforge.net/packages/gtar.htm to extract the files.
Note:If you are using a stand-alone ESXi server without vCenter, due to a limitation of the VMware host client, you cannot upload large OVA files to the client. In such cases, you must extract and use the OVF and .vmdk files to create your VMs.
After the software image is downloaded, go to Create the nodes on ESXi 8.0.
On AWS
If you are using AWS, extract the .vmdk files from the OVA.
After the software image is downloaded, go to Create the node VMs on AWS.
What's Next
To create the node VMs after the software image is downloaded, go to Create the node VMs on KVM, Create the node VMs on Proxmox VE, Create the nodes on ESXi 8.0 or Create the node VMs on AWS depending on your VM deployment platform.