
Manage Global Cloud Portal Settings
The Global Cloud Portal provides centralized access to all your organizations.
Instead of logging in separately to each organization, you can log in once through the portal and gain access to all organizations from a single dashboard.
Access the portal at https://auth.global.mist.com.
-
The Global Cloud Portal requires a global account to authenticate you. See, Create a Global Account.
- Once you link your local and global accounts, organizations associated with the same e-mail address are automatically available after login on the Global Cloud Portal.
- No additional sign in is required to access different cloud environments.
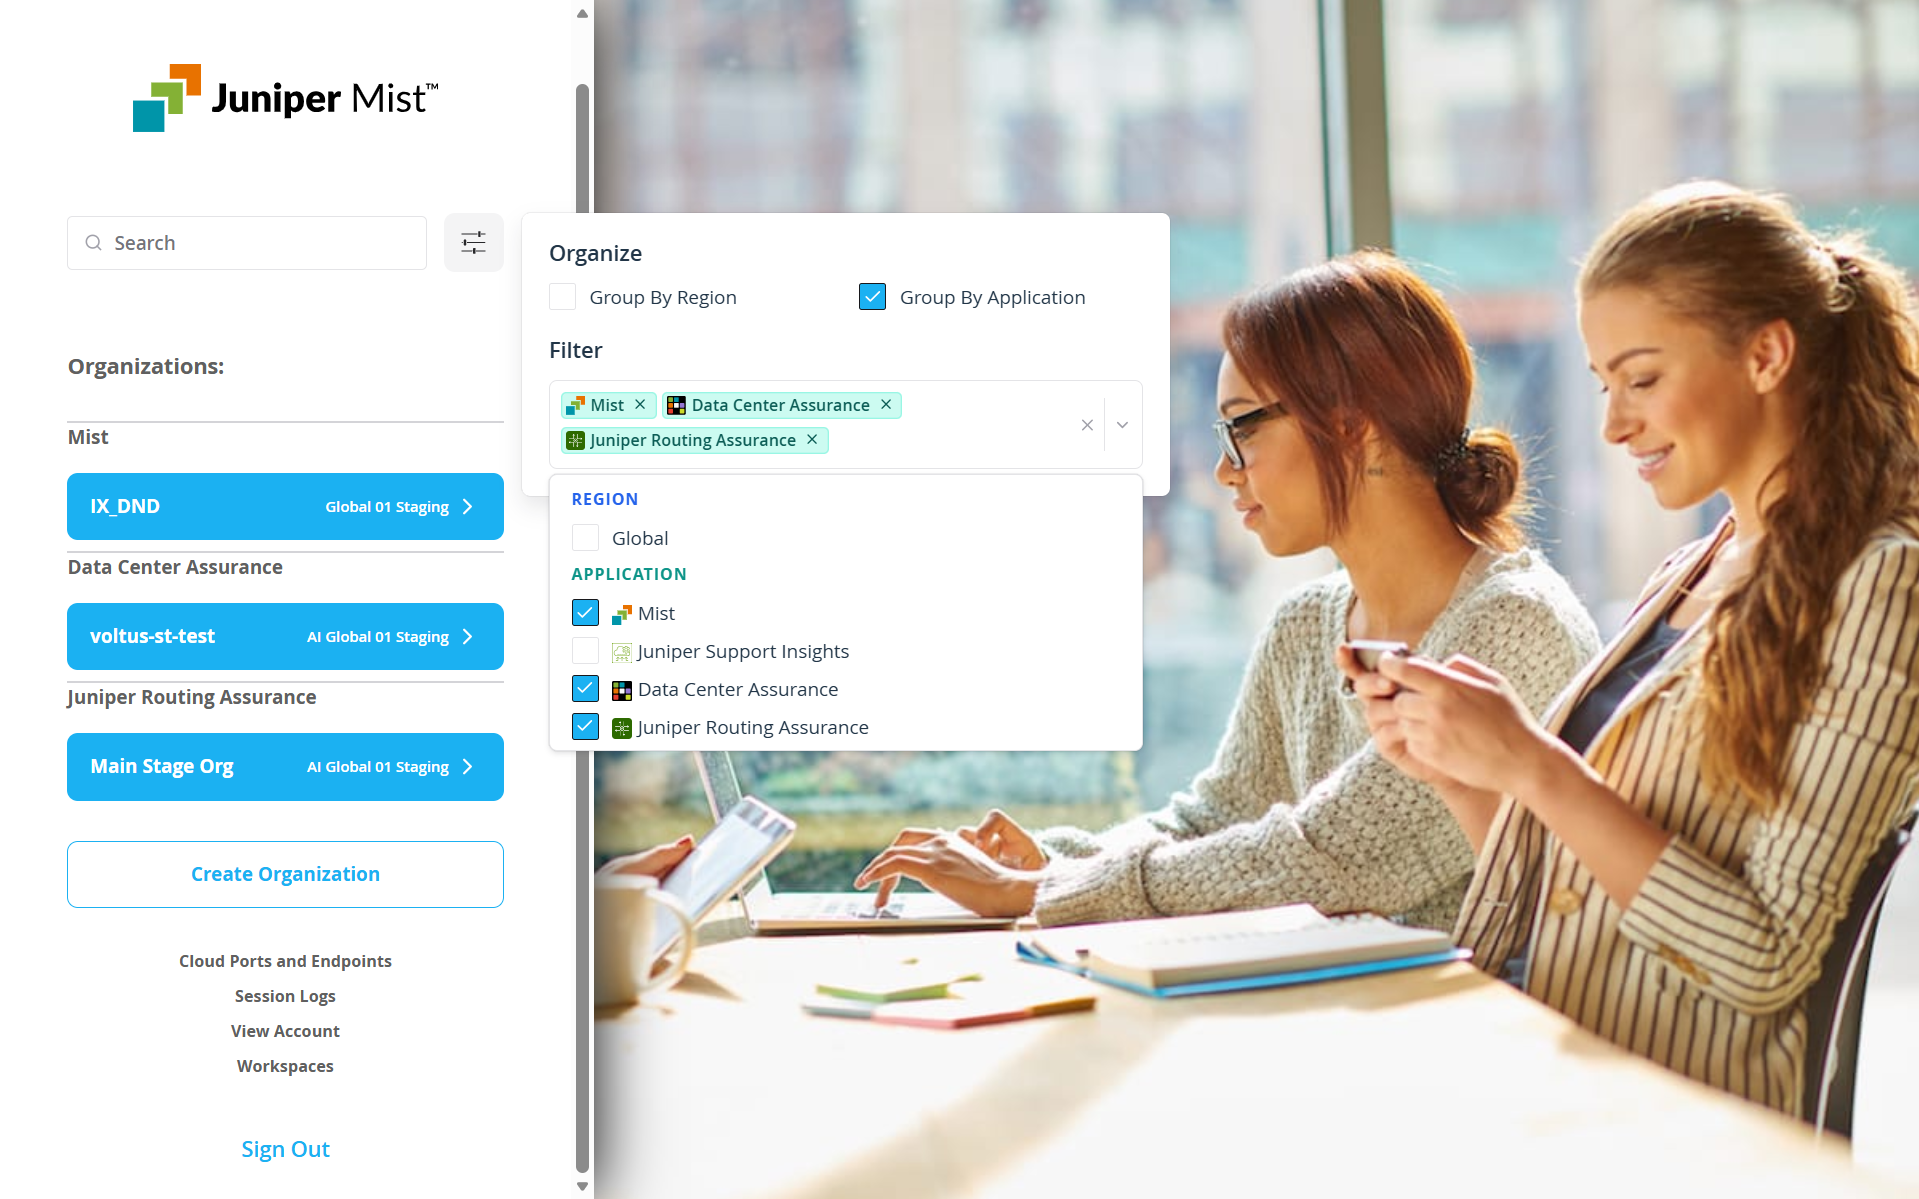
Tasks You Can Perform
You can perform the following tasks from this portal:
-
Organization Management
-
Create Organization—Click Create Organization, then select the primary application portal that users are directed to when accessing the organization. The cloud region is automatically selected and cannot be modified.
Click Create Organization. You are redirected to the application portal’s Create Organization page. Enter a unique name for the organization and click Save.
Note: You can update the preferred portal from the organization's Settings page. See, Set a Preferred Portal for an Organization. -
View organizations that you created or are authorized to access—Click an organization tile to access the organization. You are redirected to the preferred portal configured for that organization. See, Set a Preferred Portal for an Organization.
-
Group organization by cloud region and application—Click the Filter icon and select the Group by Region or Group by Application check-box.
The drop-down lists all the regions and applications where you have organizations.
-
Search organizations by name—Enter the name of the organization in the search field.
-
-
Account Management
Click View Account to view your account details and manage account settings.
-
Change your first name and last name.
-
Change you password—Click Change Password. In the Change Password window, enter your current password and then enter and confirm your new password. Click Update Password to save the changes.
After updating your password, you are automatically logged out of your current session and returned to the Global Cloud Portal login page. Log in again using your new password.
-
Enable two-factor authentication—Click Two-Factor Authentication and scan the QR code displayed on the screen using an authenticator app. The app will generate a 6-digit OTP. Enter the OTP in the Enter Token field on the portal. Click Save to complete the setup.
Once enabled, you will be prompted to enter an OTP from your authenticator app each time you log in.
-
Enable Sign in with Google—Click Enable Sign In with Google to link your Google account to the Global Cloud Portal. The Google sign-in window appears. Select your Google account and grant the required permissions.
Once linked, you can log in using the Sign in with Google option on the login page.
-
Update Session Timeout—Enter the time, in minutes, after which the session should timeout and click Update Session Timeout. By default, a session times out after 1440 minutes.
-
Permanently delete your global account—Click Delete Account.
The Delete Account window appears. Enter your registered e-mail address in the Email Address text box and click Delete.
CAUTION:You cannot restore a deleted account. However, you can still access your organizations through application-specific URLs using your local account.
-
-
Workspace Management
Workspace provides centralized management of Single Sign-On (SSO) and authentication settings for the Global Cloud Portal. For more information, see Manage Your Global Workspace.
-
Monitor Session Logs—Click Session Logs to view your activity log in the Global Cloud Portal, including actions such as login, organization access, and workspace operations.
Use it to centrally monitor usage and track actions performed from the portal.
-
View information on cloud ports and endpoints