Step 1: Verify and Secure Local Branch Connectivity
There’s no better way to get to know your SRX than to just jump in and start using it. First, let's use the CLI to verify the operational state of your SRX. This step assumes you've done the initial configuration using the factory defaults, as described in the Day One+ guide. At this point, you should have both local and Internet connectivity for your branch.
Understand SRX300 Line Default Connectivity
Figure 1 shows the ending state of your branch office after you've done the initial configuration. We'll show you how to leverage the SRX factory-default configuration to get the branch online quickly.
As we noted in Table 1, some SRX300 Line models have dedicated management interfaces while other models don't. This impacts the IP subnet used for the trust LAN ports. The diagram below is based on a SRX model with a dedicated management interfaces, specifically a SRX380. If your SRX does not have a dedicated management interface, simply alter the IRB subnet shown to reflect 192.168.1.0/24. You’ll have to keep this change in mind as you proceed through the guide.
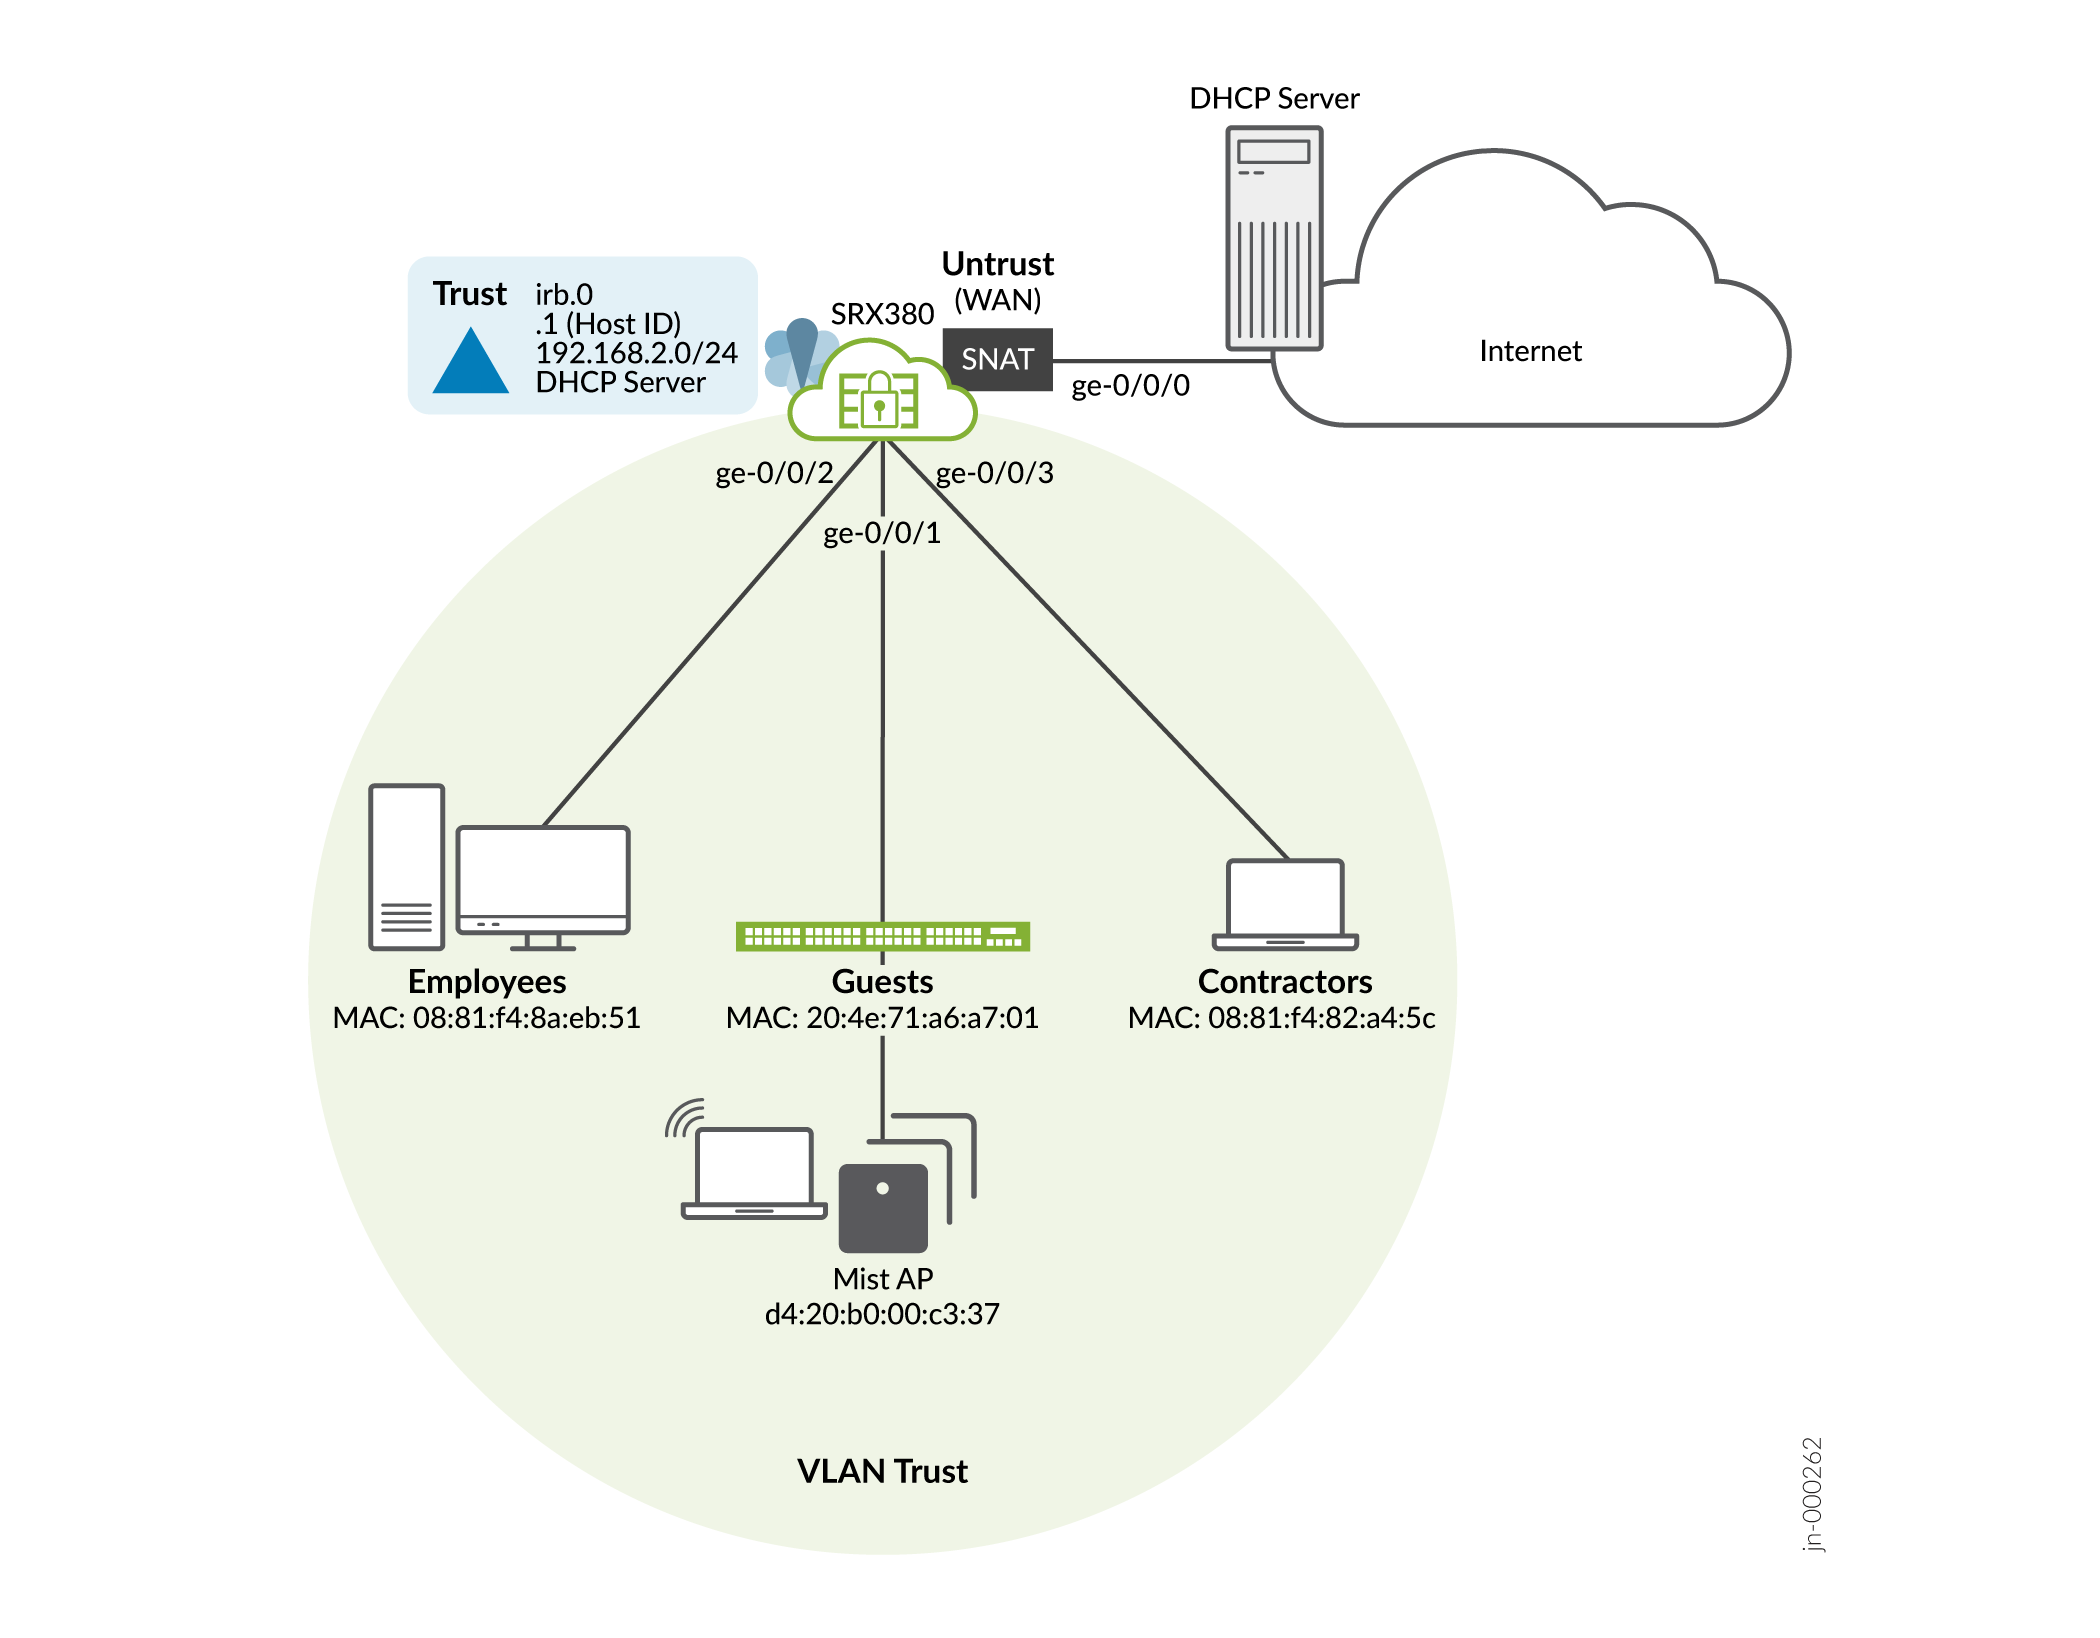
Our default connectivity is based on a SRX380, which again, has a dedicated management interface. If your device does not have a management interface then your trust LAN ports use 192.168.1.0/24.
First, a few reminders about the Day One+ ending state for your SRX300 Line device:
How to Access the CLI
There are several ways to access the SRX CLI. In all cases, you log in as the root user using the password that you configured in the Day One+ procedure:
- Direct console access with a serial port
-
SSH access:
Access via a trust zone device
You can SSH to 192.168.2.1 from a device attached to a local LAN port in the Trust VLAN.Access via a management interface
If the SRX has a dedicated management interface (fxp0), SSH to 192.168.1.1 from a device attached to the out of band management network.Remote access
To access the SRX remotely, use the IP address assigned by the WAN provider to the ge-0/0/0 interface. Simply issue theshow interfaces ge-0/0/0 tersecommand on the SRX to confirm the address assigned by the provider to the WAN interface.
Default LAN Port Configuration
- Devices attached to the LAN ports are configured to use DHCP. They receive their network configuration from the SRX. These devices obtain an IP address from the 192.168.2.0/24 address pool using the SRX as a default gateway.
- The trust zone LAN ports are in the same subnet with Layer 2 connectivity. All traffic is permitted between trust interfaces.
- All traffic originating in the trust zone is permitted in the untrust zone. Matching response traffic is allowed back from the untrust zone to the trust zone. Traffic that originates from the untrust zone is blocked from the trust zone.
- The SRX performs source Network Translation (source NAT) using the WAN interface’s IP address for traffic originating from the trust zone and sent to the WAN untrust zone.
- Traffic associated with specific system services (HTTPS, DHCP, TFTP, and SSH) is permitted from the untrust zone to the local host. All local host services and protocols are allowed for traffic that originates in the trust zone.