Performing Hitless Software Upgrade on Data Center Devices
Perform the following steps to upgrade the software image on the devices in a data center fabric with no loss of user traffic.
To perform hitless software upgrade on data center devices.
-
Upload the software images to which you want to upgrade
your devices.
-
Navigate to the Infrastructure > Fabrics page in Contrail Command. A list of fabrics is displayed in the Fabrics tab.
-
Click the Upload button in the Images tab. The Upload Image page appears.
-
Enter the required software image details and click Upload. Table 1 lists all the mandatory parameters that must be entered to upload a software image.
Figure 1: Upload Image
Table 1: Upload Image Fields Field Description Name
Enter a name for the software Image. This name cannot be changed once the image has been uploaded.
Pick a File
Select the actual image file to be uploaded.
Vendor name
Enter the image vendor name. For example, Juniper, Arista, and so on.
Device Family
Enter the device family. For example, junos, junos-qfx, and so on.
Supported Platforms
Enter all the device platforms that the image is compatible on. For more information on supported platforms, see Contrail Supported Platforms.
Os Version
Enter the OS version of the image. For example, 18.1R1.10.
Note:In the Os Version field, you should specify an exact OS version of the image. For example, if the OS version is '18.1R1.10 ' then you should specify it as '18.1R1.10' only. If you specify it as '18.1R1', the image upgrade will be successful. However, the upgrade job (running in the backend) will not be able to bring the device out of the maintenance mode (because of version mismatch) with no user feedback.
-
Upon successful image upload, the Images tab appears listing the newly uploaded software image. Apart from the image name, you can edit image details at any time.
The same list of device images is available for image upgrade in 3.
Figure 2: Device Images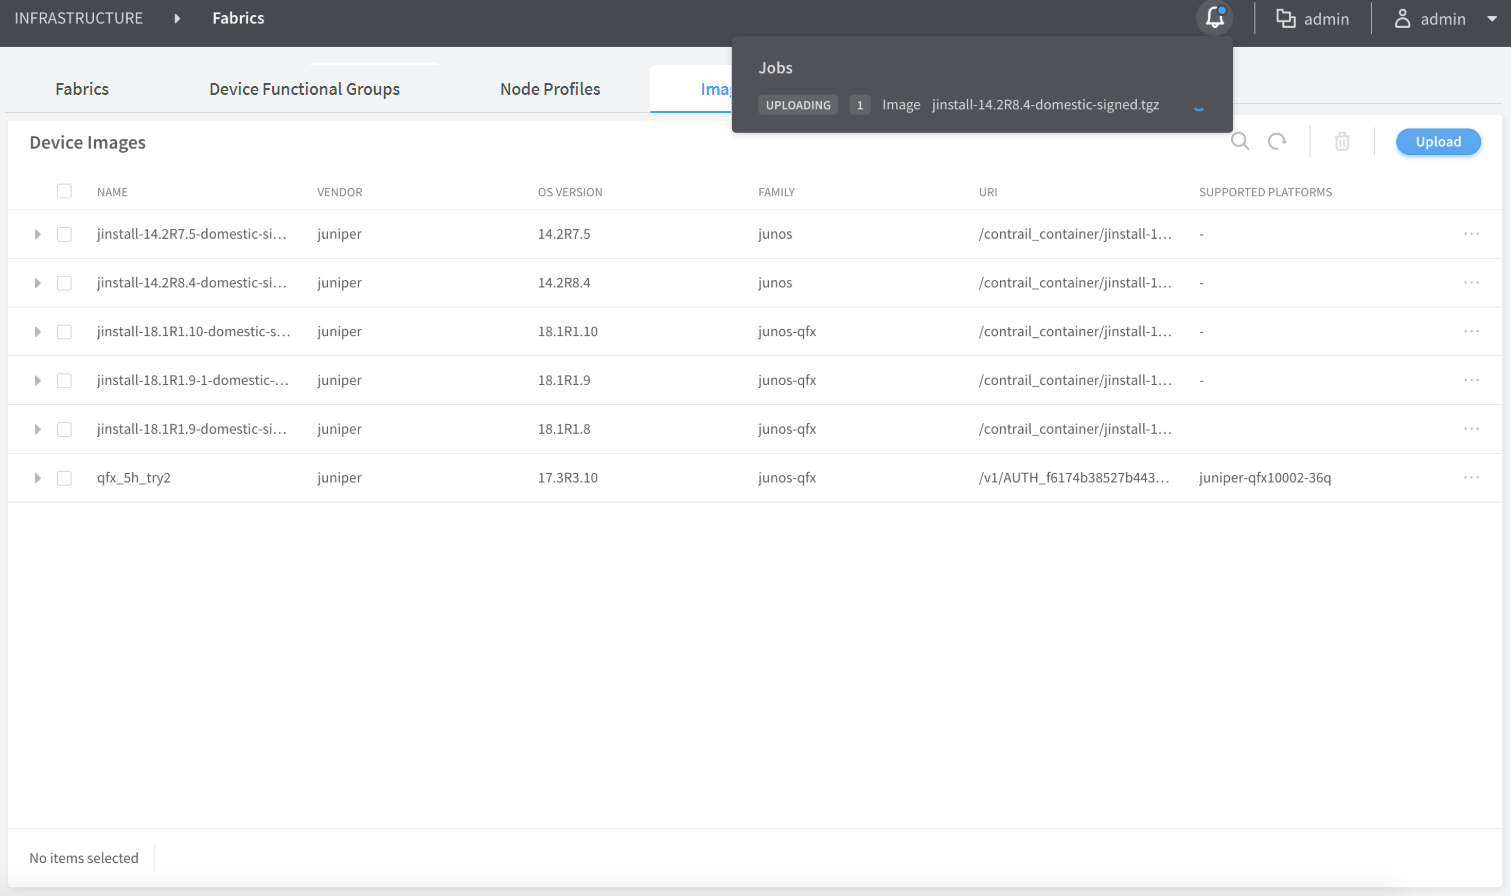
-
-
Select the image and the compatible devices to be upgraded
to that image in the Assign Devices tab.
You can select one or more devices in the fabric. You can also select multiple images.
Figure 3: Select Device > Assign Devices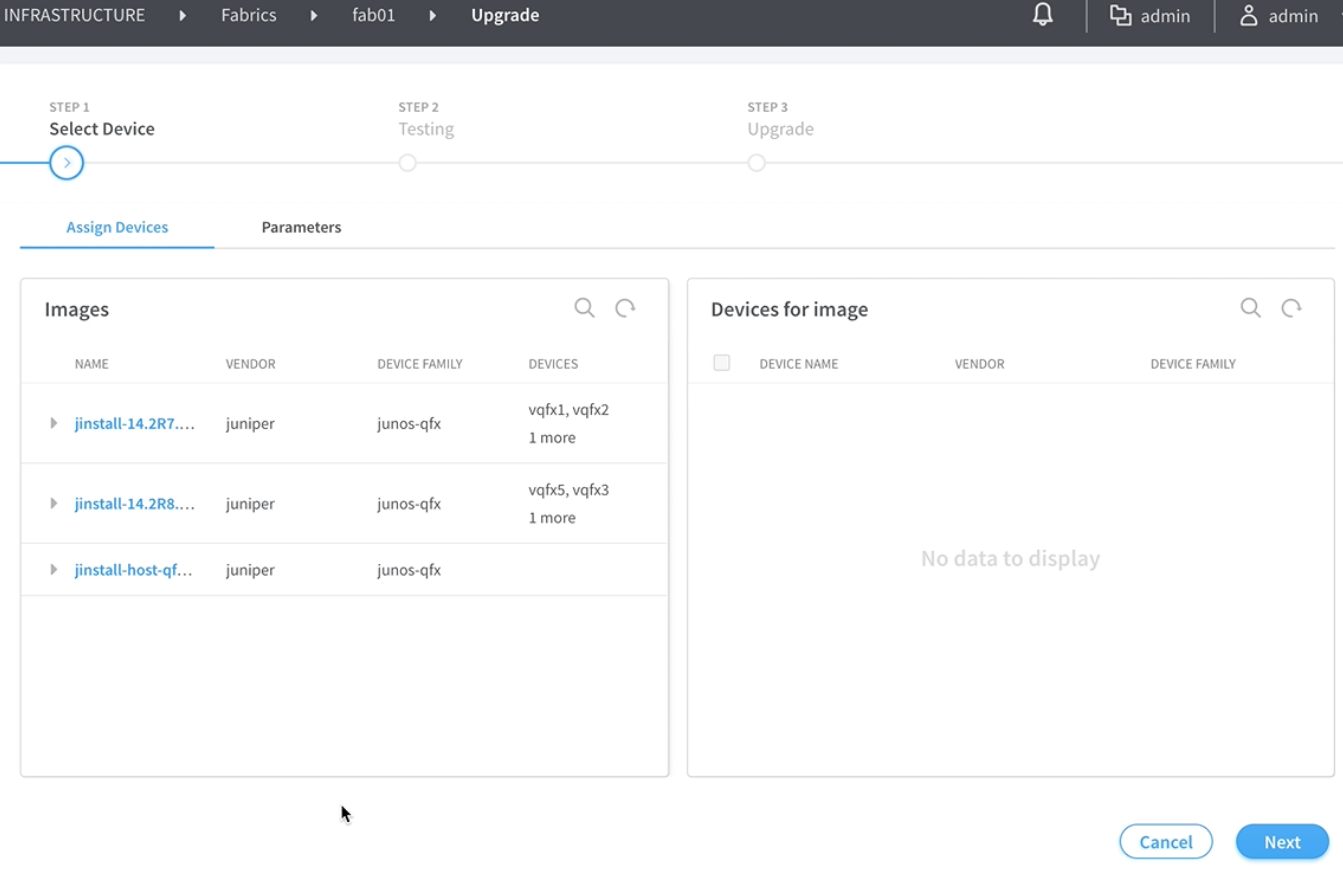
-
Select the health check parameters for each device in
the Parameters tab.
The health check parameters confirm that the devices and the network as a whole are stable to perform hitless image upgrade. By default, if health check fails for a particular device, then image upgrade is terminated. You can deselect the Abort on health check failure check box to continue upgrade on a device even if the health check fails.
Figure 4: Select Device > Parameters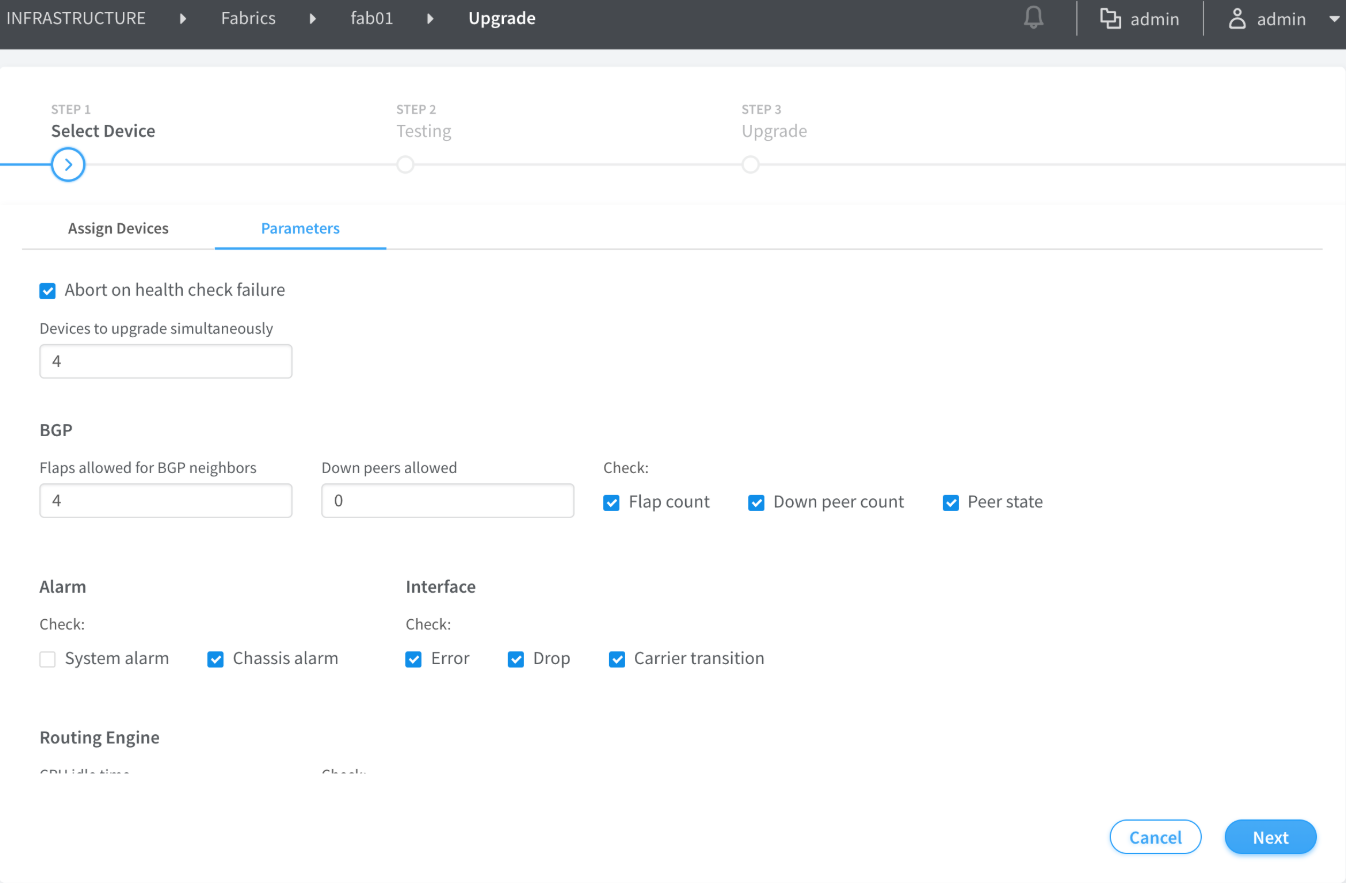
-
Click Next. The Testing page appears.
The Test Run tab checks that the devices selected for upgrade are not already running the selected software version. The Test Run tab also displays the result of the health check on the devices for the parameters selected previously in the Parameters tab. If health check fails for the selected parameters, then you can go back to the previous page by clicking Previous and either changing the value of the health check parameter or disabling the parameter altogether. You can perform this step multiple times until health check passes for the device or you are able to determine that upgrade on the devices is feasible. Alternatively, you can click Previous and deselect the Abort on health check failure check box in the Parameters tab to continue upgrade on a device even if health check fails.
Figure 5: Testing > Test Run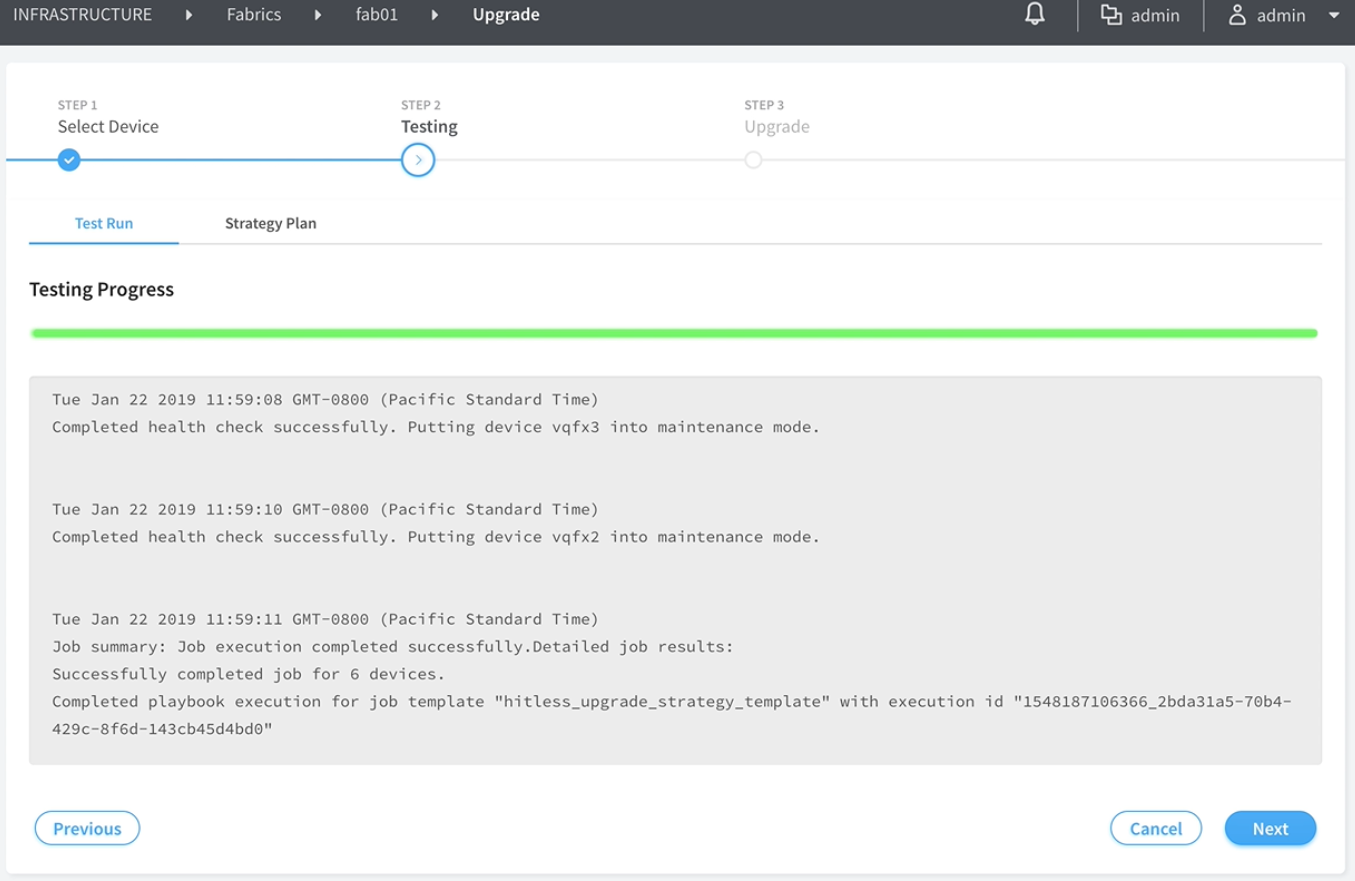
-
Click the Strategy Plan tab. The Strategy
Plan tab displays the strategy used to upgrade the images on
the selected devices. Image upgrades occurs in batches, where multiple
devices are upgraded at one go. The default maximum size of a batch
is four devices.
The leafs are upgraded first and in a separate batch from their corresponding spines. If multihoming is configured on a BMS, the corresponding leafs are upgraded in different batches. No more than half the total number if spines will be upgraded in a batch. The batches are formed so as to have backup devices in a separate batch to the devices being upgraded in order to make the upgrade hitless. You can view the summary of the strategy used to upgrade the devices at the top and you can scroll down to view complete details of the devices. The estimated time for image upgrade per batch is also displayed.
Figure 6: Testing > Strategy Plan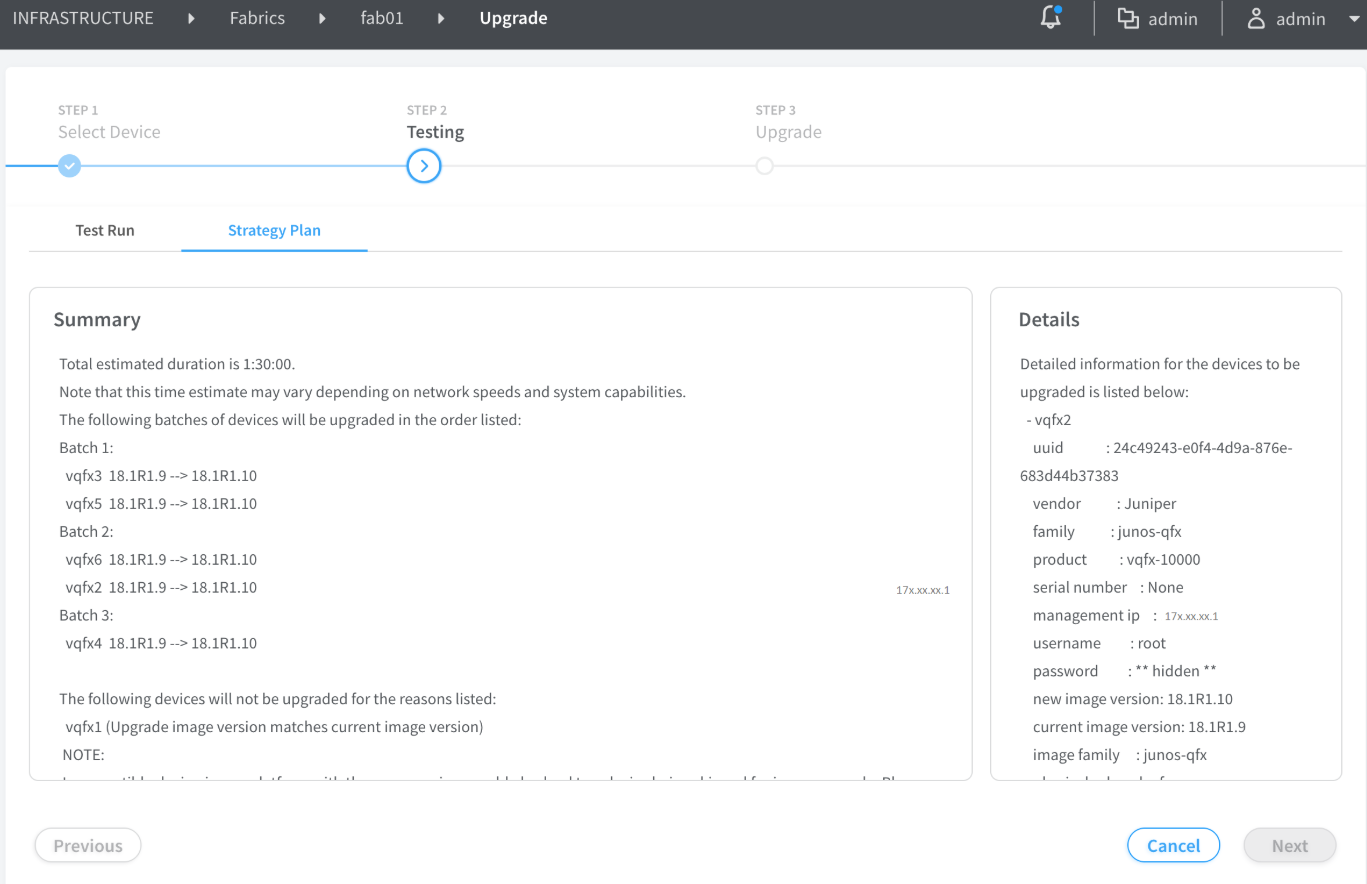
-
Click Yes to confirm that you want to continue
with the image upgrade. The Upgrade page appears displaying
the status of the image upgrade progress for each device. The cumulative
list of devices is displayed and the upgrade process happens according
the batches determined in the strategy plan. The overall progress
of all the devices is also displayed.
Alternatively, click No to go back to the previous page.
Figure 7: Testing > Strategy Plan Confirmation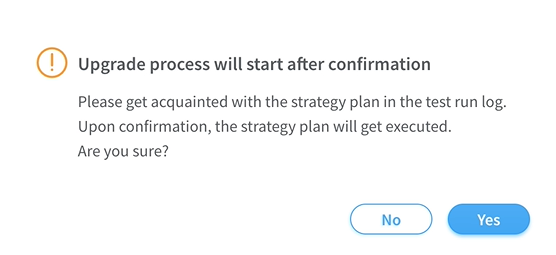
-
Click on each device to view the image upgrade progress
for that device. Click the device again to toggle back to display
the overall image upgrade progress of all devices. Table 2 displays the states displayed during
the course of the upgrade.
Table 2: Image Upgrade Progress States State Description Loading
Validating
The devices are prepping for the upgrade by running health checks.
Health Check Failed
Health check on the device has failed. You can click Previous and go back the Parameters page to either change the health check parameter value or disable the parameter.
Activating Maintenance Mode
The device has passed health check and the device is being placed under maintenance mode.
Deactivating Maintenance Mode
Removing maintenance mode configuration from device and exiting maintenance mode.
Maintenance Mode Activated
Maintenance mode is active on the device.
Maintenance Mode Deactivated
Deactivating maintenance mode is complete and maintenance mode configuration is successfully removed from the device.
Maintenance Mode Failure
Internal error detected during maintenance mode activation or deactivation.
Hitless Image Upgrade Successful
Device image is successfully upgraded.
Hitless Image Upgrade Failed
Device image is not upgraded.
Skipped
Attempted to upgrade to the same image version or the device family does not support hitless upgrade.
Figure 8: Upgrade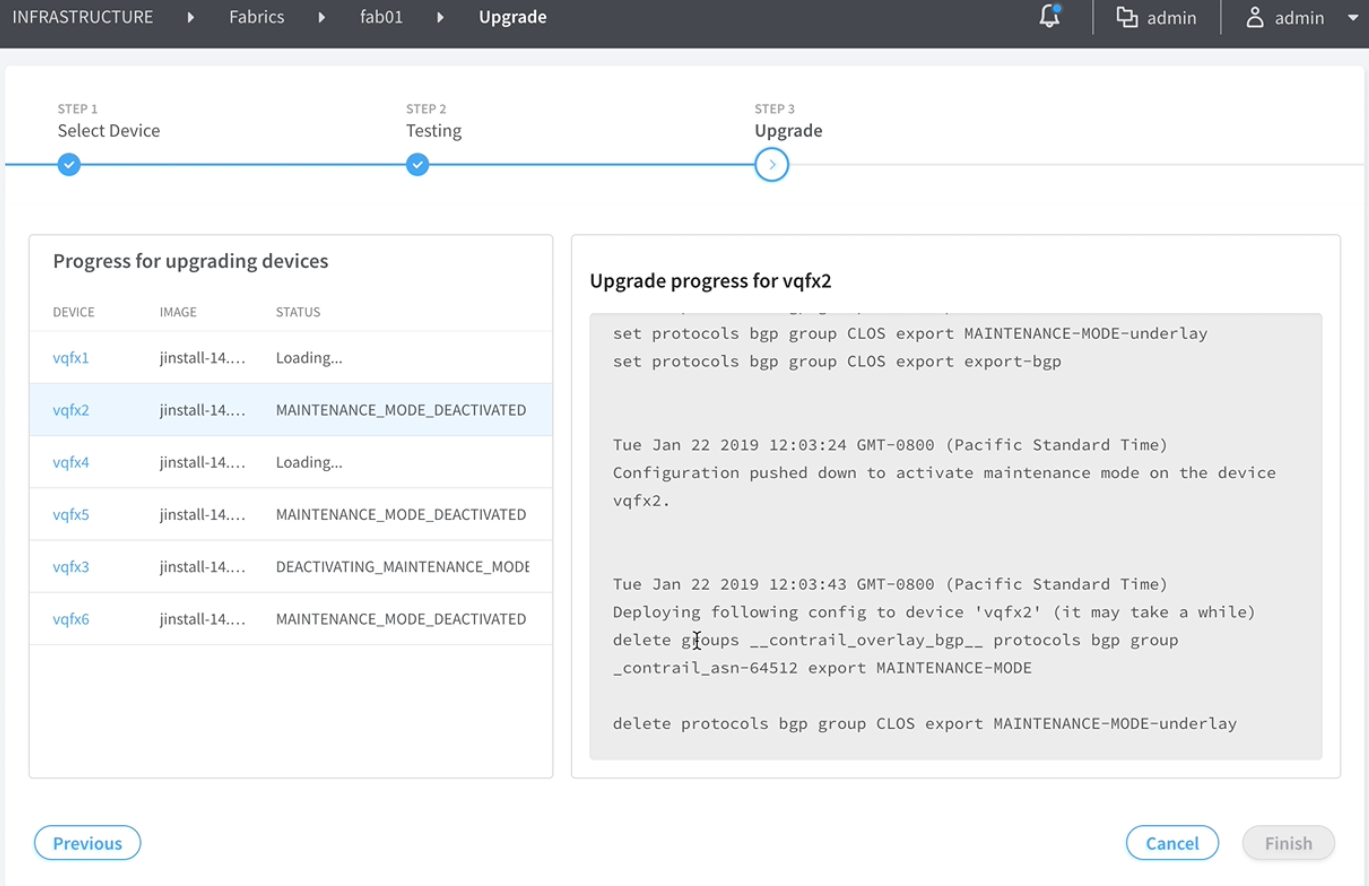
You can re-enter the upgrade workflow if you exit at any point in the process. Also, in case of any failure, the reason is available in the device logs.