Help us improve your experience.

Let us know what you think.

Do you have time for a two-minute survey?


Install Single Cluster CN2 on Amazon EKS

SUMMARY See examples on how to install single cluster CN2 on Amazon EKS.

In a single cluster deployment, CN2 is the networking platform and CNI plug-in for that cluster. Figure 1 shows an Amazon EKS cluster with three worker nodes running the Contrail controller. The Amazon EKS control plane communicates with worker nodes in the user VPC over an Elastic Network Interface (ENI). In a typical deployment, there would be additional worker nodes that run the user workloads.
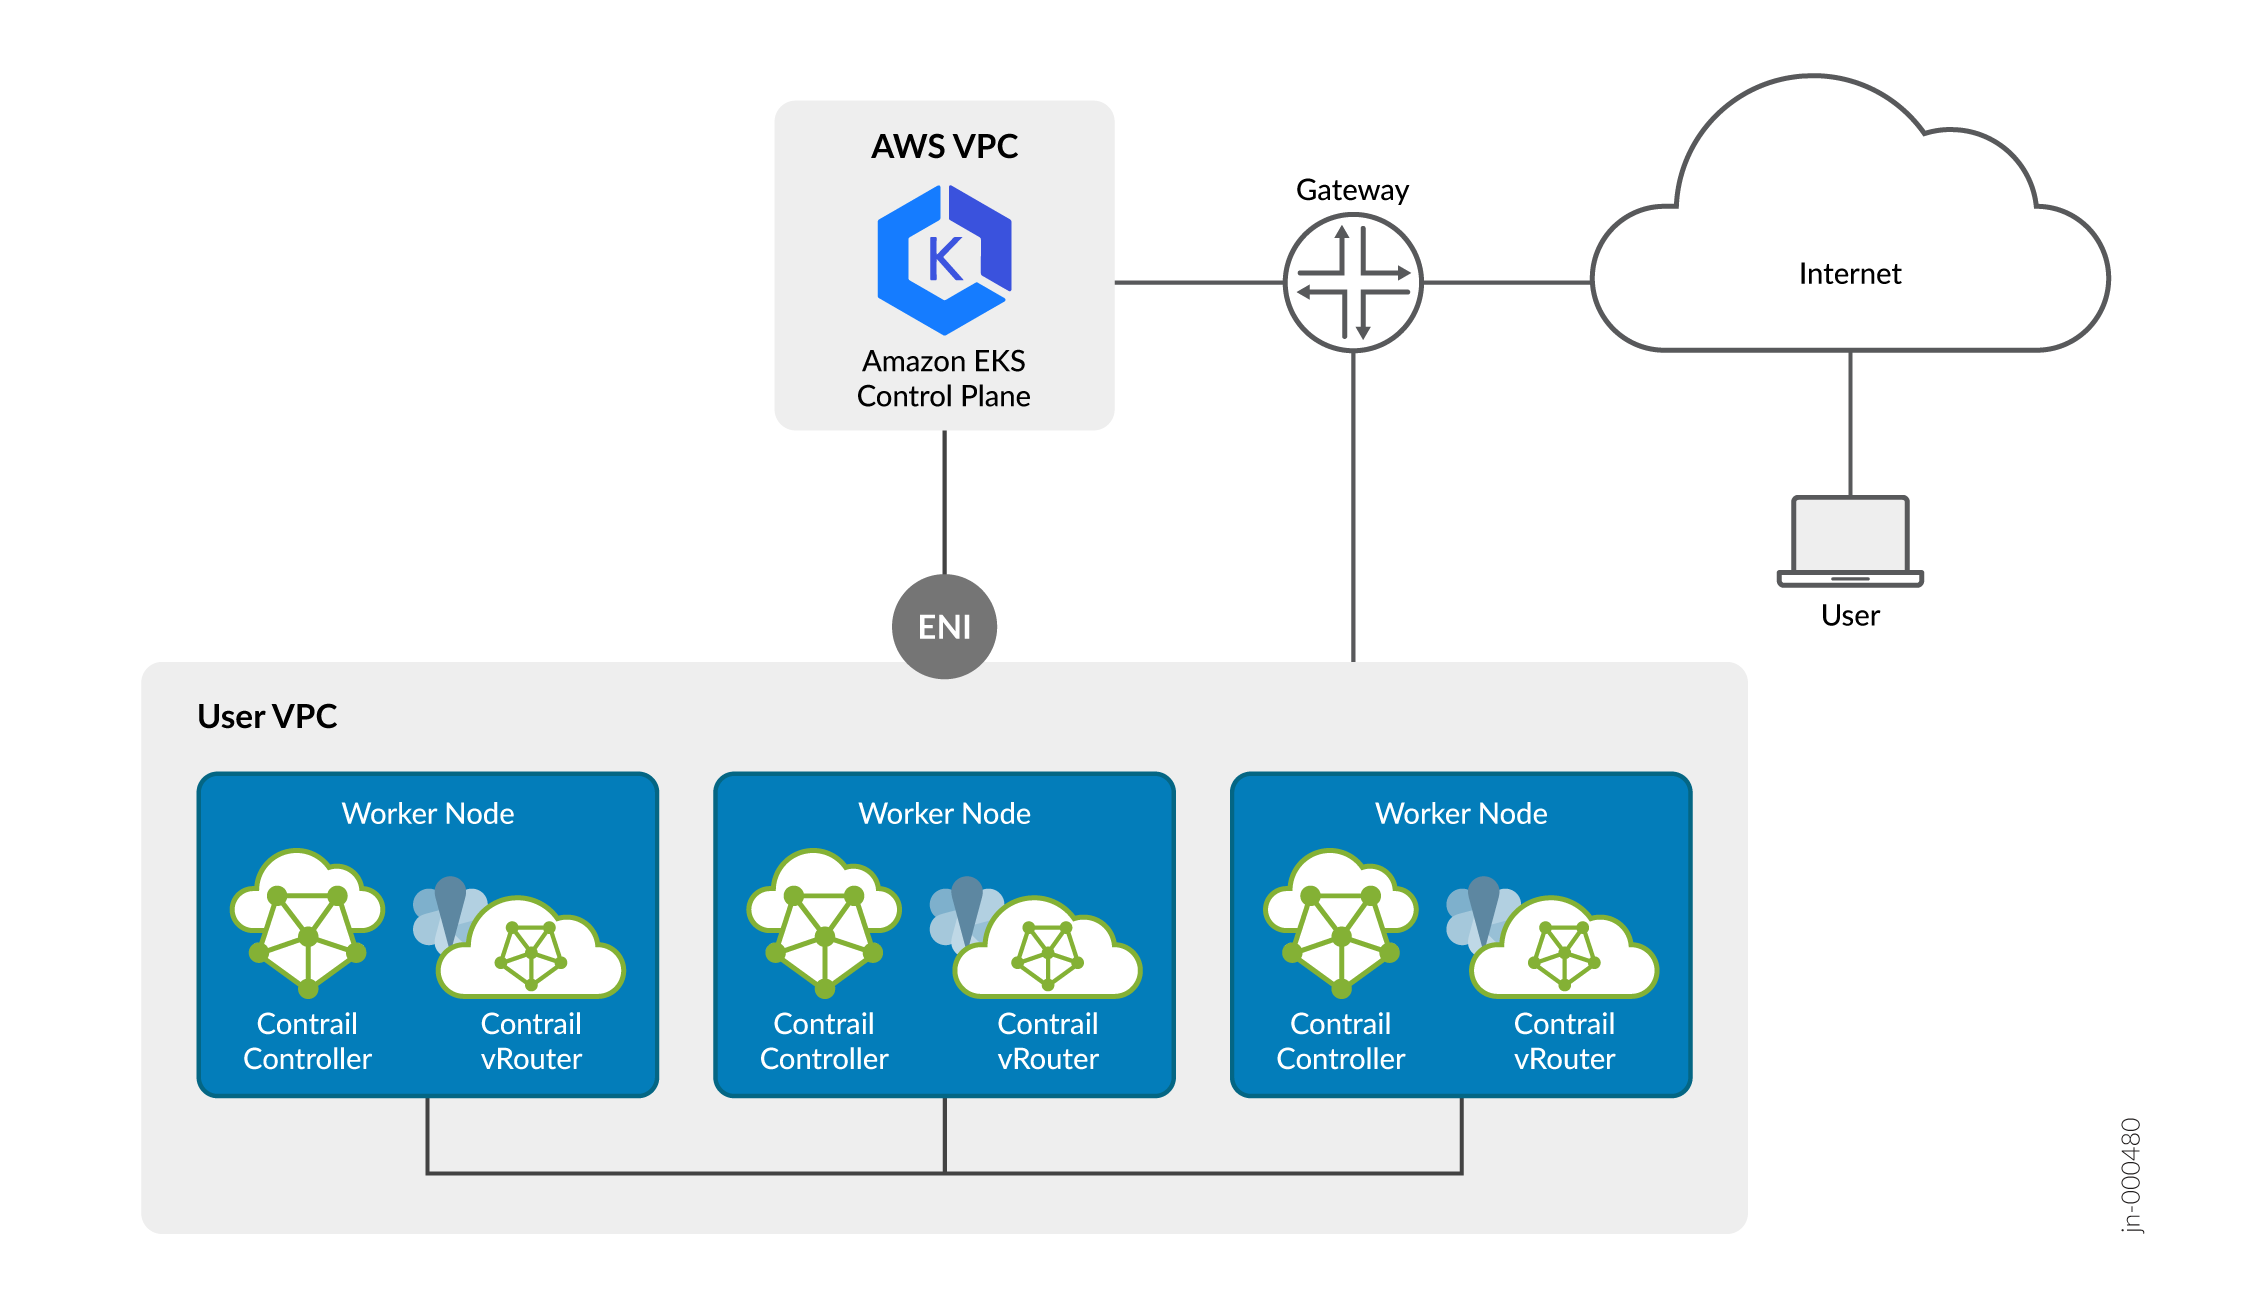
Figure 1: CN2 on Amazon EKS CN2 on Amazon EKS

Before you can install CN2, you'll need to create an Amazon EKS cluster. For convenience, we provide a Terraform blueprint that creates a fully functional three-node Amazon EKS cluster. You can use that blueprint to get a cluster up and running quickly or you can use a method of your choosing. In the sections that follow, we'll show you examples on using the provided Terraform blueprint as well as eksctl, the popular EKS command line tool.

Additionally, we provide a Helm chart to simplify your CN2 installation. You can use that Helm chart to install CN2 or you can install CN2 by directly applying the CN2 YAML manifests that you download from Juniper Networks.

The procedures in this section show basic examples of how you can use the provided Terraform blueprints, eksctl, Helm charts, and YAML manifests to install CN2 on an Amazon EKS cluster.

You're not limited to the deployment described in these sections nor are you limited to using the provided files and manifests. CN2 supports a wide range of deployments that are too numerous to cover in detail. Use the provided examples as a starting point to roll your own manifest tailored to your specific situation.

Install Single Cluster CN2

Use this procedure to install single cluster CN2. In a single cluster CN2 deployment, CN2 is the networking platform and CNI plug-in for that cluster.

  1. Use any method of your choosing to create a new Amazon EKS cluster running the VPC CNI.
    Here are two examples on how to create an Amazon EKS cluster:
    • If you want to use our Terraform blueprint to create a cluster, see Create an Amazon EKS Cluster Using Terraform. Our blueprint accomplishes the following.

      • creates a new sample VPC, 3 private subnets, and 3 public subnets using the default VPC CNI

      • creates Internet gateway for public subnets and NAT gateway for private subnets

      • creates an EKS Cluster called cn2cluster with one managed node group (desired nodes set to 3)

      • creates a role called cn2cluster-managed-ondemand that the managed nodes use

    • If you want to use eksctl to create a cluster, see Create an Amazon EKS Cluster Using Eksctl.

    In the examples that follow, we assume that you name the cluster cn2cluster
  2. Install CN2.

Install Single Cluster CN2 Using Helm Charts

Use this procedure to install CN2 on an Amazon EKS cluster using Helm charts. This procedure is only applicable if the existing Amazon EKS cluster is running the VPC CNI.

  1. Add the Juniper Networks CN2 Helm repository.
  2. Ensure your repository credentials are stored in the docker config.json file.
    See step 9 in Before You Install.
  3. Install CN2.
    Change the filepath to match the location of the docker config.json file in your system.
  4. Use standard kubectl commands to check on the installation.
    Check that the nodes are up. Check that the pods have a STATUS of Running. You may need to wait a few minutes for the pods to come up.

Install Single Cluster CN2 Using YAML Manifests

Use this procedure to install CN2 on an Amazon EKS cluster using YAML manifests.

The manifests that you will use in this example procedure are amazon-eks/single-cluster/single_cluster_deployer_example.yaml, amazon-eks/single-cluster/cert-manager.yaml, and optionally contrail-tools/contrail-readiness/*.yaml.

This procedure assumes that you've placed these manifests into a manifests directory.

  1. Download the Contrail Networking manifests from the Juniper Networks software download site. See Manifests.
  2. Ensure your repository credentials are stored in the docker config.json file.
    See step 9 in Before You Install.
  3. Configure your repository login credentials in the downloaded manifests.

    Add your repository login credentials to the amazon-eks and contrail-tools manifests.

    1. Encode your credentials in base64 and store the resulting string.
      Take a look at the encoded credentials.
    2. Replace the credentials placeholder in the manifests with the encoded credentials.
      The manifests have a <base64-encoded-credential> credentials placeholder. Simply replace the placeholder with the encoded credentials in all manifests.where *.yaml is a placeholder representing the amazon-eks and contrail-tools manifests you are using.
      Double check by searching for the encoded credentials in the manifests.You should see the encoded credentials in the manifests.
  4. Configure the service IP address subnet for the Contrail kubemanager. This subnet must match the service IP address subnet of the cluster.
    To see the service IP address subnet of the cluster:where cn2cluster is the name of the cluster.
    Edit the single_cluster_deployer_example.yaml manifest and look for the serviceV4Subnet configuration in the Kubemanager section.Change the subnet as necessary to match the service IP address subnet of the cluster.
  5. Apply the cert-manager manifest. The cert-manager provides encryption for all CN2 management and control plane connections.
  6. Apply the Contrail deployer manifest.
  7. Use standard kubectl commands to check on the deployment.
    Check that the nodes are up.Check that the pods have a STATUS of Running. If not, wait a few minutes for the pods to come up.
    Note:

    If you check the logs, you may see a PlatformNotSupportedException or a CustomerNotEntitledException. This is normal and can safely be ignored.

    If you run into a problem you can't solve or if you made a mistake during the install, simply uninstall Contrail and start over. To uninstall Contrail, see Uninstall CN2.

  8. (Optional) Run postflight checks. See Run Preflight and Postflight Checks.