Upgrade Apstra on New VM (VM-VM)
Upgrading Apstra on a new VM includes Ubuntu Linux OS fixes and security updates. You need Apstra OS admin privileges and admin group permissions for the upgrade.
Step 1: Pre-Upgrade Validation
-
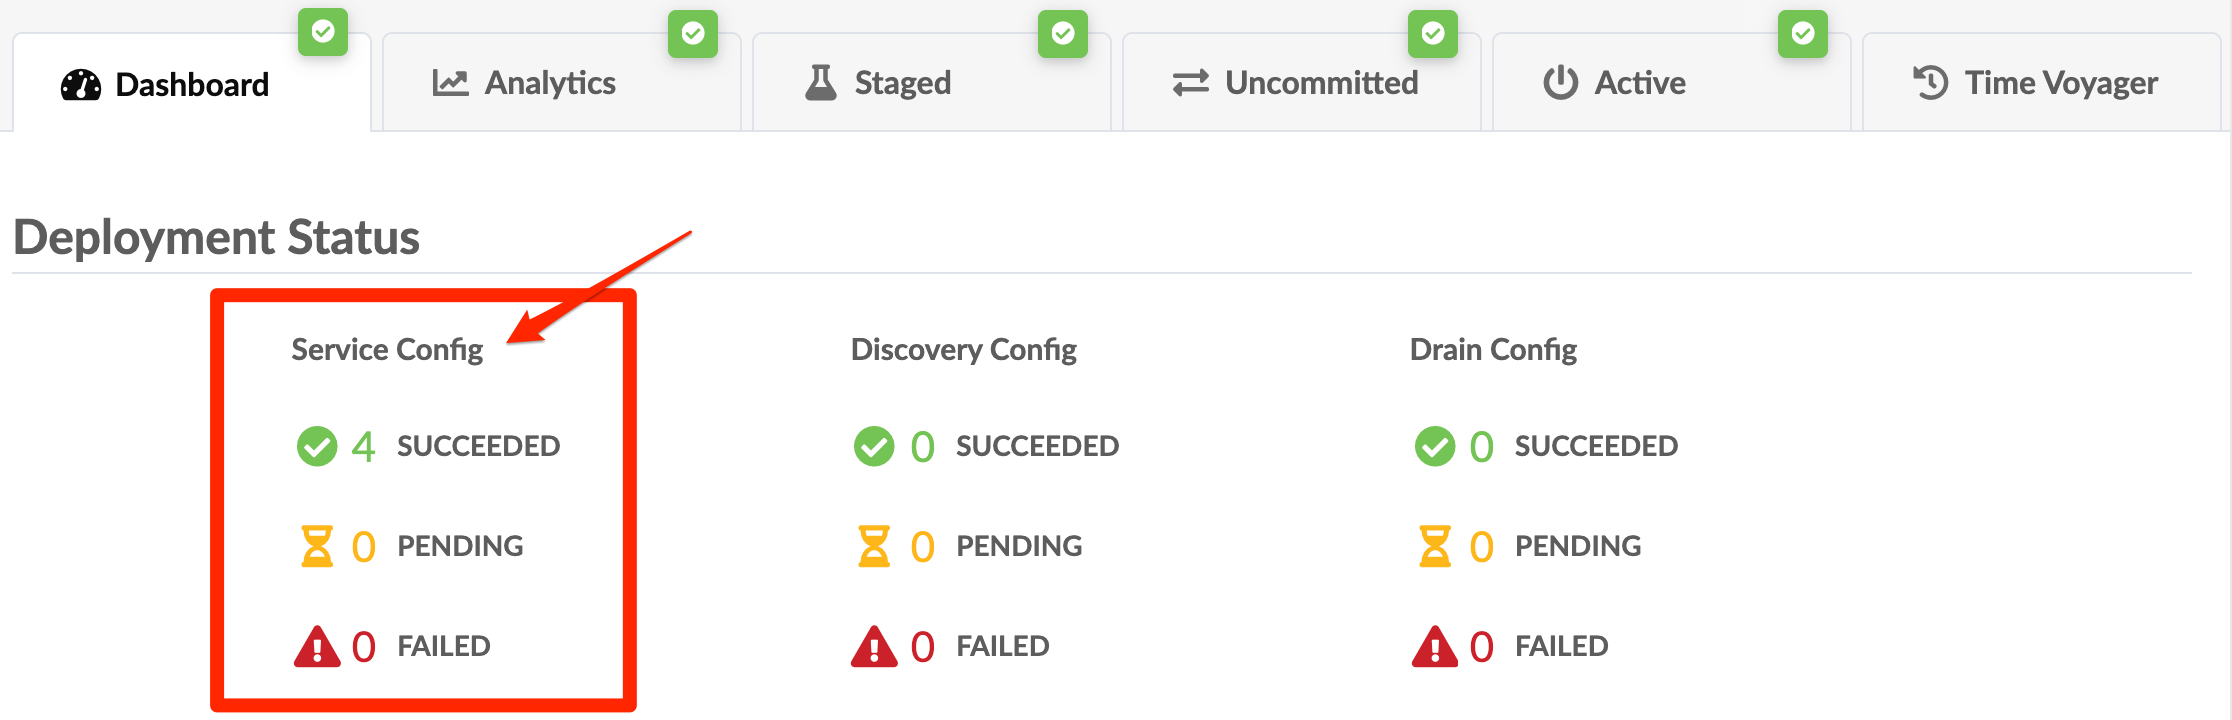
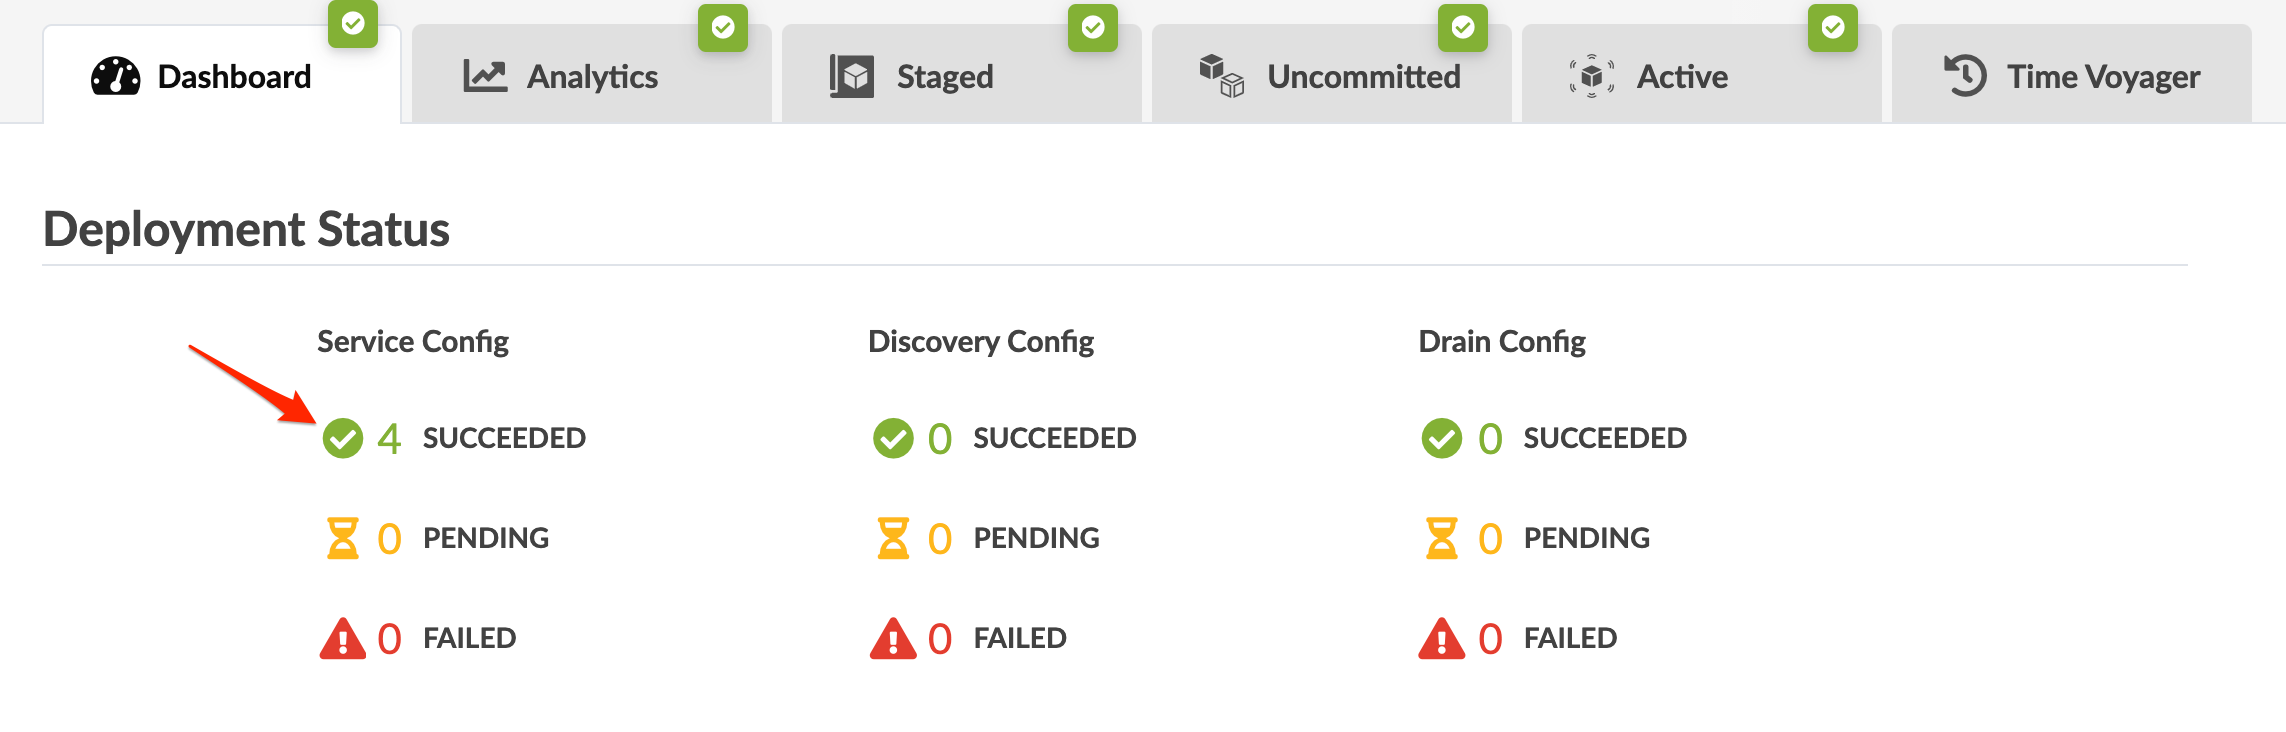
Review each blueprint to confirm that all Service Config is in the
SUCCEEDED state. If necessary, undeploy and remove devices from the
blueprint to resolve any pending or failed service config.
Step 2: Deploy New Apstra Server
If you customized the /etc/aos/aos.conf file on the old
Apstra server (for example, if you updated the metadb field
to use a different network interface), re-apply those changes to the new
Apstra server VM. Automatic migration doesn't occur.
Step 3: Import State
Avoid performing API/GUI write operations on the old Apstra server after starting the new VM import. Changes made won't transfer to the new Apstra server.
Step 4: Import State for Intent-Based Analytics
As of Apstra 5.0.0, we no longer assign tags to probes and stages or support
the evpn-host-flap-count telemetry service.
To remove or disable any widgets or probes for intent-based analytics, add the
following arguments to the sudo aos_import_state command:
-
--iba-remove-unused widgets: Remove unused widgets from the dashboard. -
--iba-remove-probe-and-stage-tags: Remove tags from probes and stages. -
--iba-number-non-unique-probe-labels: Add serial numbers to non-unique probe labels. -
--iba-number-non-unique-dashboard-labels: Add serial numbers to non-unique dashboard labels. -
--iba-disable-probe-with-evpn-host-flap-count-service: Disable non-predefined probes using the evpn-host-flap-count service. -
--iba-strip-dashboard-labels-widget-labels: Remove leading/trailing spaces from dashboard and widget labels. -
--iba-strip-probe-labels-processor-names: Remove leading/trailing spaces from probe labels and processor names.
Step 5: Keep Old VM's IP Address (Optional)
Perform the following steps before changing the Operation Mode and upgrading the devices' agent.
To keep the old VM's IP address:
Step 6: Modify Apstra IP in Flow Config After Apstra Upgrade (if not resusing original IP)
During the Apstra upgrade with VM-to-VM, the Apstra IP address changes unless you reuse the old IP in Step 5.
If the IP address changes, update the Apstra Flow component to capture the new IP as follows:
- SSH to the Apstra Flow CLI (default credentials are apstra/apstra).
-
Open
/etc/juniper/flowcoll.yml. - Modify the EF_JUNIPER_APSTRA_API_ADDRESS field with the new IP address.
-
Run
sudo systemctl restart flowcoll.service.
Step 7: Change Operation Mode to Normal
When you start an Apstra server upgrade, the mode switches from Normal to Maintenance automatically. Maintenance mode blocks offbox agents from going online, halts configuration pushes, and stops telemetry pulls. To revert to the previous version, shut down the new server. To complete the upgrade, switch the mode back to Normal.
-
To view pending service configuration changes, navigate to the dashboard of
the blueprint and click PENDING to see the affected
devices.

-
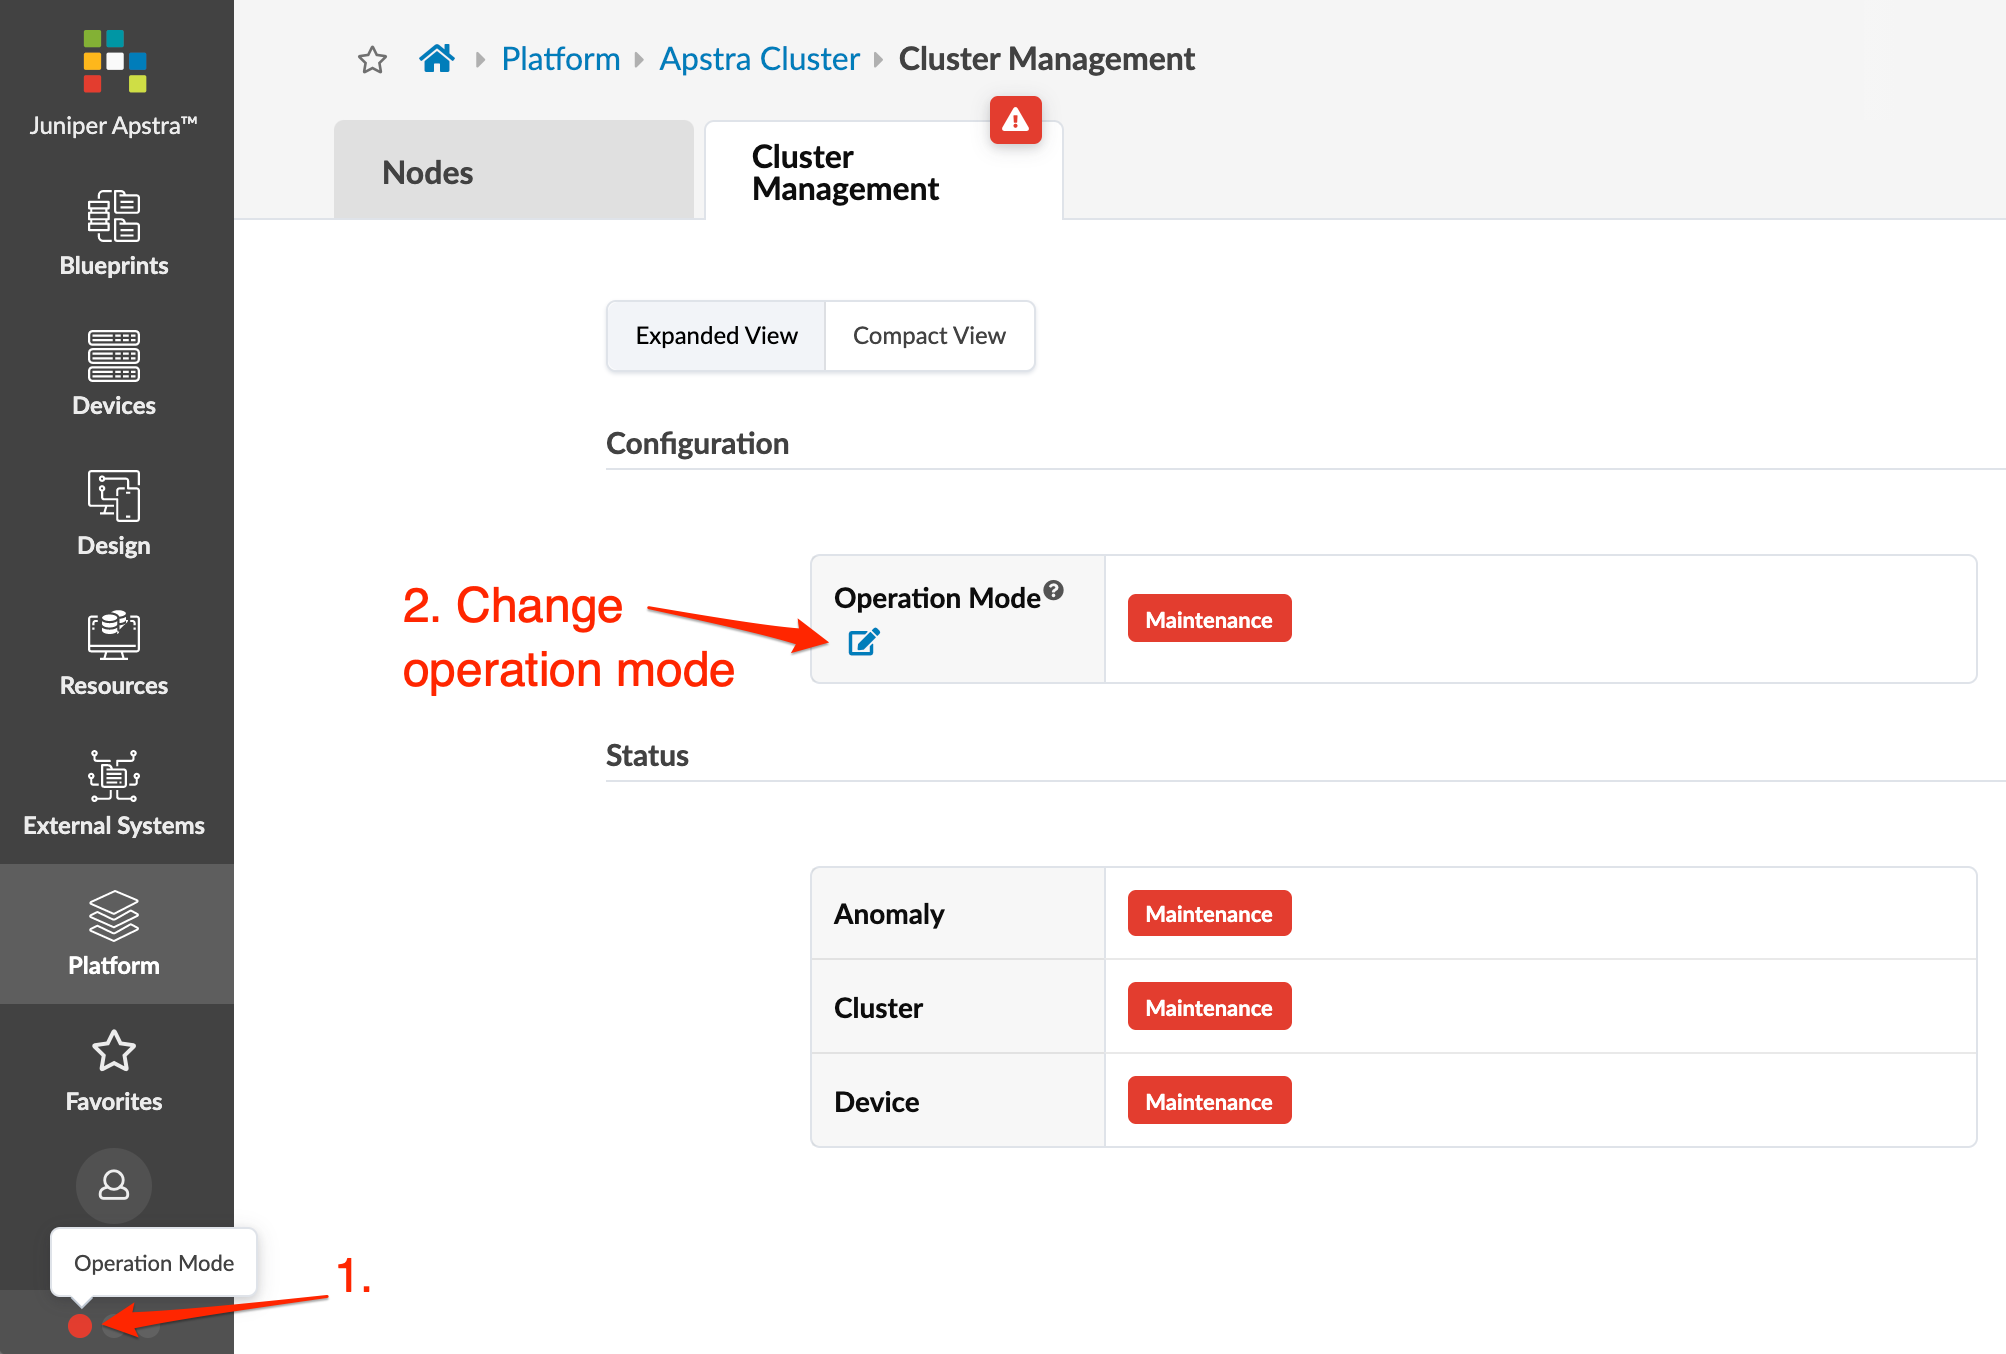
From the left navigation menu, navigate to Platform > Apstra
Cluster > Cluster Management.

-
Click the Change Operation Mode button, select
Normal, then click Update.
Any offbox agents, whether they're on the controller or worker VMs
automatically go online and reconnect devices and push any pending
configuration changes. After a few moments the temporary anomalies on the
dashboard resolve and the service configuration section shows that the
operation has SUCCEEDED.
You can also access the Cluster Management page from the lower left section of any page. You have continuous platform health visibility from here as well, based on colors.
From the bottom of the left navigation menu, click one of the dots, then click Operation Mode to go to Cluster Management. Click the Change Operation Mode button, select Normal, then click Update.
Step 8: Upgrade Agents for Devices
Upgrade Onbox Agent(s)
The Apstra server and onbox agents must be running the same Apstra version. If versions are different the agents won't connect to the Apstra server.
If you're running a multi-state blueprint, especially 5-stage, upgrade agents in stages:
-
First, upgrade superspines.
-
Next, upgrade spines.
-
Finally, upgrade leafs.
This order minimizes path hunting issues. Routing may temporarily go from leaf to spine, back to another leaf, and then to another spine. Staged upgrades reduce this risk.
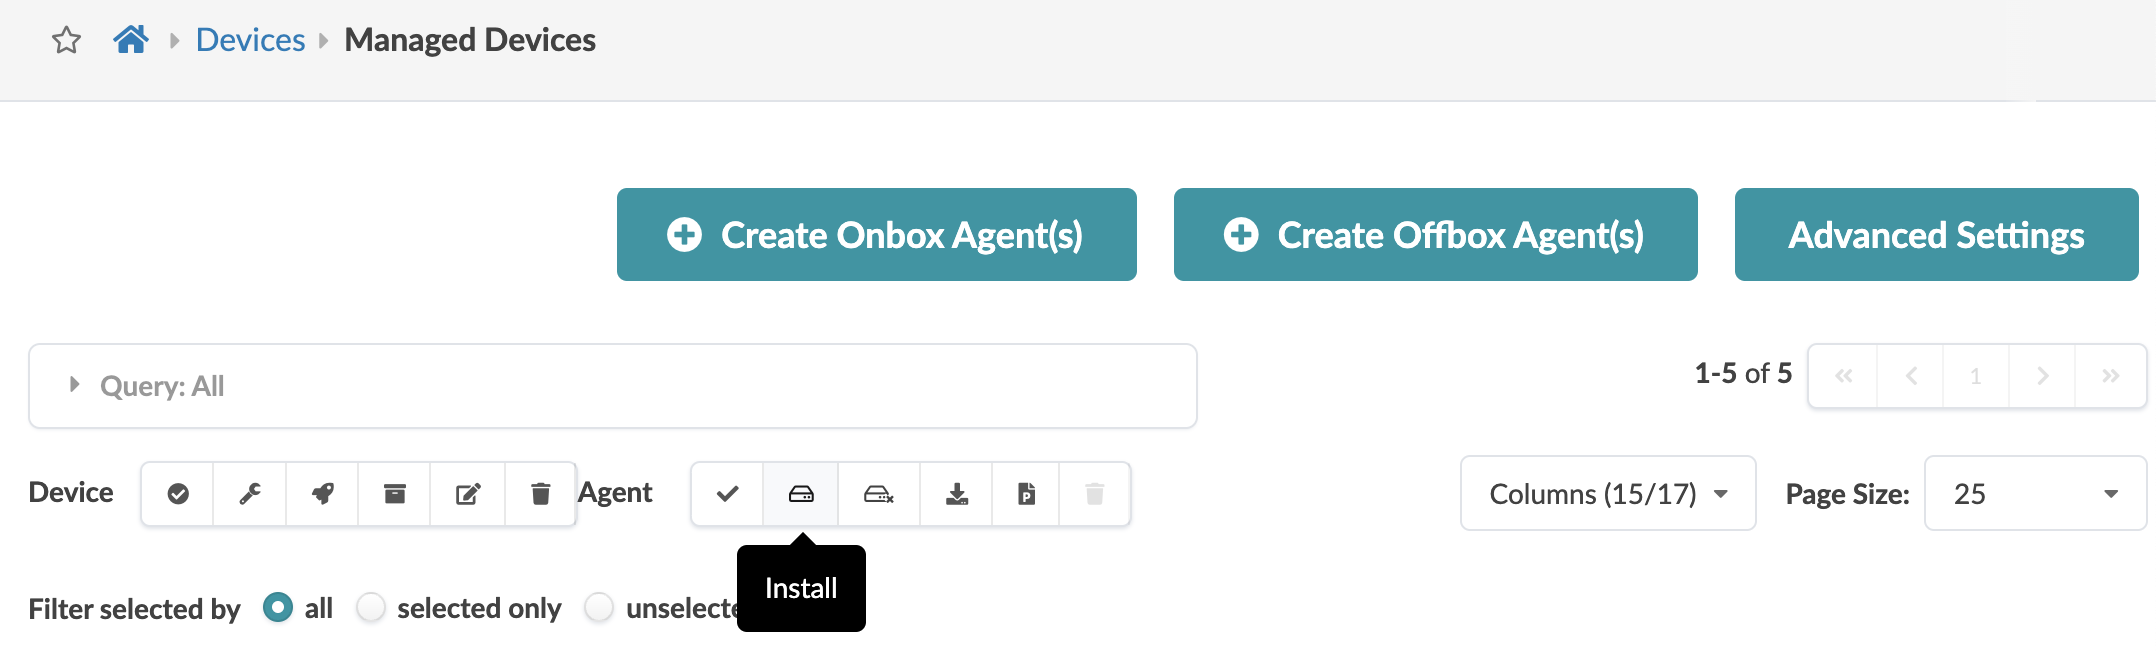
To upgrade an Onbox agent:
Log in to the Apstra GUI as user admin.
From the left navigation menu, navigate to Devices > Managed Devices and select the check boxes for the device(s) to upgrade (up to 100 devices at a time). You can upgrade multiple onbox agents at the same time, but the order of device upgrade is important.
- Upgrade agents for superspines first.
- Upgrade agents for spines second.
- Upgrade agents for leafs third.
When you select one or more devices the Device and Agent menus appear above the table.
Click the Install button to initiate the install process.
The job state changes to IN PROGRESS. If agents are using a previous version of the Apstra software, they are automatically upgraded to the new version. Then they connect to the server and push any pending configuration changes to the devices. Telemetry also resumes, and the job states change to SUCCESS.
In the Liveness section of the blueprint dashboard confirm there are no device anomalies.
Note: To roll back to the previous Apstra version after and agent upgrade, build a new VM with the previous Apstra version and restore the configuration to the new VM. Contact Juniper Technical Support for assistance
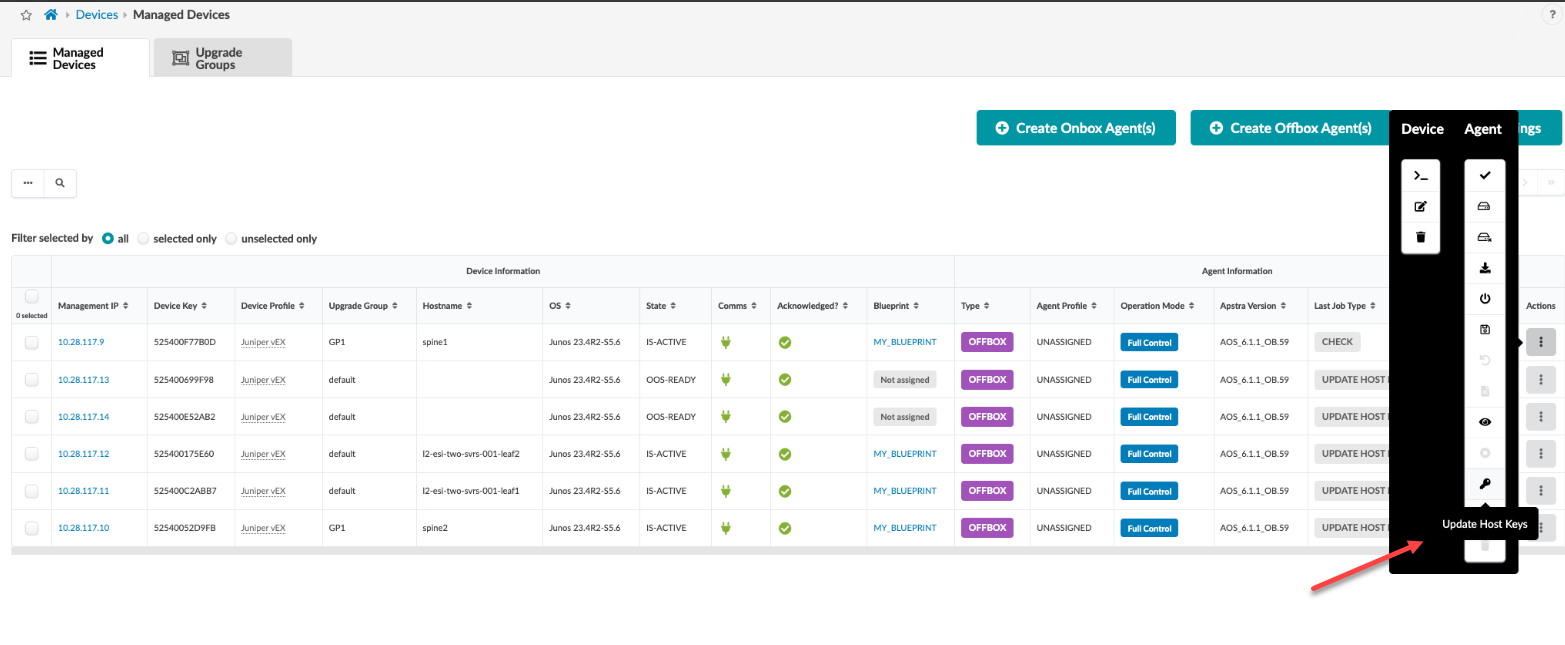
Upgrade OffBox Agent(s)
Starting in Apstra 6.1, click the Update Host Keys button for offbox agents in the managed device.
Step 9: Shut Down Old Apstra Server
- Update any DNS entries to use the new Apstra server IP/FQDN based on your configuration.
- If you're using a proxy for the Apstra server, ensure it points to the new server.
-
Gracefully shut down the old Apstra server. If you confirmed shutting it
down, the
service aos stopcommand runs automatically. - If you're upgrading an Apstra cluster and you replaced your worker nodes with new VMs, shut down the old worker VMs.
Upgrade your device NOS versions to a qualified version if they are not compatible with the new Apstra version, See the Juniper Apstra User Guide for details.