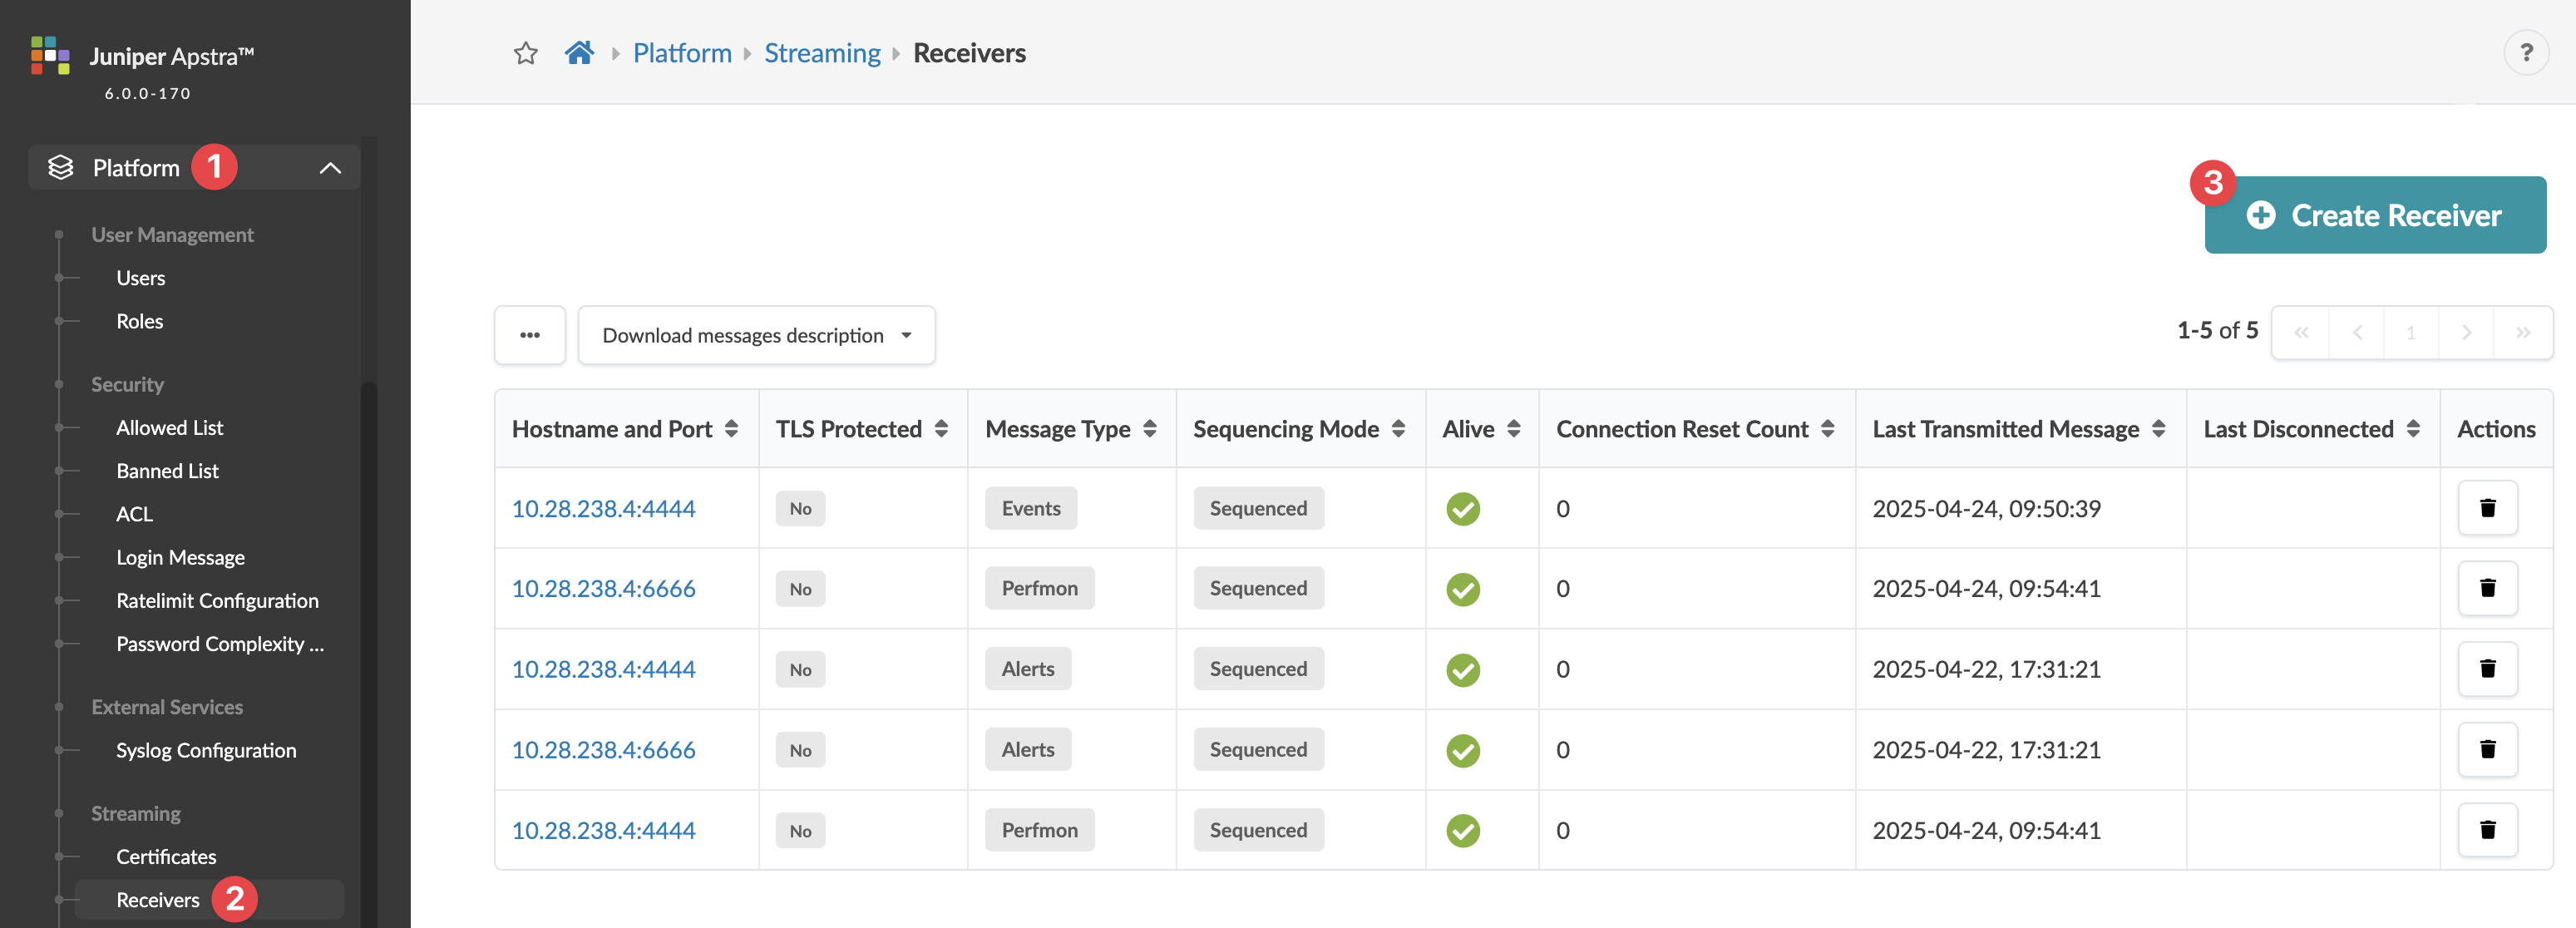
Receivers (Streaming)
Streaming Receivers
Overview
You can configure the server to stream alerts, events and perfmon, or any combination thereof. Each data type is sent to a streaming receiver over its own TCP socket. Even if all three data types are configured for the same streaming receiver, 3 connections are created between the server and the streaming receiver. This also allows for all three types to be sent to three different streaming receivers.
Receivers include the following details:
-
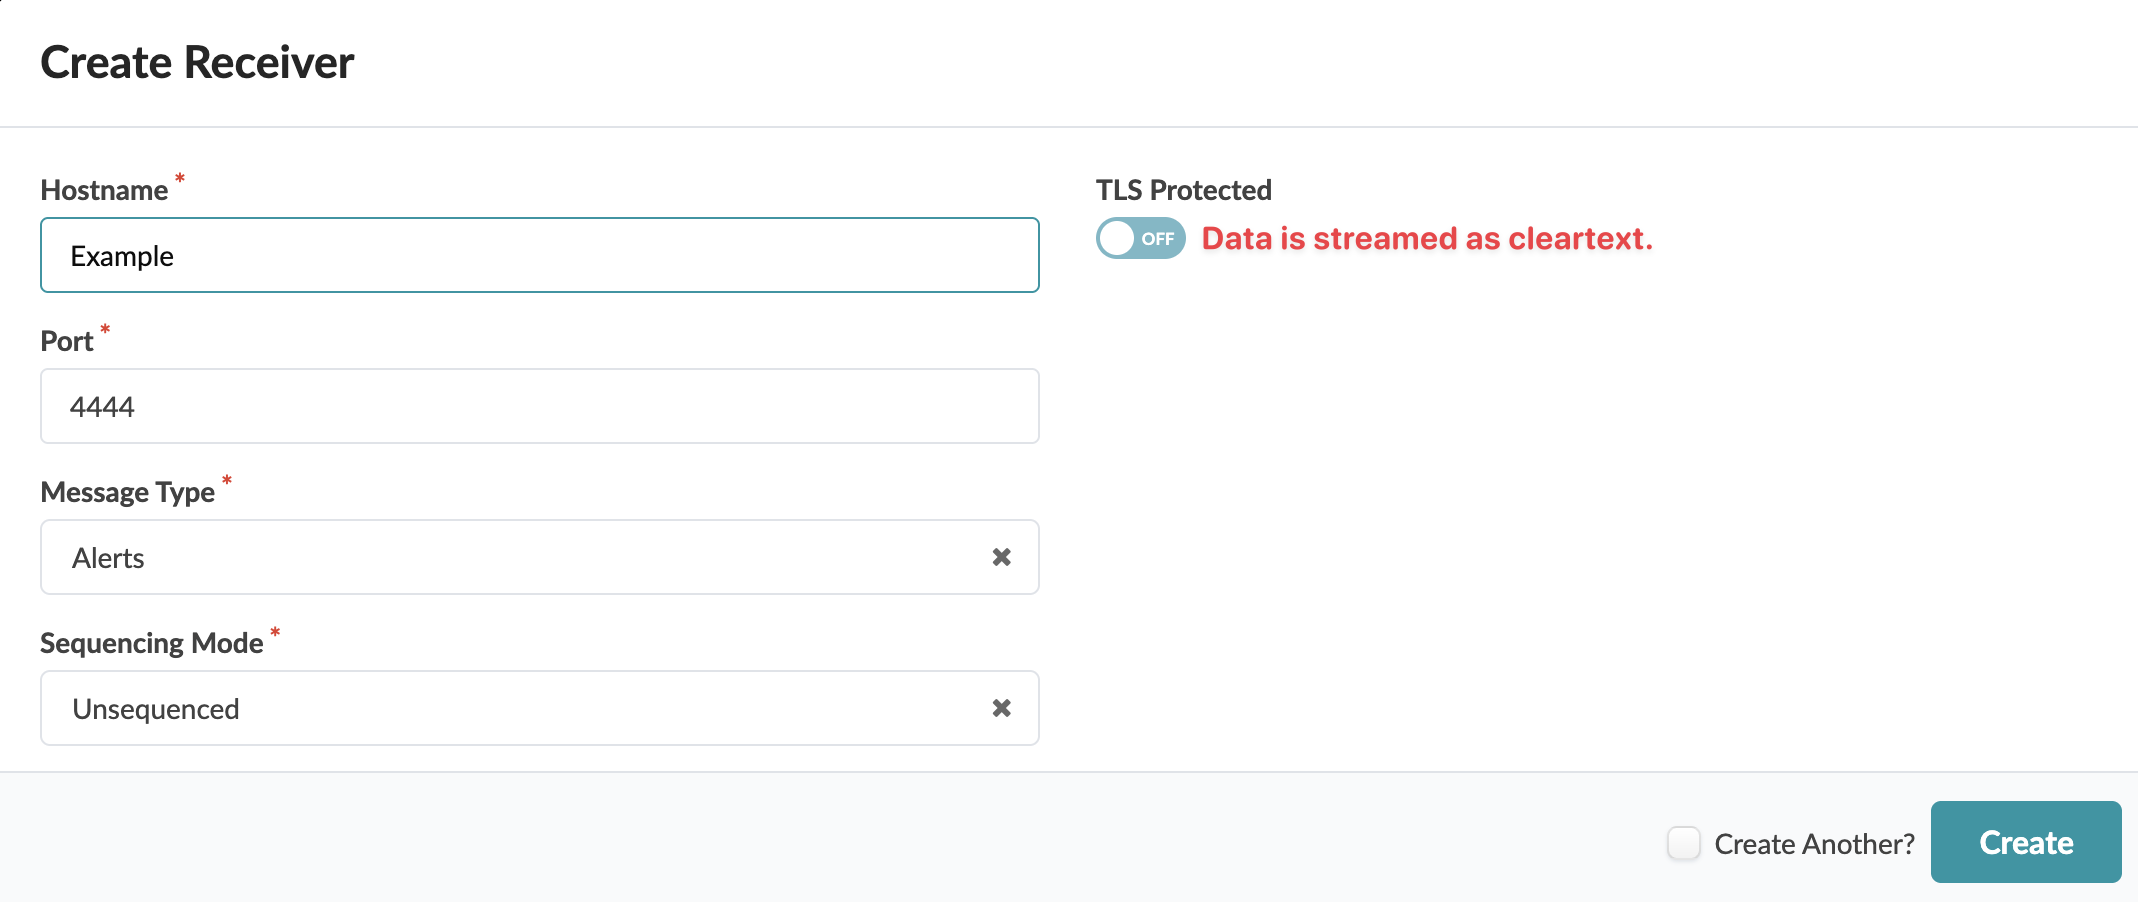
Hostname - Hostname
-
Port - default: 4444
-
Message Type - alerts, events, perfmon
-
Sequencing Mode - unsequenced, sequenced
-
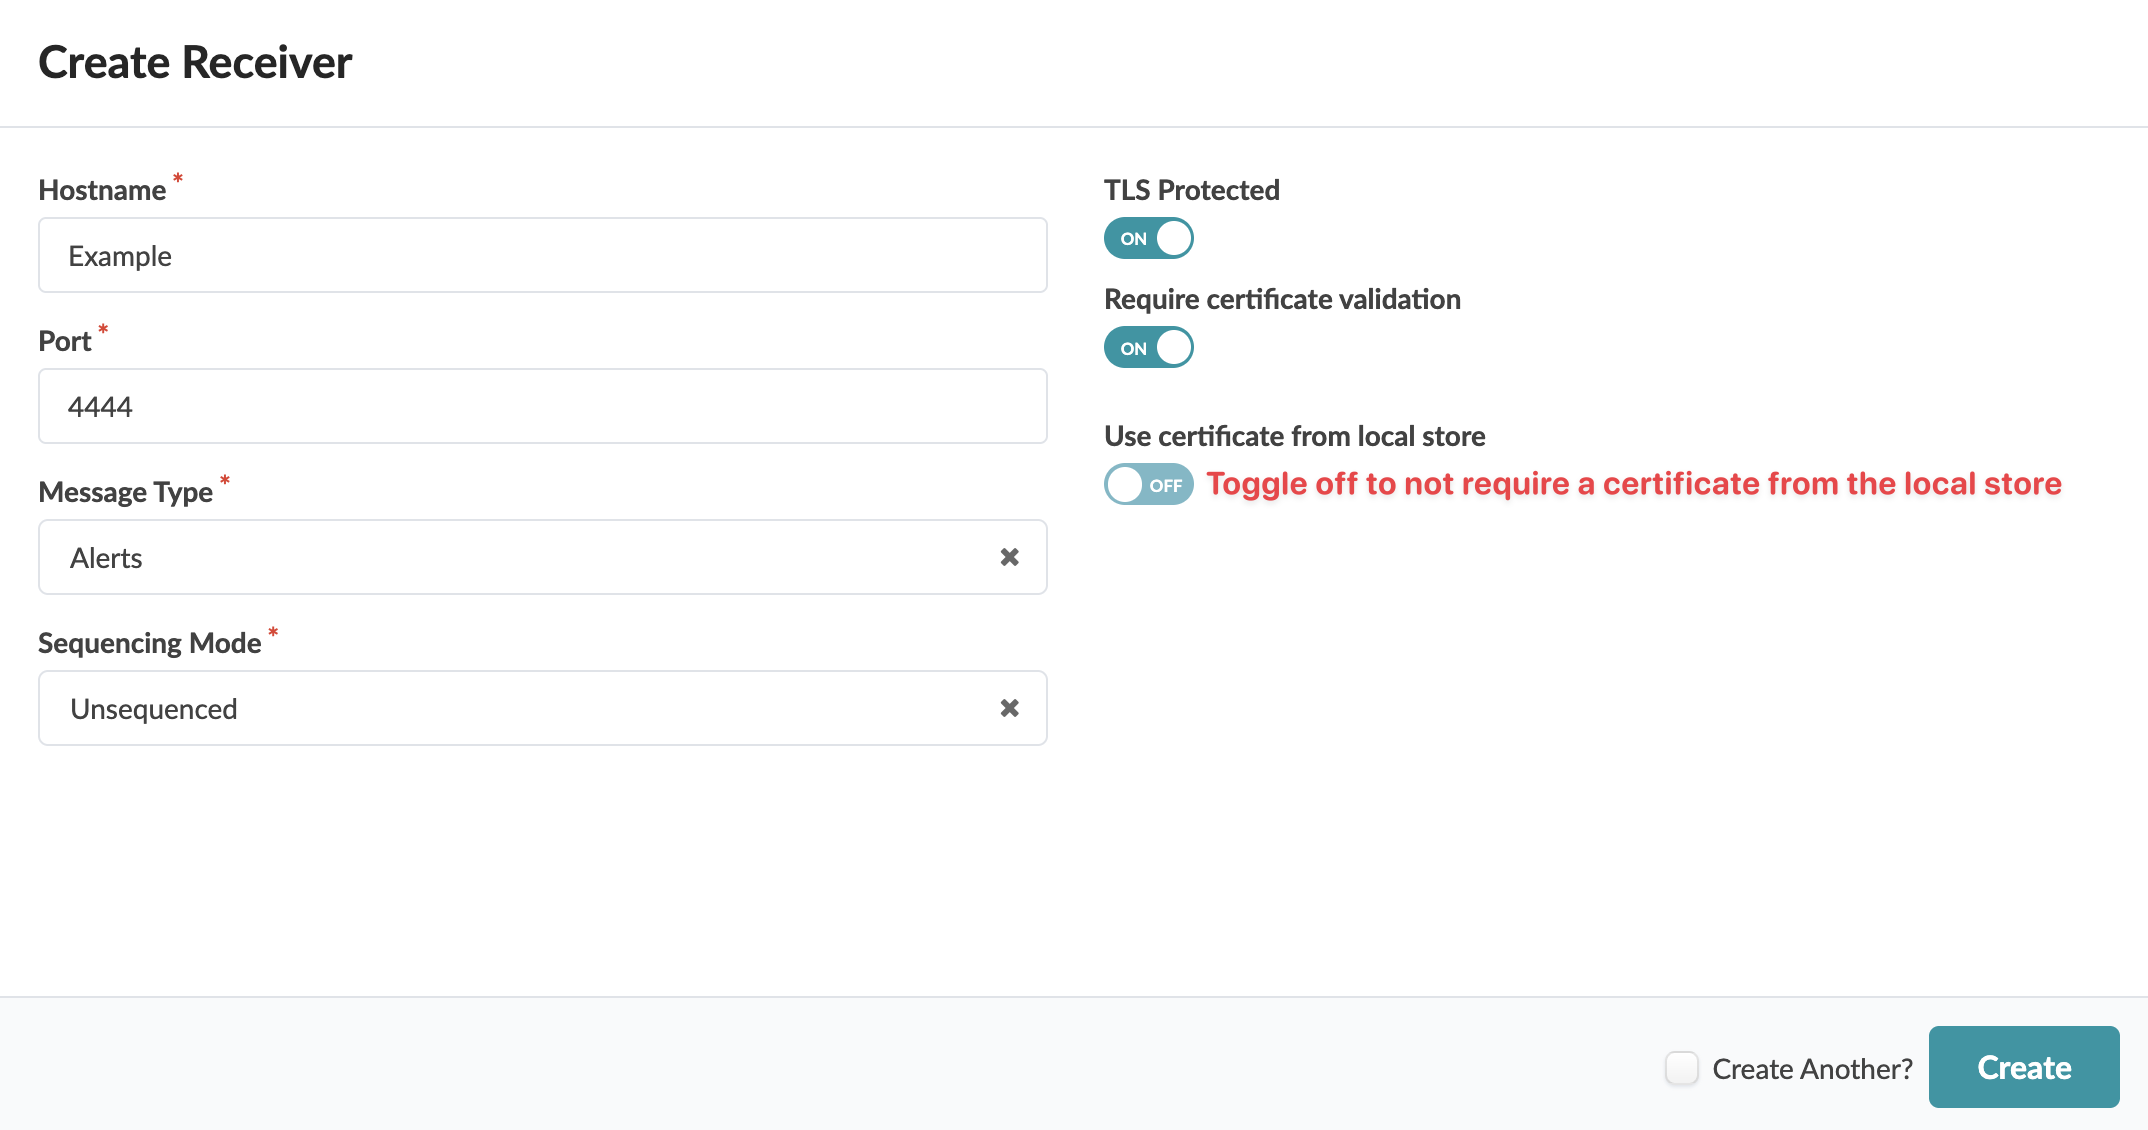
TLS Protected - defaults to "OFF", toggle "ON" to encrypt data (new in version 6.0.0) (See next section for details.)
-
Require certificate validation - option to require certificate validation - appears if receiver is TLS-protected (new in version 6.0.0)
-
Use certificate from local store - option to use a certificate from the local store - appears if receiver is TLS-protected and if certificate validation is required (new in version 6.0.0)
-
Selected certificates - appears if selecting certificate from local store (new in version 6.0.0)
Secure Telemetry Streaming with TLS
TLS is a cryptographic protocol that ensures secure communication over a network. It provides:
-
Encryption - Protects data from being intercepted (for example, via HTTPS)
-
Authentication - Verifies the identity of the communicating parties.
-
Integrity - Ensures transmitted data is not altered during transit.
TLS relies on certificates to establish trust between parties. These certificates serve as digital documents that verify the identity of a server or client.
The primary impact of streaming with TLS is the enhanced security of telemetry data in transit, mitigating risks associated with data interception and ensuring compliance with data protection standards.
TLS protection for telemetry data streams defaults to "No" (for backward compatibility). You can optionally enable TLS protection (new in version 6.0.0), then specify whether certificate validation is required (default "YES") and whether to select certificates from a local store or to use the default system certificates. If you're using a trusted certificate from a local store it must be in the PEM format and uploaded before creating the receiver.
Streaming Telemetry in the GUI
Create Receiver
To create a streaming receiver using the GUI:
-
From the left navigation menu, navigate to Platform >
Streaming > Receivers and click Create
Receiver.
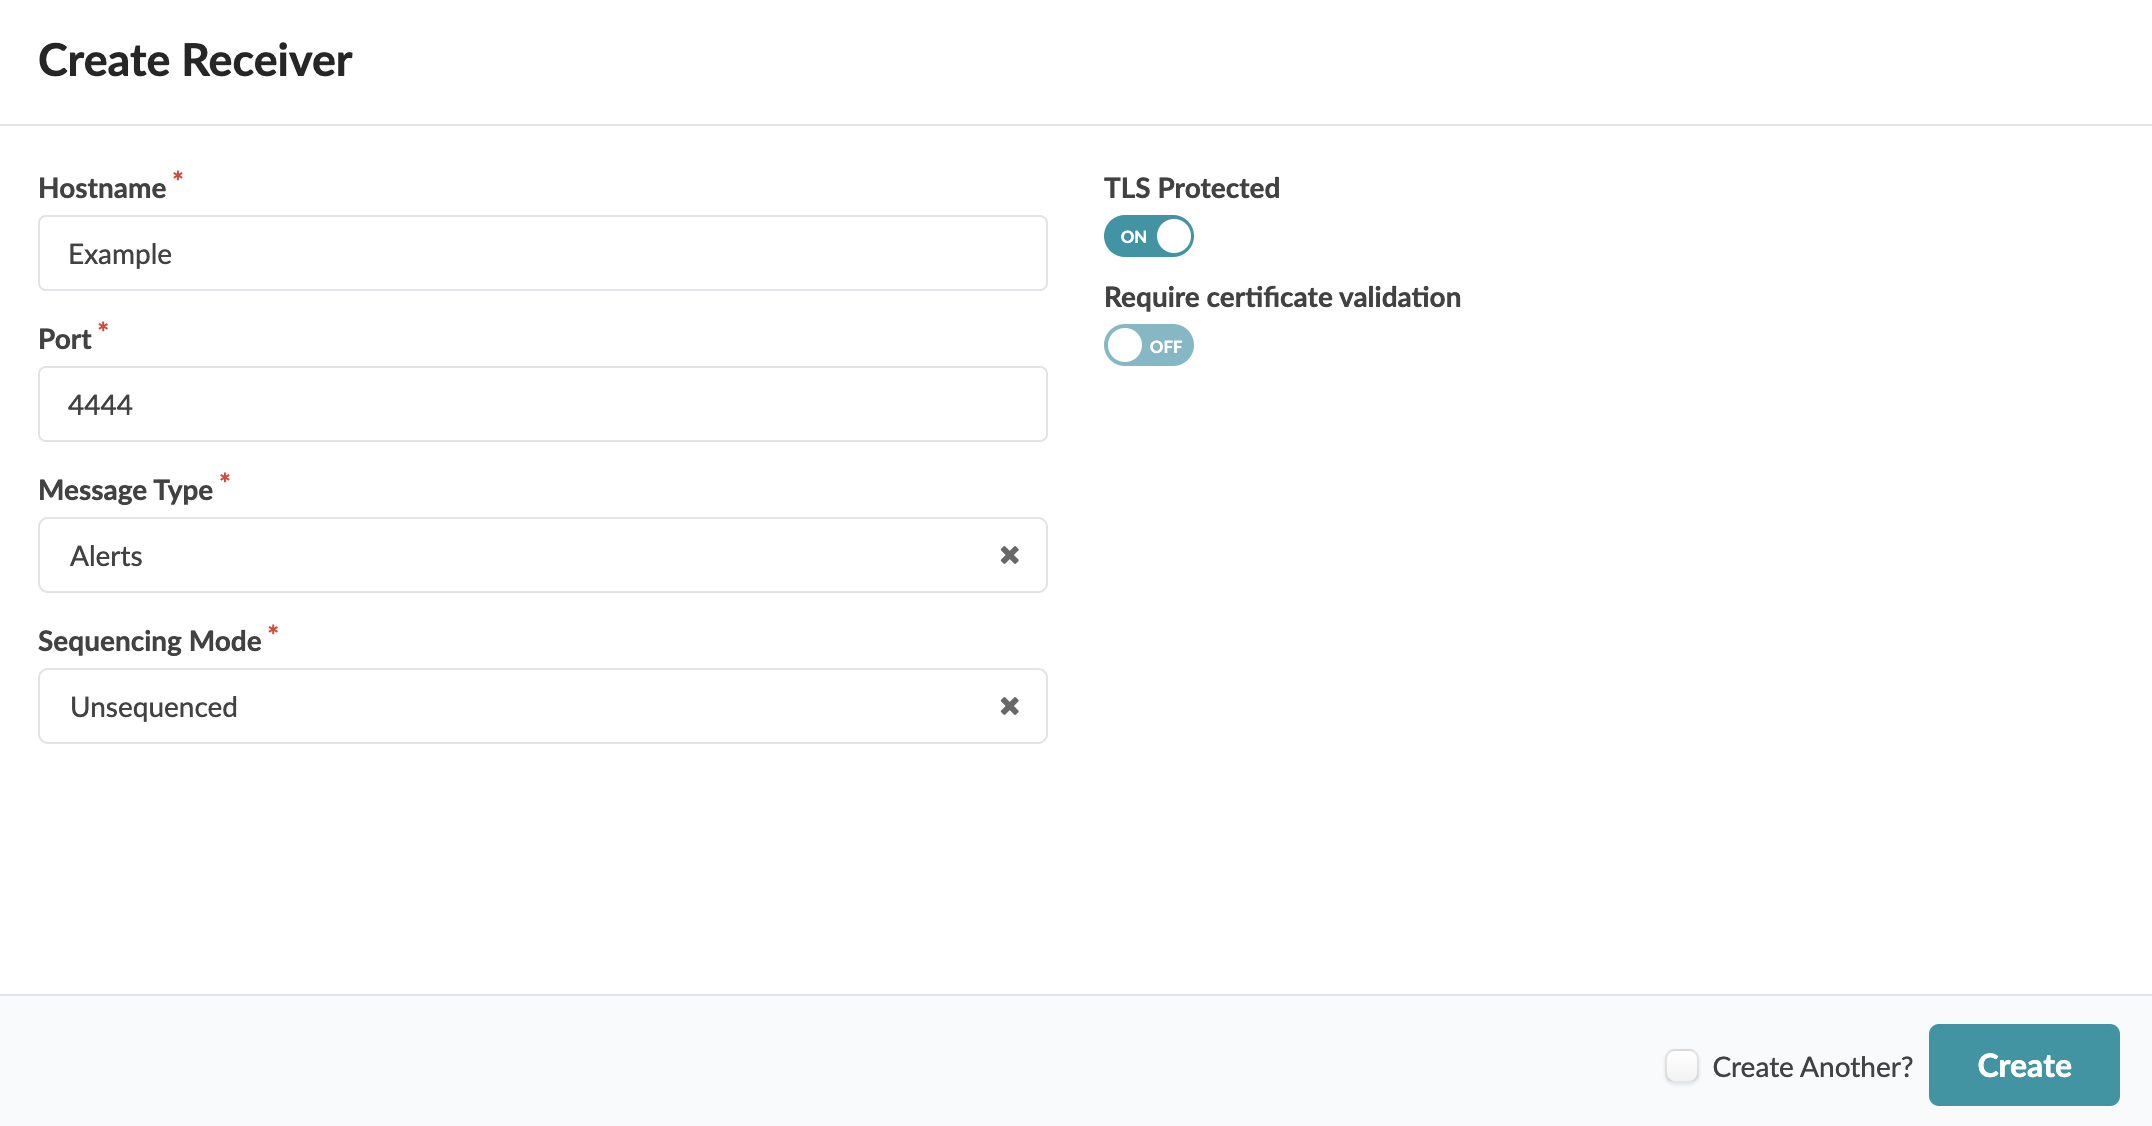
 The Create Receiver dialog opens.
 -
Enter the hostname, port number, message type, and sequencing mode.
-
To have streaming data TLS-protected, toggle on TLS Protected.
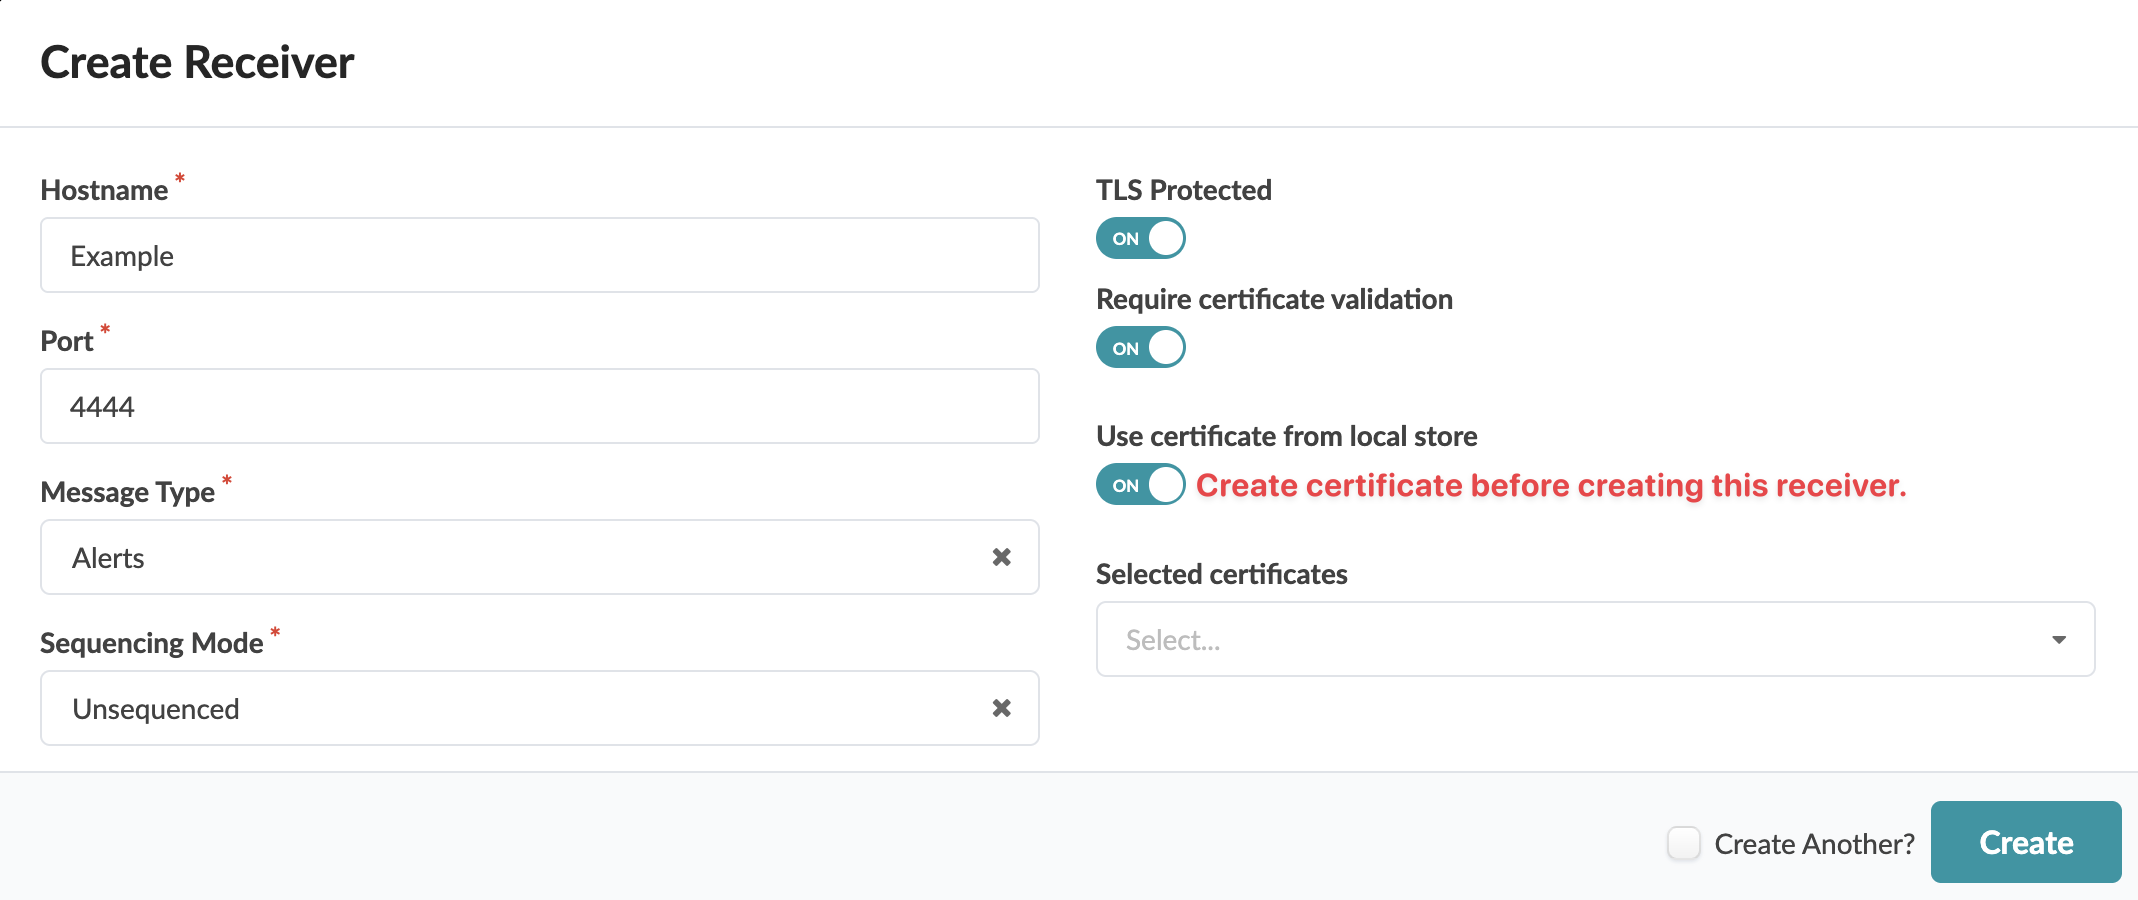 After toggling on TLS Protected, the default result is to require certificate validation from the local store.
 -
If you're using the standard certificate, toggle off Use certificate
from local store.
-
If you don't require certificate validation toggle off Require
certificate validation.
Change Receiver Certificates
If a streaming receiver is TLS-protected and requires certificate validation, you can add and/or remove certificates.
To change certificates that are assigned to a receiver using the GUI:
-
From the left navigation menu, navigate to Platform >
Streaming > Receivers and click the Edit button in
the Actions panel for the receiver to update. (The Edit button
appears only if the receiver is TLS-protected.)
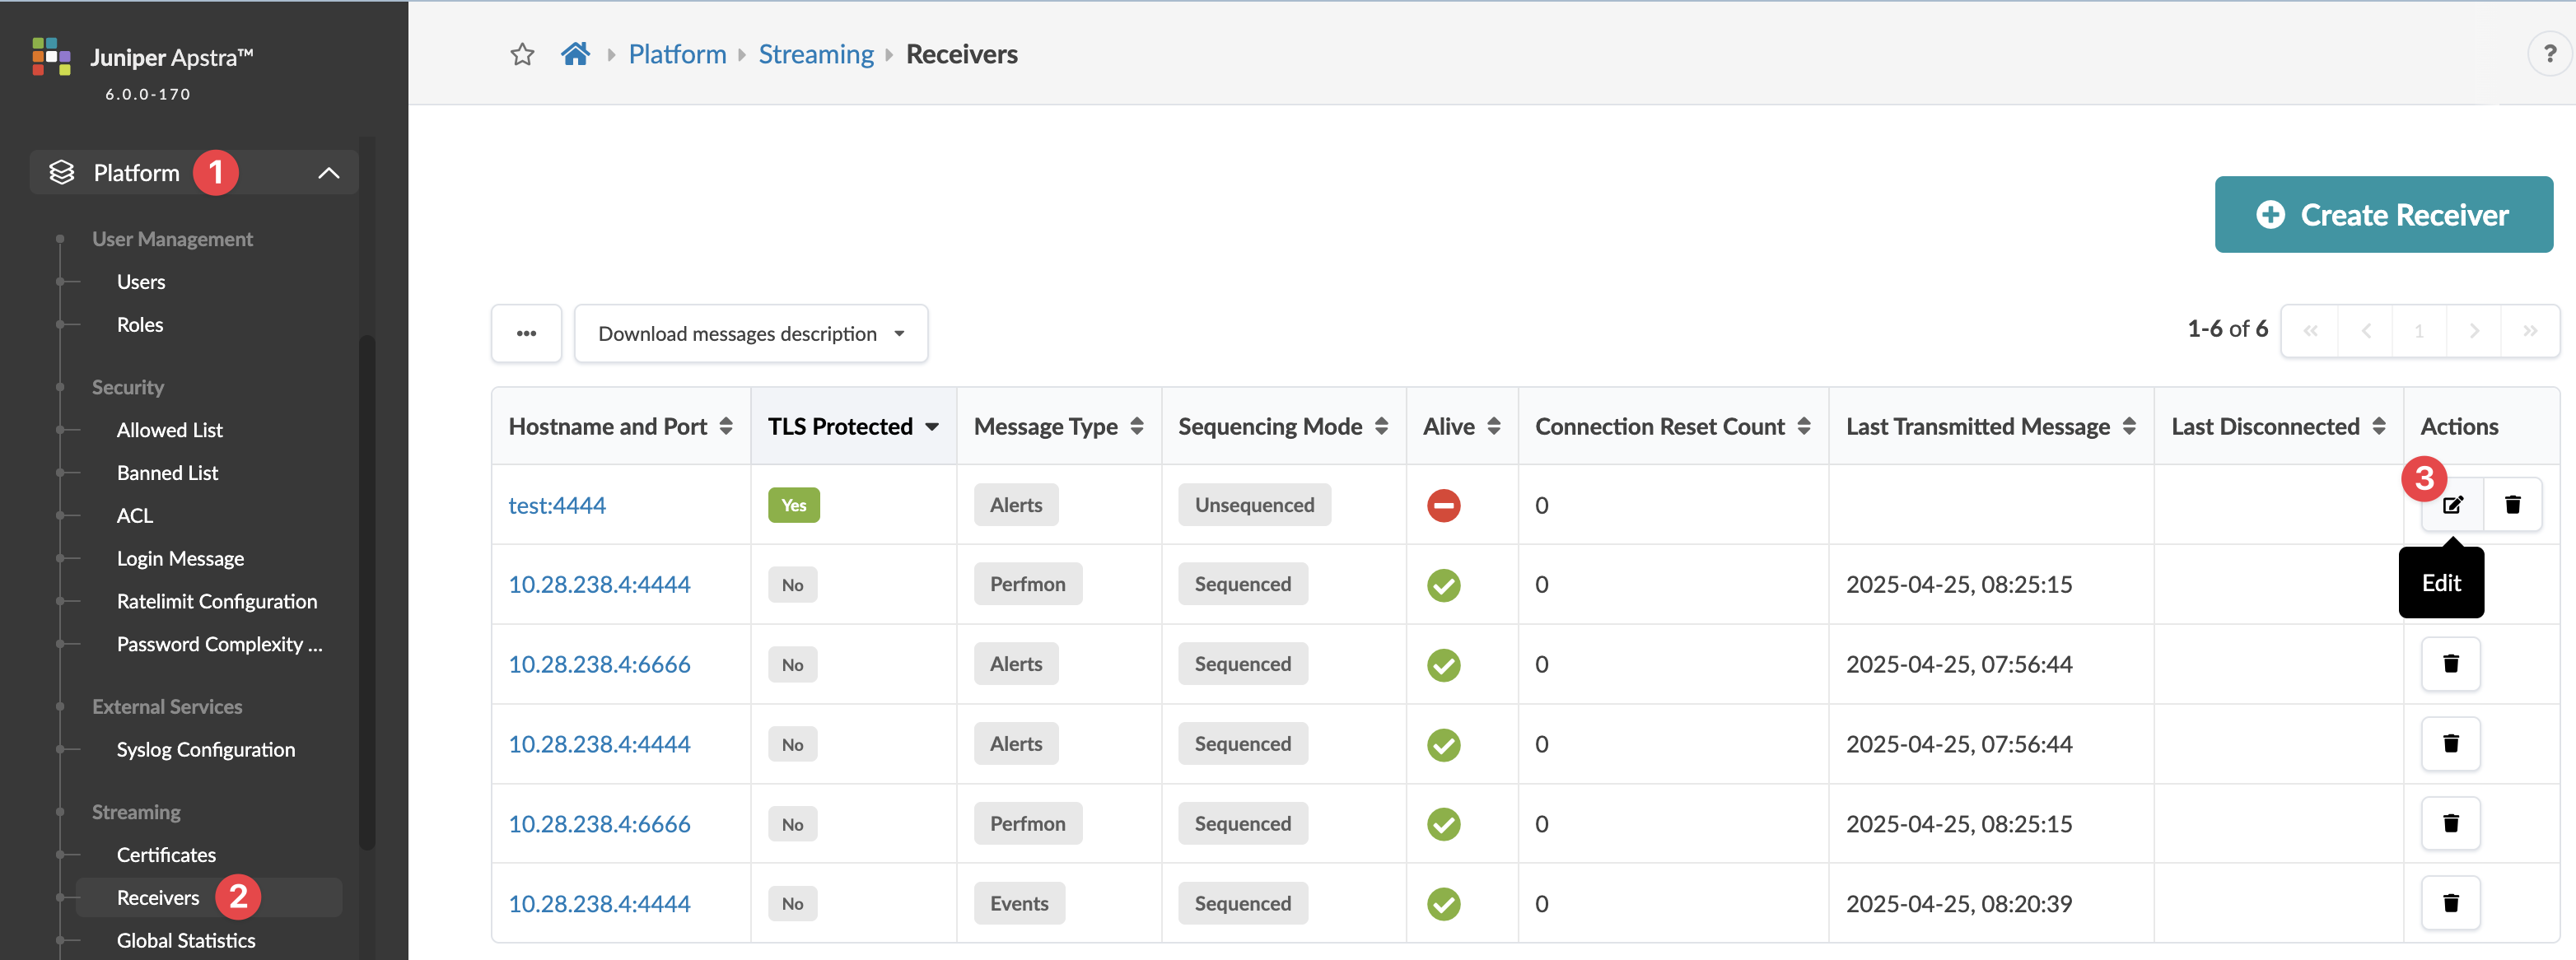 The Edit Receiver dialog opens.
Delete Receiver
To delete a streaming receiver using the GUI:
-
From the left navigation menu, navigate to Platform >
Streaming > Receivers and click the Delete button
in the Actions panel for the receiver to delete.
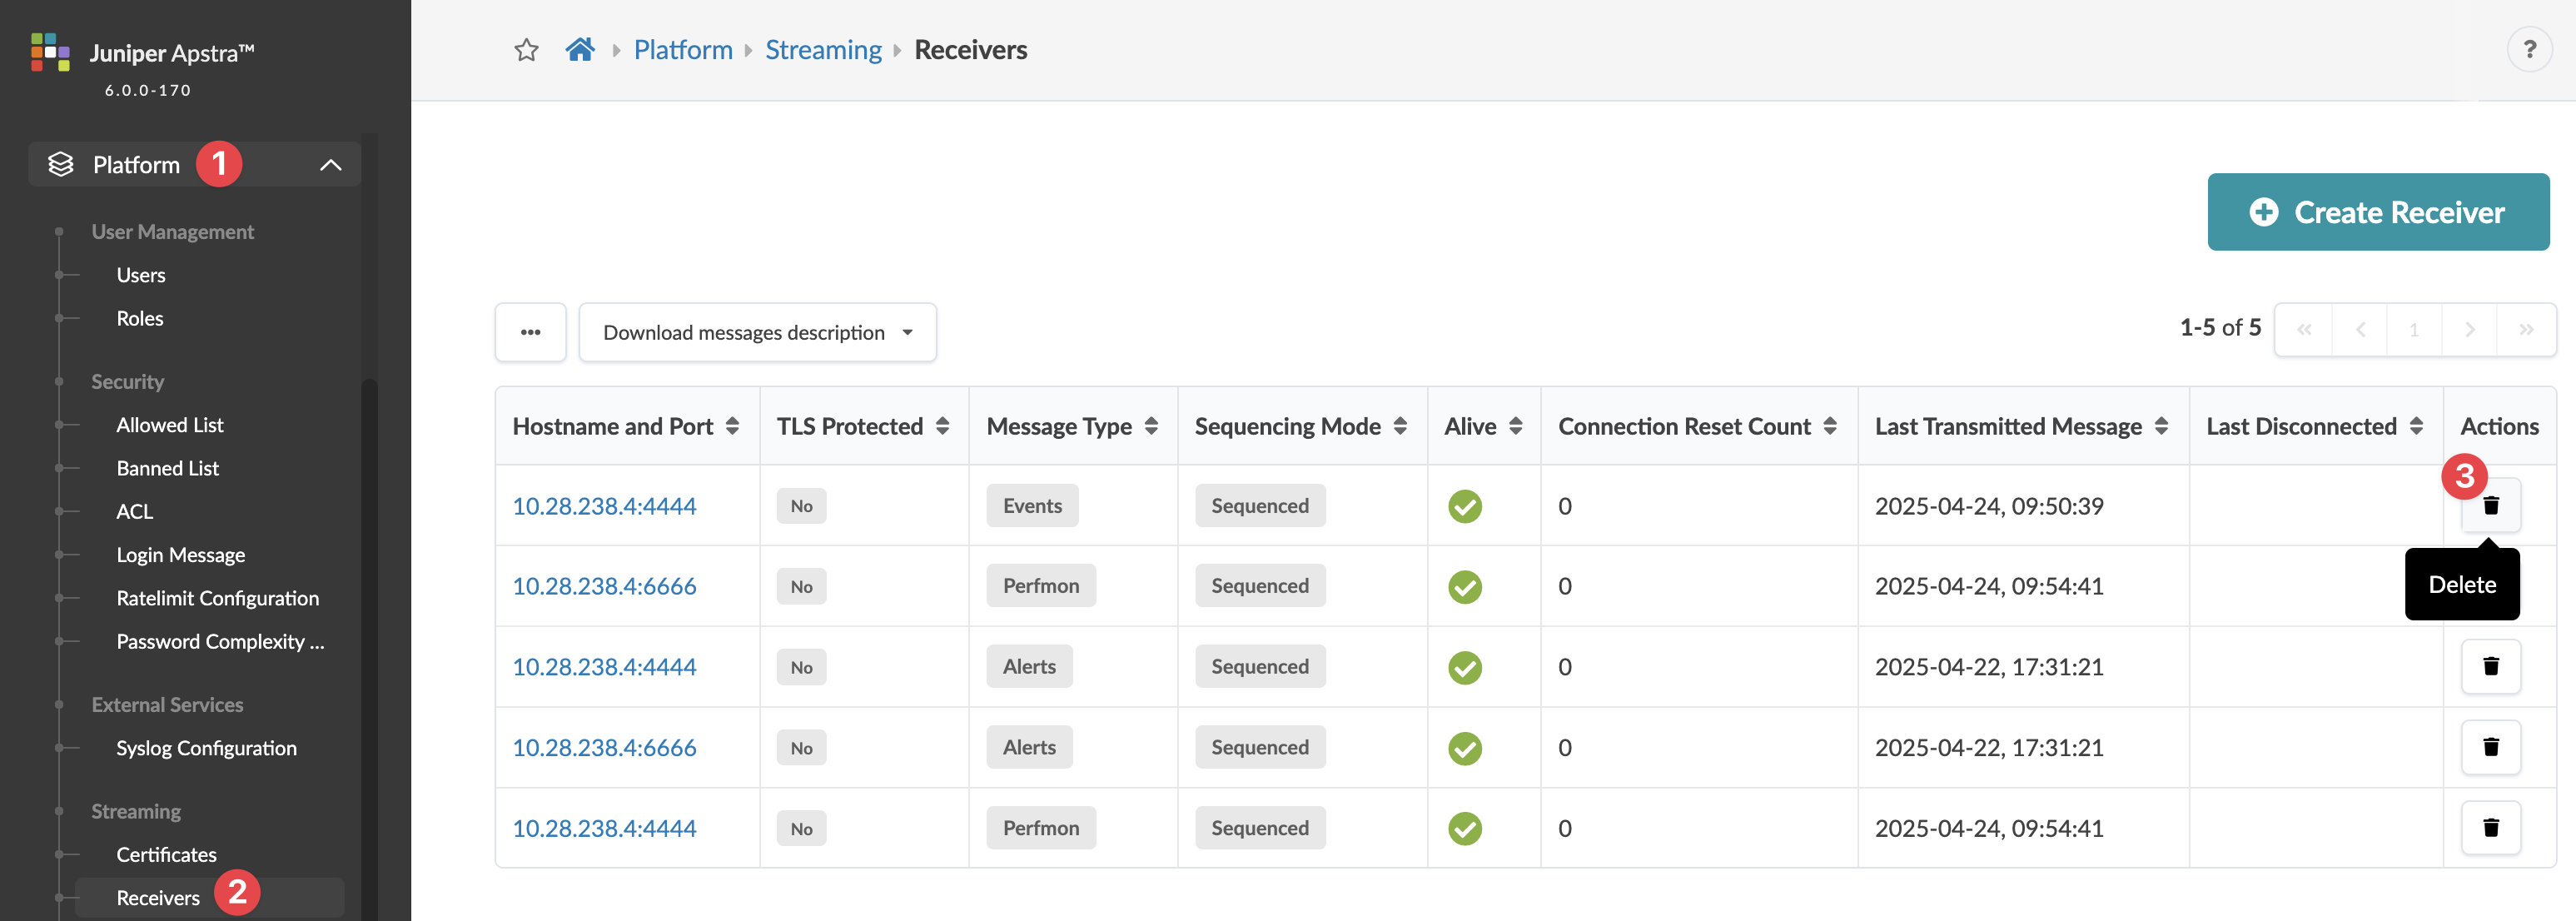 The Delete this resource? dialog opens.
Configure Receivers Using Telegraf Plugin
You can use the streaming input plugin for Telegraf to receive streaming telemetery. The streaming plugin is an external plugin maintained and supported outside of Telegraf. Telegraf is an agent for collecting, processing, aggregating, and writing metrics. The Telegraf plugin handles the reception of the protobuf messages from the software environment. For more information, see the Streaming Guide.
Provide credentials to configure streaming receivers with the Telegraf plugin. We recommend that you use a separate Apstra account with only the streaming credentials. If you configure through the GUI, then there is no need to supply credentials in the Telegraf config file.
In the examples, the Telegraf receiver is run in a docker container. The
docker-compose.yml snippet below shows the configuration for
the Telegraf container. Note that the image is built on Telegraf v1.21.3.
docker-compose.yml
services:
  telegraf-aos:
    image:  telegraf:1.31.3
    command: telegraf
    volumes:
      - type: bind
        source: ./apstra-telegraf-plugin
        target: /apstra-telegraf-plugin
        read_only: true
      - ./aos-telegraf.conf:/etc/telegraf/telegraf.conf
      - ./plugin.conf:/etc/telegraf/apstra-telegraf-plugin.conf
    ports:
      - '7777:7777'
The Telegraf configuration file - ./aos-telegraf.conf - is mapped to
/etc/telegraf/apstra-telegraf-plugin.conf on the container. It
includes the following parameters:
- address - specifies the IP address of the streaming receiver
- port - specifies the port that the streaming receiver will be listening on
- streaming_type - specifies the type of data to be streamed to this receiver
To configure the Telegraf plugin to stream receivers via the API, the remaining parameters are necessary.
- aos_server - specifies the IP address of the server
- aos_port - should always be 443
- aos_login - Apstra username
- aos_password - Apstra password
The Apstra input plugin configurations are shown in the snippet below.
[[inputs.aos]]
  # TCP Port to listen for incoming sessions from the Apstra Server.
  port = 7777

  # Address of the server running Telegraf. It must to be reachable from the Apstra Server.
  address = "<telegraf-server-ip>"

  # Streaming Type Can be "perfmon", "alerts" or "events".
  streaming_type = [ "perfmon", "alerts" ]

  # Define parameters to configure the Apstra Server using the REST API.
  # These paramters are not required when the receiver is configured from the Apstra GUI.
  aos_server = "<apstra-server-ip>"
  aos_port = 443
  aos_login = "admin"
  aos_password = "admin"
  aos_protocol = "https"