Help us improve your experience.

Let us know what you think.

Do you have time for a two-minute survey?


Log in to the GUI

Access the GUI

  1. From the latest web browser version of Google Chrome (or Mozilla FireFox) enter the URL https://<server_ip> where <server_ip> is the IP address of the server (or a DNS name that resolves to the IP address of the server).
  2. If a security warning appears, click Advanced and Proceed to the site. The warning occurs because the SSL certificate that was generated during installation is self-signed, and you didn't replace it with a signed one when you installed the software. We recommend, for security reasons, that you replace the SSL certificate. (See the Installation and Upgrade Guide for details.)
  3. If a login message was activated, the message appears next. Click Accept to proceed to the next screen.
  4. From the login page, enter username admin and the secure password that you set when you configured the server. (Entering the password incorrectly too many times locks you out for a few minutes depending on how password requirements have been configured. You can update password complexity requirements. )

    The main screen appears.

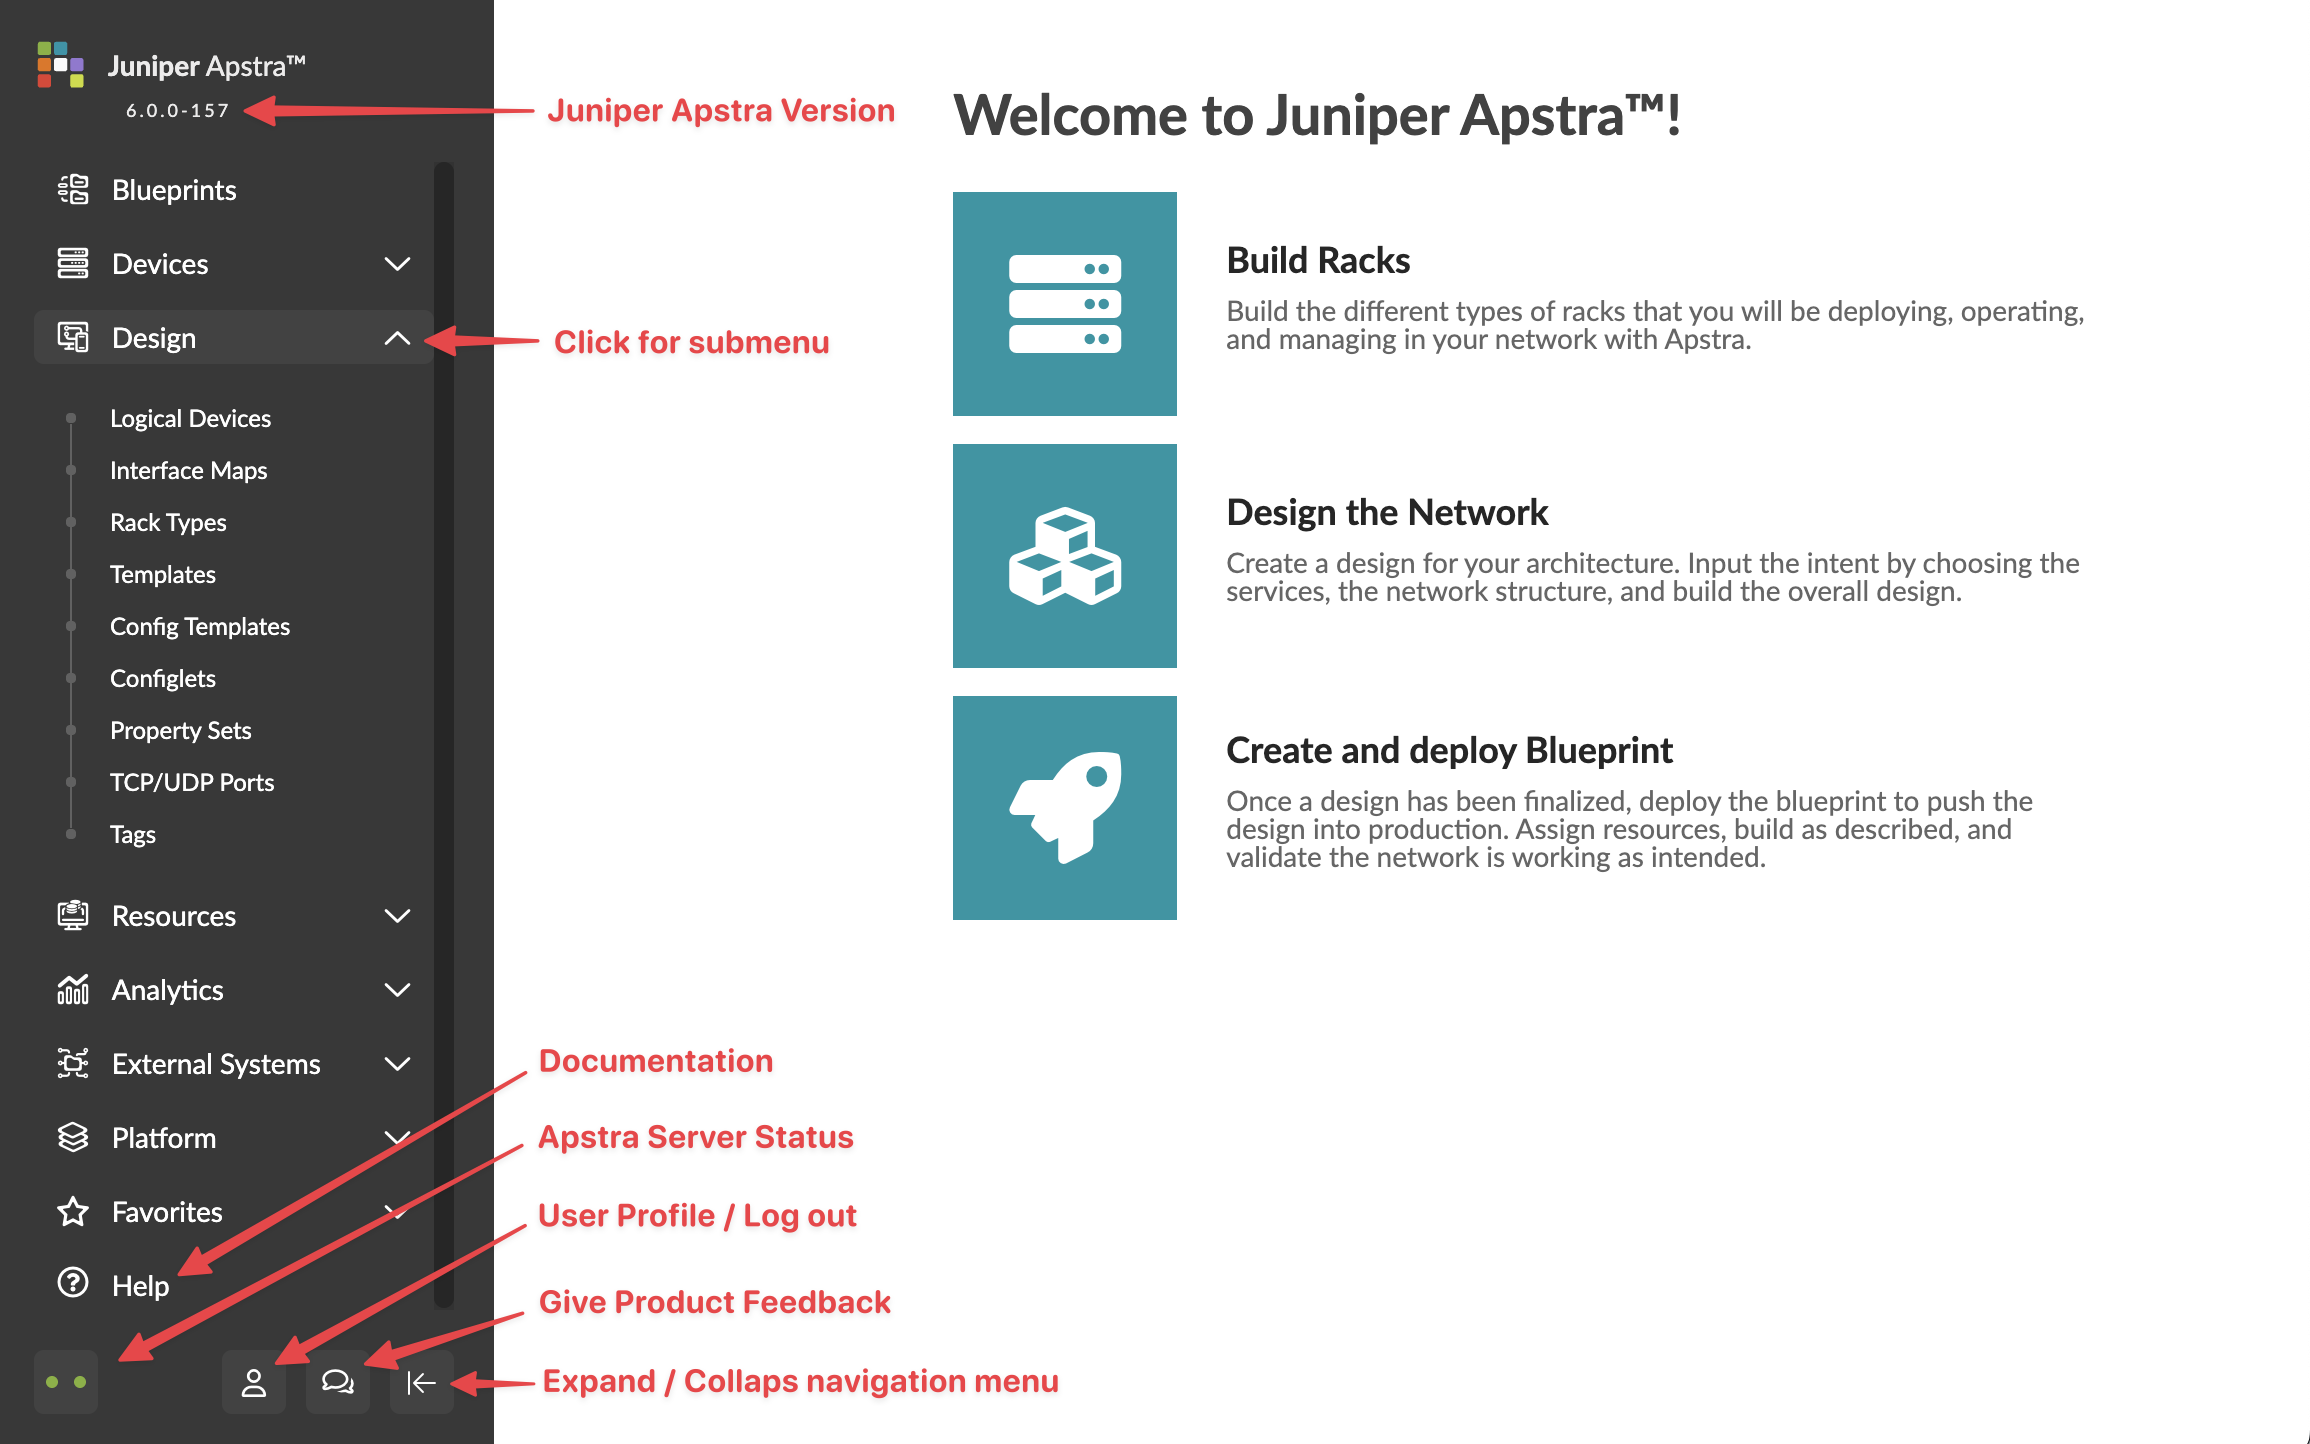
Next Steps: See the Get Started section of this guide for the general workflow for building your network, with links to more information.