Add/Remove Interface Tags (Datacenter)
You can add tags to interfaces in a few different ways and use them for configuration.
You can manage interface tags from various locations in the Apstra GUI.
Update Tags on One Interface (Topology Neighbors View)
-
From the blueprint, navigate to Staged > Physical >
Topology and select the leaf with the interface to tag. In
our example, we've selected leaf3.
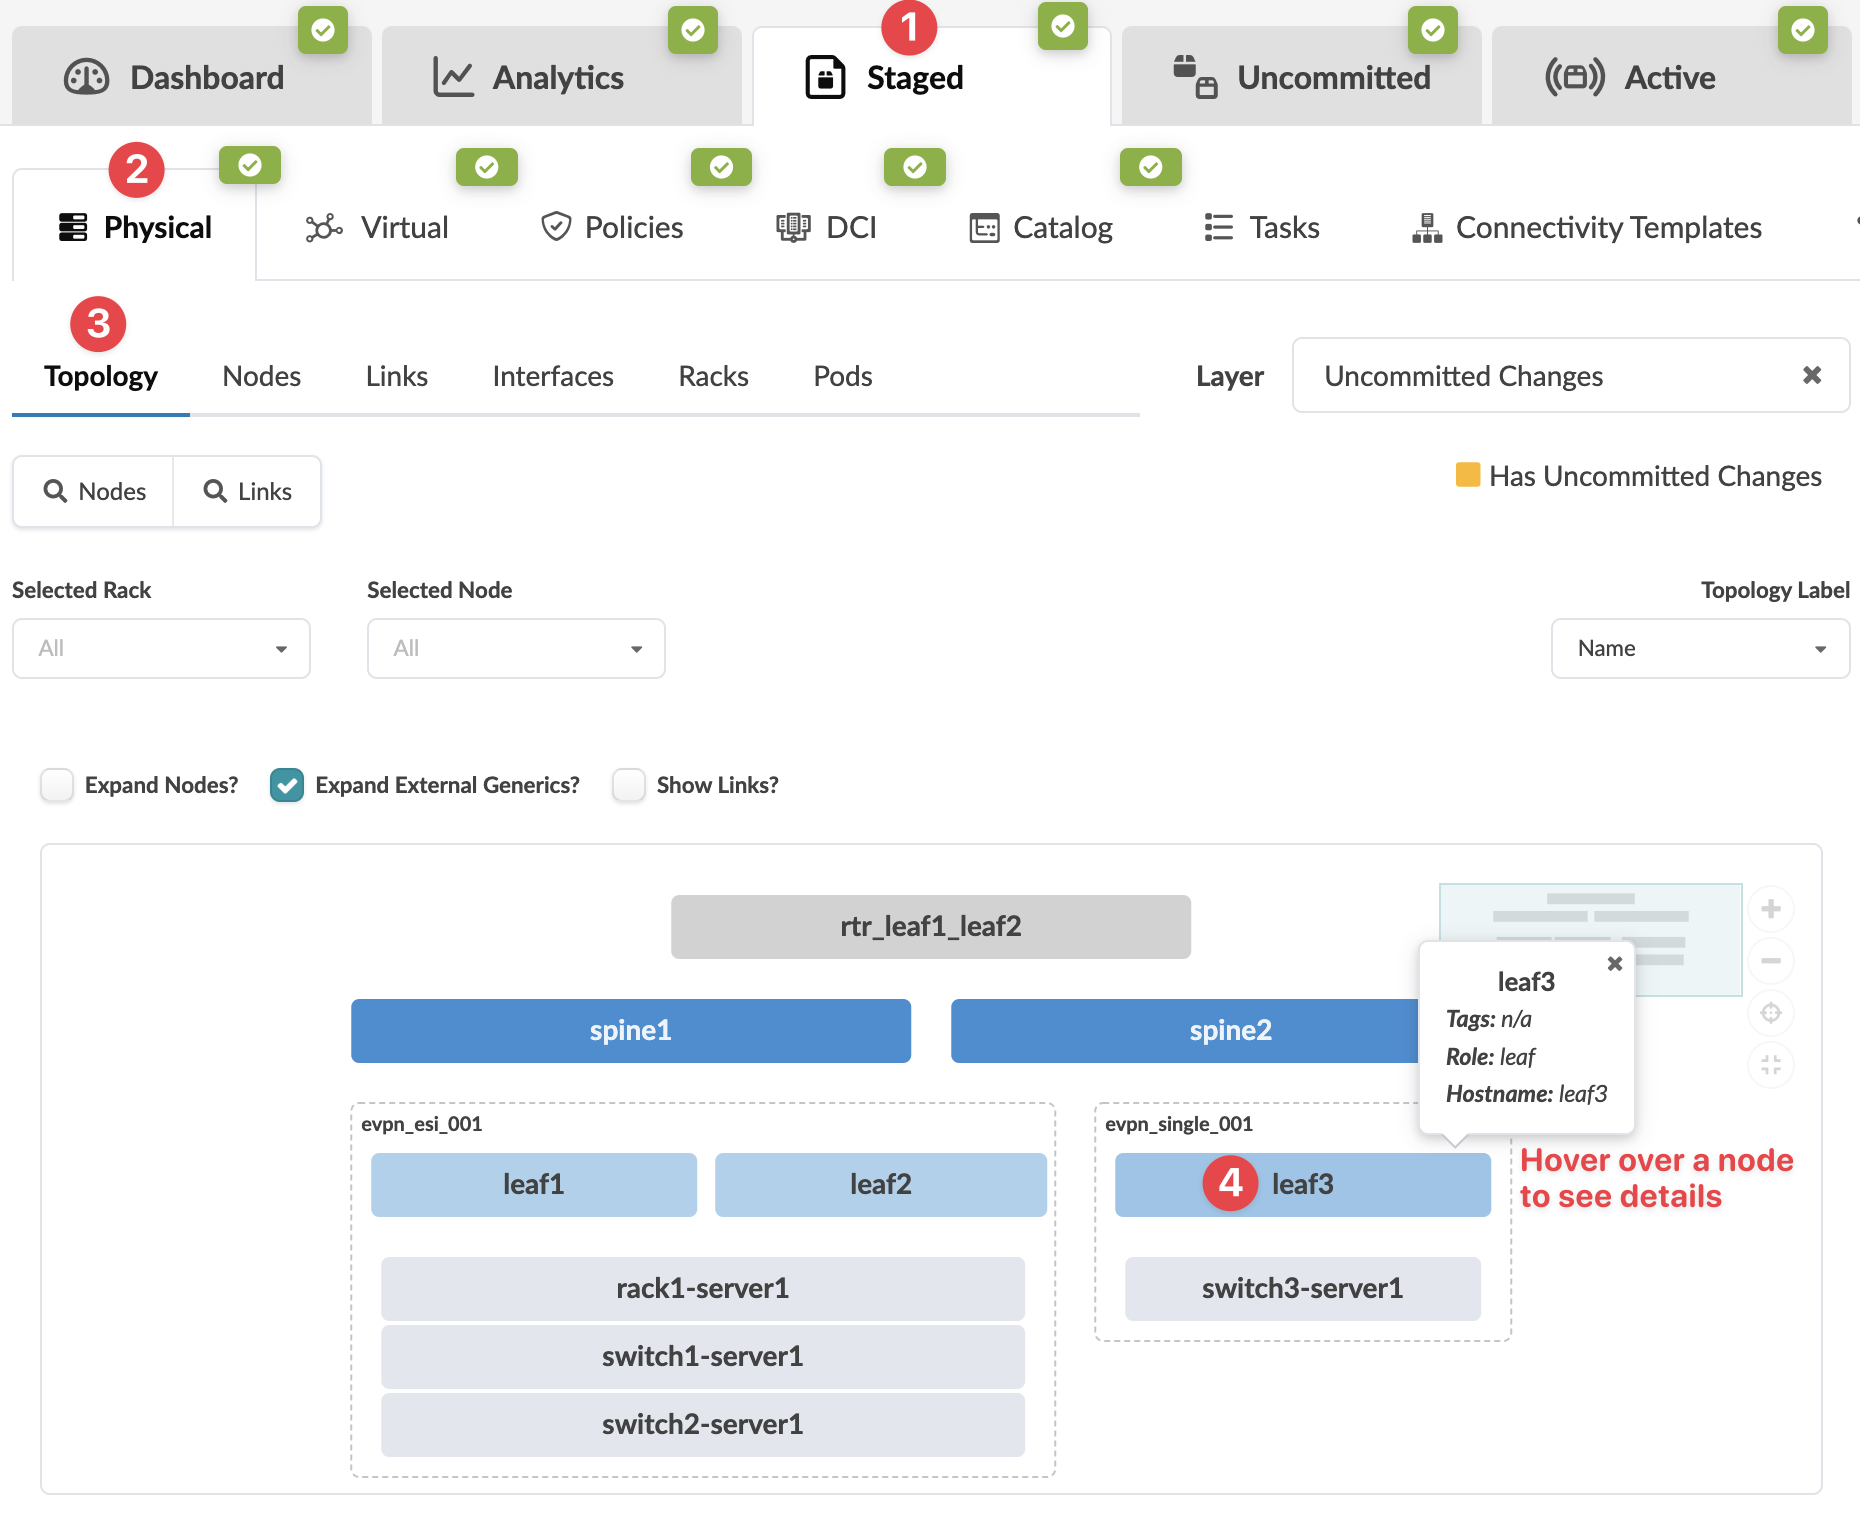 The topology selection view appears.
 -
From the Neighbors view (default view), select the interface check
box to see the operations available for that interface (and that you have
permissions for).
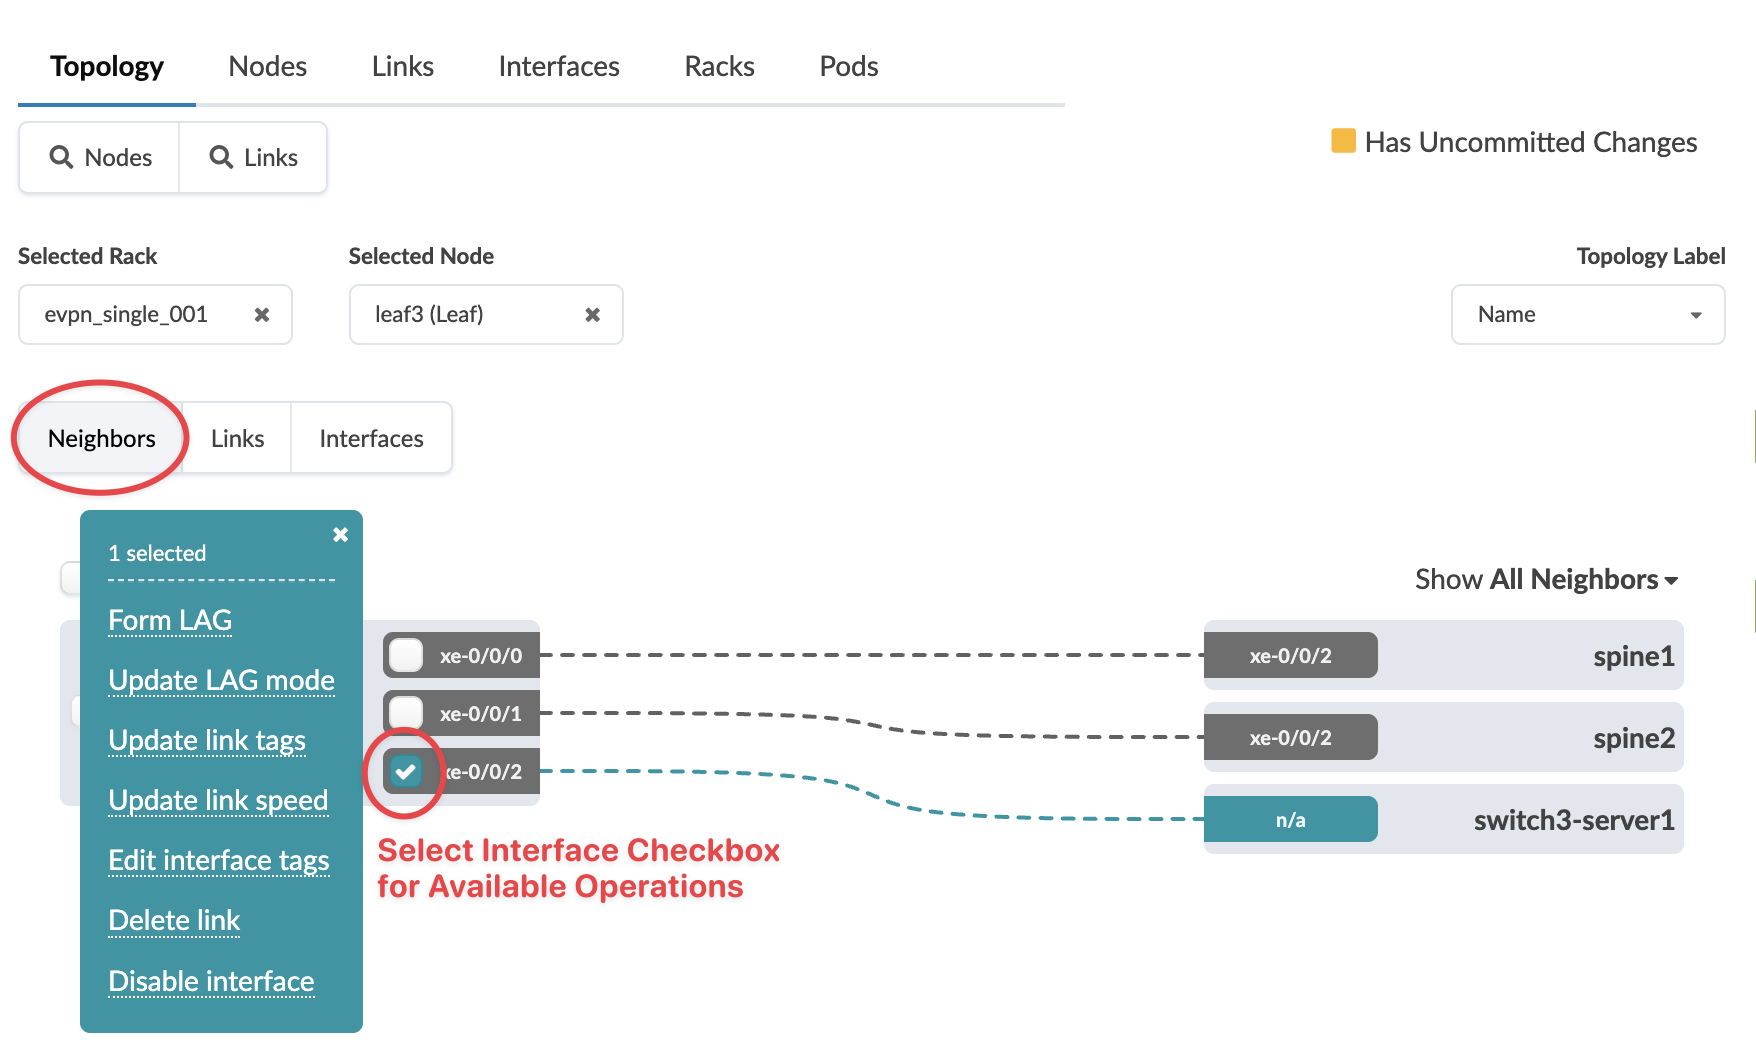
-
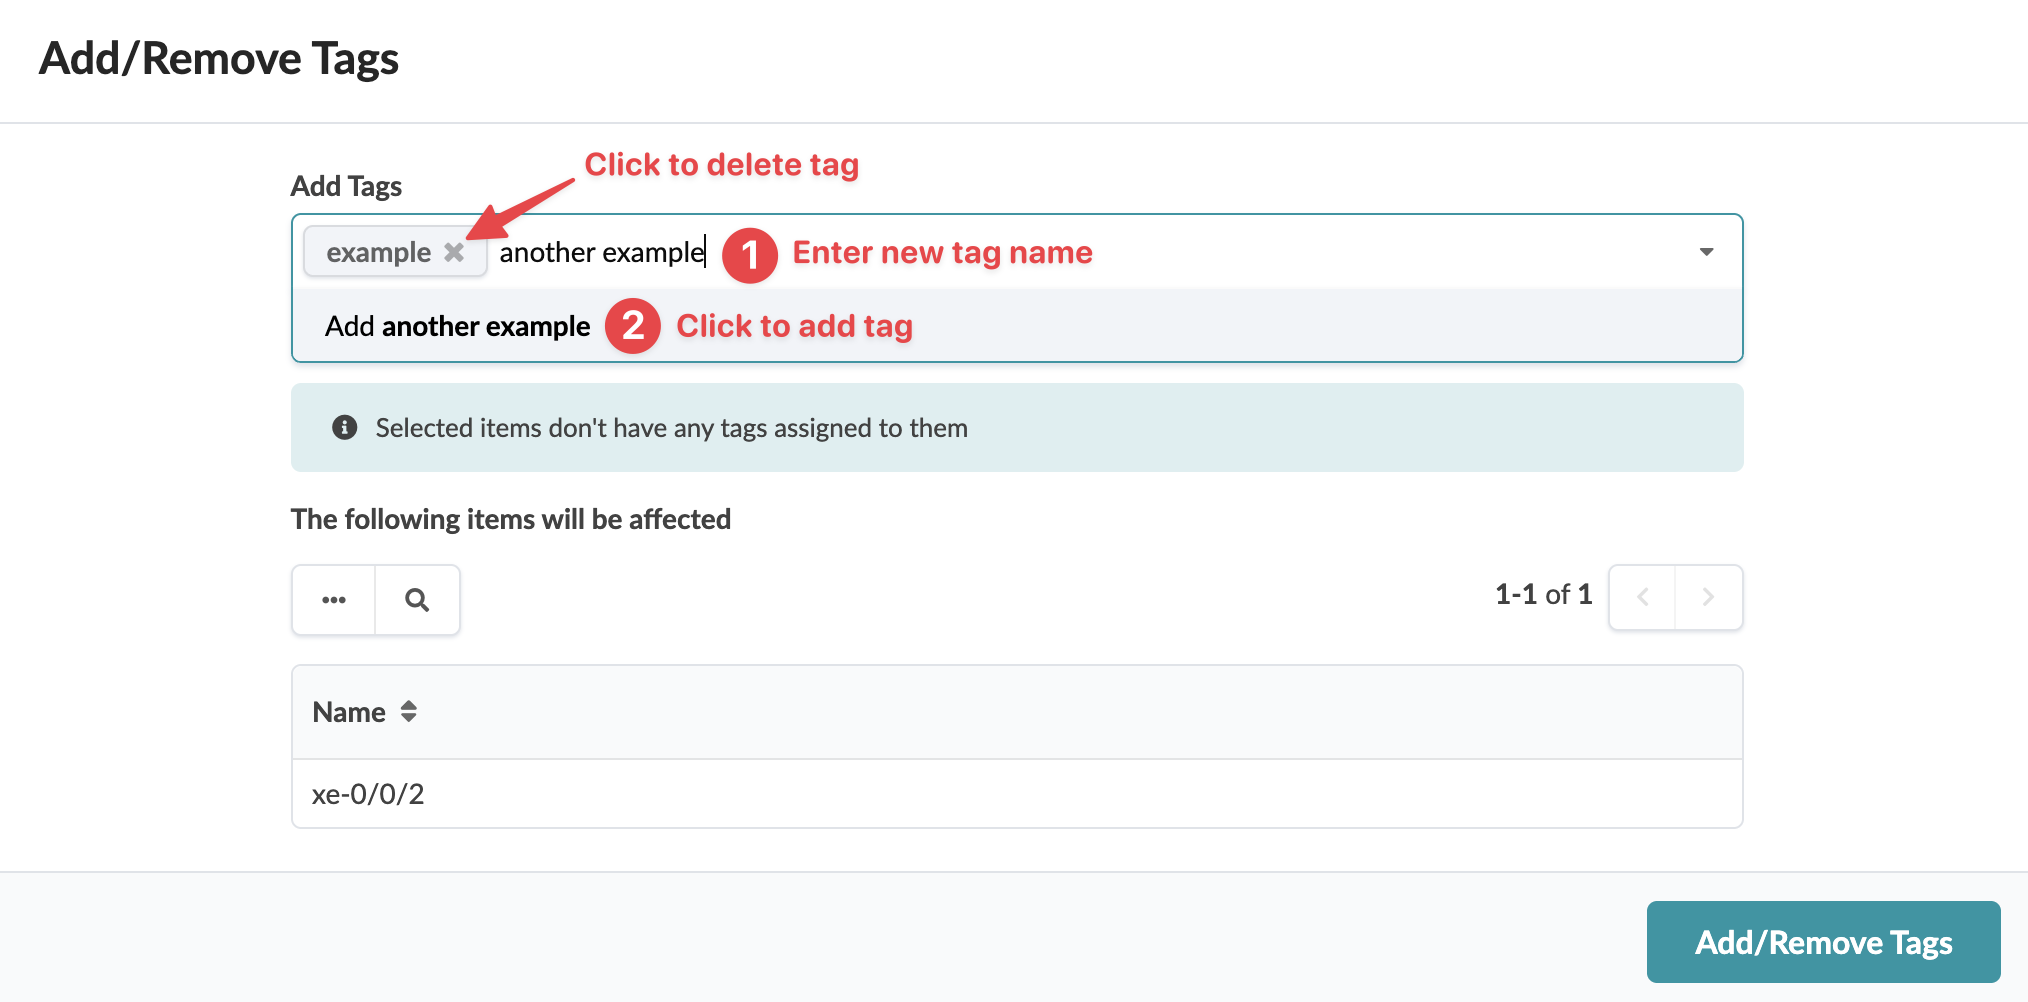
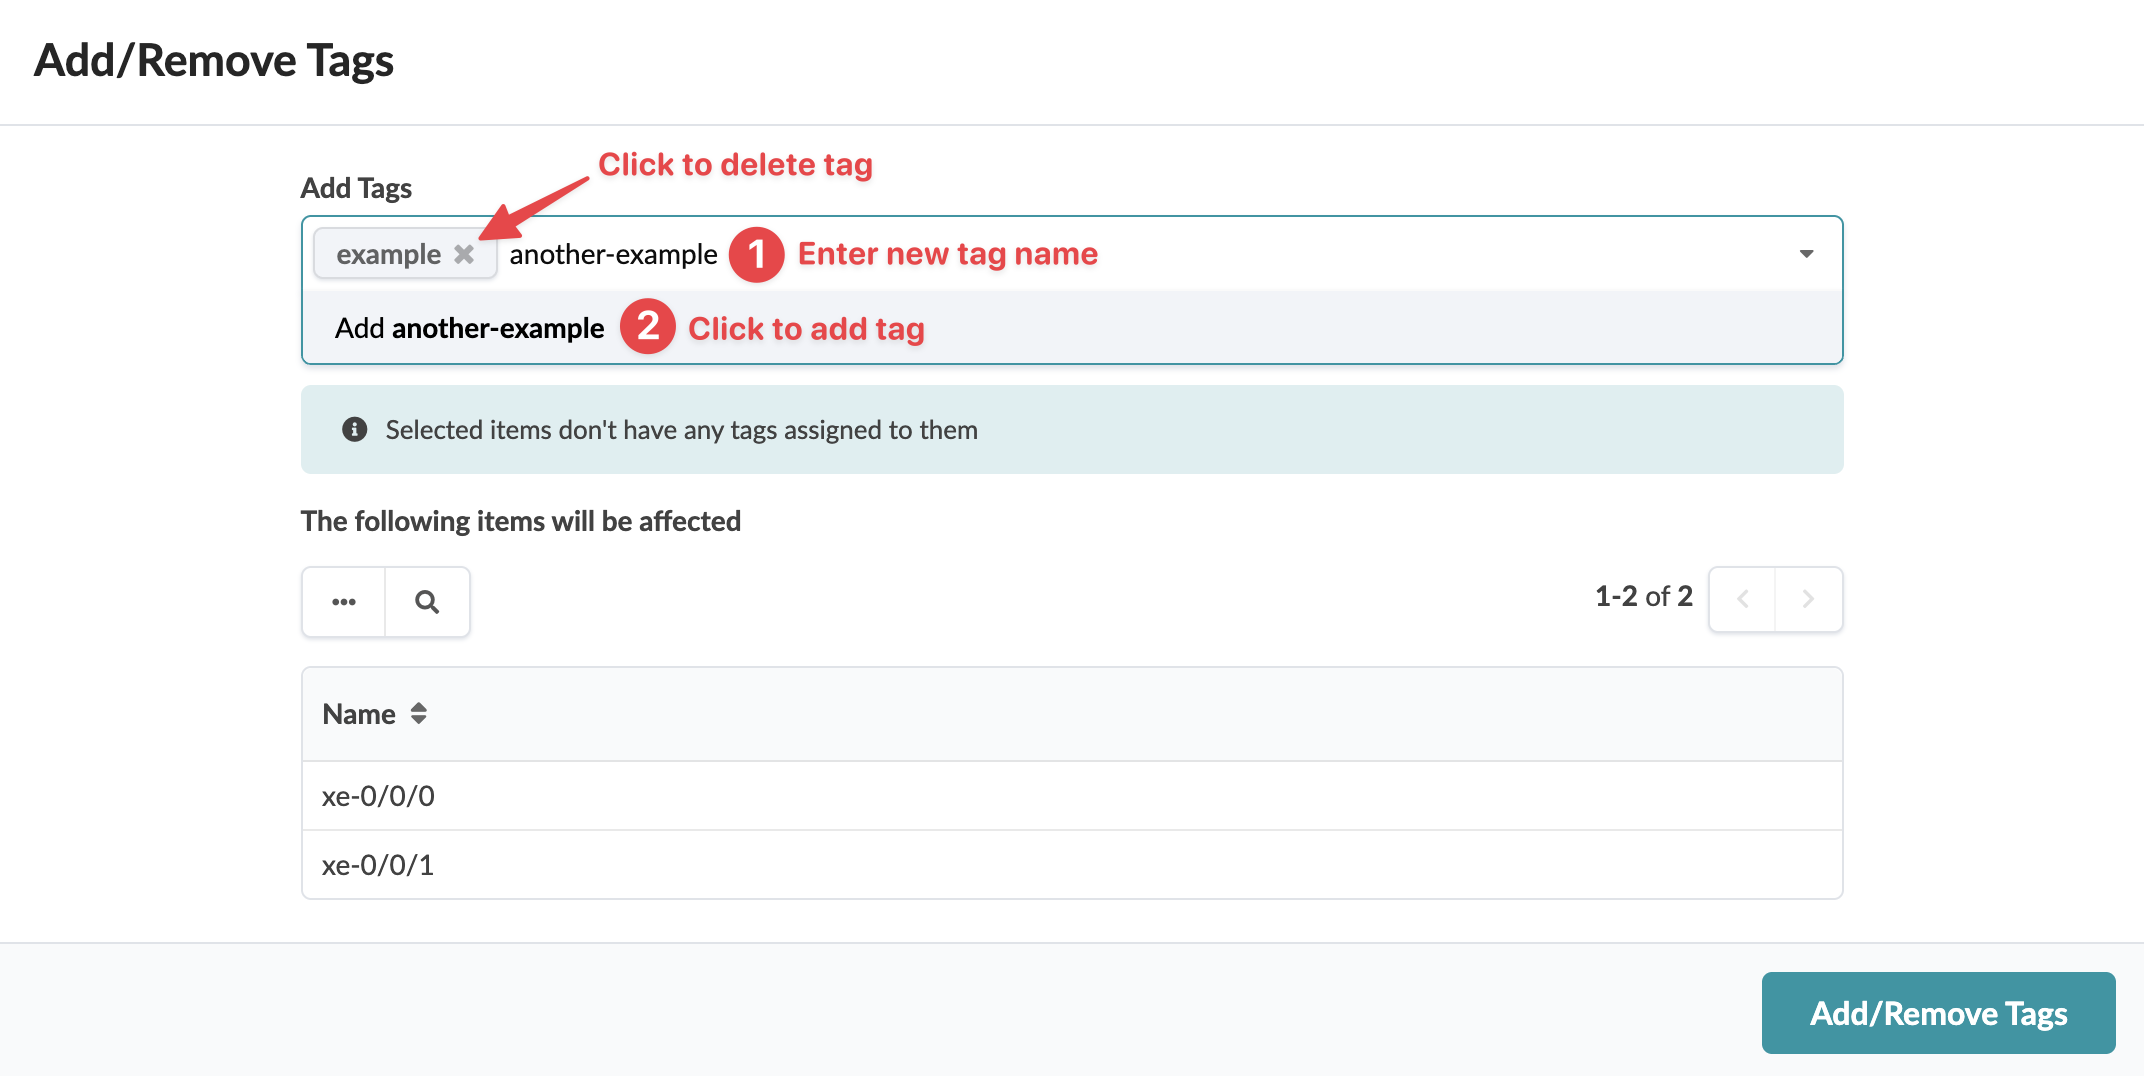
Add and/or remove tags, as needed. You can create tags from here; they'll
be tagged to the link and added to the blueprint catalog.
When you're ready to activate your changes, go to the Uncommitted tab to review and commit (or discard) your changes.
Update Tags on One Interface (Interfaces Table)
-
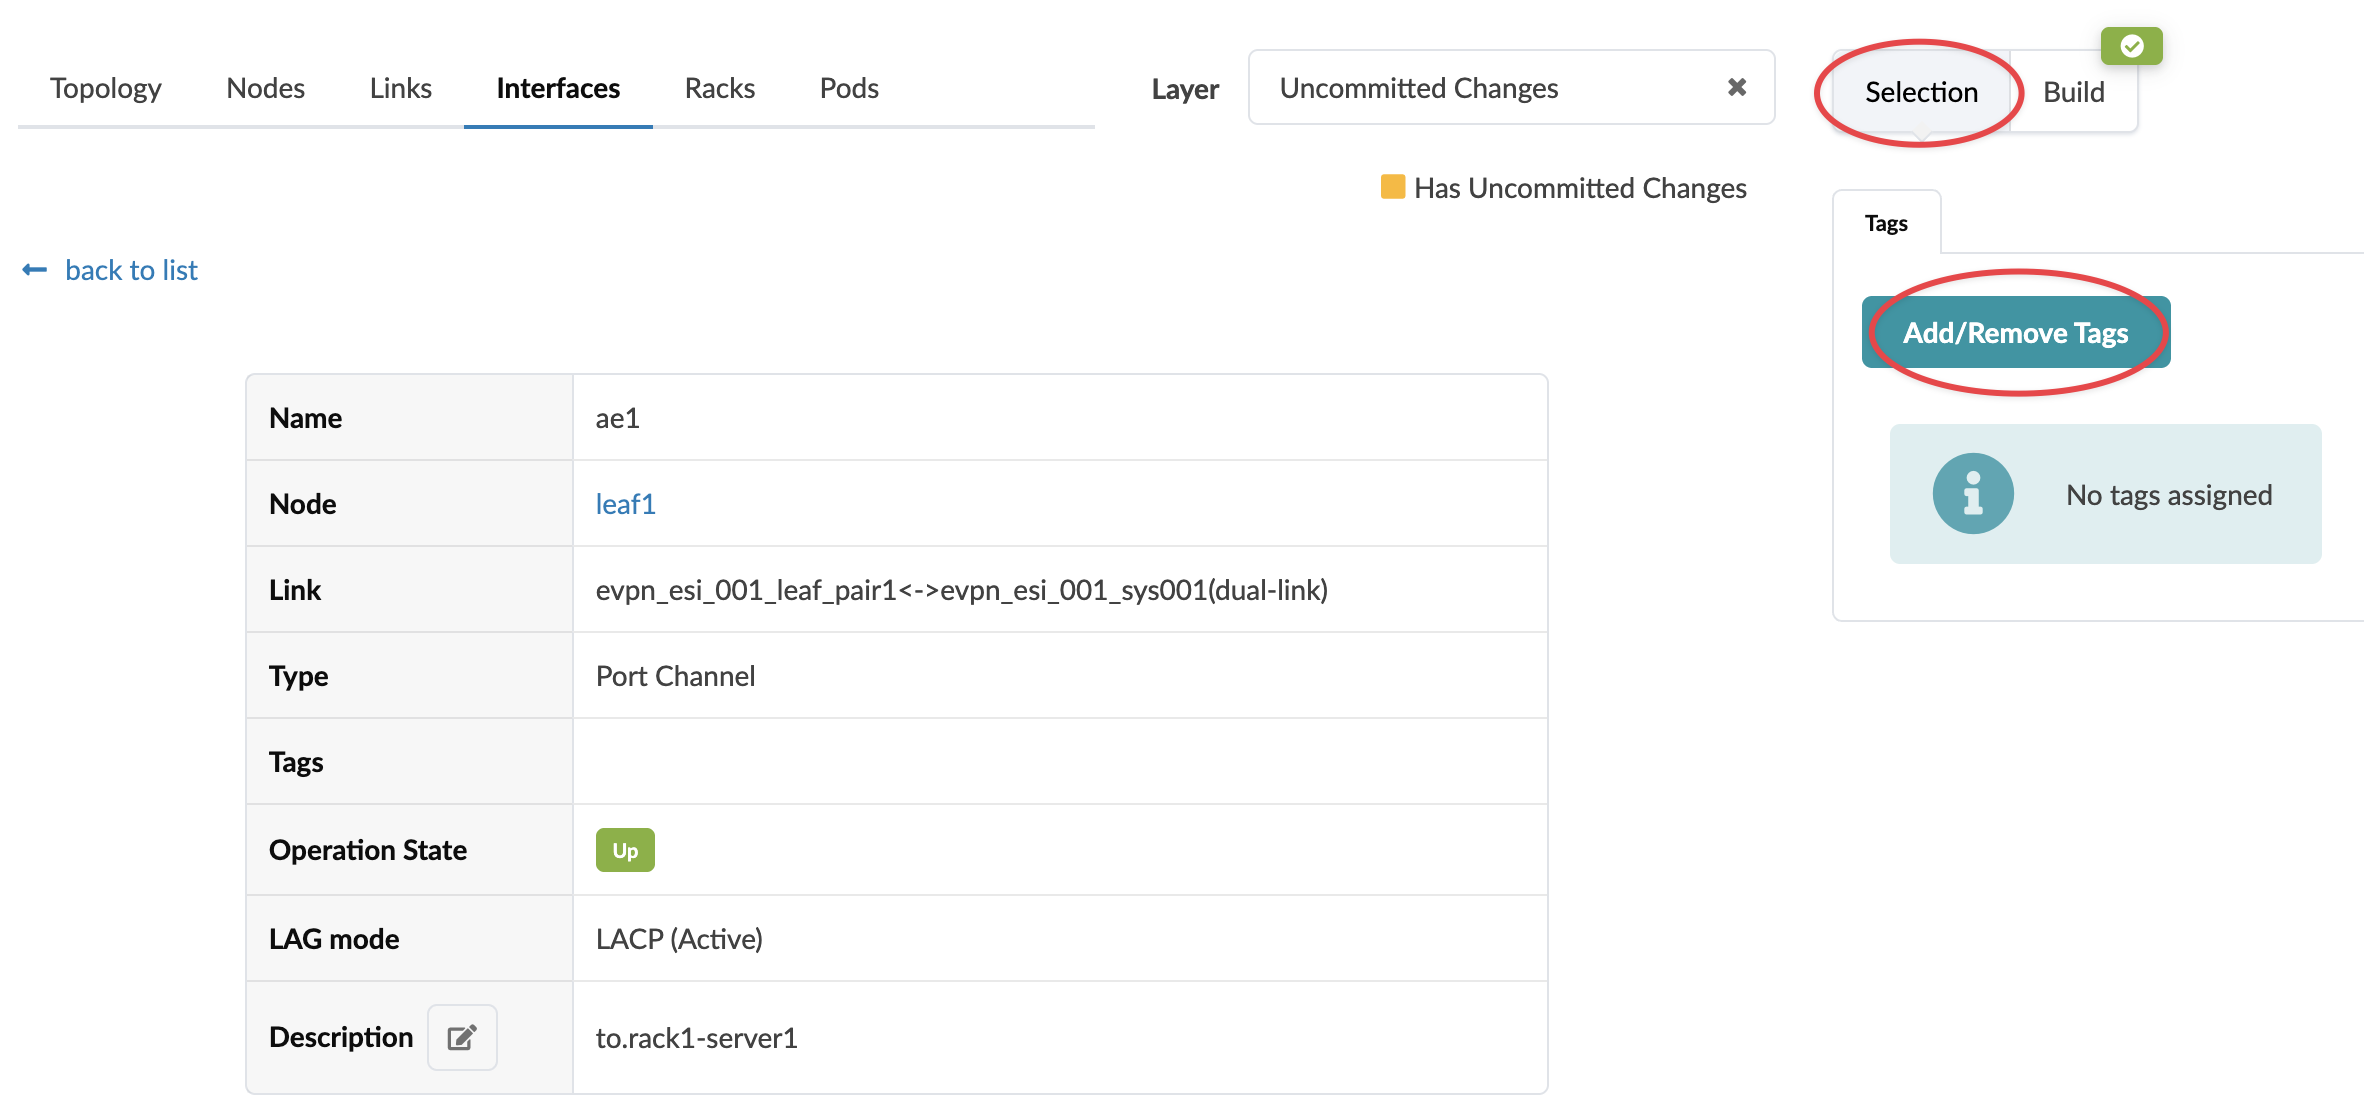
From the blueprint, navigate to Staged > Physical >
Interfaces and select the interface name (not the check box)
for the interface that needs updated tags.
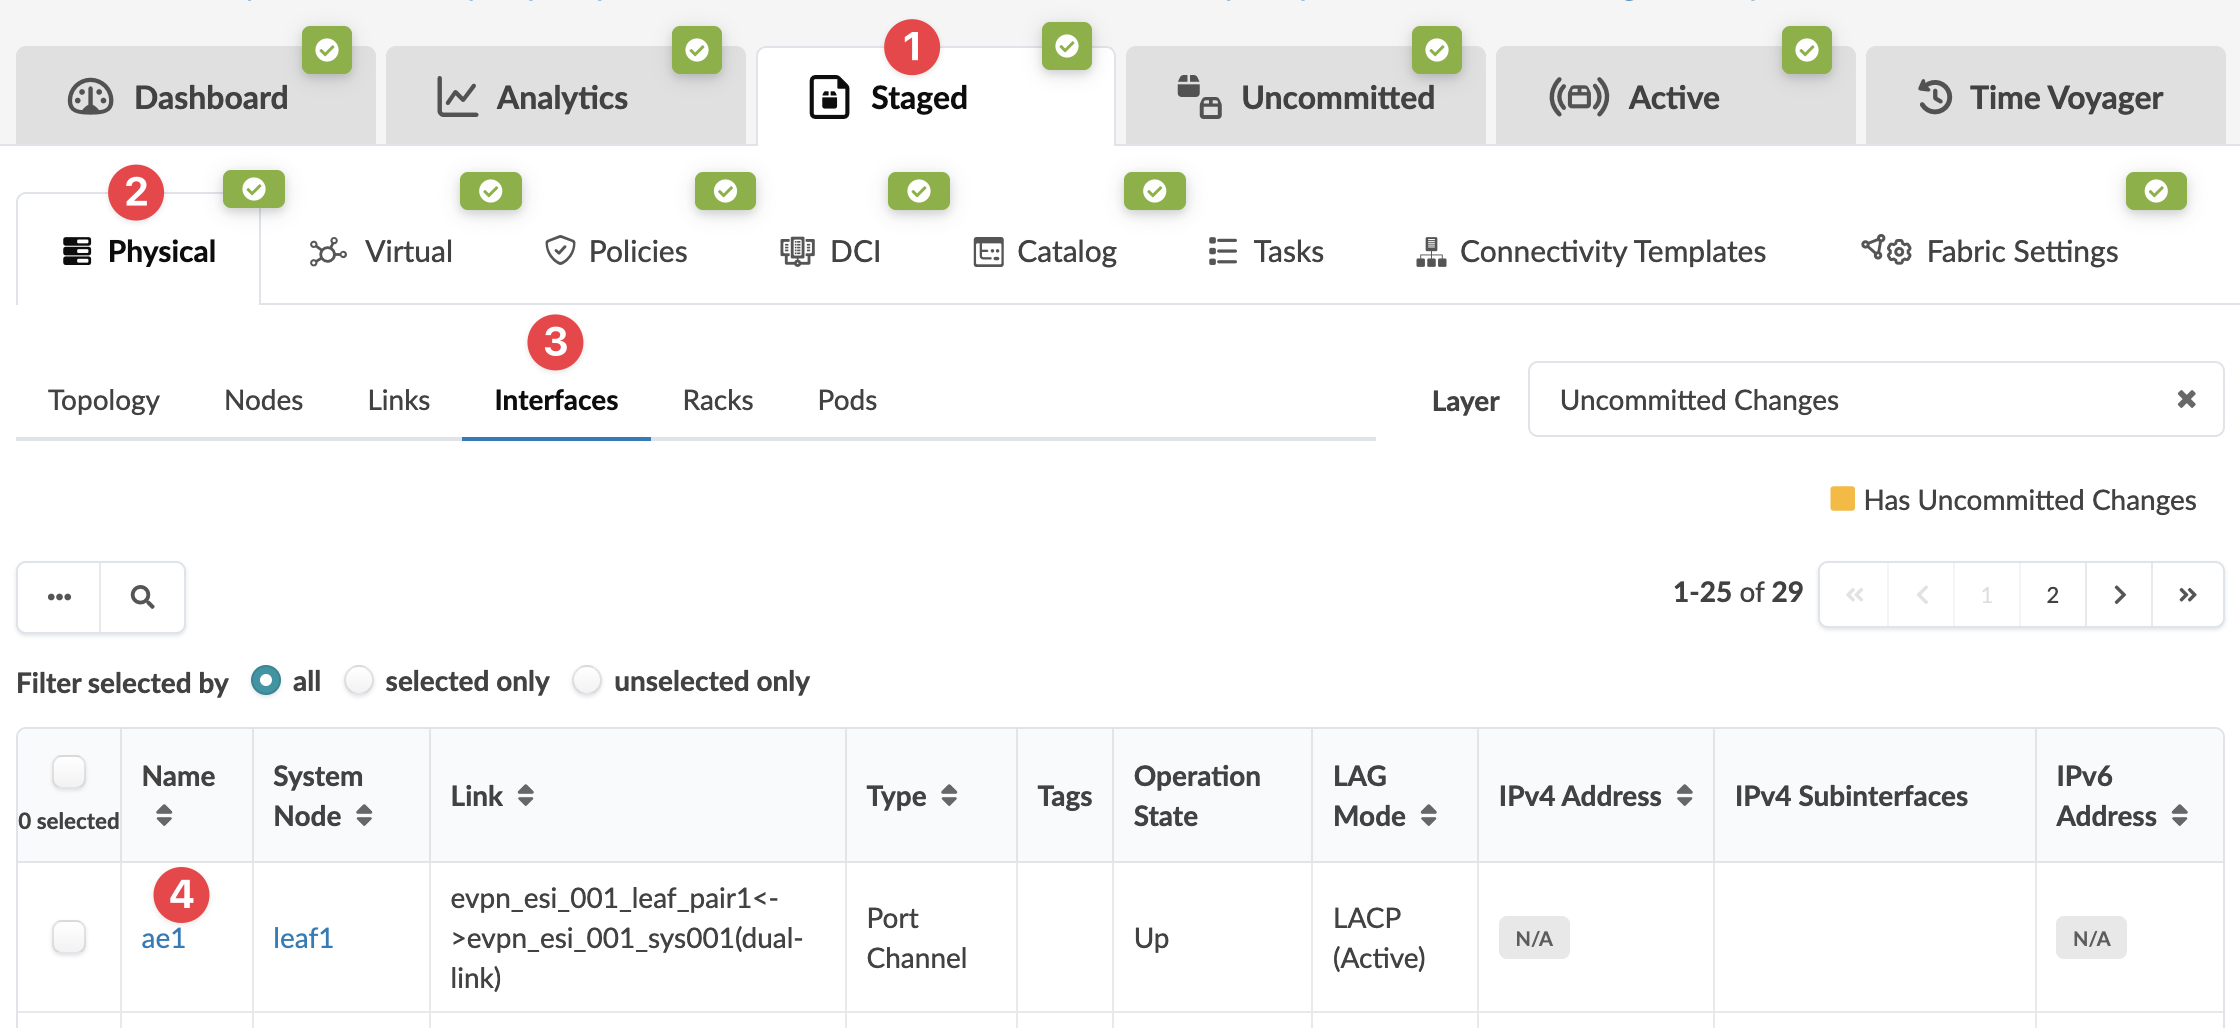 The interface selection view appears, including tag information in the right Selection panel.
 -
Click Add / Remove Tags in the panel.
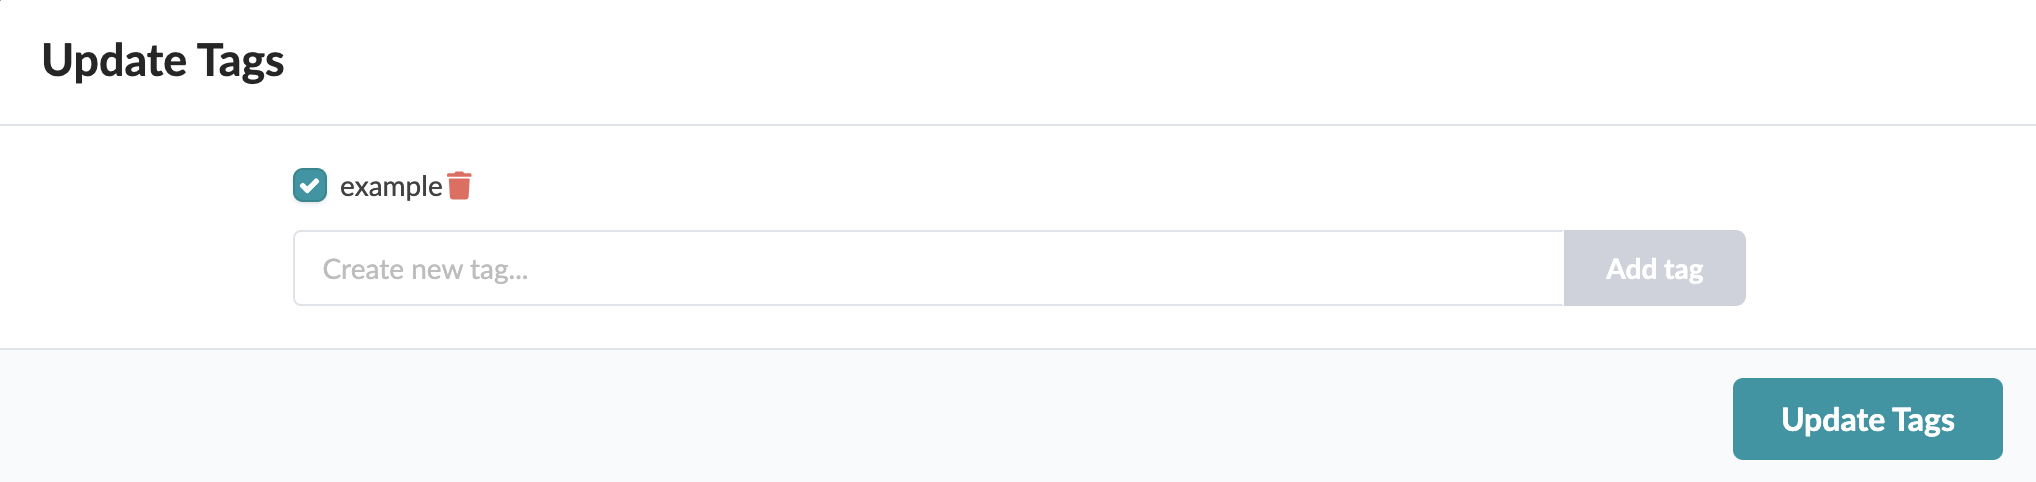
 The Update Tags dialog opens.
 -
Add and/or remove tags, as needed. You can create tags from here; they'll
be tagged to the link and added to the blueprint catalog.
When you're ready to activate your changes, go to the Uncommitted tab to review and commit (or discard) your changes.
Update Tags on One or More Interfaces (Topology Interfaces View)
-
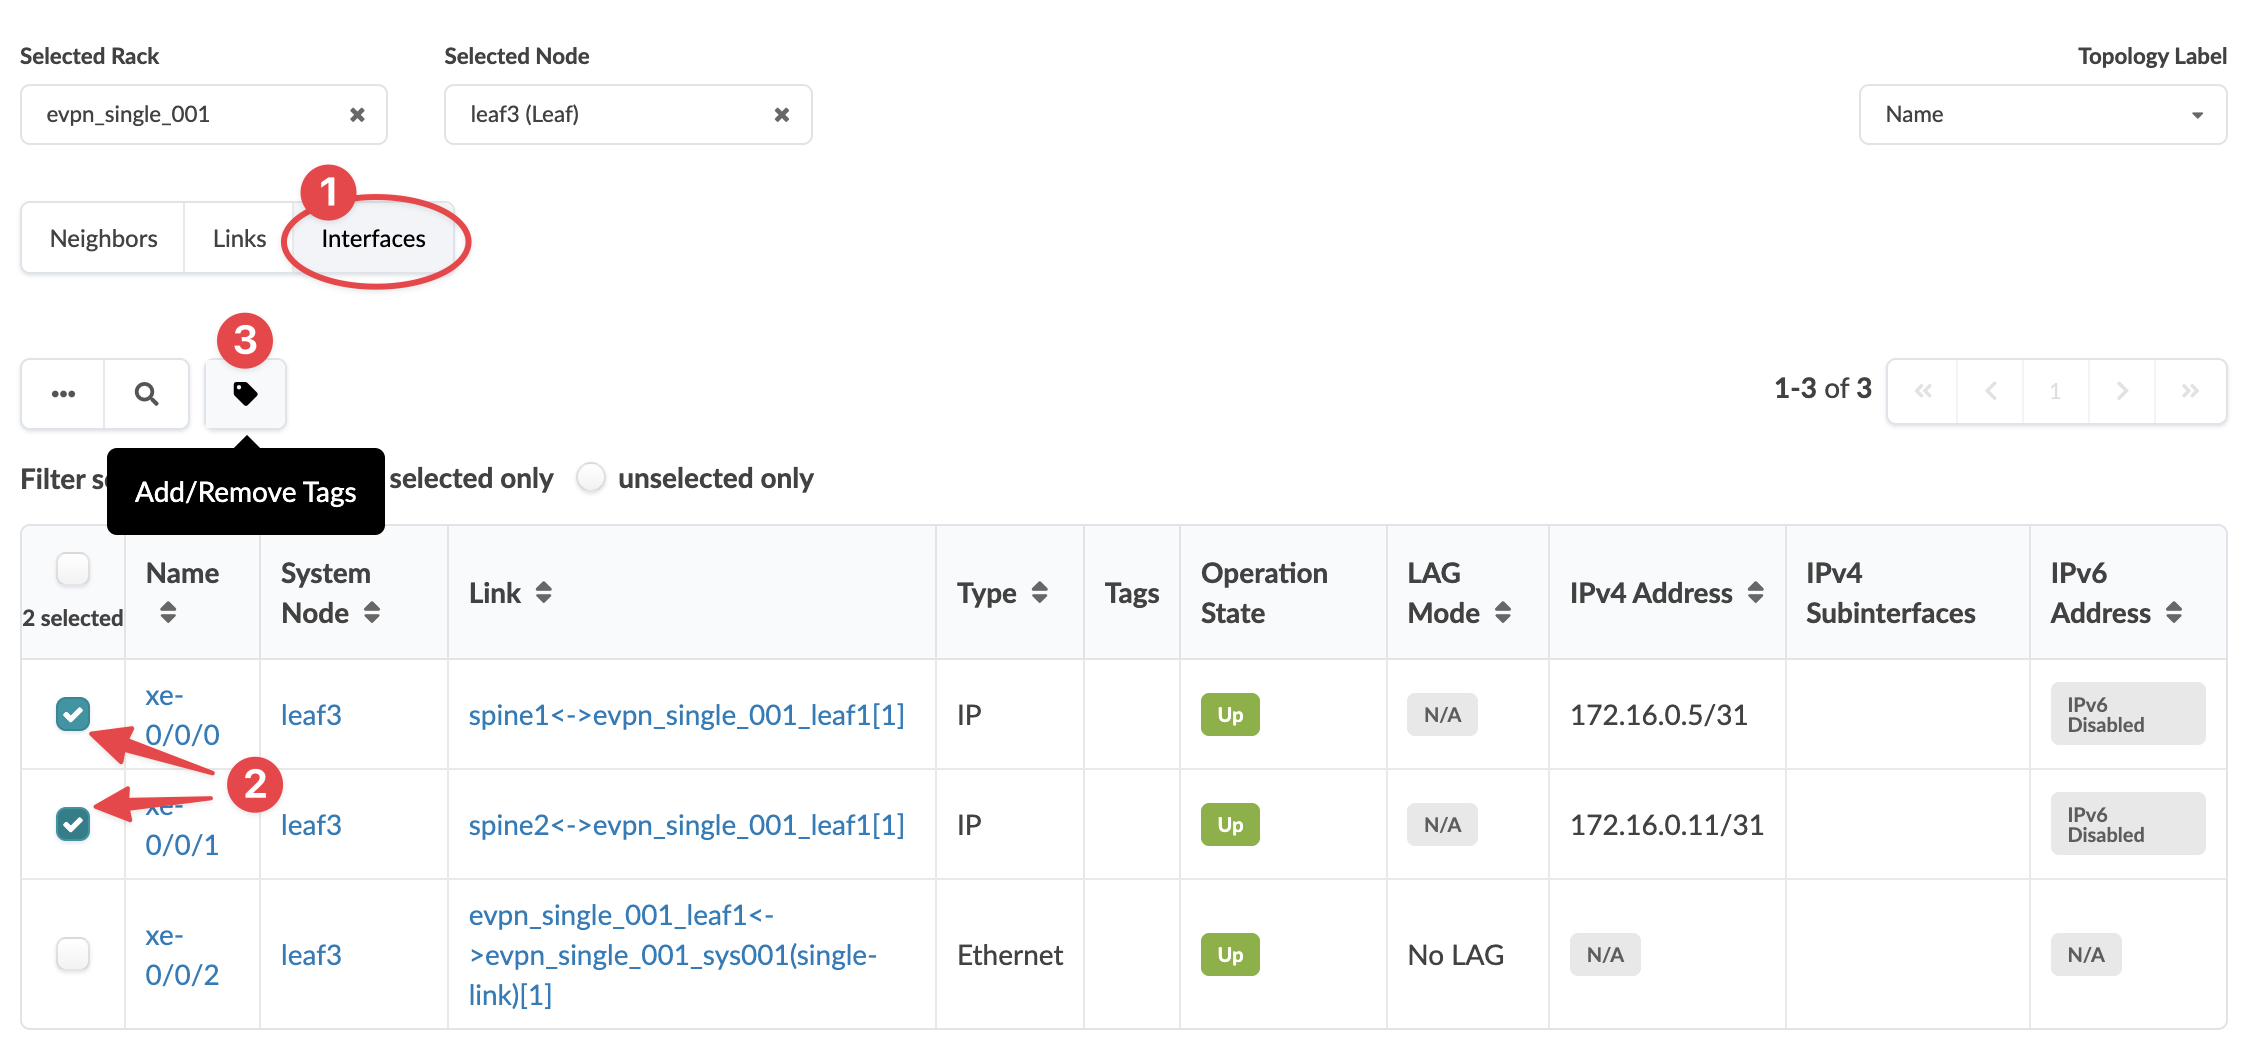
From the blueprint, navigate to Staged > Physical >
Topology and select the leaf with the interface to tag. In
our example, we've selected leaf3.
-
Click Interfaces view, then select one or more check
boxes for the interface(s) that need updated tags.The Add/Remove
Tags button appears above the table.
-
Add and/or remove tags, as needed. You can create tags from here; they'll
be tagged to the link and added to the blueprint catalog.
When you're ready to activate your changes, go to the Uncommitted tab to review and commit (or discard) your changes.
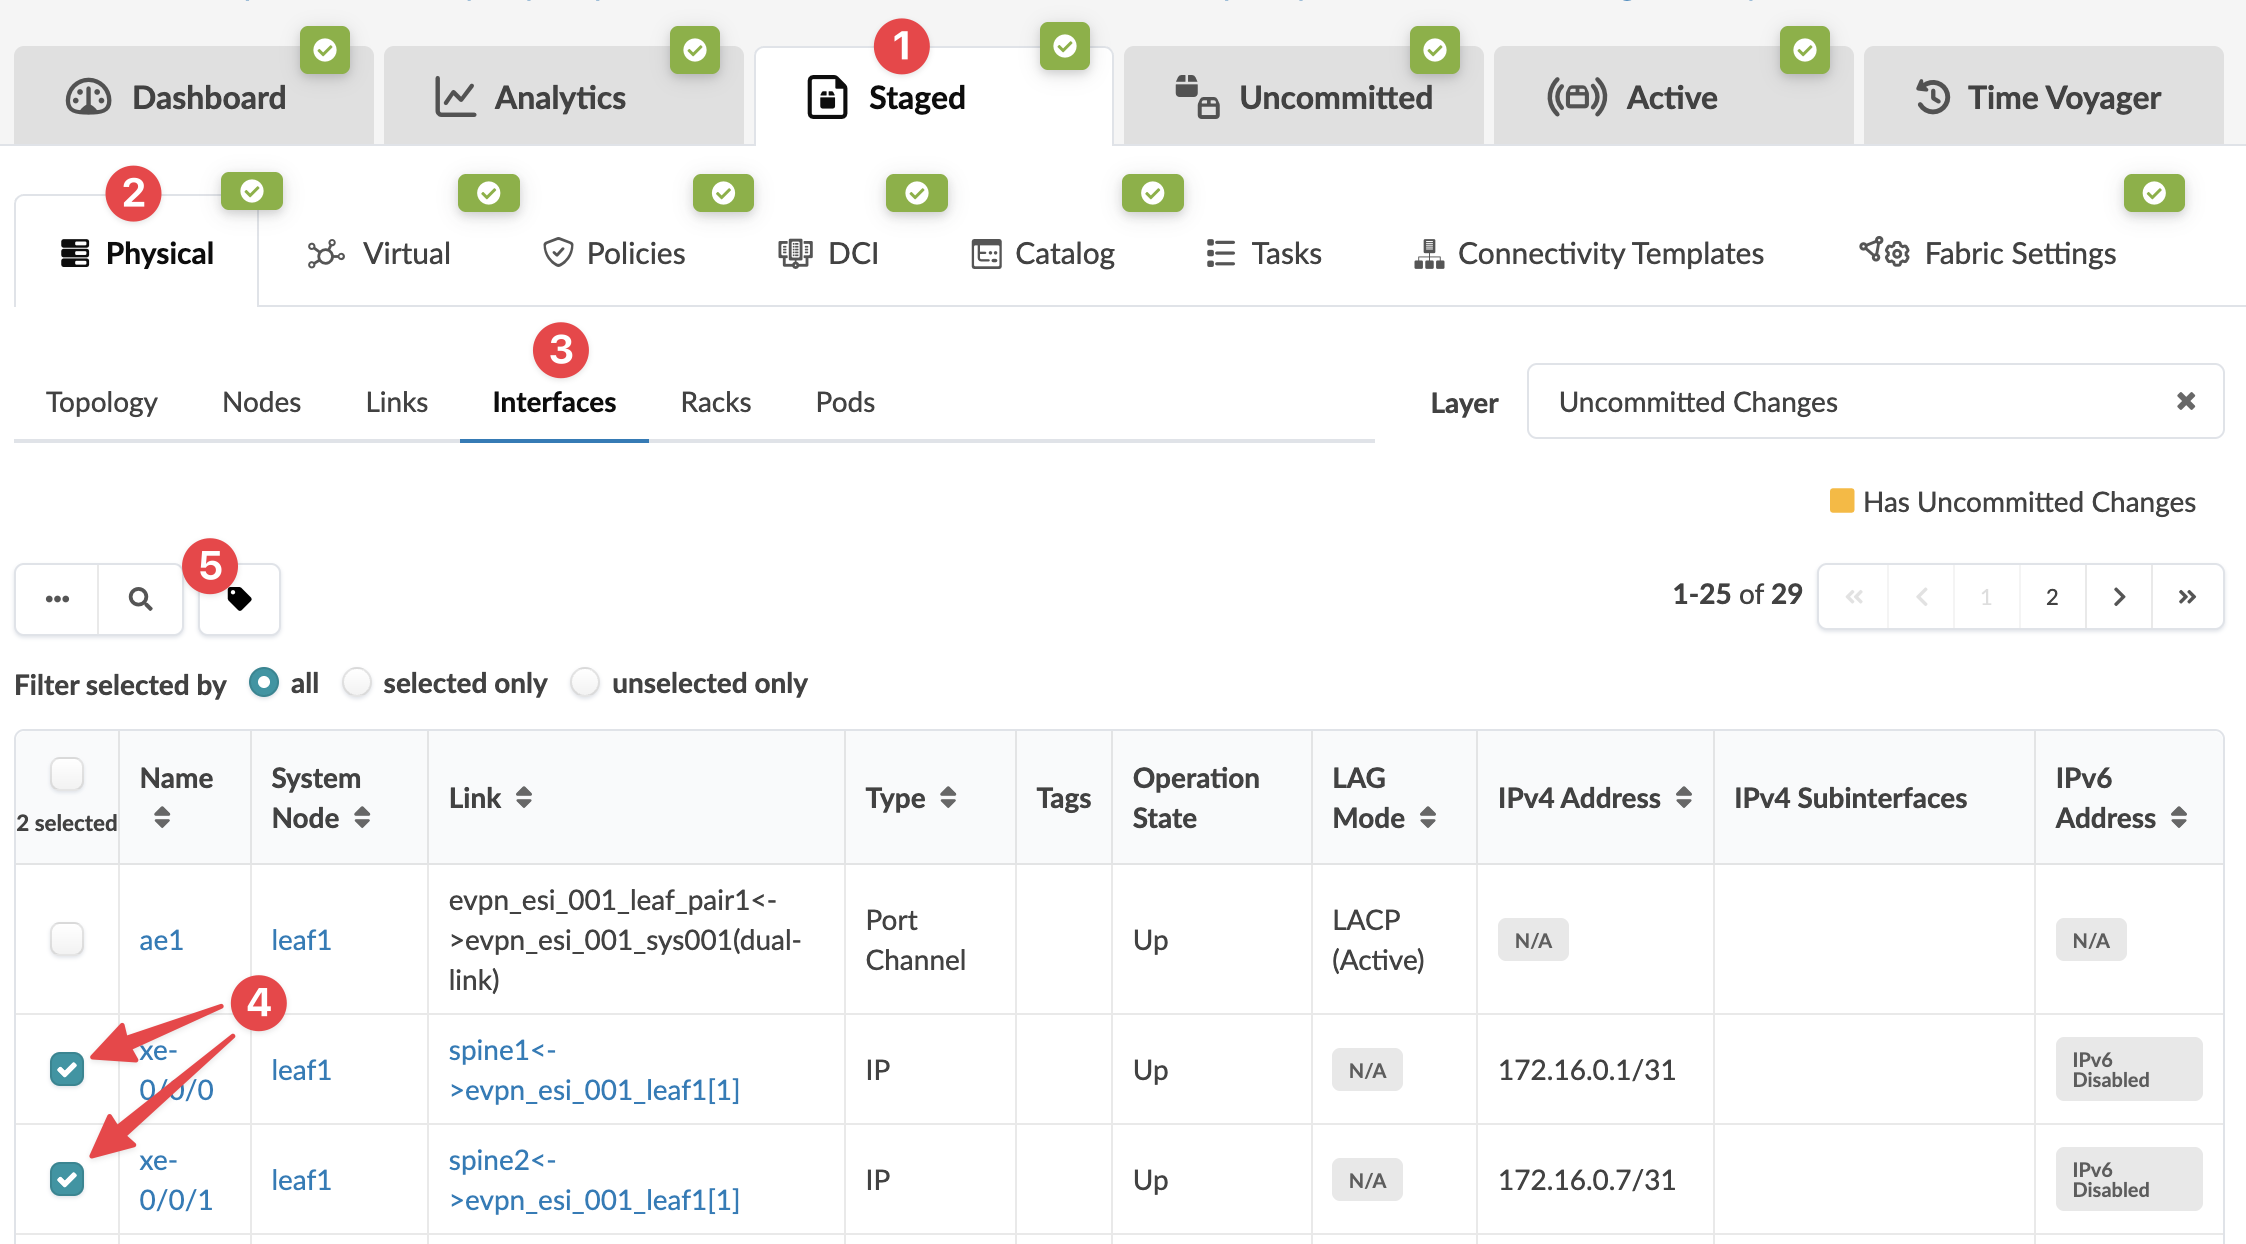
Update Tags on One or More Interfaces (Interfaces Table)
-
From the blueprint, navigate to Staged > Physical >
Interfaces, select one or more check boxes for the
interface(s) that need updated tags. The Add/Remove
Tags button appears above the table.
-
Add and/or remove tags, as needed. You can create tags from here; they'll
be tagged to the link and added to the blueprint catalog.
When you're ready to activate your changes, go to the Uncommitted tab to review and commit (or discard) your changes.