Step 1: Begin
This guide explains how to prepare Juniper data center switches for deployment with the Apstra automation solution. Key tasks include:
-
Installing device system agents on switches.
-
Onboarding devices manually or using Apstra ZTP.
After onboarding, the switches become Managed Devices, ready for assignment in an Apstra blueprint.
Before you begin, you must install and configure the Apstra server. For more information, see the Juniper Apstra Quick Start.
Apstra automates data center networks of any size or complexity. Intent-based networking simplifies and improves the reliability and efficiency of data center fabrics. The solution achieves this by controlling each device in the managed fabric. Its distributed agent architecture makes Apstra a unique and powerful automation tool. Let’s explore the onboarding process!
System Agents
Device system agents handle communication with the Apstra server, configure devices, and transfer telemetry for intent-based analytics (IBA). Juniper rigorously tests supported device models and NOS software. Always check the Qualified Device and NOS versions tables when selecting hardware and software for your data center fabric.
You can install agents on a switch in the NOS user space (onbox) or in containers within the Apstra cluster (offbox). Your choice depends on the scenario. Some NOS types lack onbox agent support, and some operators avoid installing software on network devices. If you choose offbox agents, ensure the cluster has enough capacity.
Device Configuration Stages
Apstra uses an out-of-band management network for the server and managed devices to communicate. A "pristine configuration" includes the IP address, user credentials, and basic configuration parameters. Once in place, and communication is established, you can install a device agent. Apstra then captures and saves the device's existing configuration as a baseline. See the example below.
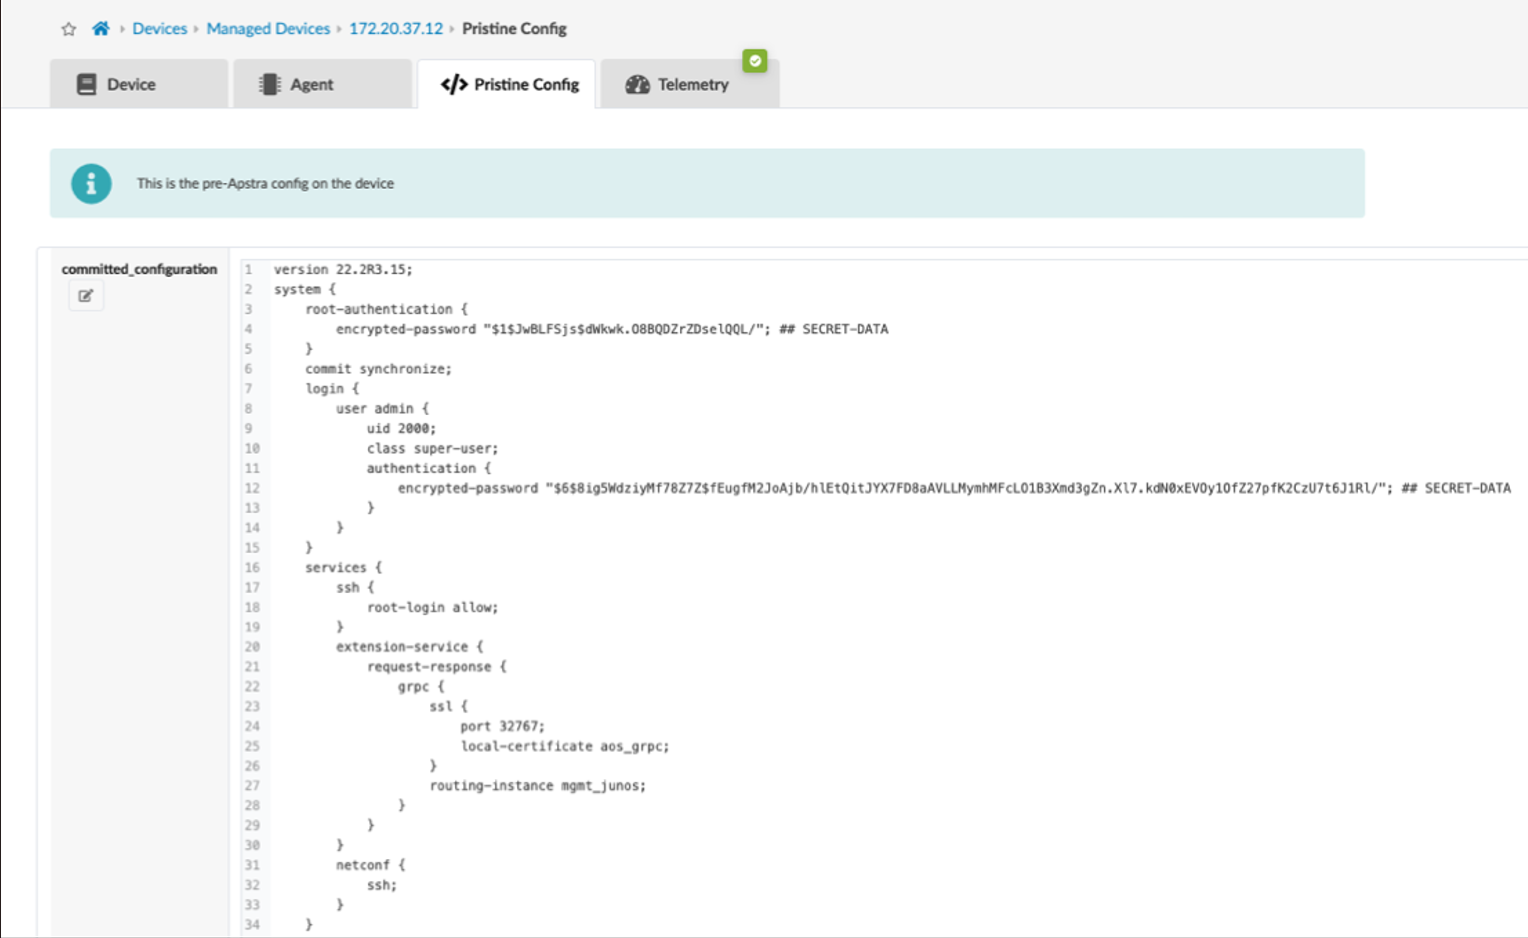
Pristine configuration is the first stage a device enters under Apstra management. Devices transition through various configurations during operation. See the Device Configuration Cycle section in the Juniper Apstra User Guide to understand these stages.
Onboarding Manually
The minimum steps to manually connect the switch and server are:
Configure the management interface and IP address on the out-of-band management network, including a default route to the server.
Set user credentials and password for the Apstra server to connect to the switch.
Enable the switch's API for server-based lifecycle configuration.
Commands vary by vendor NOS. See the Juniper Apstra User Guide for details for supported vendors.
Once the switch can ping the Apstra server, you can use the Device Installer to install the agent. Do this from the Managed Devices view.
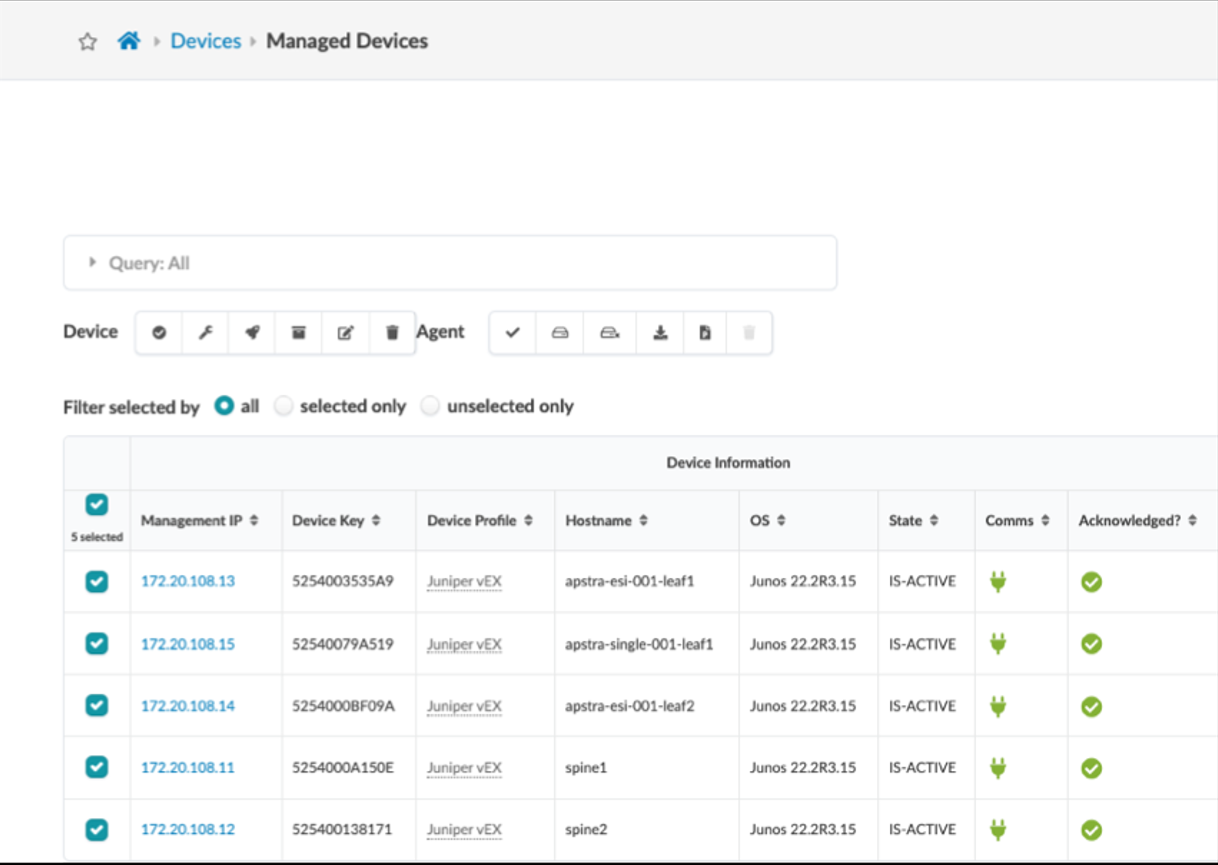
To initiate the installer, click either Create Onbox Agent(s) or Create Offbox Agent(s) in the upper right.
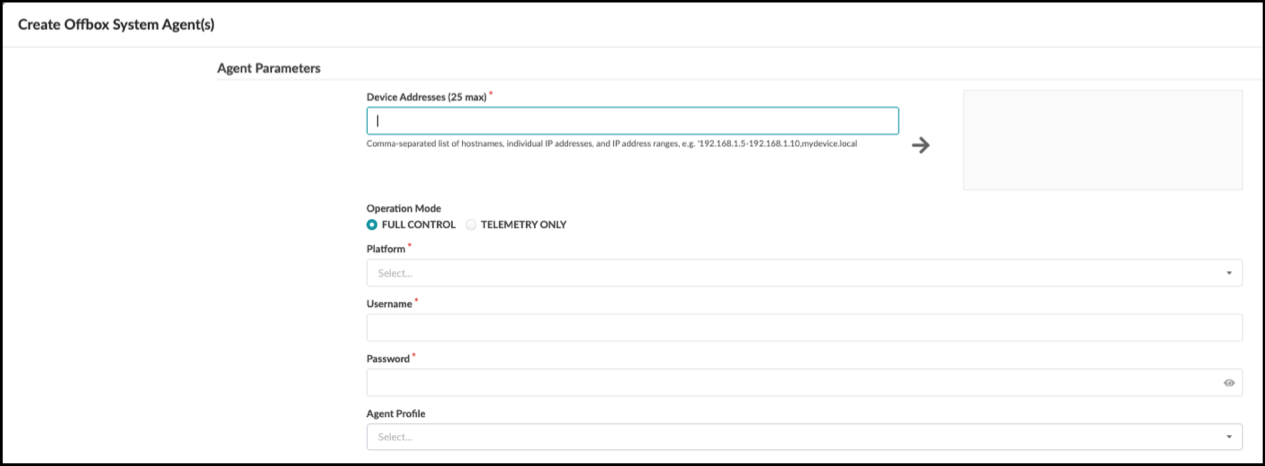
Enter the required information into the Create Agent(s) form, then click Create. The server takes some time to complete the installation. Once done, the device appears in the table view as quarantined. Additional steps move quarantined devices to the OOS-Ready state, making them assignable to a blueprint.
Use of the Device Installer to bring switches into the Apstra automation platform is shown in detail in the Managed Devices section of the Juniper Apstra User Guide.
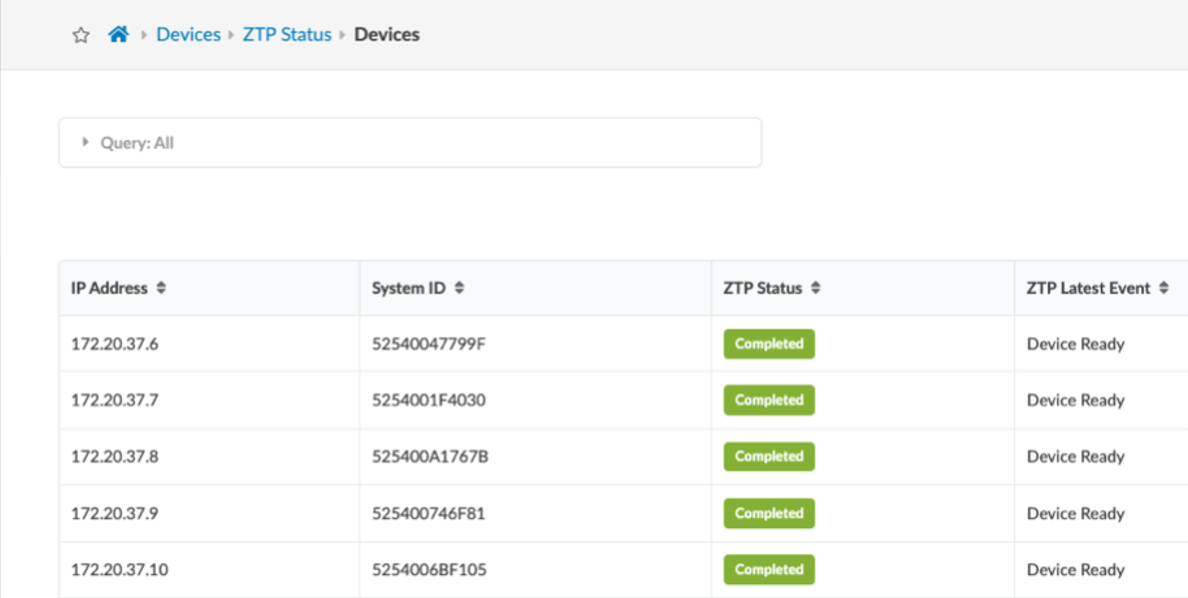
Onboarding with Apstra ZTP
Apstra ZTP runs on a separate VM from the Apstra server and discovers new or factory-reset switches. Use the Apstra server GUI to monitor the ZTP server and manage devices. This setup simplifies onboarding devices quickly with desired settings and NOS versions.
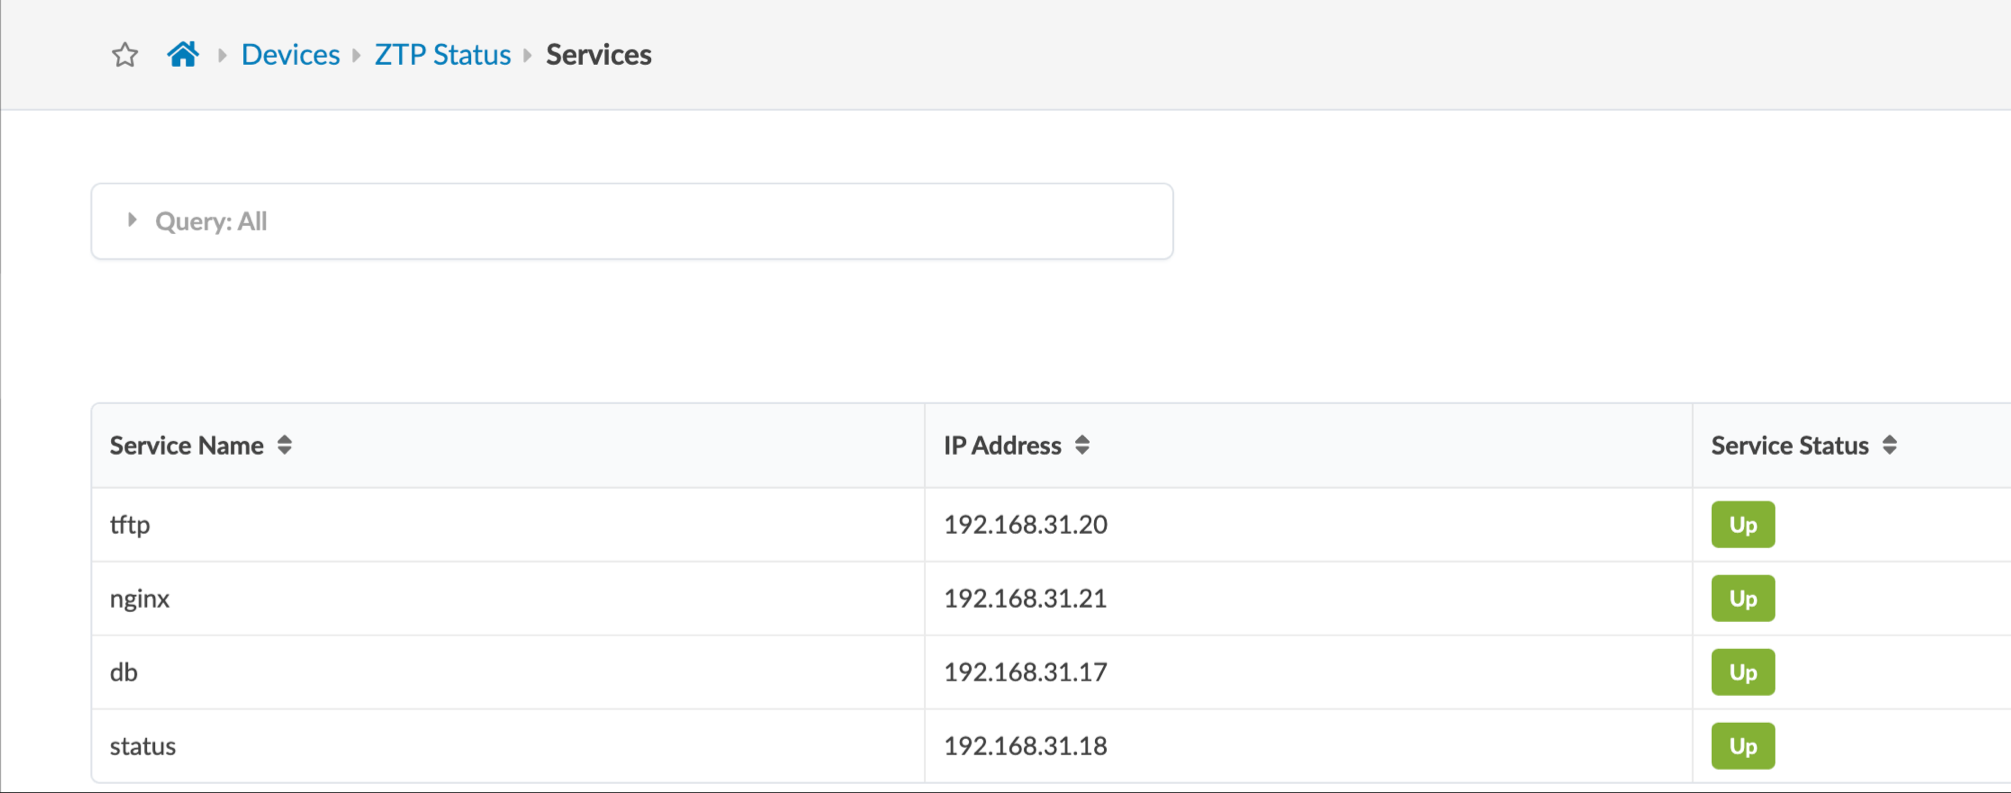
The ZTP service provides DHCP for automatic IP addressing, installation of pristine configurations and the installation of the system agents. Apstra ZTP performs these steps:
DHCP (optional)
The device requests an IP address via DHCP.
The device receives the assigned IP address and a pointer to the specified OS image.
Device Initialization
The device downloads the customizable ZTP script via TFTP.
The device executes script preparing it for management. The OS image is checked and is upgraded, if necessary.
The device admin/root password is set.
System Agent ID is initialized.
Agent Initialization
The ZTP script leverages APIs to initiate the agent installation. It recognized automatically whether onbox or offbox is needed.
The Apstra ZTP service is a comprehensive set of tools that you can customize in various ways to adapt to your specific requirements. Once you have downloaded the server image and performed any customizations, it's ready to simplify bringing switches into the Apstra automation platform.
The Apstra ZTP service requires installation and configuration to adapt to your specific environment. You can find step-by-step instructions for installing and onboarding devices, see the Apstra ZTP chapter in the Juniper Apstra User Guide.
Now we've seen how devices are initialized. Let’s now look at how we move them into an operating network.