Step 1: Begin
This guide walks you through the simple steps to get a new Juniper Mist access point (AP) up and running in the Mist cloud. You can onboard a single AP using your mobile phone, or you can onboard one or more APs using your computer.
Before you begin, you must set up your organization and sites, and activate your subscriptions. For more information, see Quick Start: Mist.
We show you how to onboard AP using two different methods:
-
To onboard a single AP using your mobile phone, see Onboard One AP Using the Mist AI Mobile App.
-
To onboard one or more APs using your computer, see Onboard One or More APs Using a Web Browser.
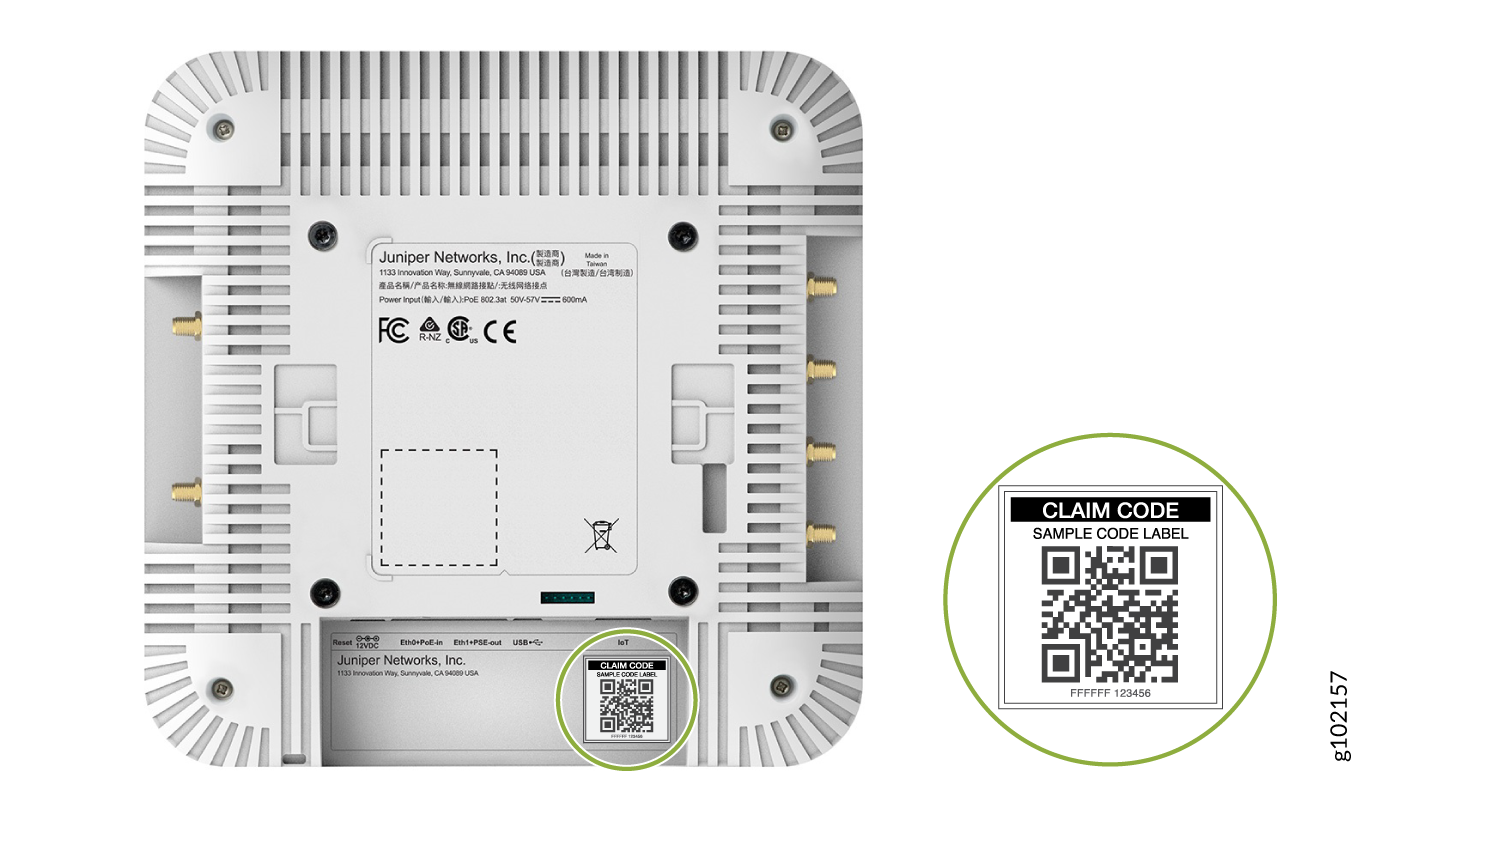
To perform either onboarding process, you will need to locate the claim code label on the rear panel of your AP. To onboard multiple APs, you can use the activation code that is listed in your purchase order (PO).
Onboard a Single AP Using the Mist AI Mobile App
You can use the Mist AI mobile app to quickly onboard an AP. With this app you can claim an AP and assign it to a site, rename the AP, and even place the AP on a floor plan. To onboard a single AP using the Mist AI mobile app from your mobile phone:
-
Tap the AP to view its details.
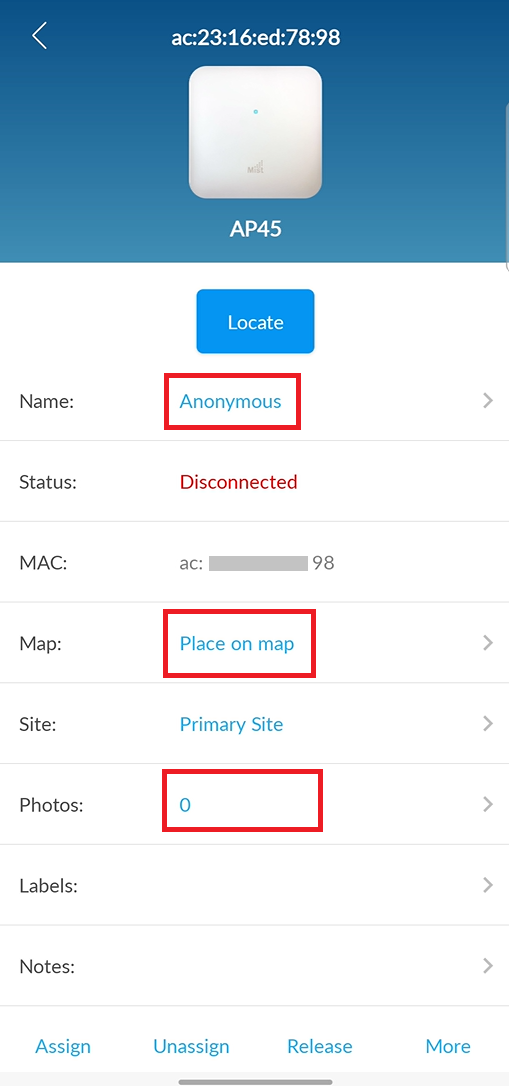
You can perform various tasks from the AP details screen such as renaming the AP, setting it on a floor plan, releasing an AP, or even adding a photo. Simply tap the option and you can update the details. To rename an AP, tap the AP name and enter a new name.
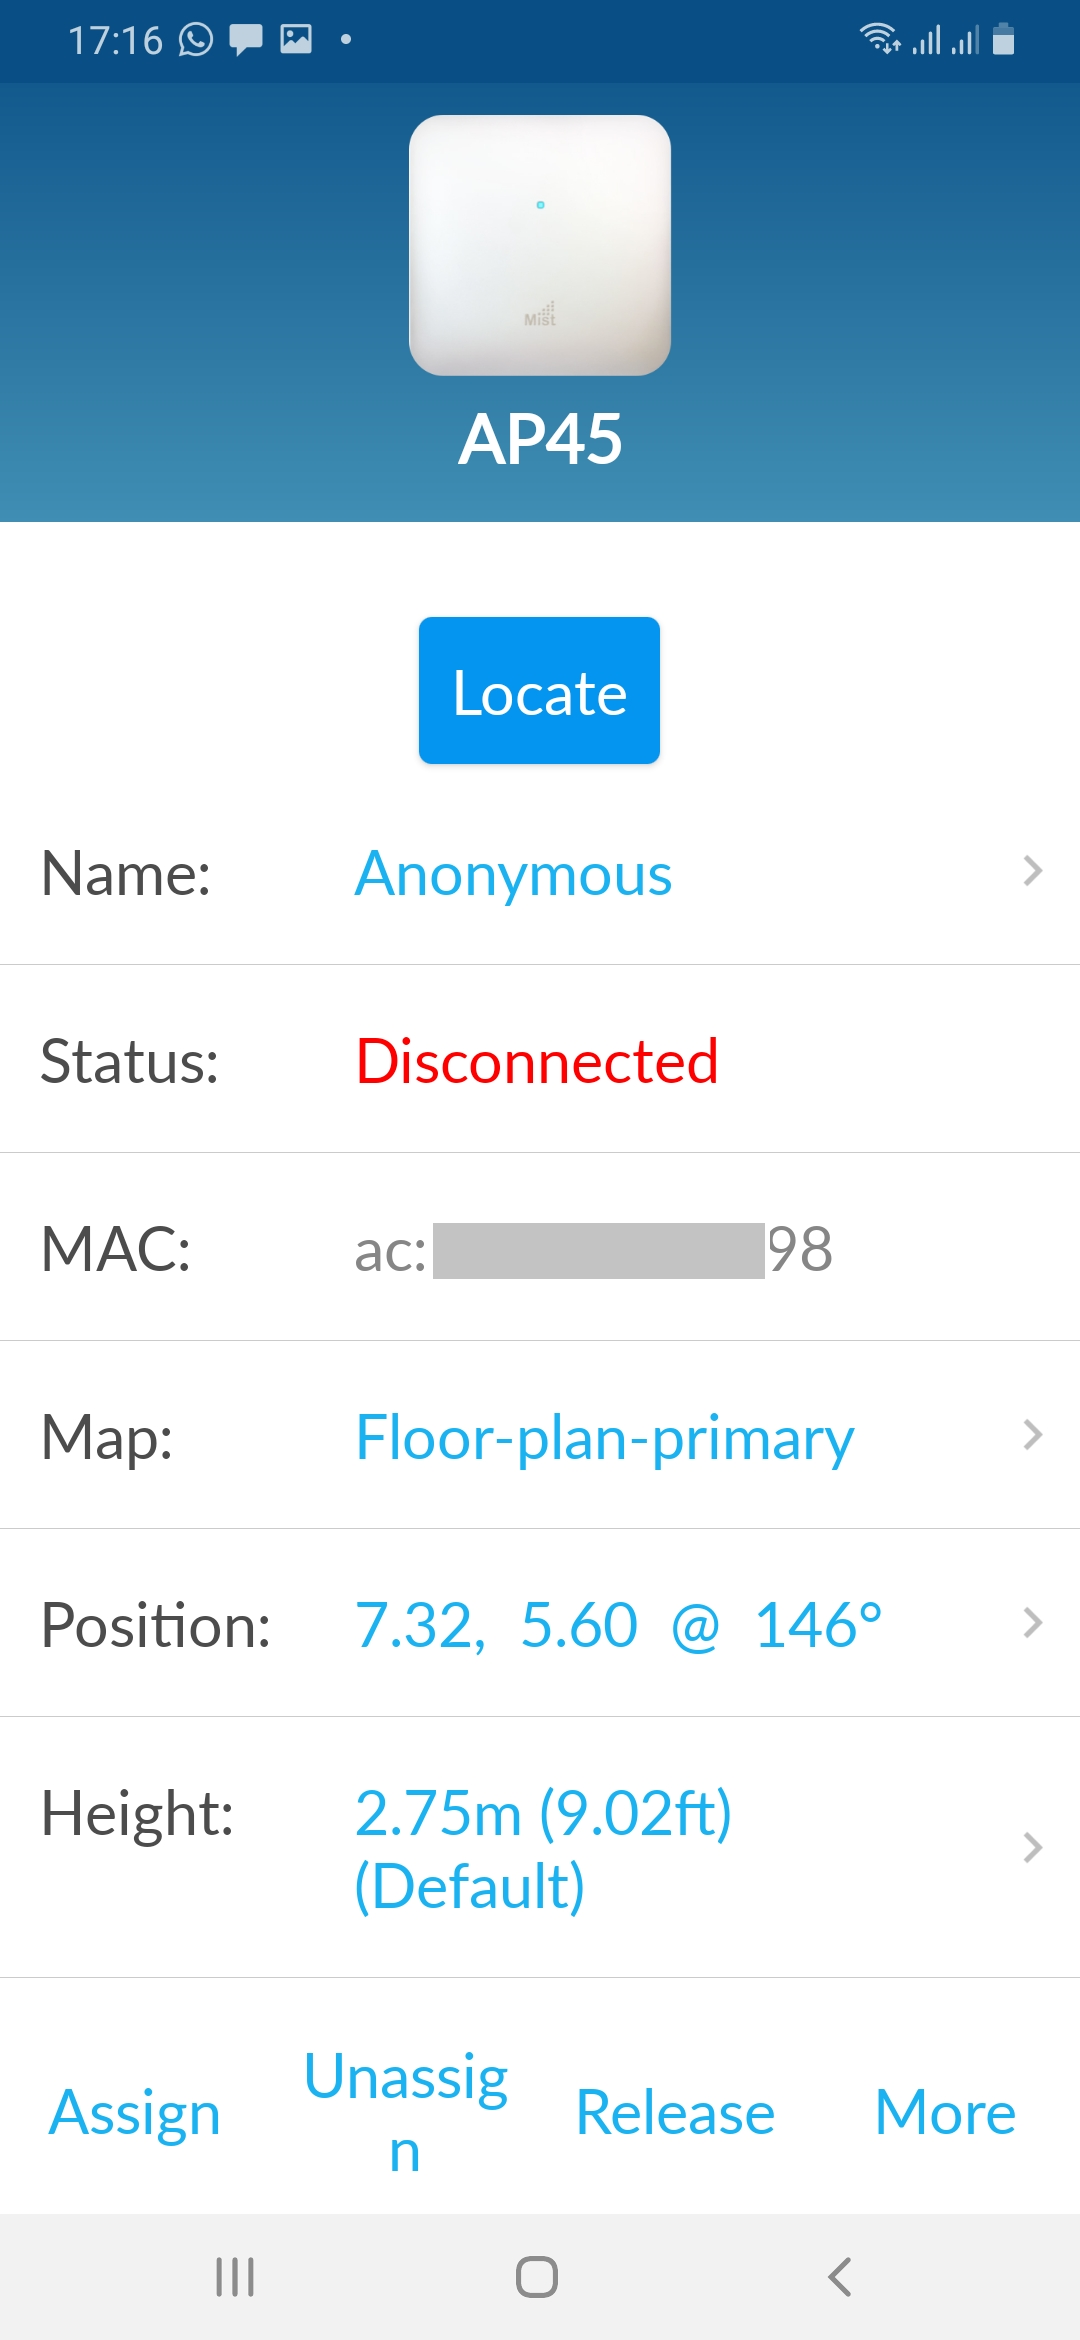
To place an AP on a floor plan, tap Place on map. You need to have a floor plan already set up in Location > Live View in the Mist to use this option. See Adding and Scaling a Floorplan.
After you place the AP on the floor plan, you'll see more details such as the position of the AP and the height at which the AP is mounted (default value that you can modify).
Here's a video that shows how you can onboard an AP using the Mist AI mobile app:
To continue onboarding, proceed to Step 2: Up and Running.
Rename a Claimed AP
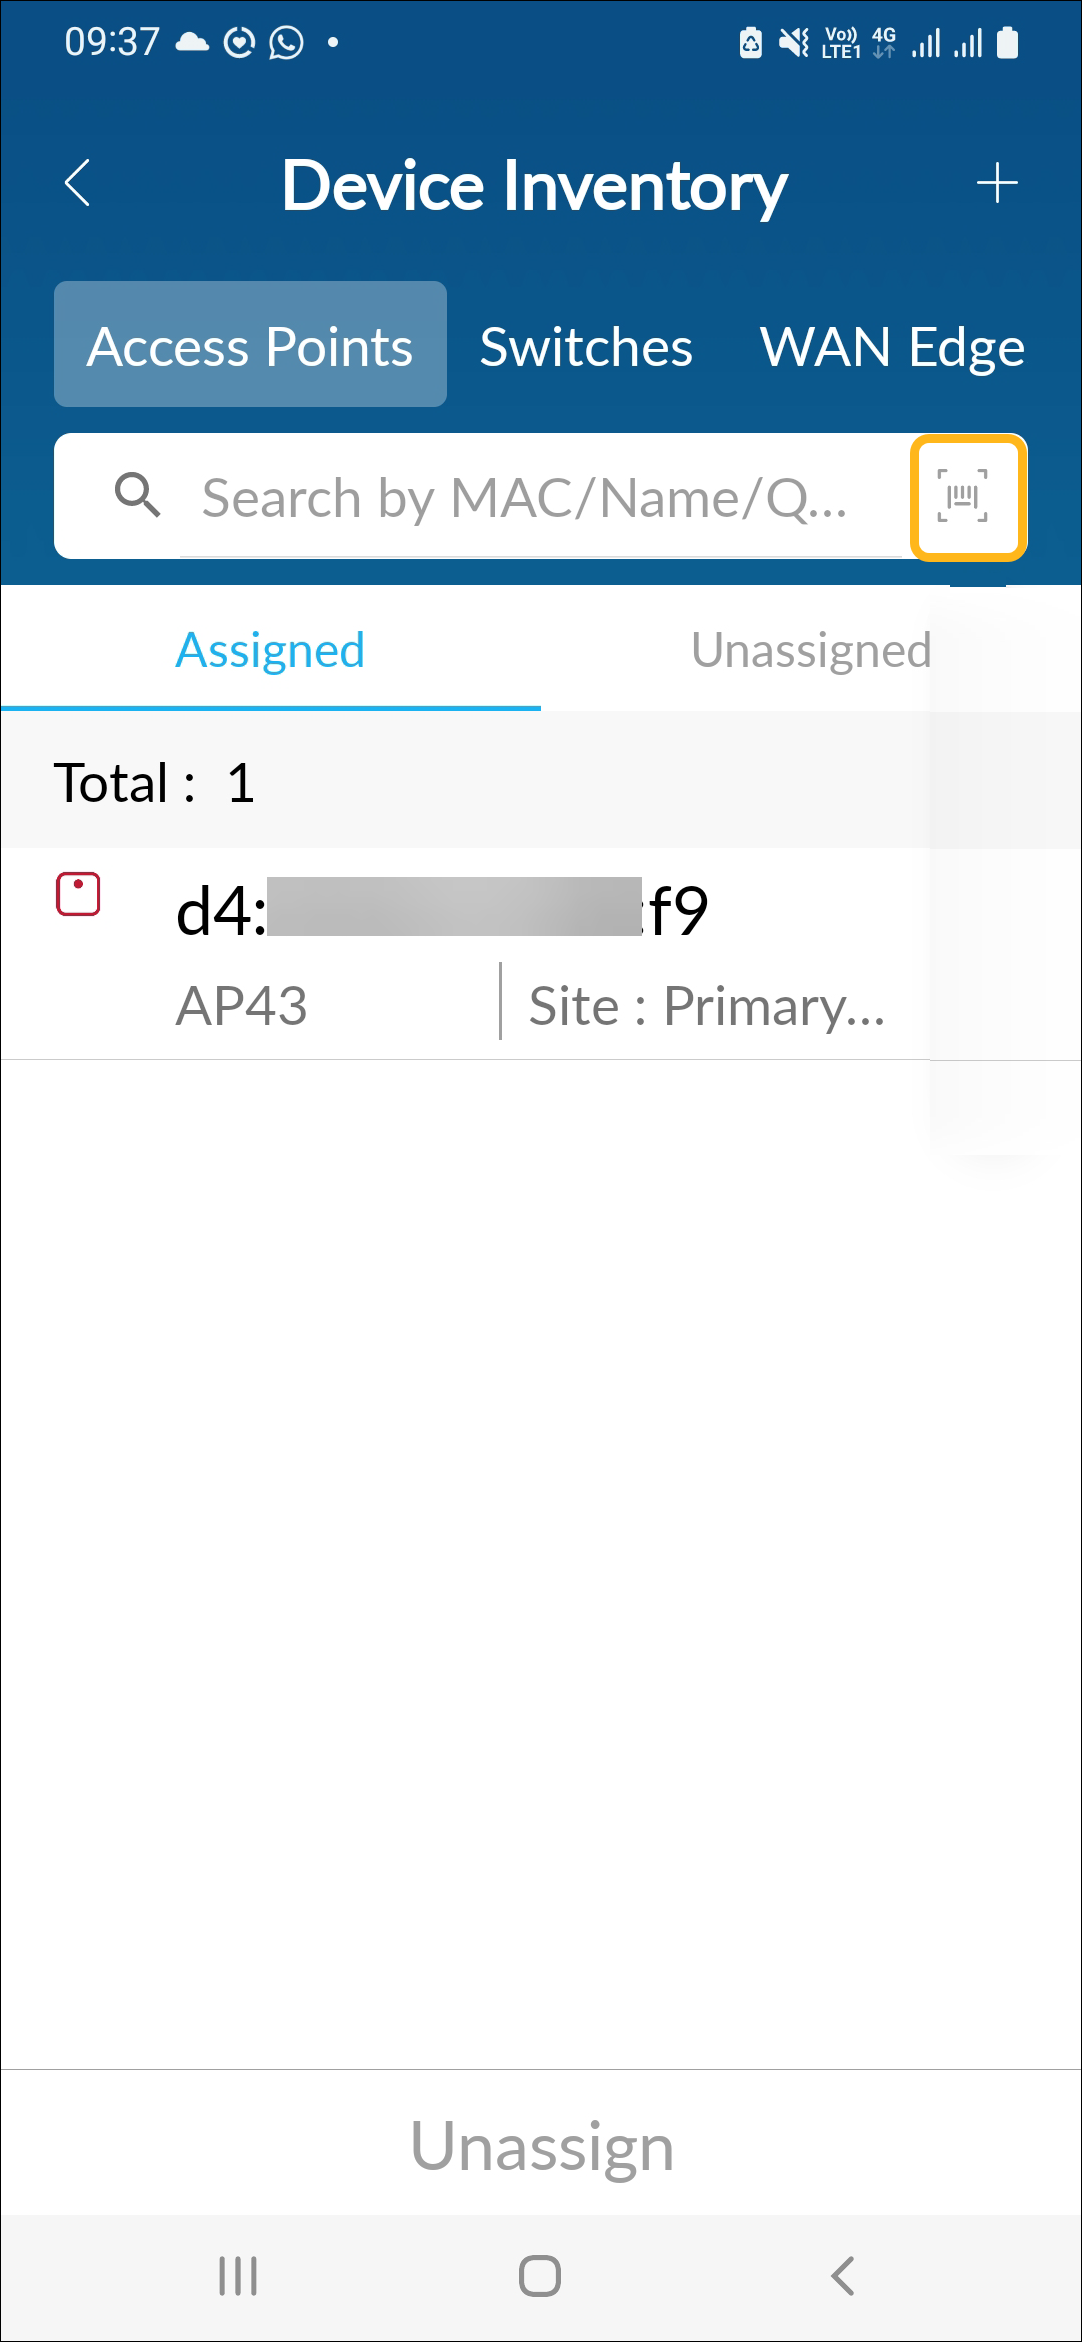
If you've already claimed an AP (using the activation code, for example) and assigned it to a site, you can rename the AP by simply scanning the QR code.
-
Navigate to the Device Inventory page and select Access Points.
-
Tap the scan option in the Search field.
-
Focus the camera on the QR code provided on the AP.
You'll see the AP details page.
-
Tap the AP name and enter a new name.
Onboard One or More APs Using a Web Browser
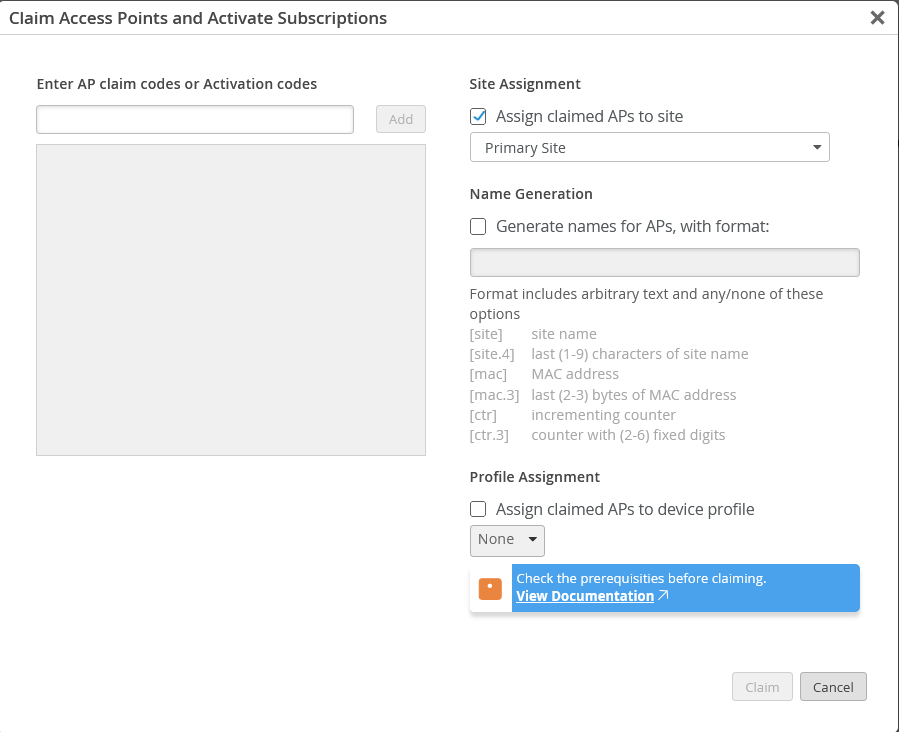
Onboarding multiple APs—When you purchase multiple APs, we provide you with an activation code along with your PO information. Make a note of this code.
Onboarding a single AP—Locate the QR code on your AP and jot down the alphanumeric claim code directly above it.
-
Enter the Activation code or Claim code.
To complete the onboarding process, see Step 2: Up and Running.