Step 3: Install the Firewall
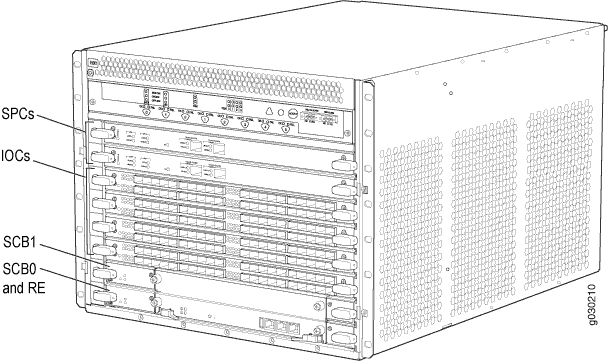
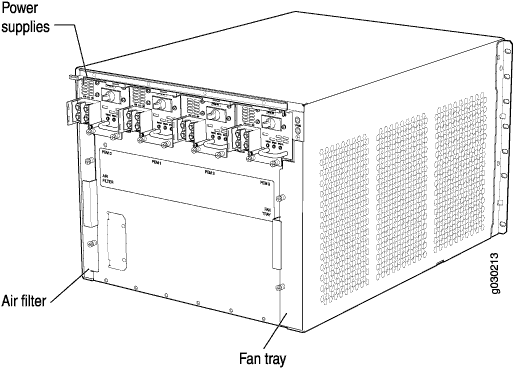
Because of the firewall’s size and weight, you must remove all components, as shown in Figure 1 and Figure 2, before you install the firewall. We also recommend using a mechanical lift to install the firewall.
Remove Components
Before you lift the firewall, you must remove the following components:
Power supplies
Cards (SCBs, SPCs, IOCs, Flex IOCs, and MPCs)
Air filter
Fan tray
To remove the components from the firewall:
- Slide each component out of the chassis evenly so that it does not become stuck or damaged.
- Label each component as you remove it so you can reinstall it in the correct location.
- Immediately store each removed component in an electrostatic bag.
- Do not stack removed components. Lay each one on a flat surface.
For complete instructions on removing firewall components, see “Install the Firewall Without a Mechanical Lift” in the SRX5600 Firewall Hardware Guide.
Install the Firewall Using a Lift
To install the firewall using a lift:
-
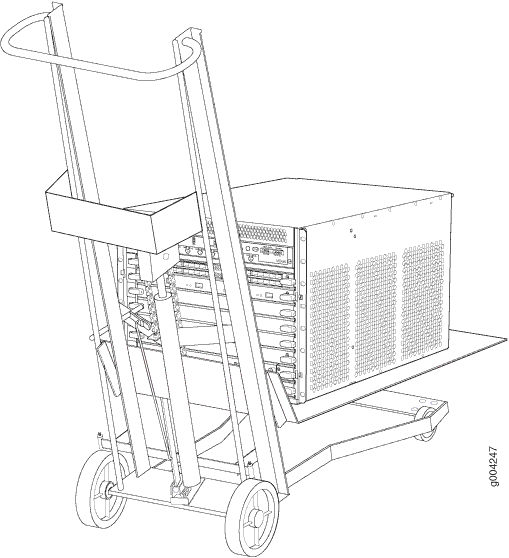
Load the firewall onto the lift, making sure that it rests securely on the
lift platform (see Figure 3).
Figure 3: Load the Firewall onto the Lift
Install the Firewall Without a Mechanical Lift
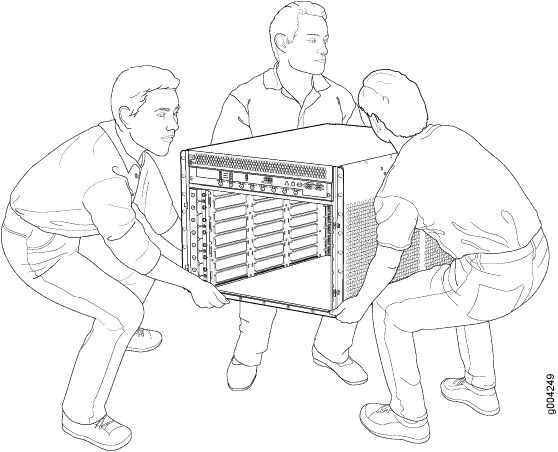
Lifting the chassis and mounting it in a rack requires at least two people. The empty chassis weighs approximately 65.5 lb (29.7 kg).
- With one person on each side, hold onto the bottom of
the chassis and carefully lift it onto the small mounting shelf.
See Figure 4.Figure 4: Lift the Firewall into the Rack
Reinstall Components
- Attach an electrostatic discharge (ESD) grounding strap to your bare wrist, and connect the strap to one of the ESD points on the chassis. For more information about ESD, see the SRX5600 Firewall Hardware Documentation at www.juniper.net/documentation/.
- Slide each component into the chassis evenly so that it does not become stuck or damaged.
- Tighten the captive screws or lock any levers for each component installed.
Make sure that all empty slots are covered with blank panels before you operate the firewall.
Proceed to Step 4: Connect the Grounding Cable.