Connect the PTX10002-60MR to Power
Connnecting power to the PTX10002-60MR involves the following steps and safety precautions to prevent equipment damage and personal injury.
Connect the PTX10002-60MR to Ground
To meet safety and EMI requirements and to ensure proper operation, you must connect the chassis to earth ground before you connect it to power. You must use the protective earthing terminal on the router chassis to connect it to earth ground. For installations that require a separate grounding conductor to the chassis, use the protective earthing terminal on the router chassis to connect to the earth ground.
Before you connect the chassis to earth ground, ensure that a licensed electrician has attached the protective earthing terminal lug (provided in the accessory kit) to the grounding cable that you supply. A cable with an incorrectly attached lug can damage the router (for example, by causing a short circuit).
Mount the router before attaching the grounding lug. See Unpack the PTX10002-60MR.
You must install the router in a restricted-access location and ensure that the chassis is always properly grounded. The router has a two-hole protective grounding terminal on the rear panel. Under all circumstances, use this grounding connection to ground the chassis. For AC/HVAC/HVDC-powered systems, you must also use the grounding wire in the power cord along with the two-hole protective grounding lug connection. This tested system meets or exceeds all applicable EMC regulatory requirements with the two-hole protective grounding terminal.
Before you connect the router to ground, ensure that you have the following parts and tools available:
-
Grounding lug for your grounding cable—The grounding lug required is a Panduit LCDX4-14AH-L or equivalent—provided.
-
Grounding cable—The grounding cable must be 4 AWG (21 mm²), minimum 75 °C wire, or as permitted by the local code—not provided.
-
Two M6 screws and washers—not provided.
-
A screwdriver appropriate for the screws—not provided.
To connect the router to ground:
-
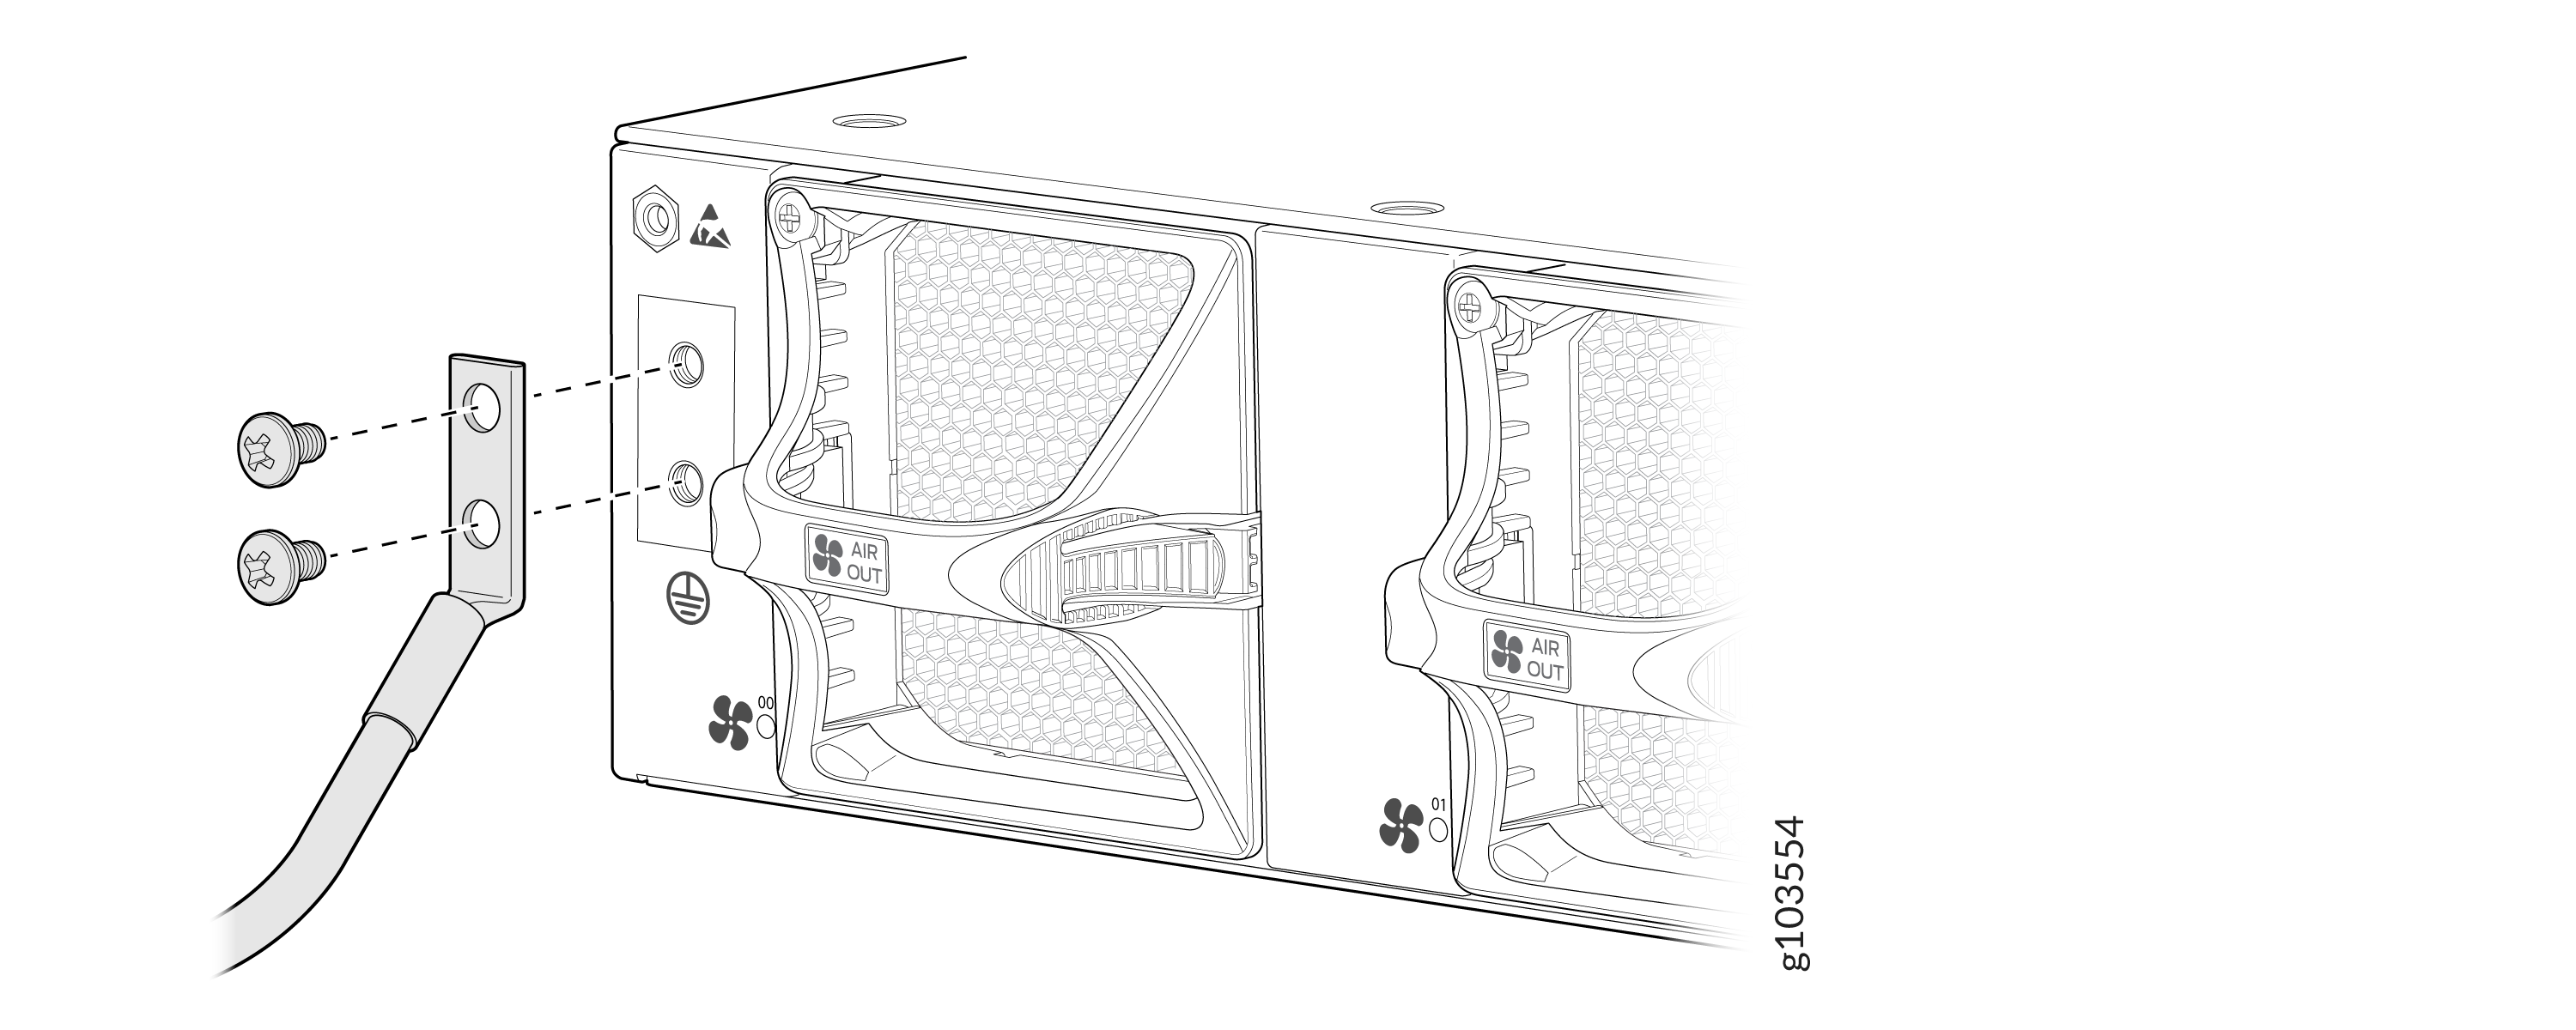
Place the grounding lug attached to the grounding cable over the protective
earthing terminal on the chassis.
Figure 1: Connect a Grounding Cable to the Router
Connect AC, HVAC, or HVDC Power to the PTX10002-60MR
Before you begin connecting AC, HVAC, or HVDC power:
-
Read AC Power Electrical Safety Guidelines and General Safety Guidelines and Warnings.
-
Ensure that you have taken the necessary precautions to prevent electrostatic discharge (ESD) damage (see Prevention of Electrostatic Discharge Damage).
-
Ensure that you have connected the router chassis to earth ground.
-
Install the PSU in the chassis.
-
Ensure that you have the following parts and tools available:
You must connect each PSU to a dedicated power source outlet.
To connect AC, HVAC, or HVDC power:
-
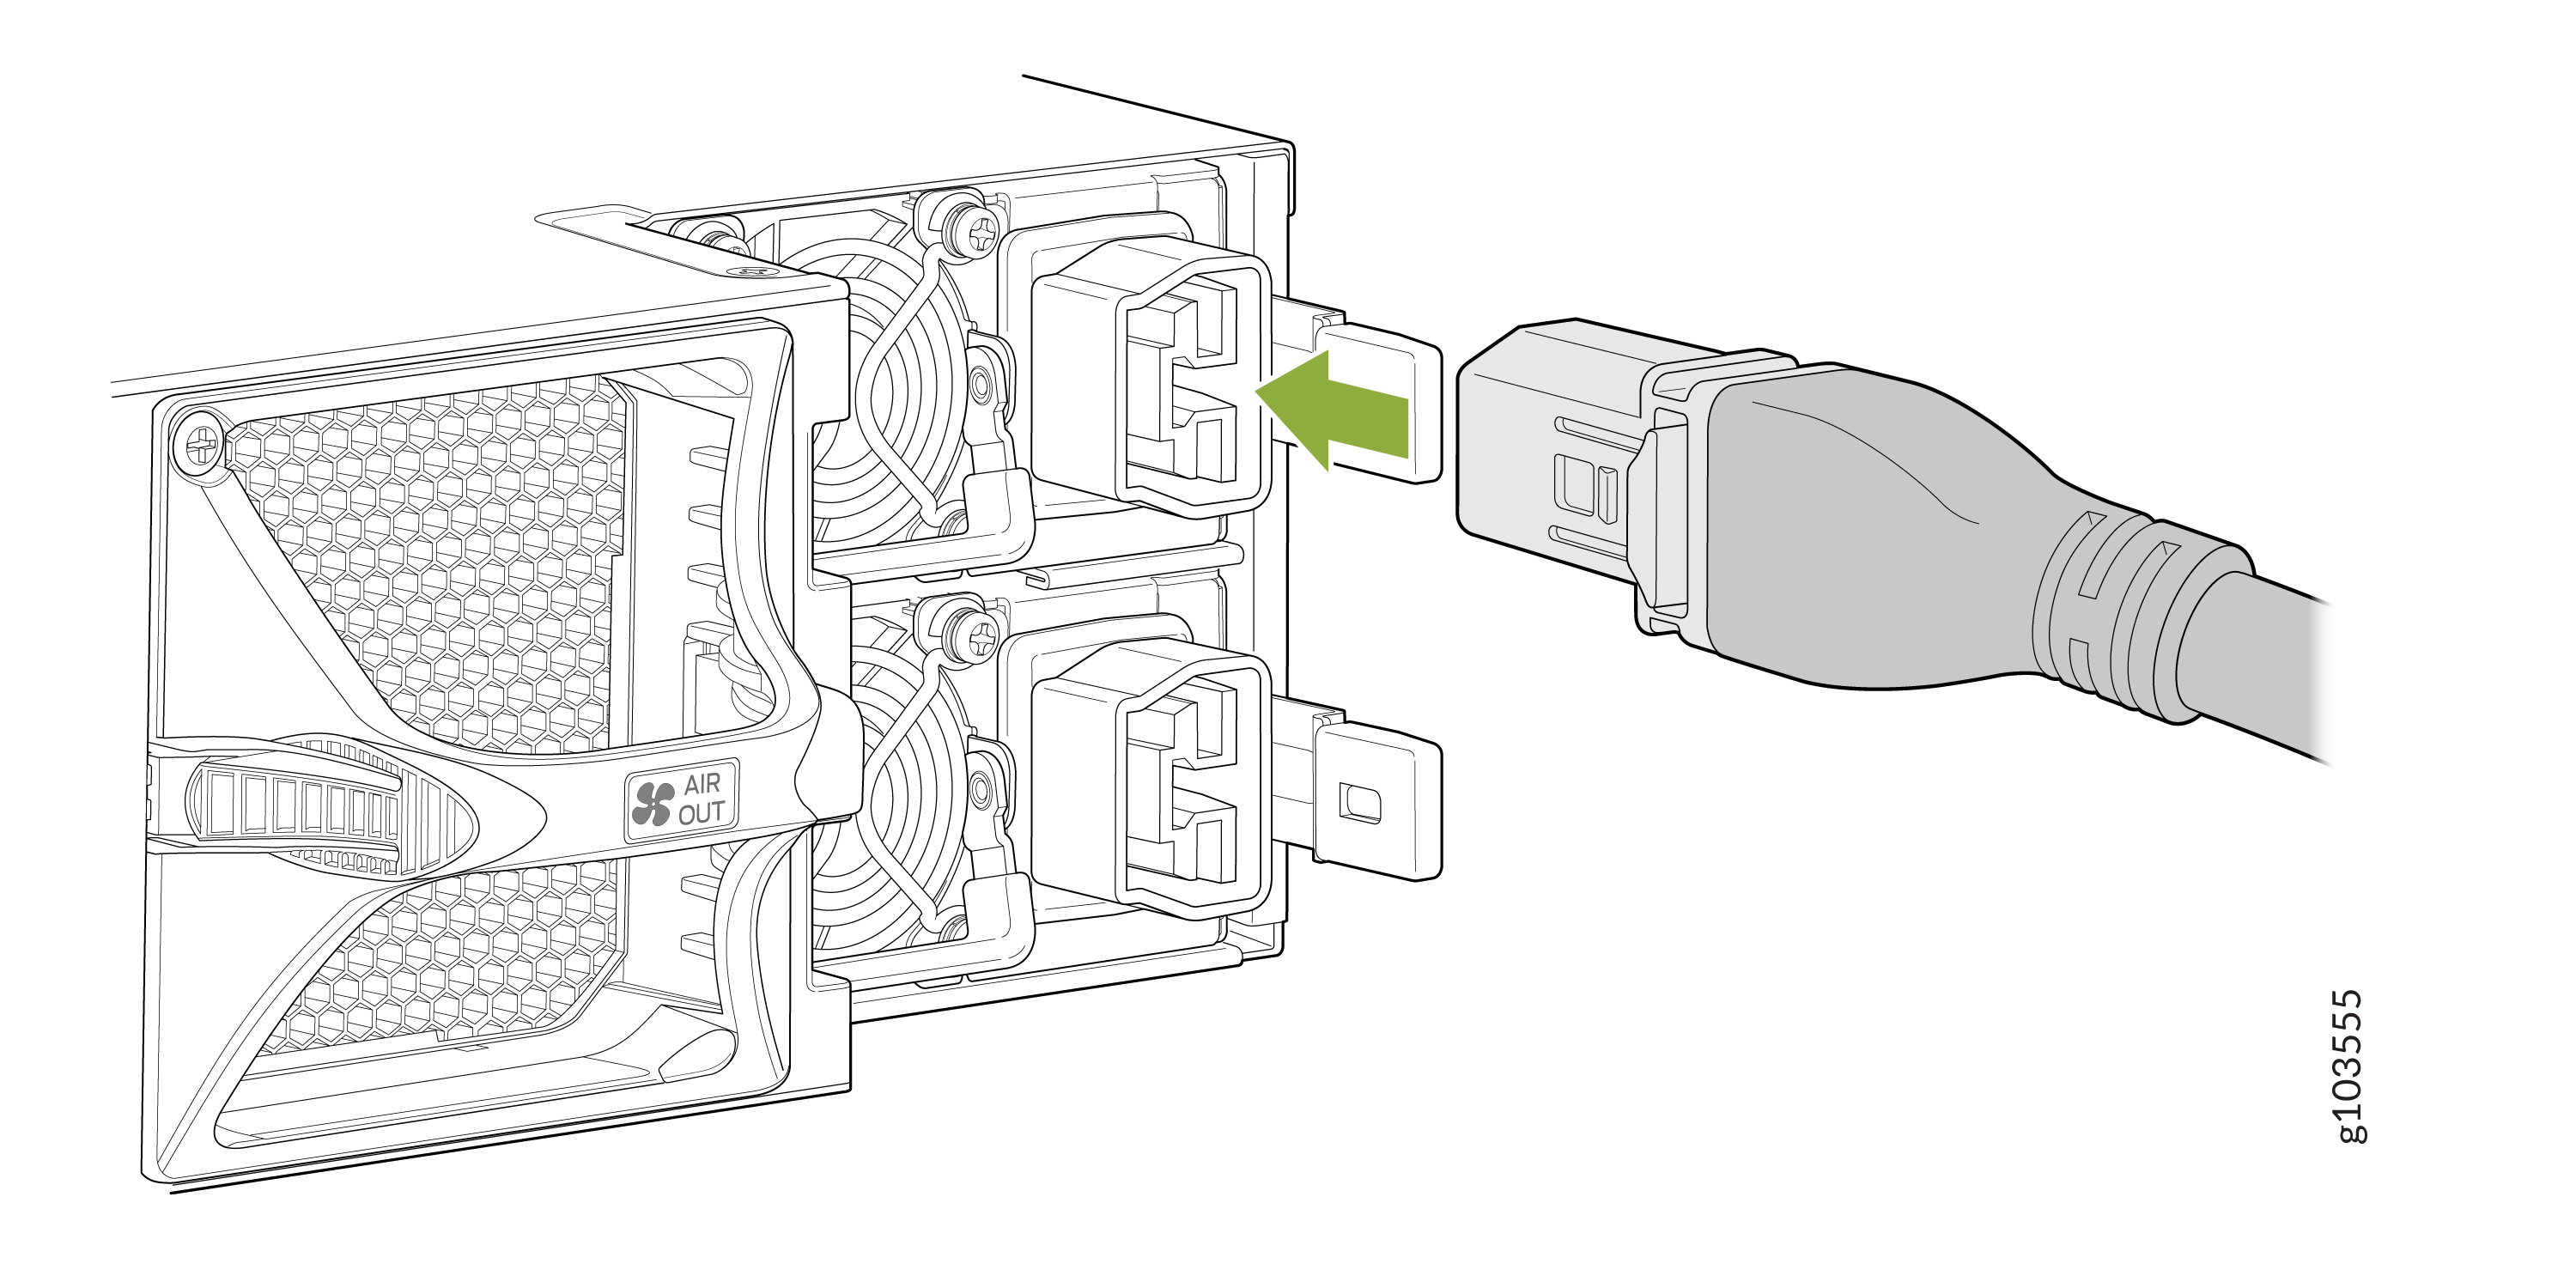
Insert the coupler end of the power cord into the power cord inlet on the
PSU faceplate.
Figure 2: Connect a Power Cord to an AC, HVAC, or HVDC PSU
Connect DC Power to the Router
Before you begin connecting DC power:
-
Read DC Power Electrical Safety Guidelines and DC Power Electrical Safety Warnings.
-
Ensure that you have connected the router chassis to earth ground.
CAUTION:Before you connect power to the router, a licensed electrician must attach a cable lug to the power cables that you supply. A cable with an incorrectly attached lug can damage the router (for example, by causing a short circuit).
-
Install the PSU in the chassis.
-
Ensure that you have the following parts and tools available:
-
An ESD grounding strap—not provided
- Power cables—The power cables must be 4 AWG (21 mm²), minimum 75 °C wire, or as permitted by the local code—not provided.
-
Power cable lugs for your power cables—The power cable lugs required is a Panduit LCD4-14AH-L or equivalent—provided.
-
A Phillips (+), number 1 screwdriver—not provided
-
Four hex nuts to secure the power cables to the terminal studs and a wrench to tighten the hex nuts—provided
-
Heat-shrink tubing and a heat gun to shrink the tubing—not provided
-
You must connect each PSU to a dedicated power source outlet.
To connect DC power:
-
Install heat-shrink tubing insulation around the power cables.
-
Slide the tubing over the portion of the cable where it is attached to the lug barrel. Ensure that tubing covers the end of the wire and the barrel of the lug attached to it.
-
Shrink the tubing with a heat gun. Ensure that you heat all sides of the tubing evenly so that it shrinks around the cable tightly.
Note:Do not overheat the tubing.
Figure 3: Install Heat-Shrink Tubing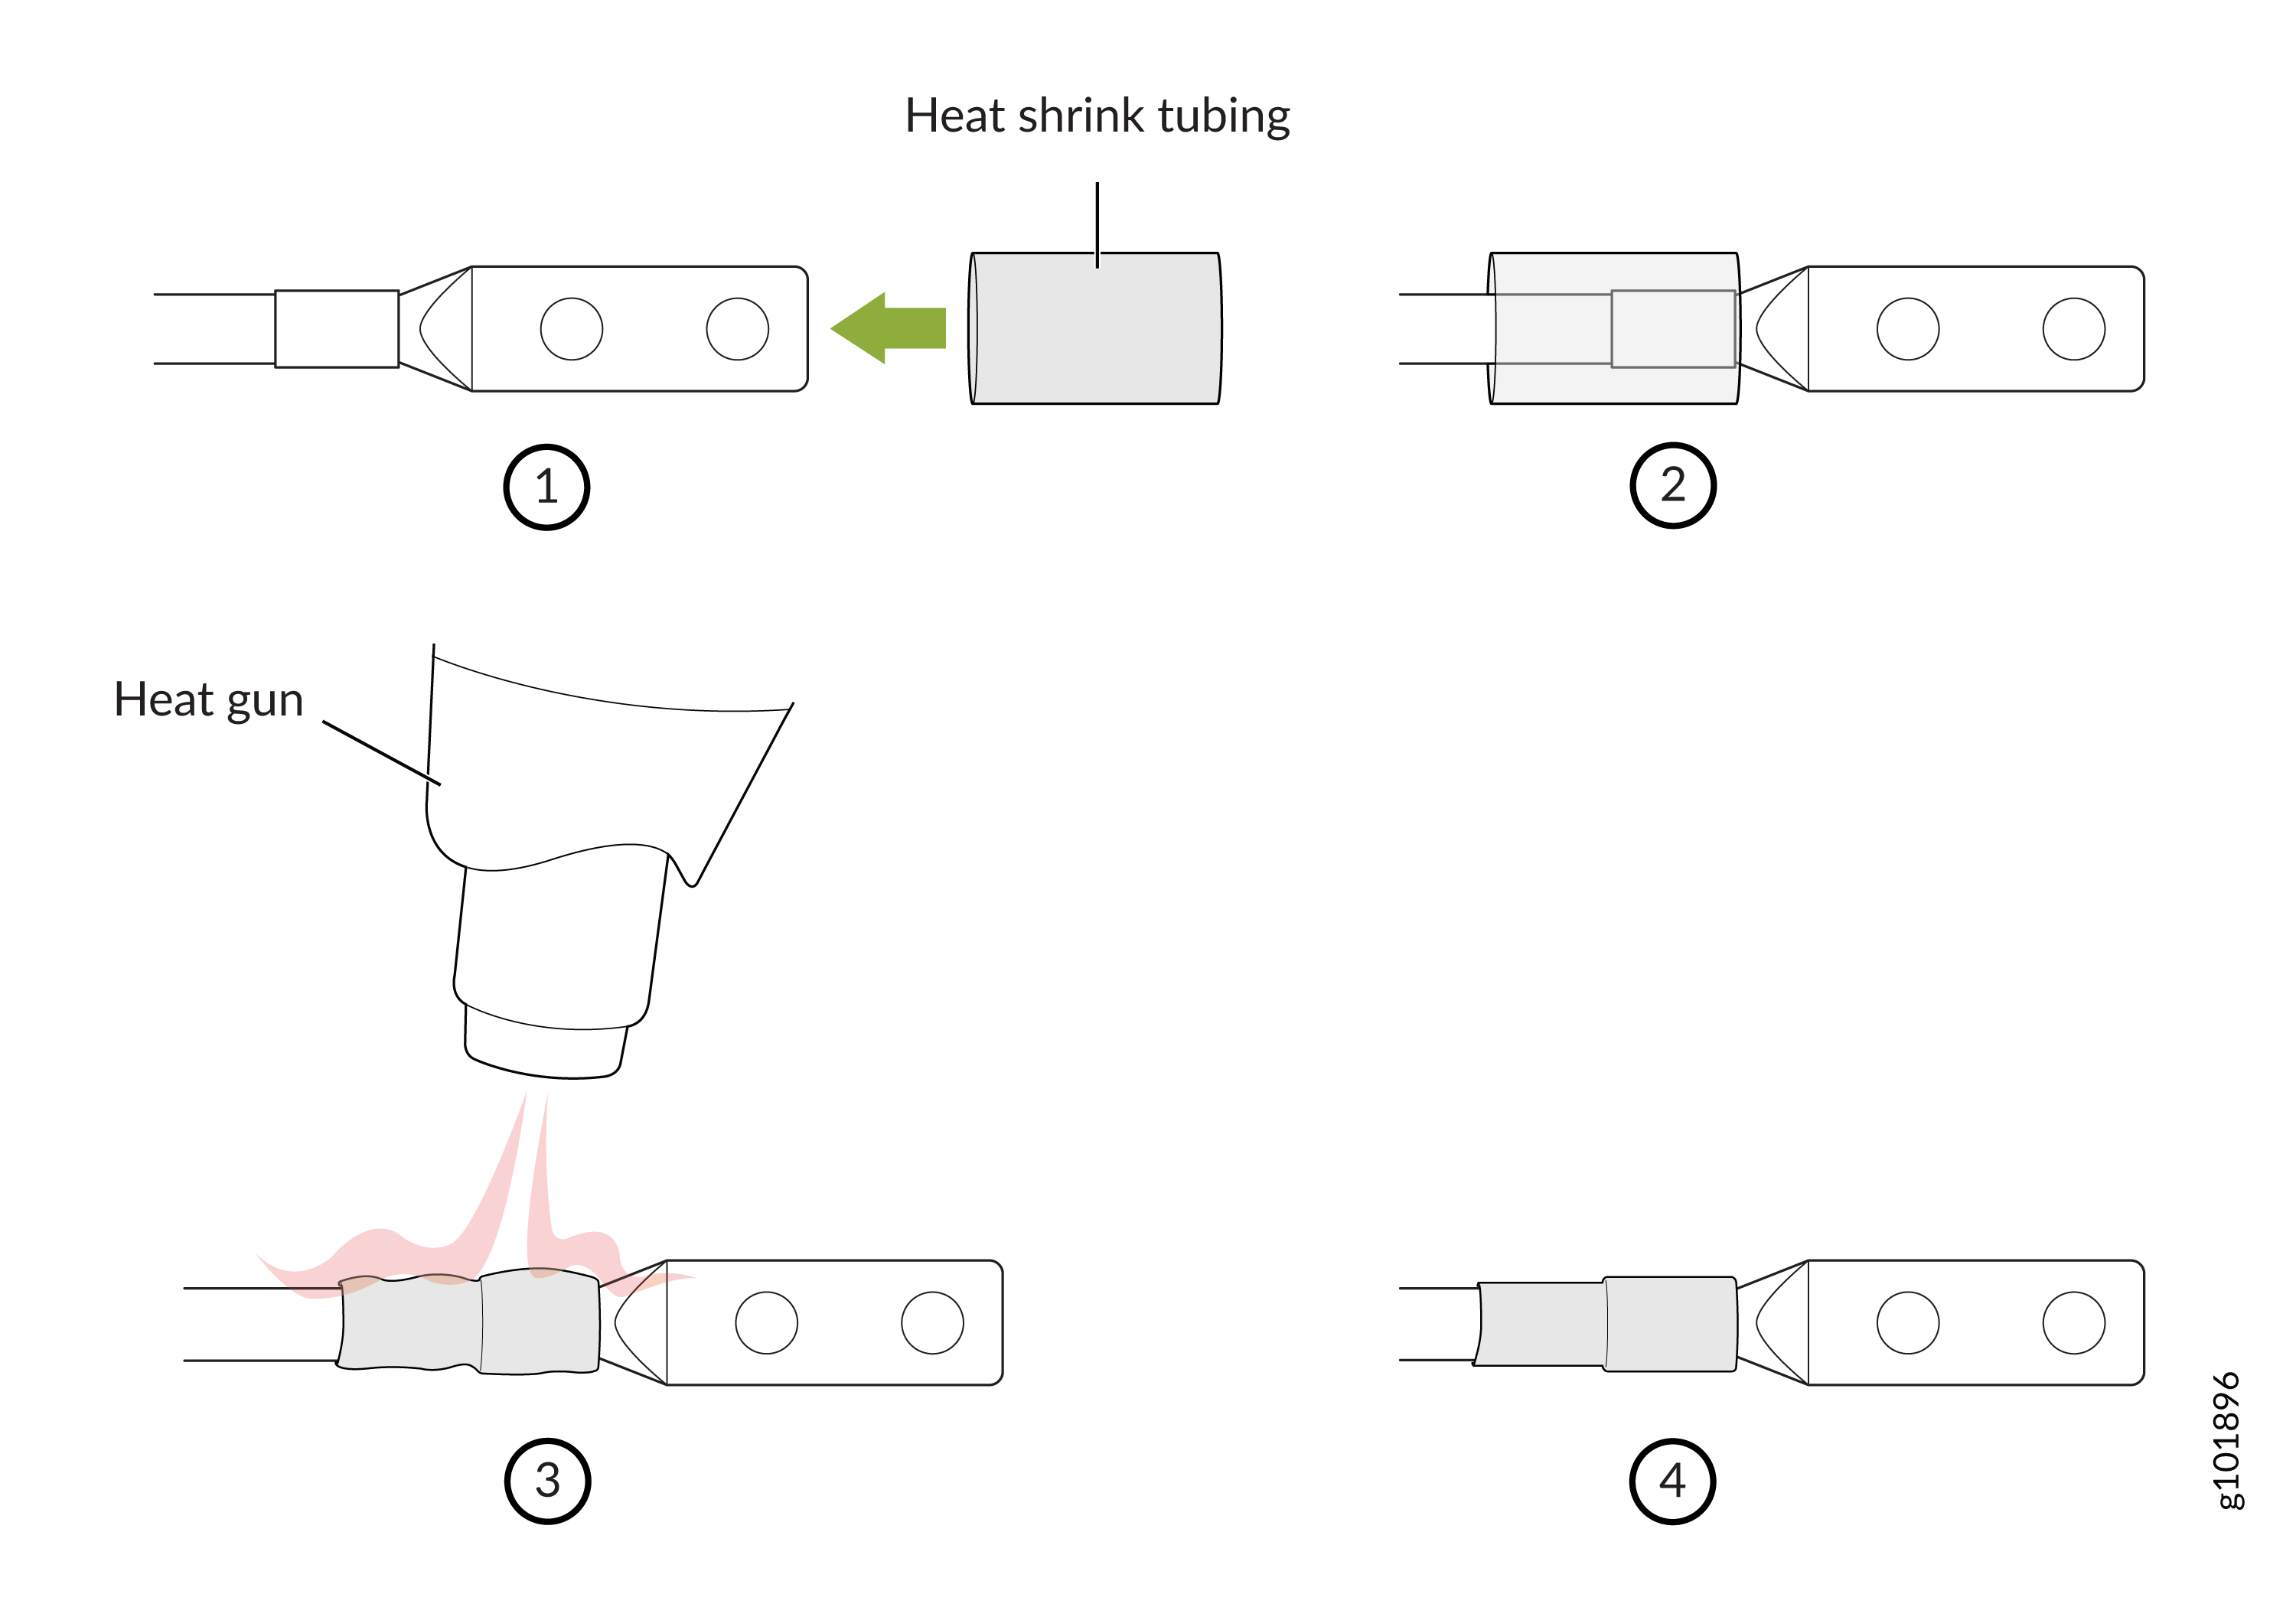
-
-
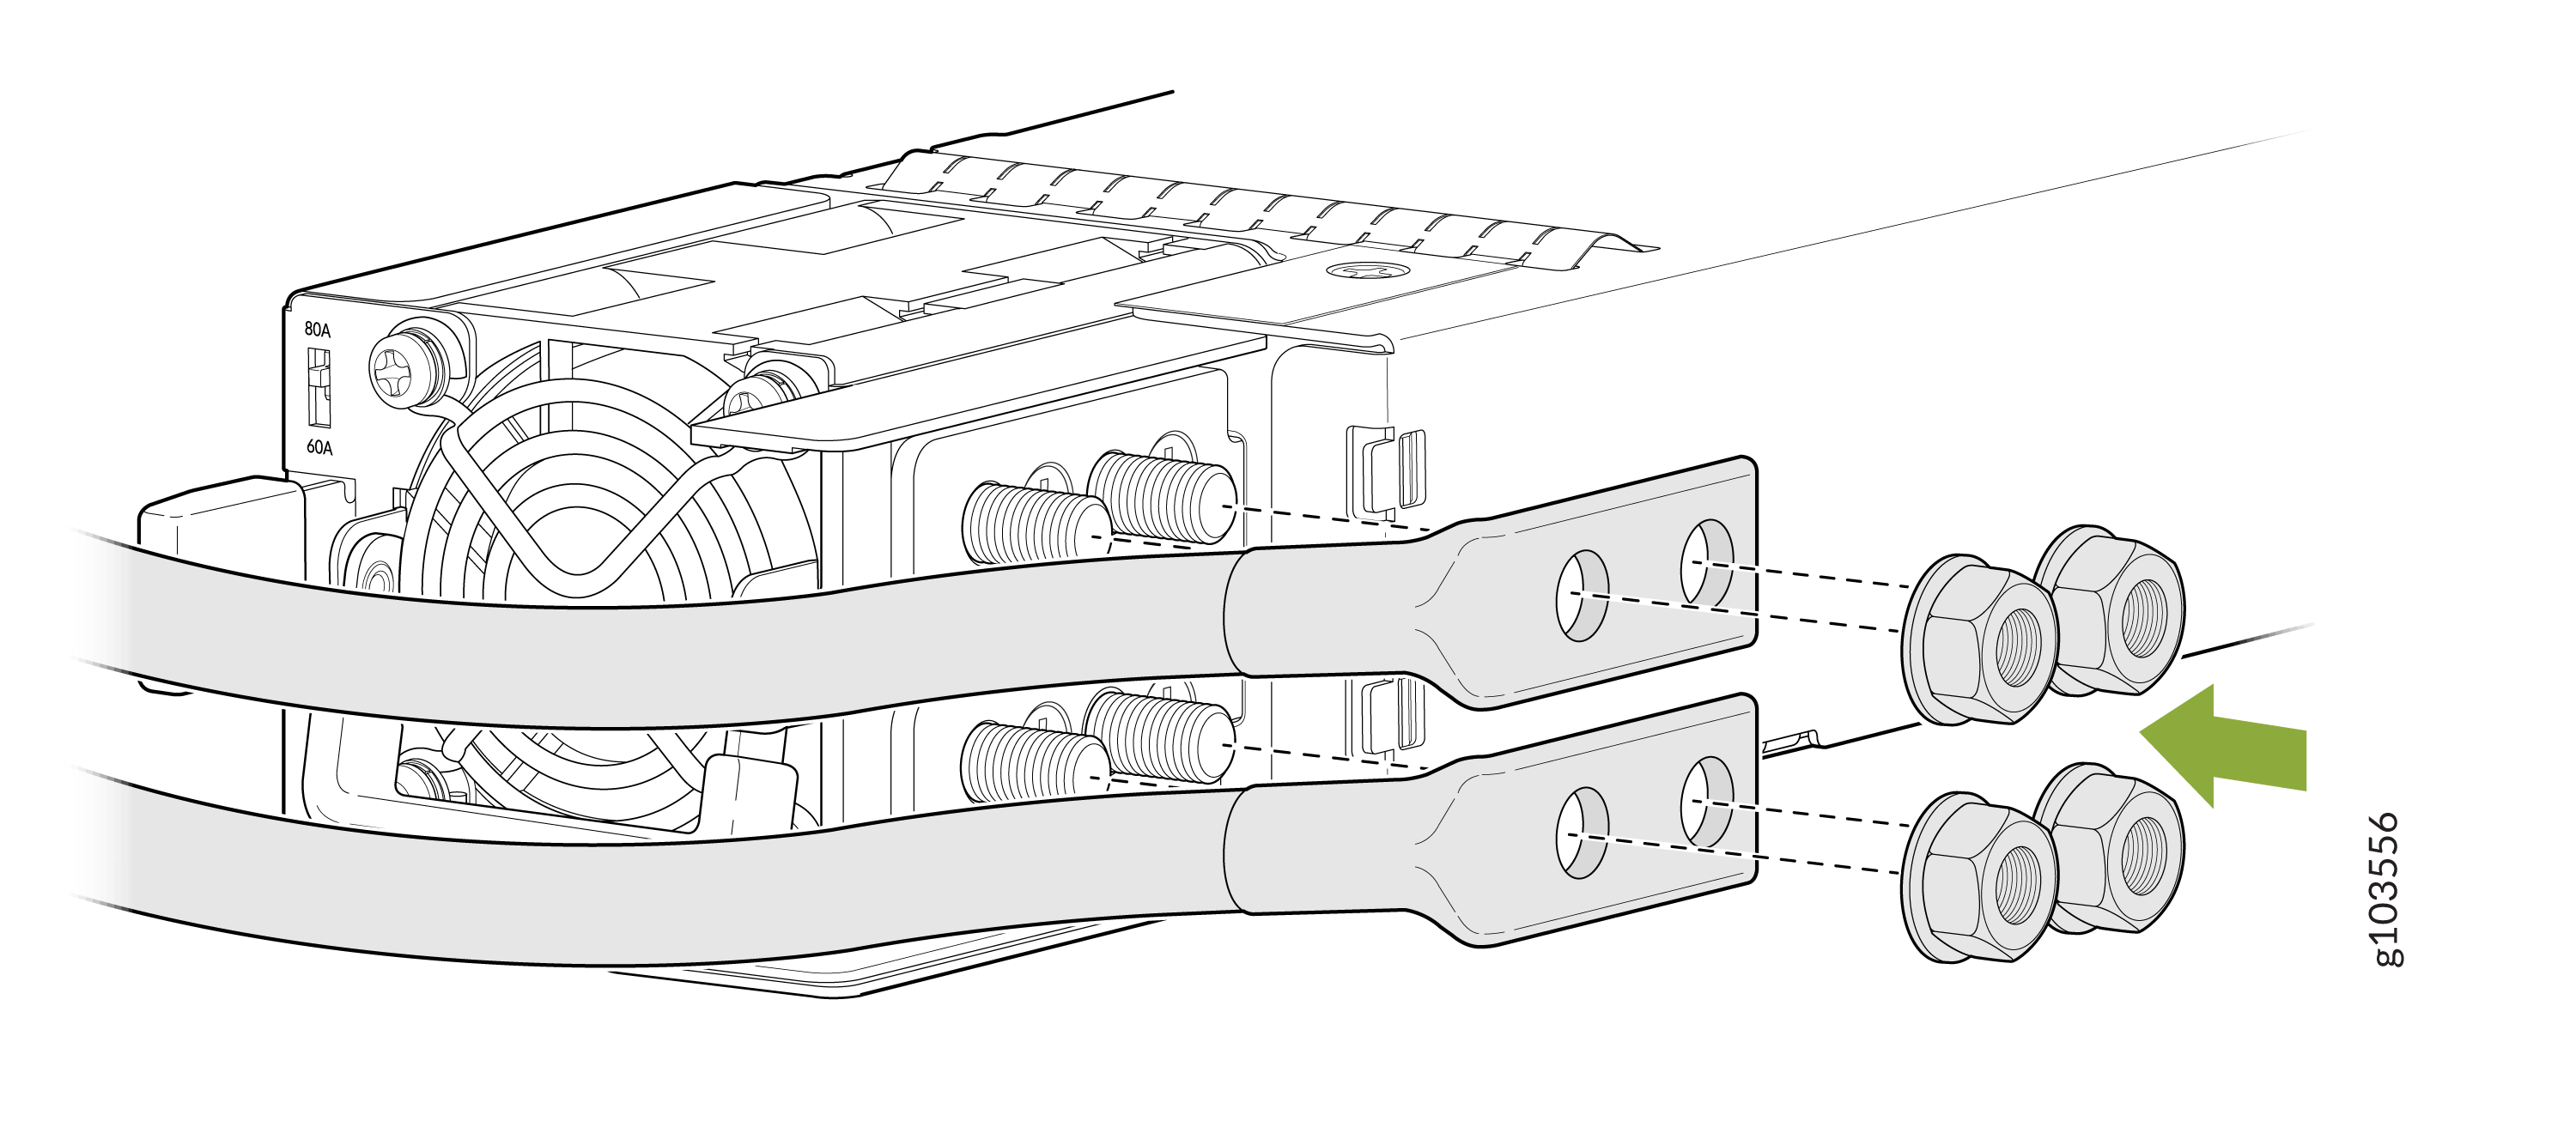
Connect the DC power cable lugs to the terminal studs on the DC PSU and
secure the power cables by using hex nuts.
Figure 4: Connect DC Power Cables to a DC Power Supply Unit
 Warning:
Ensure that the power cables do not block access to device components or drape where people could trip over them.
CAUTION:You must use an appropriate wrench to tighten the hex nuts. Do not overtighten the hex nuts. Applying excessive torque damages the terminal block.
-
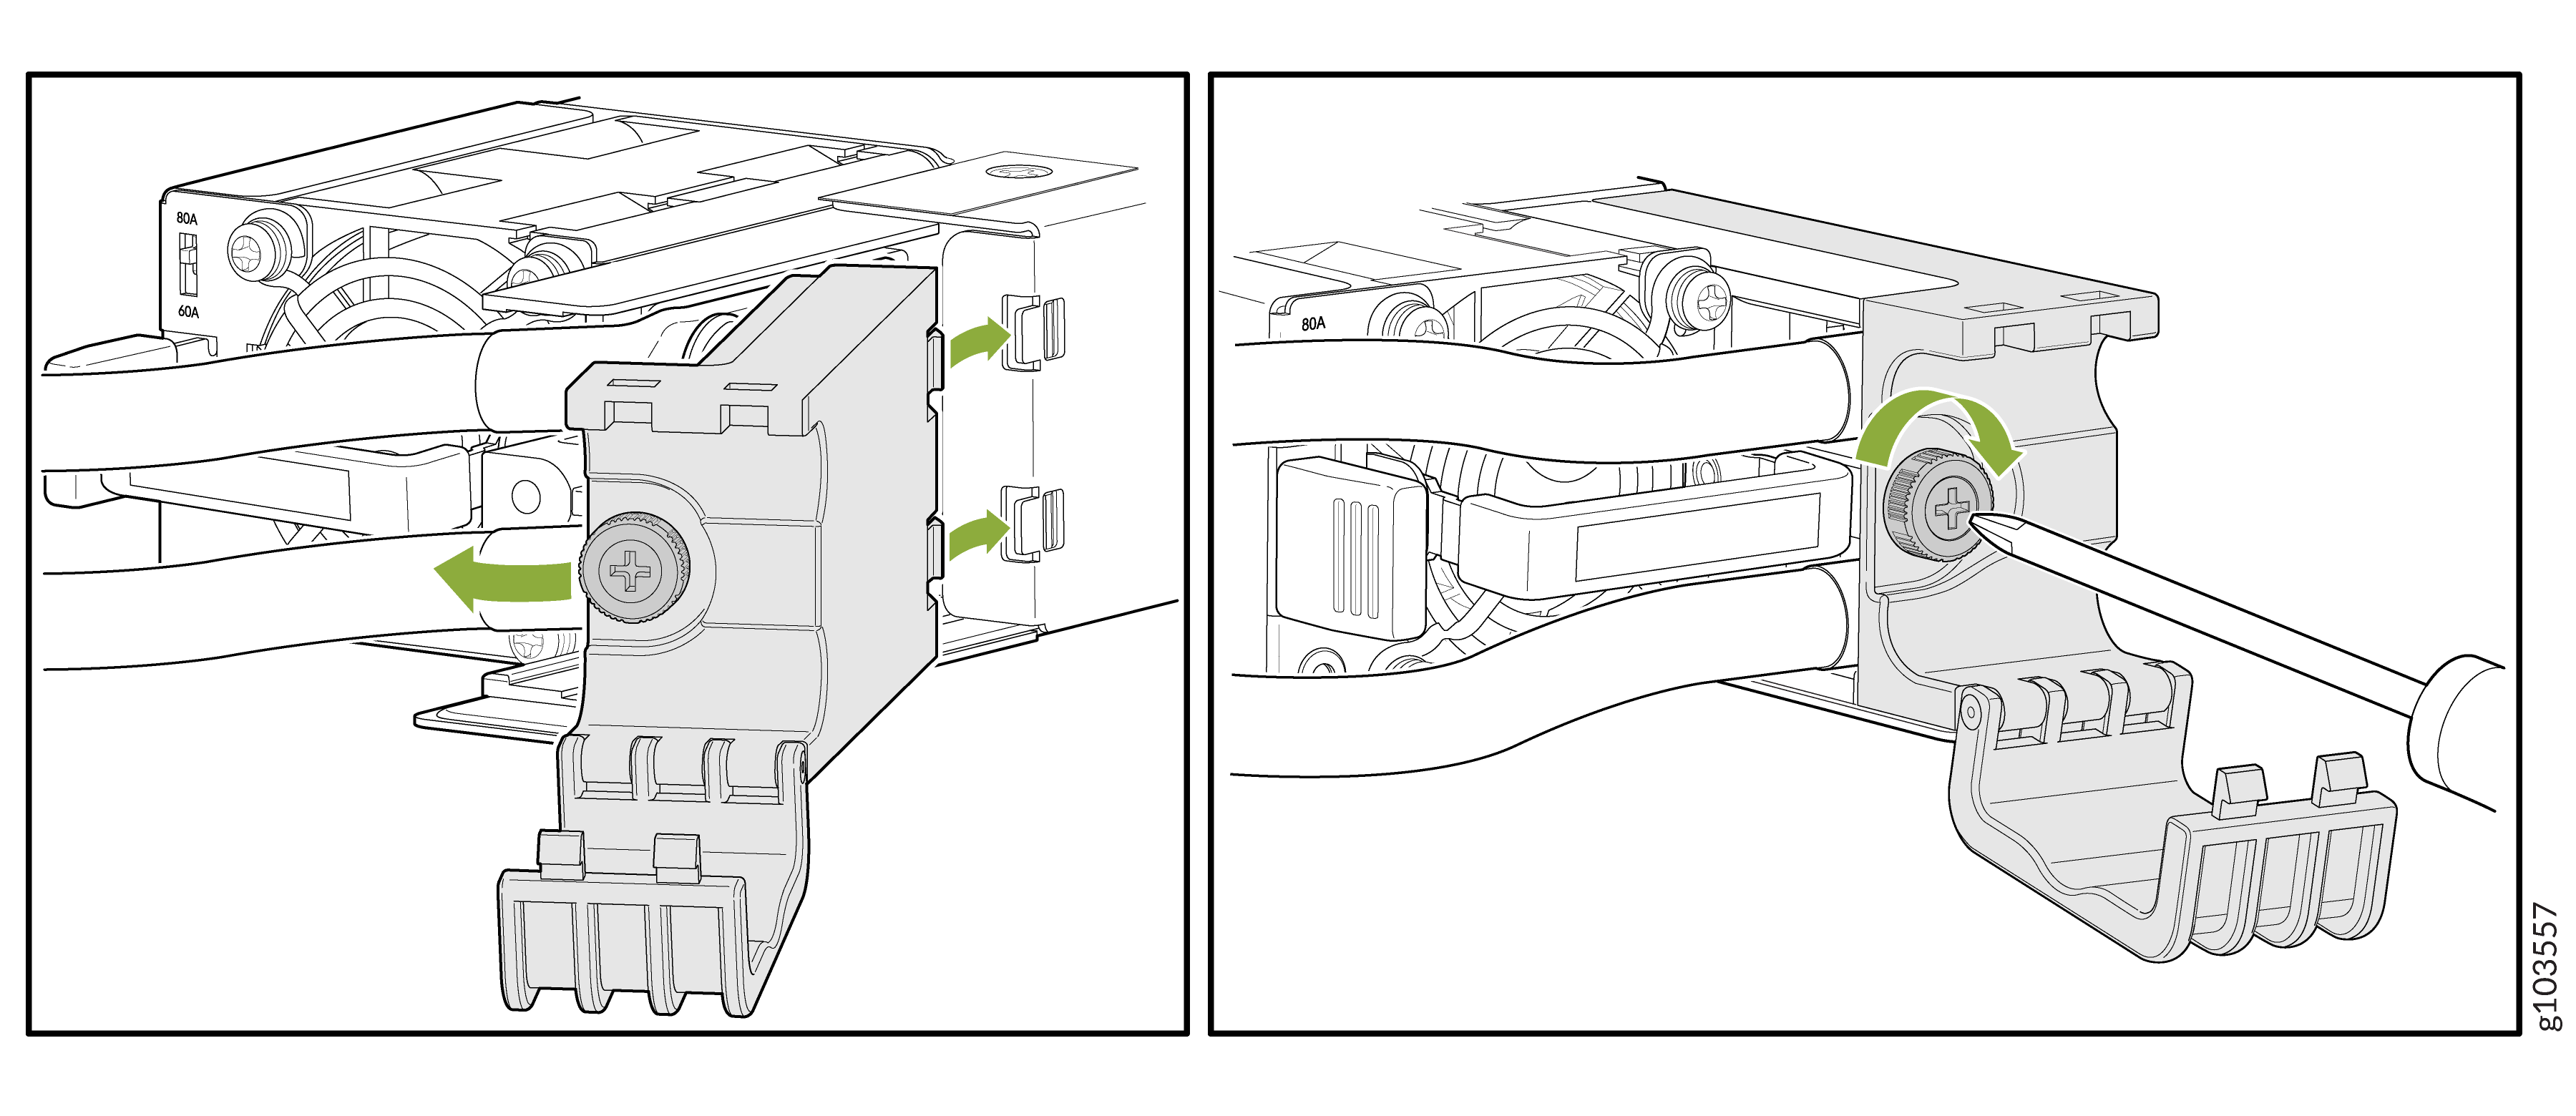
Align the slots on the cable manager bracket with the slots on the PSU and
push it in place. Gently move the bracket to the left to cover the power
cables. Secure the bracket to the PSU by tightening the captive screw on the
bracket by using the screwdriver.
Figure 5: Attach the Cable Manager Latch