Help us improve your experience.

Let us know what you think.

Do you have time for a two-minute survey?


Replacing an MX960 SCB

Before replacing an SCB, read the guidelines in Operating and Positioning the MX960 SCB Ejectors.

Removing an MX960 SCB

To remove an SCB (see Figure 1):

Note:

You can remove the SCB and Routing Engine as a unit, or remove the Routing Engine separately.

CAUTION:

Before removing an SCB, ensure that you know how to operate the ejector handles properly to avoid damage to the equipment.

Note:

You do not need to offline the host subsystem in the following scenarios:

  • You are replacing an SCB installed in slot 2/6.

  • You are replacing an SCB that functions as a third SCB and no Routing Engine is installed.

  1. Take the host subsystem offline.
    Note:

    If there is only one host subsystem, taking the host subsystem offline shuts down the router and you are not required to offline the SCB.

  2. Take the SCB offline by issuing the following CLI command:
  3. Place an electrostatic bag or antistatic mat on a flat, stable surface.
  4. Attach an ESD grounding strap to your bare wrist, and connect the other end of the strap to an ESD grounding point.
  5. Rotate the ejector handles simultaneously counterclockwise to unseat the SCB.
  6. Grasp the ejector handles, and slide the SCB about halfway out of the chassis.
  7. Place one hand underneath the SCB to support it, and slide it completely out of the chassis.
  8. Place the SCB on the antistatic mat.
  9. If you are not replacing the SCB now, install a blank panel over the empty slot.
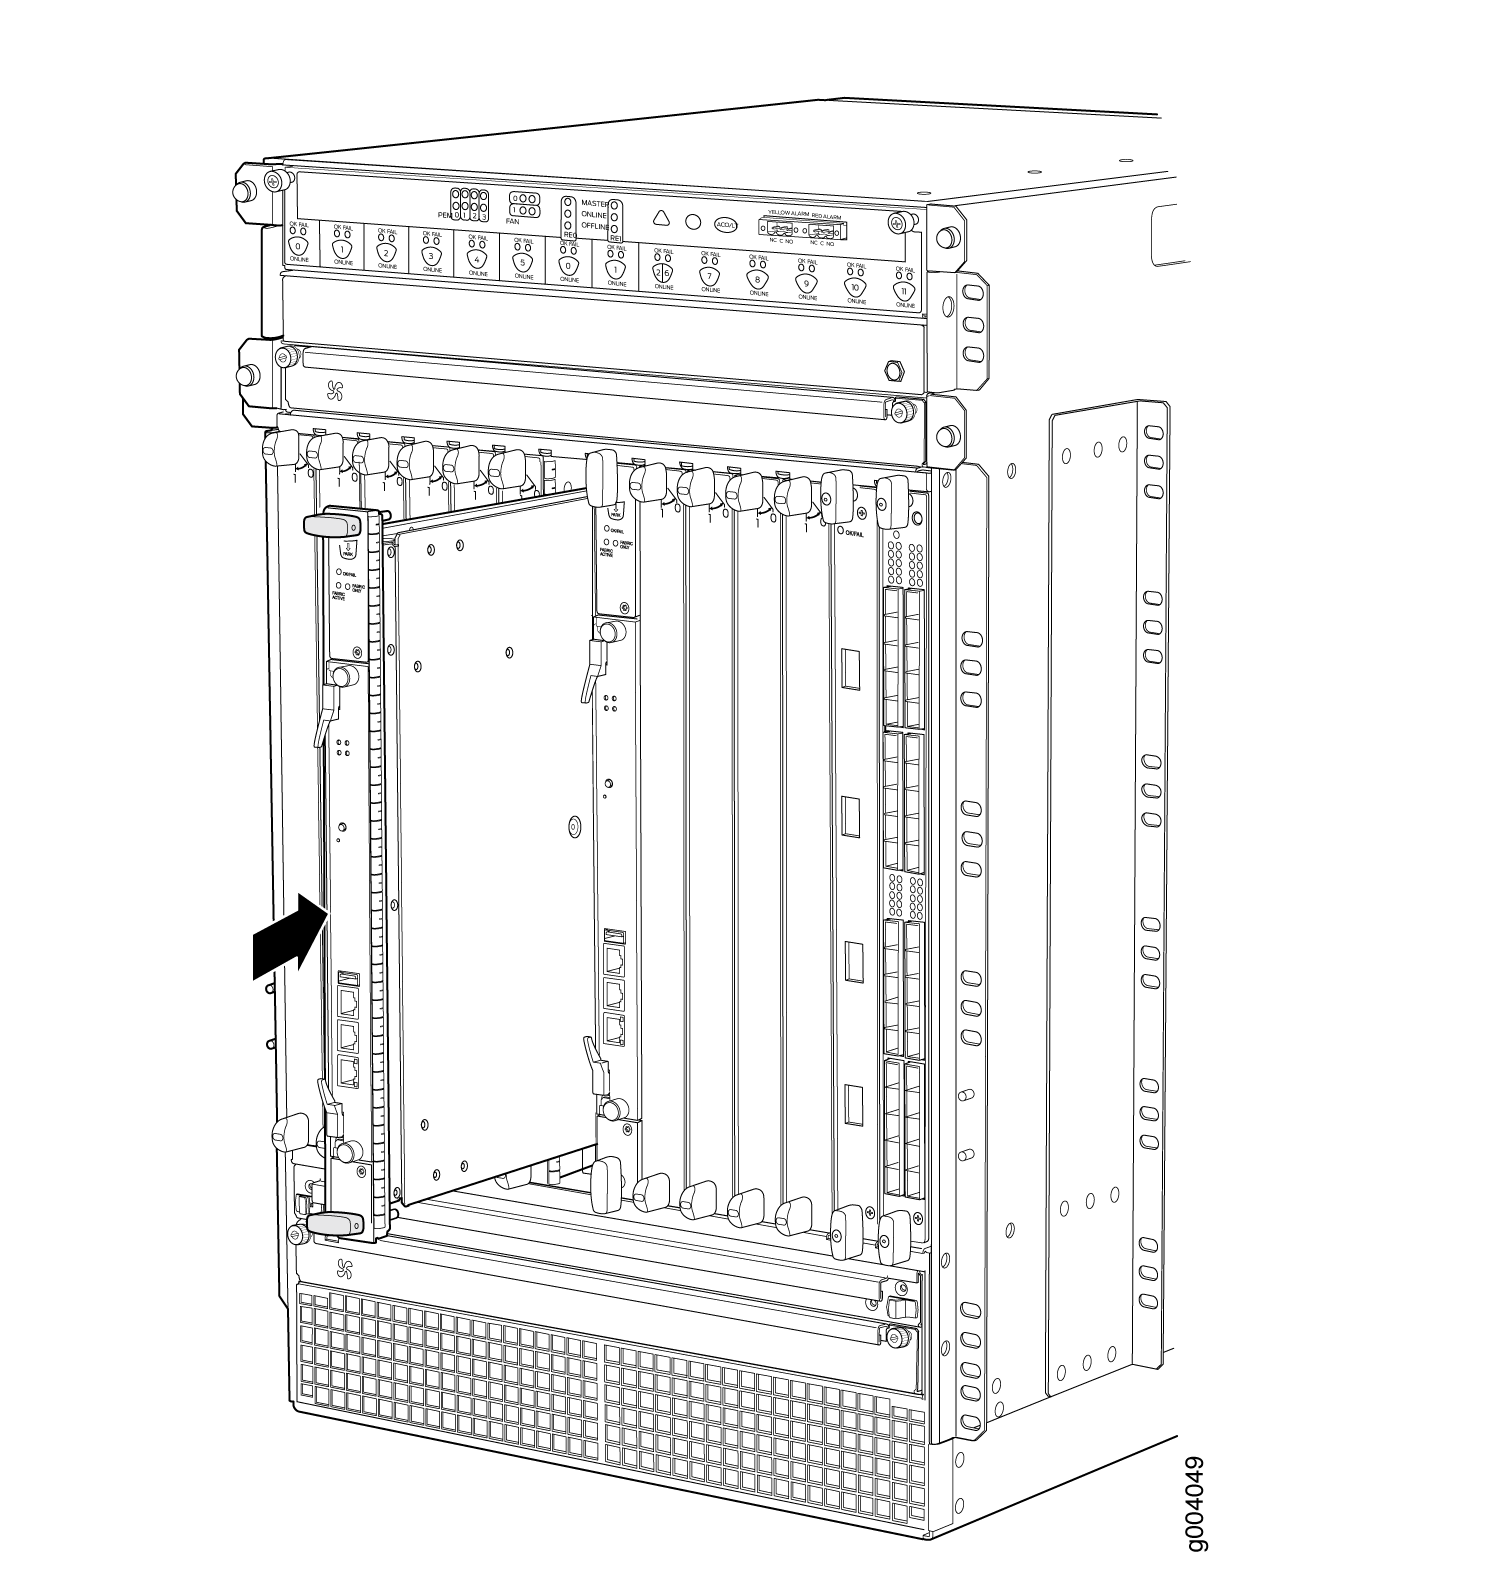
Figure 1: Removing a MX960 SCBRemoving a MX960 SCB

Installing an MX960 Switch Control Board

  1. Attach an ESD grounding strap to your bare wrist, and connect the other end of the strap to an ESD grounding point.
  2. Carefully align the sides of the Switch Control Board with the guides inside the chassis.
  3. Slide the Switch Control Board into the chassis until you feel resistance, carefully ensuring that it is correctly aligned.
  4. Grasp both ejector handles, and rotate them simultaneously clockwise until the Switch Control Board is fully seated.
  5. Place the ejector handles in the proper position, horizontally and toward the center of the board.
    Figure 2: Installing a Switch Control Board in the MX960 Router Installing a Switch Control Board in the MX960 Router
  6. Check the LEDs on the Switch Control Board faceplate to verify that it is functioning normally.
    • The green OK/FAIL LED should light steadily a few minutes after the Switch Control Board is installed.

    • If the OK/FAIL LED is red, remove and install the Switch Control Board again. If the OK/FAIL LED still lights steadily, the Switch Control Board is not functioning properly. Contact your customer support representative.

  7. Check the status of the Switch Control Board using the show chassis environment cb command: