Installing an MX960 Switch Control Board
- Attach an ESD grounding strap to your bare wrist, and connect the other end of the strap to an ESD grounding point.
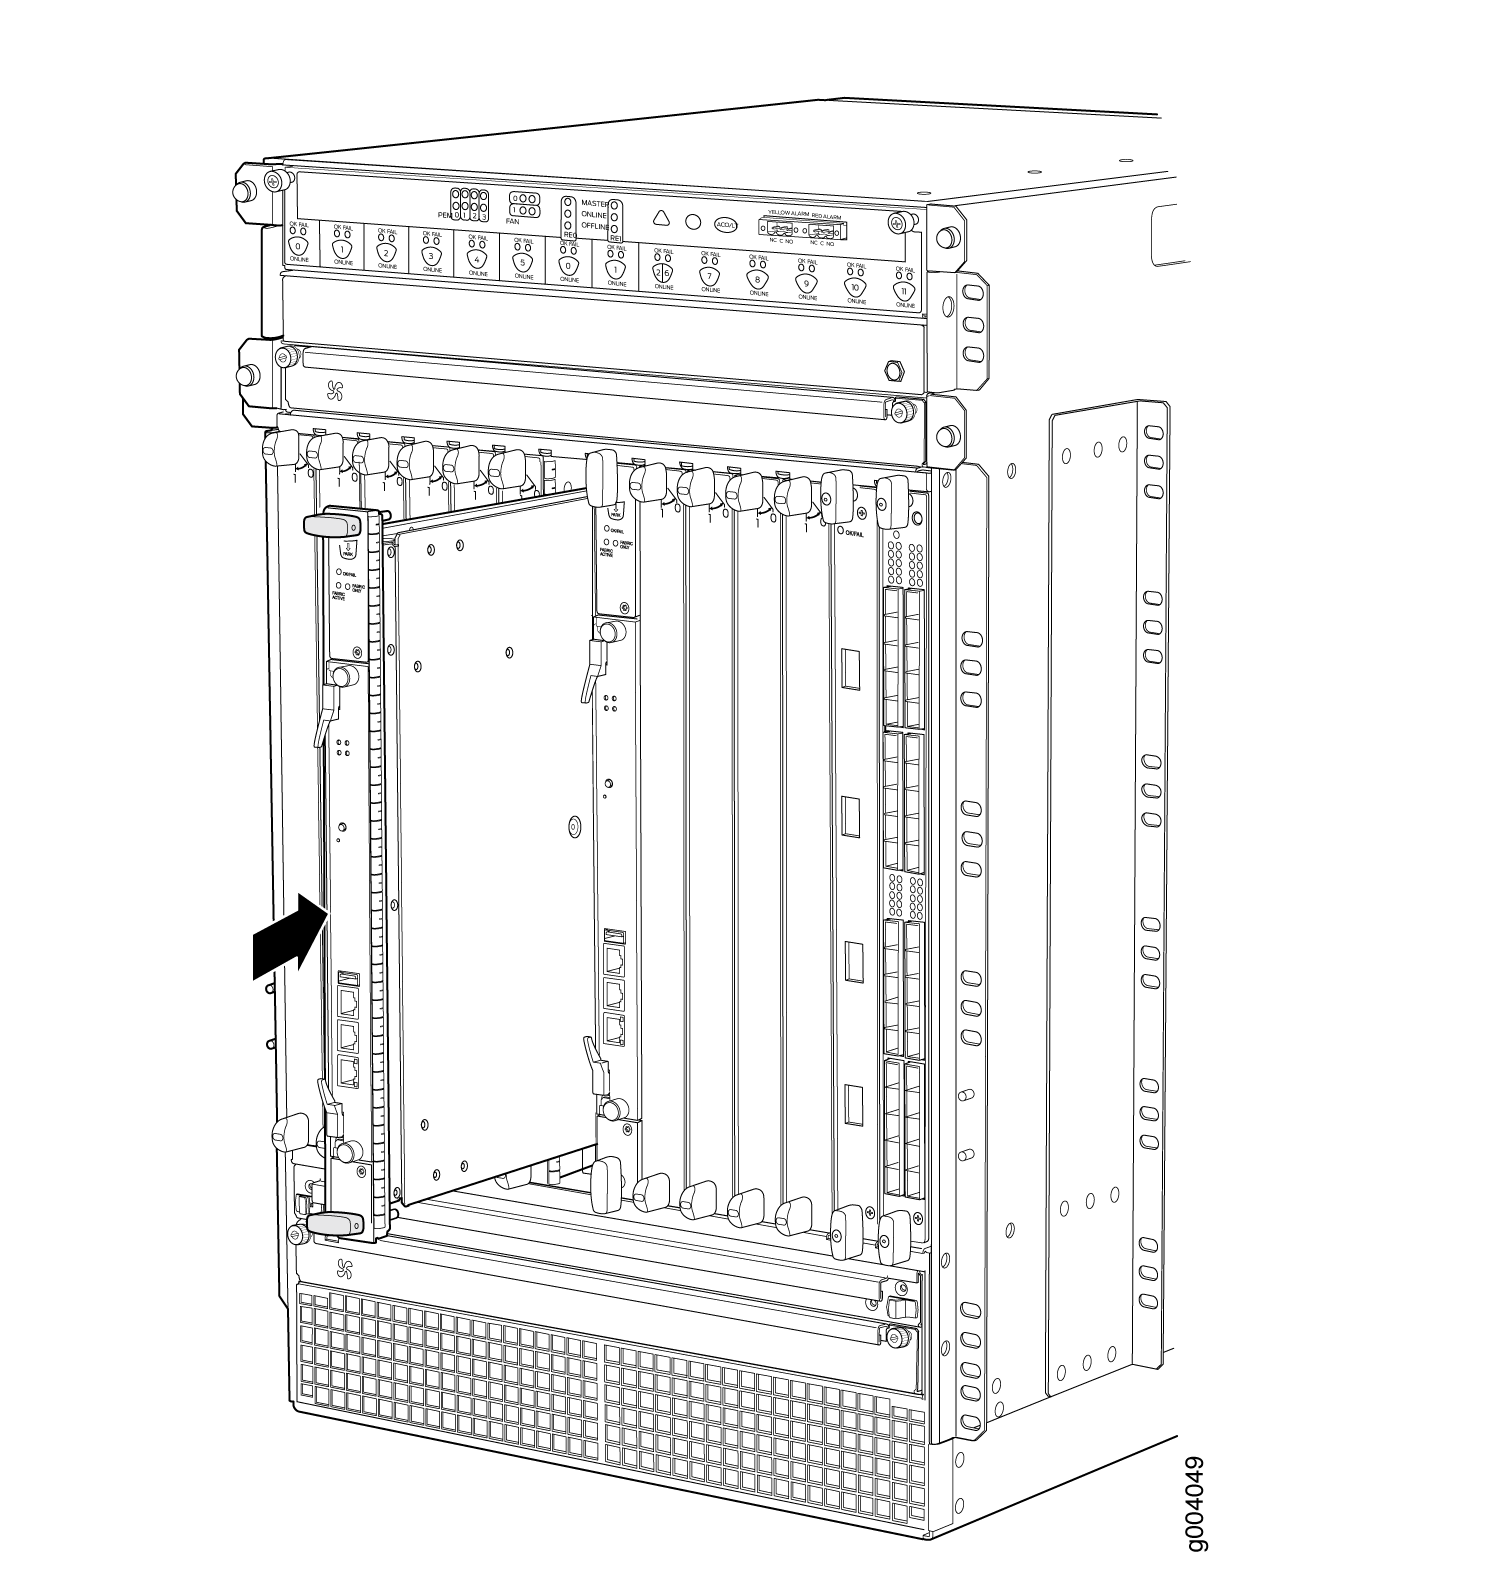
- Carefully align the sides of the Switch Control Board with the guides inside the chassis.
- Slide the Switch Control Board into the chassis until you feel resistance, carefully ensuring that it is correctly aligned.
- Grasp both ejector handles, and rotate them simultaneously clockwise until the Switch Control Board is fully seated.
- Place the ejector handles in the proper position, horizontally and
toward the center of the board.
Figure 1: Installing a Switch Control Board in the MX960 Router
- Check the LEDs on the Switch Control Board faceplate to
verify that it is functioning normally.
The green OK/FAIL LED should light steadily a few minutes after the Switch Control Board is installed.
If the OK/FAIL LED is red, remove and install the Switch Control Board again. If the OK/FAIL LED still lights steadily, the Switch Control Board is not functioning properly. Contact your customer support representative.
- Check the status of the Switch Control Board using the show chassis environment cb command:
user@host> show chassis environment cb
CB 0 status:
  State                      Online Master
  Temperature                25 degrees C / 77 degrees F
  Power 1
    1.2 V                     1198 mV
    1.5 V                     1508 mV
    1.8 V                     1830 mV
    2.5 V                     5059 mV
    3.3 V                     6593 mV
    5.0 V                     5111 mV
    12.0 V                   12181 mV
    1.25 V                    1250 mV
    3.3 V SM3                 6587 mV
    5 V RE                    5078 mV
    12 V RE                  12026 mV
  Power 2
    11.3 V bias PEM          11253 mV
    4.6 V bias MidPlane       4827 mV
    11.3 V bias FPD          11408 mV
    11.3 V bias POE 0        11446 mV
    11.3 V bias POE 1        11408 mV
  Bus Revision               6
  FPGA Revision              0
CB 1 status:
  State                      Online Standby
  Temperature                26 degrees C / 78 degrees F
  Power 1
    1.2 V                     1211 mV
    1.5 V                     1517 mV
    1.8 V                     1817 mV
    2.5 V                     2507 mV
    3.3 V                     3312 mV
    5.0 V                     5136 mV
    12.0 V                   12142 mV
    1.25 V                    1260 mV
    3.3 V SM3                 3306 mV
    5 V RE                    5085 mV
    12 V RE                  11968 mV
  Power 2
    11.3 V bias PEM          11369 mV
    4.6 V bias MidPlane       4814 mV
    11.3 V bias FPD          11427 mV
    11.3 V bias POE 0        11350 mV
    11.3 V bias POE 1        11330 mV
  Bus Revision               39
  FPGA Revision              1