Help us improve your experience.

Let us know what you think.

Do you have time for a two-minute survey?


Replacing the MX960 Air Filter

Removing the MX960 Air Filter

CAUTION:

Do not run the device for more than a few minutes without the air filter in place.

CAUTION:

Always keep the air filter in place while the device is operating, except during replacement. The fans are very powerful and can pull small bits of wire or other materials into the device if the air filter isn't in place. These materials can damage device components.

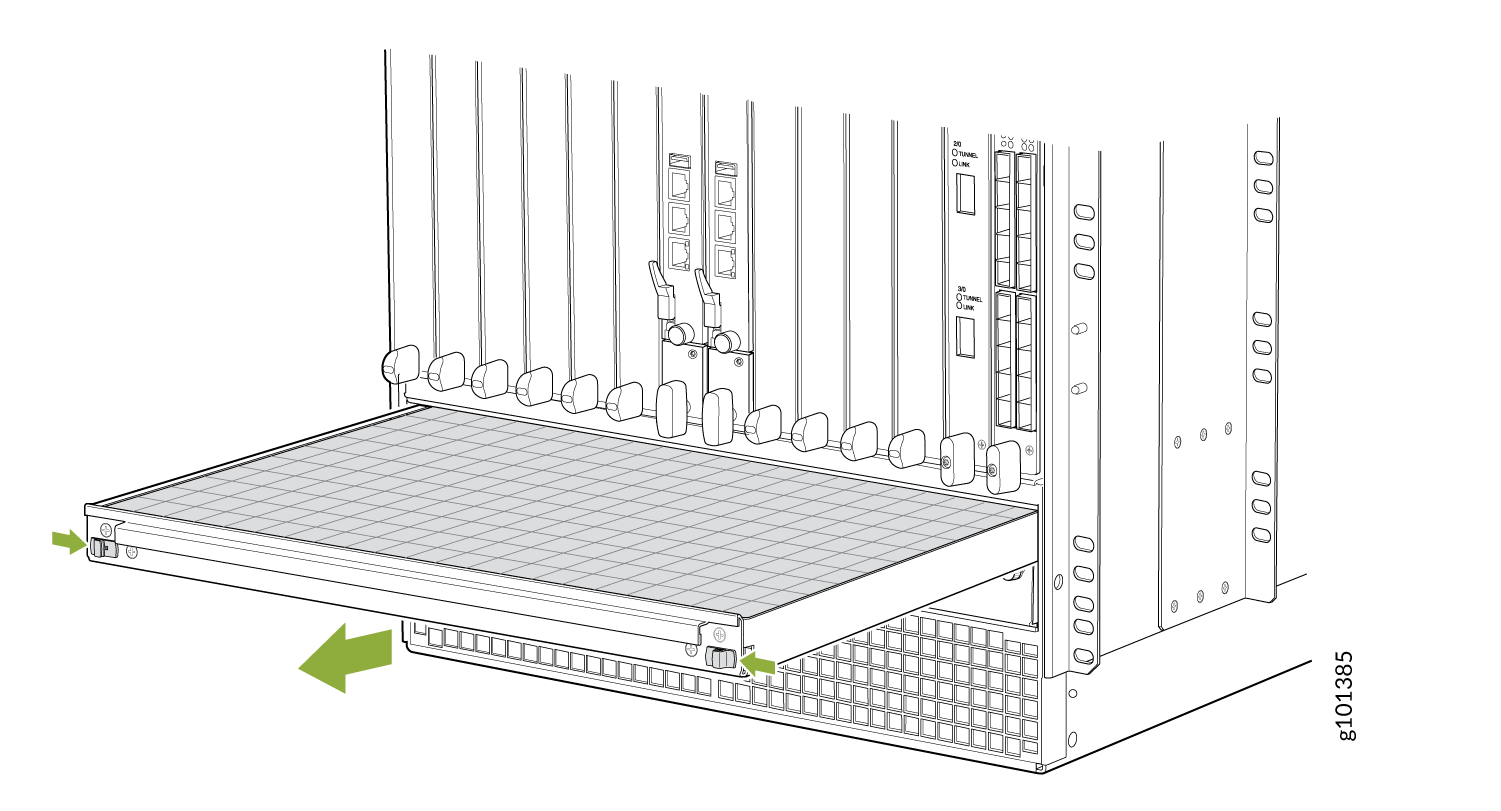
To remove the normal-capacity air filter tray, use the following procedure.

  1. Attach an ESD grounding strap to your bare wrist, and connect the other end of the strap to an ESD grounding point.
  2. Unwrap any cables on the standard cable manager and remove the cables from the tray. Arrange the cables so that they do not block the front of the cable manager and tray, and secure them with temporary fasteners so that they are not supporting their own weight as they hang from the connector.
    Note:

    Removing the cables from the extended cable manager is not necessary to access the air filter.

    CAUTION:

    Do not let fiber-optic cable hang free from the connector. Do not allow fastened loops of cable to dangle, which stresses the cable at the fastening point.

    CAUTION:

    Do not run the router for more than two minutes without the air filter in place.

  3. Simultaneously pull the two releases labeled PULL on the standard cable manager. Lift it up and outward to lock it in place to access the air filter.
  4. Pull the filter tray release on both sides of the filter tray.
  5. Slide the air filter tray out of the chassis as shown in Figure 1 and Figure 2.
    Figure 1: Removing the Normal-Capacity Air Filter Tray from the Chassis Removing the Normal-Capacity Air Filter Tray from the Chassis
    Figure 2: Removing the High-Capacity Air Filter Tray from the Chassis Removing the High-Capacity Air Filter Tray from the Chassis

Installing the MX960 Air Filter

To install the air filter (see Figure 3 and Figure 4):

  1. Attach an ESD grounding strap to your bare wrist, and connect the other end of the strap to an ESD grounding point.
  2. Ensure that the air filter is right side up.
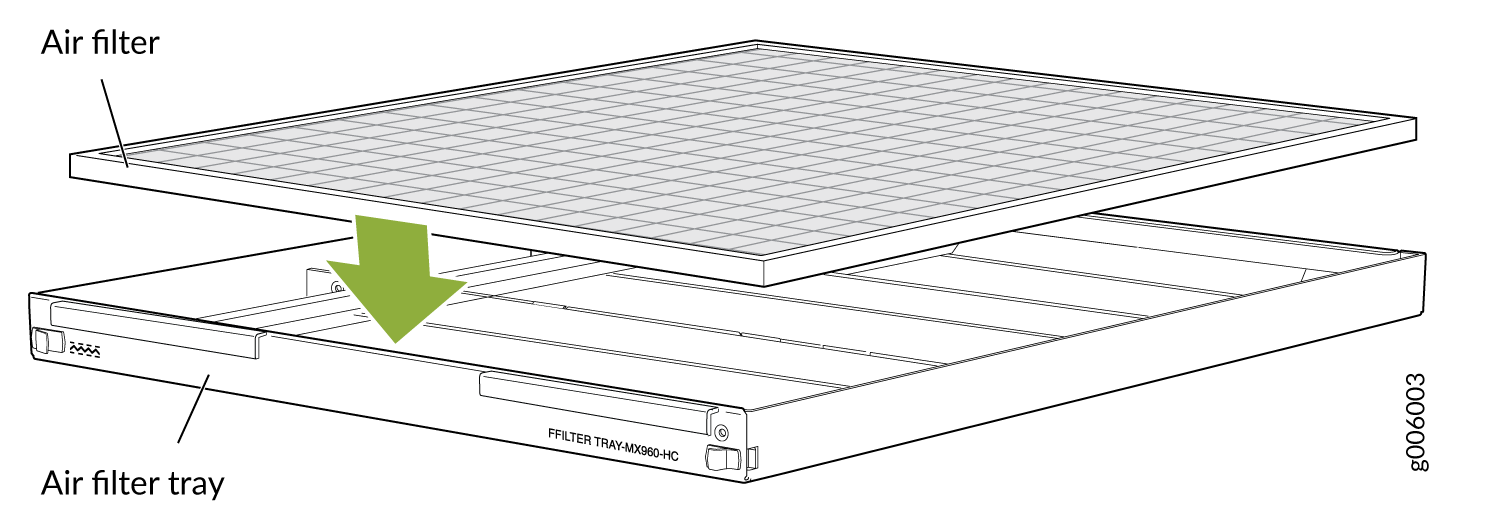
  3. Place the air filter into the air filter tray.
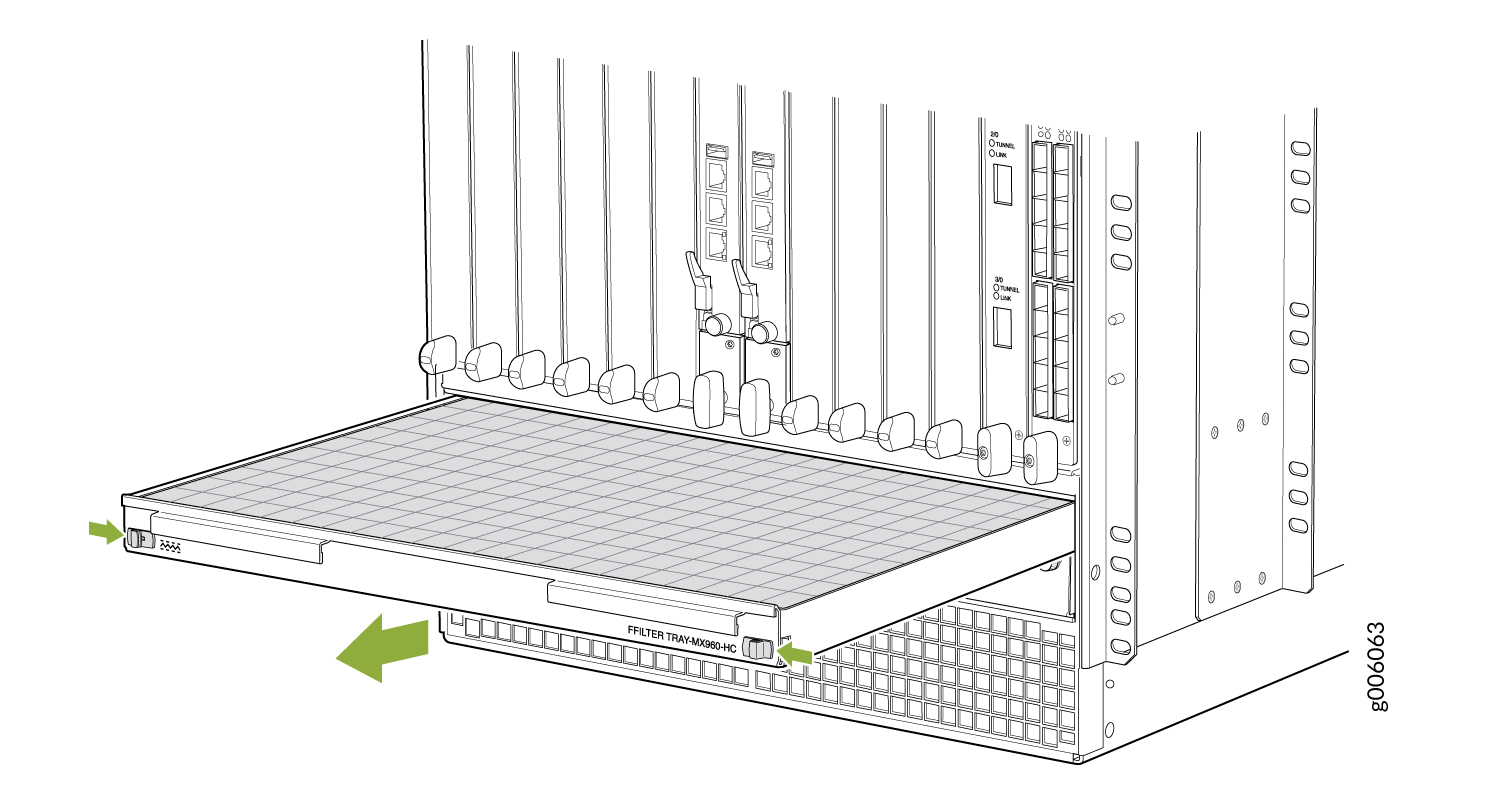
  4. Insert the air filter tray into the chassis by sliding it straight into the chassis until it stops.
  5. Lower the cable manager back into position.
  6. Rearrange the cables in the cable manager.
Figure 3: Installing the Normal-Capacity Filter Installing the Normal-Capacity Filter
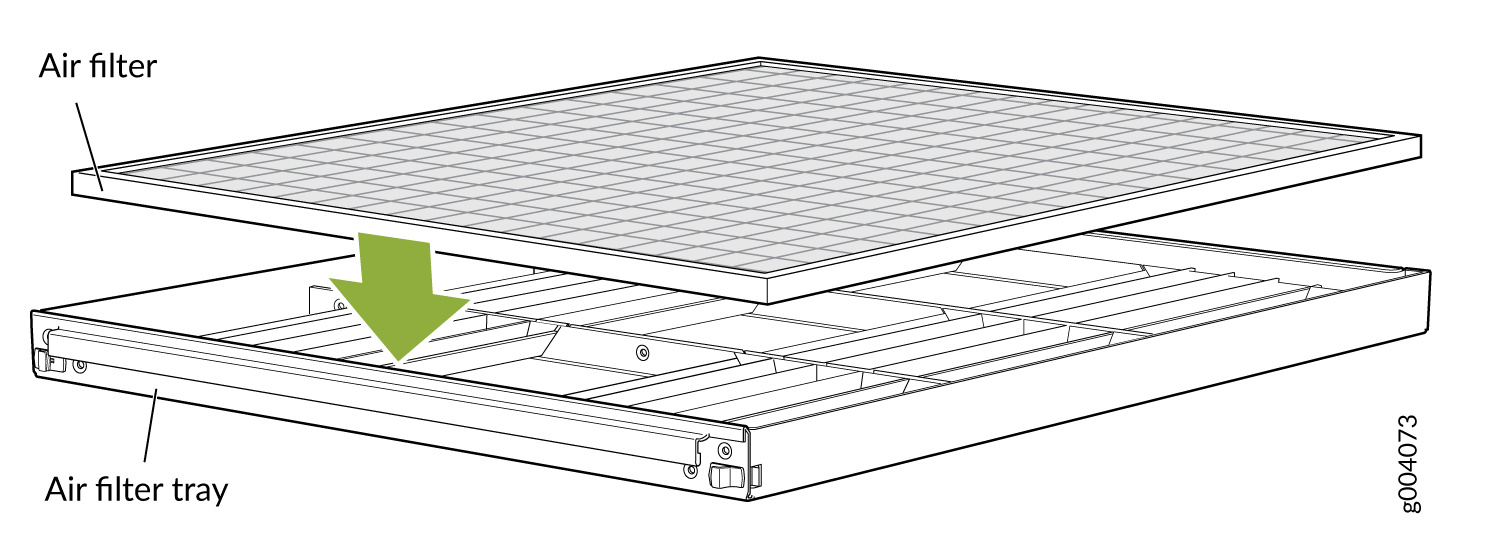
Figure 4: Installing the High-Capacity Filter Installing the High-Capacity Filter