Replace Fans on the MX301
A part of the MX301 maintenance involves removing and installing the fan modules.
On the MX301 Router, you can remove and replace up to one fan module without powering off the router or disrupting the device functions.
Before you remove or install a fan module, ensure that you have taken the necessary precautions to prevent electrostatic discharge (ESD) damage.
Ensure that you have the following parts and tools:
-
An electrostatic discharge (ESD) grounding strap
-
An antistatic bag or an antistatic mat
-
A replacement fan module
To prevent components in the chassis from overheating and shutting down, you must replace the fan module within a certain period of removing the existing fan module. For information on how long you can safely replace a fan module under different optics and temperature settings, see Table 1.
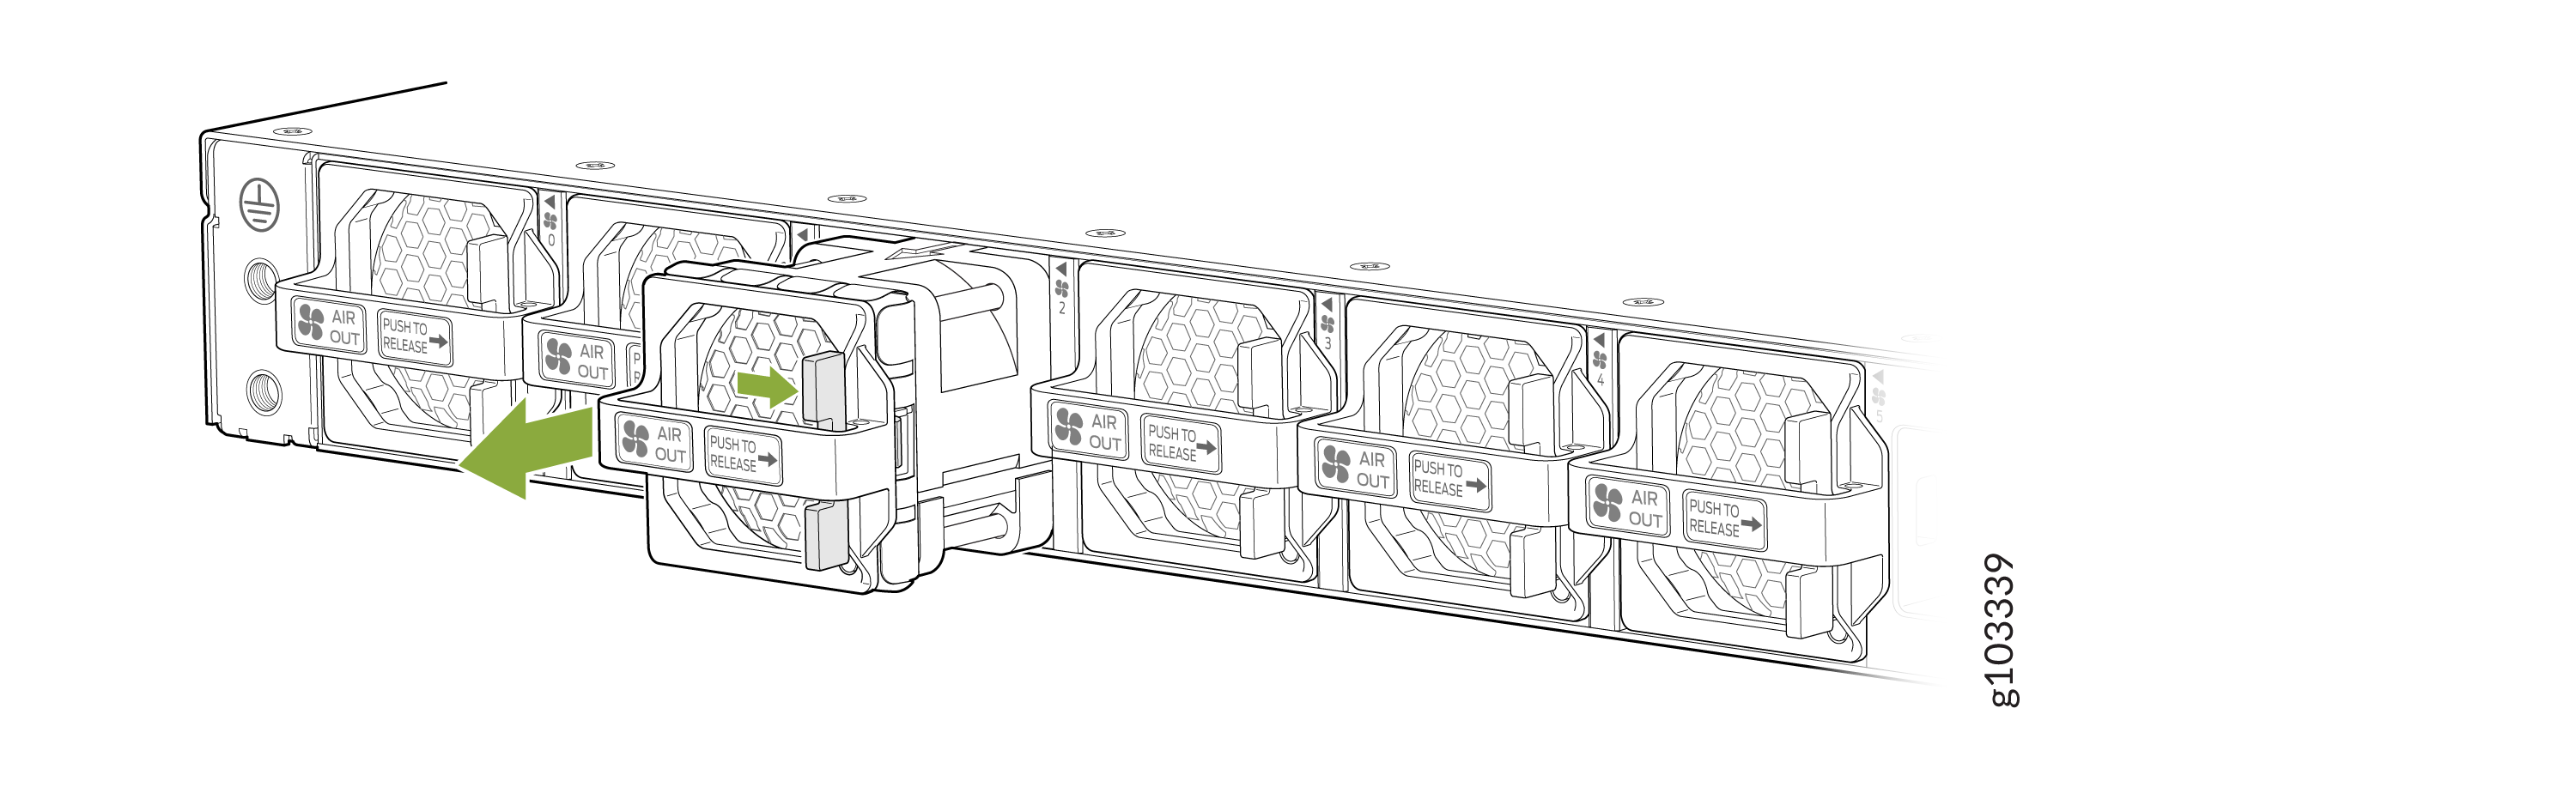
Remove a Fan Module from the MX301
Remove a JNP-FAN3-1RU
This topic guides you through the steps to remove the JNP-FAN3-1RU fan module from the MX301 Router.
-
Firmly hold the handle on the fan module and push the release latch to the right to
release the fan module from the chassis. The direction in which you must push the release
latch is indicated by the Push to Release label on the handle.
Figure 1: Remove the Fan Module
 Warning:
To prevent injury, do not touch a fan with your hands or any tools when you slide the fan module out of the chassis—the fan might still be running.
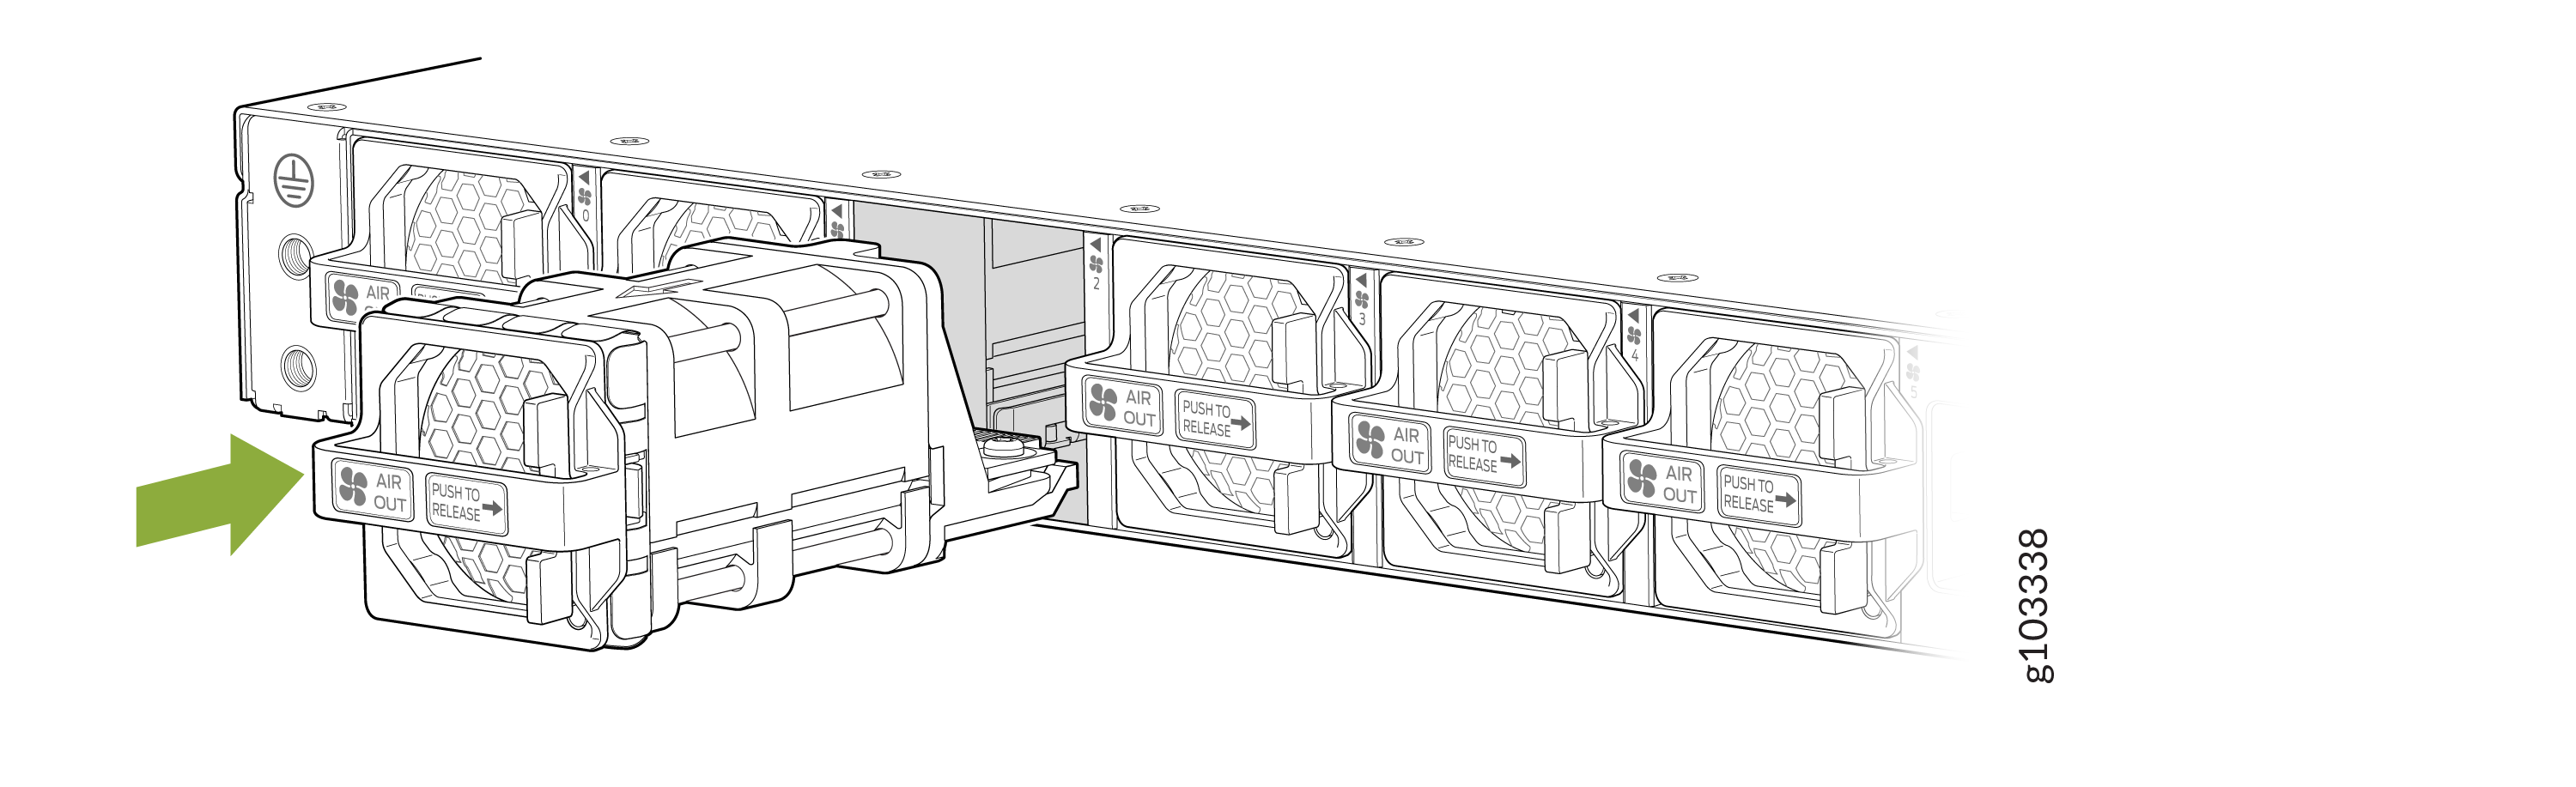
Install a Fan Module in the MX301
Install a JNP-FAN3-1RU
This topic guides you through the steps to install the JNP-FAN3-1RU fan module in the MX301 Router.
-
Align the fan module in the fan module slot on the rear panel of the router and slide
the module in until it is fully seated. You will hear a distinct click sound when the fan
module securely latches into position.
Figure 2: Install the Fan Module