Contact Customer Support and Return the Chassis or Components
If you need to return a hardware component to Juniper Networks, Inc., you need a Return Material Authorization (RMA) number and the equipment serial number. Contact the Juniper Networks Technical Assistance Center (JTAC) to generate an RMA number. You may also need to locate the chassis or component details using the CLI or by referring to equipment labels. You then pack and ship the component.
Contact Customer Support
You can contact JTAC 24 hours a day, seven days a week.
| Chat |
Use the Ask me icon at the bottom right of the Support page. Don't see the Chat icon? Read this. |
| Web | |
| Telephone |
U.S. and Canada (Toll-free): 1-888-314-JTAC (5822) Outside the US or Canada, use the relevant country number listed on the regional tabs listed on the Contact Support page. Federal Government Support: 1-833-900-1454 |
We do not support opening new cases through e-mail. Please use one of the above options to contact JTAC.
Return a Hardware Component to Juniper Networks
If a hardware component fails, contact Juniper Networks to obtain an RMA number. We use this number to track the returned material at the factory and to return the repaired or new components to you, as needed.
Do not return any component to Juniper Networks unless you have first obtained an RMA number. Juniper Networks reserves the right to refuse shipments that do not have an RMA number. Refused shipments are returned to you by collect freight.
To return a defective hardware component:
- Determine the part number and the serial number of the defective component. See Locate the Serial Number of the MX301 or its Components.
- Obtain an RMA number from JTAC as described in Request a Return Material Authorization.
- Pack the component for shipment. See Guidelines for Packing and Shipping Hardware Components.
For more information about return and repair policies, see the Support page at https://support.juniper.net/support/.
Locate the Serial Number of the MX301 or its Components
If the device is operational and you can access the CLI, you can list serial numbers for the device and for some components with a CLI command. If you don’t have access to the CLI, or if the serial number for the component doesn’t appear in the command output, you can physically locate the serial number ID label on the device or component.
If you want to find the serial number ID label on a component, you need to remove the component from the device chassis.
- List the MX301 Chassis and Component Details Using the CLI
- Locate the Chassis Serial Number ID Label on MX301
- Locate the Serial Number ID Labels on FRUs
List the MX301 Chassis and Component Details Using the CLI
To list the device and device components and their serial numbers, enter the show
chassis hardware command on the CLI.
user@host> show chassis hardware
Hardware inventory:
Item             Version  Part number  Serial number     Description
Chassis                                RF990             JNP301 [MX301]
Routing Engine 0          BUILTIN      BUILTIN           RE 3500 10C 128G
CB 0             REV 31   750-182793   EBBZ2132          Control Board
FPC 0                     BUILTIN      BUILTIN           FPC-BUILTIN
  PIC 0                   BUILTIN      BUILTIN           MRATE PIC 4x400G/14x100G/8x50G
    Xcvr 0       XXXX     NON-JNPR     AR5N000003        QSFP112-400GBASE-LR4
    Xcvr 12      XXXX     NON-JNPR     AR5P000004        QSFP112-400GBASE-FR4
    Xcvr 13      XXXX     NON-JNPR     AR5P000006        QSFP112-400GBASE-FR4
    Xcvr 22      XXXX     NON-JNPR     AR5P000003        QSFP112-400GBASE-FR4
  Mezz           REV 08   711-179260   EBBZ2559          JNP301 Wan Mezz Board
  PFE Board      REV 07   711-178583   EBBZ2068          JNP301-LC1600
  LED Board      REV 03   711-181531   EBBZ1667          JNP301 LED Board
PDB              REV 05   711-179324   EBBZ1950          JNP301 PD Board
PEM 0            REV 06   740-053352   1GD1E460897       JPSU-850W-AC-AFO
PEM 1            REV 06   740-053352   1GD1E460342       JPSU-850W-AC-AFO
Fan Tray 0       REV 08   750-184478   EBBY9901          JNP301 Fan Tray, Front to Back Airflow
Fan Tray 1       REV 08   750-184478   EBBZ0003          JNP301 Fan Tray, Front to Back Airflow
Fan Tray 2       REV 08   750-184478   EBBZ0200          JNP301 Fan Tray, Front to Back Airflow
Fan Tray 3       REV 08   750-184478   EBBZ0199          JNP301 Fan Tray, Front to Back Airflow
Fan Tray 4       REV 08   750-184478   EBBY9904          JNP301 Fan Tray, Front to Back Airflow
Fan Tray 5       REV 08   750-184478   EBBZ0120          JNP301 Fan Tray, Front to Back Airflow
Locate the Chassis Serial Number ID Label on MX301
You can find the chassis serial number for the MX301 on a label on the top panel.
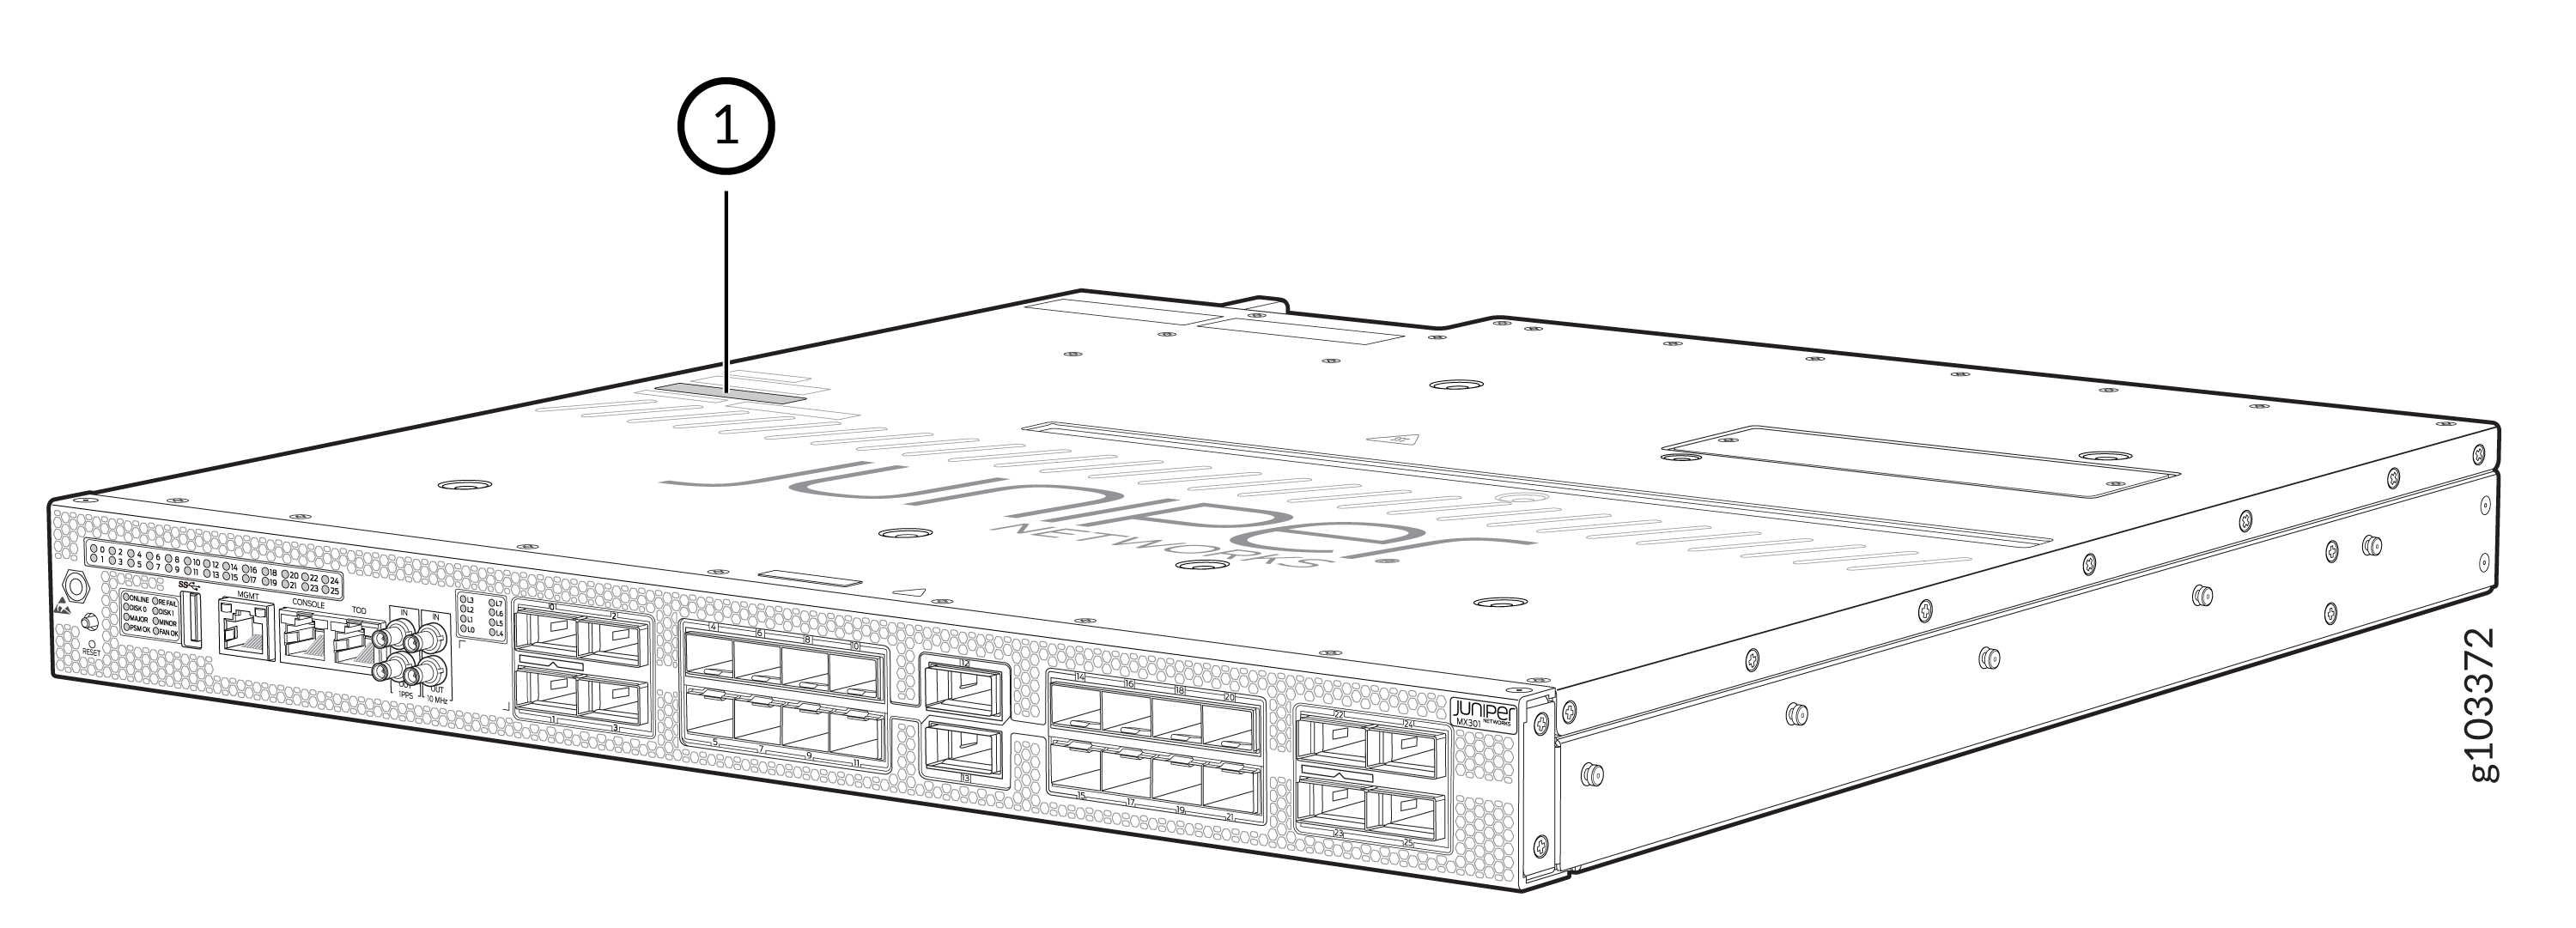
1 — Serial number ID label |
Locate the Serial Number ID Labels on FRUs
The power supplies and fan modules installed in the MX301 are field-replaceable units (FRUs). You must remove a FRU from the router chassis to see the FRU serial number ID label.
-
Power supplies—The serial number ID label is located on top of the AC, DC, and HVAC/DC power supplies for the MX301.
Figure 2: Serial Number ID Label on MX301 AC PSU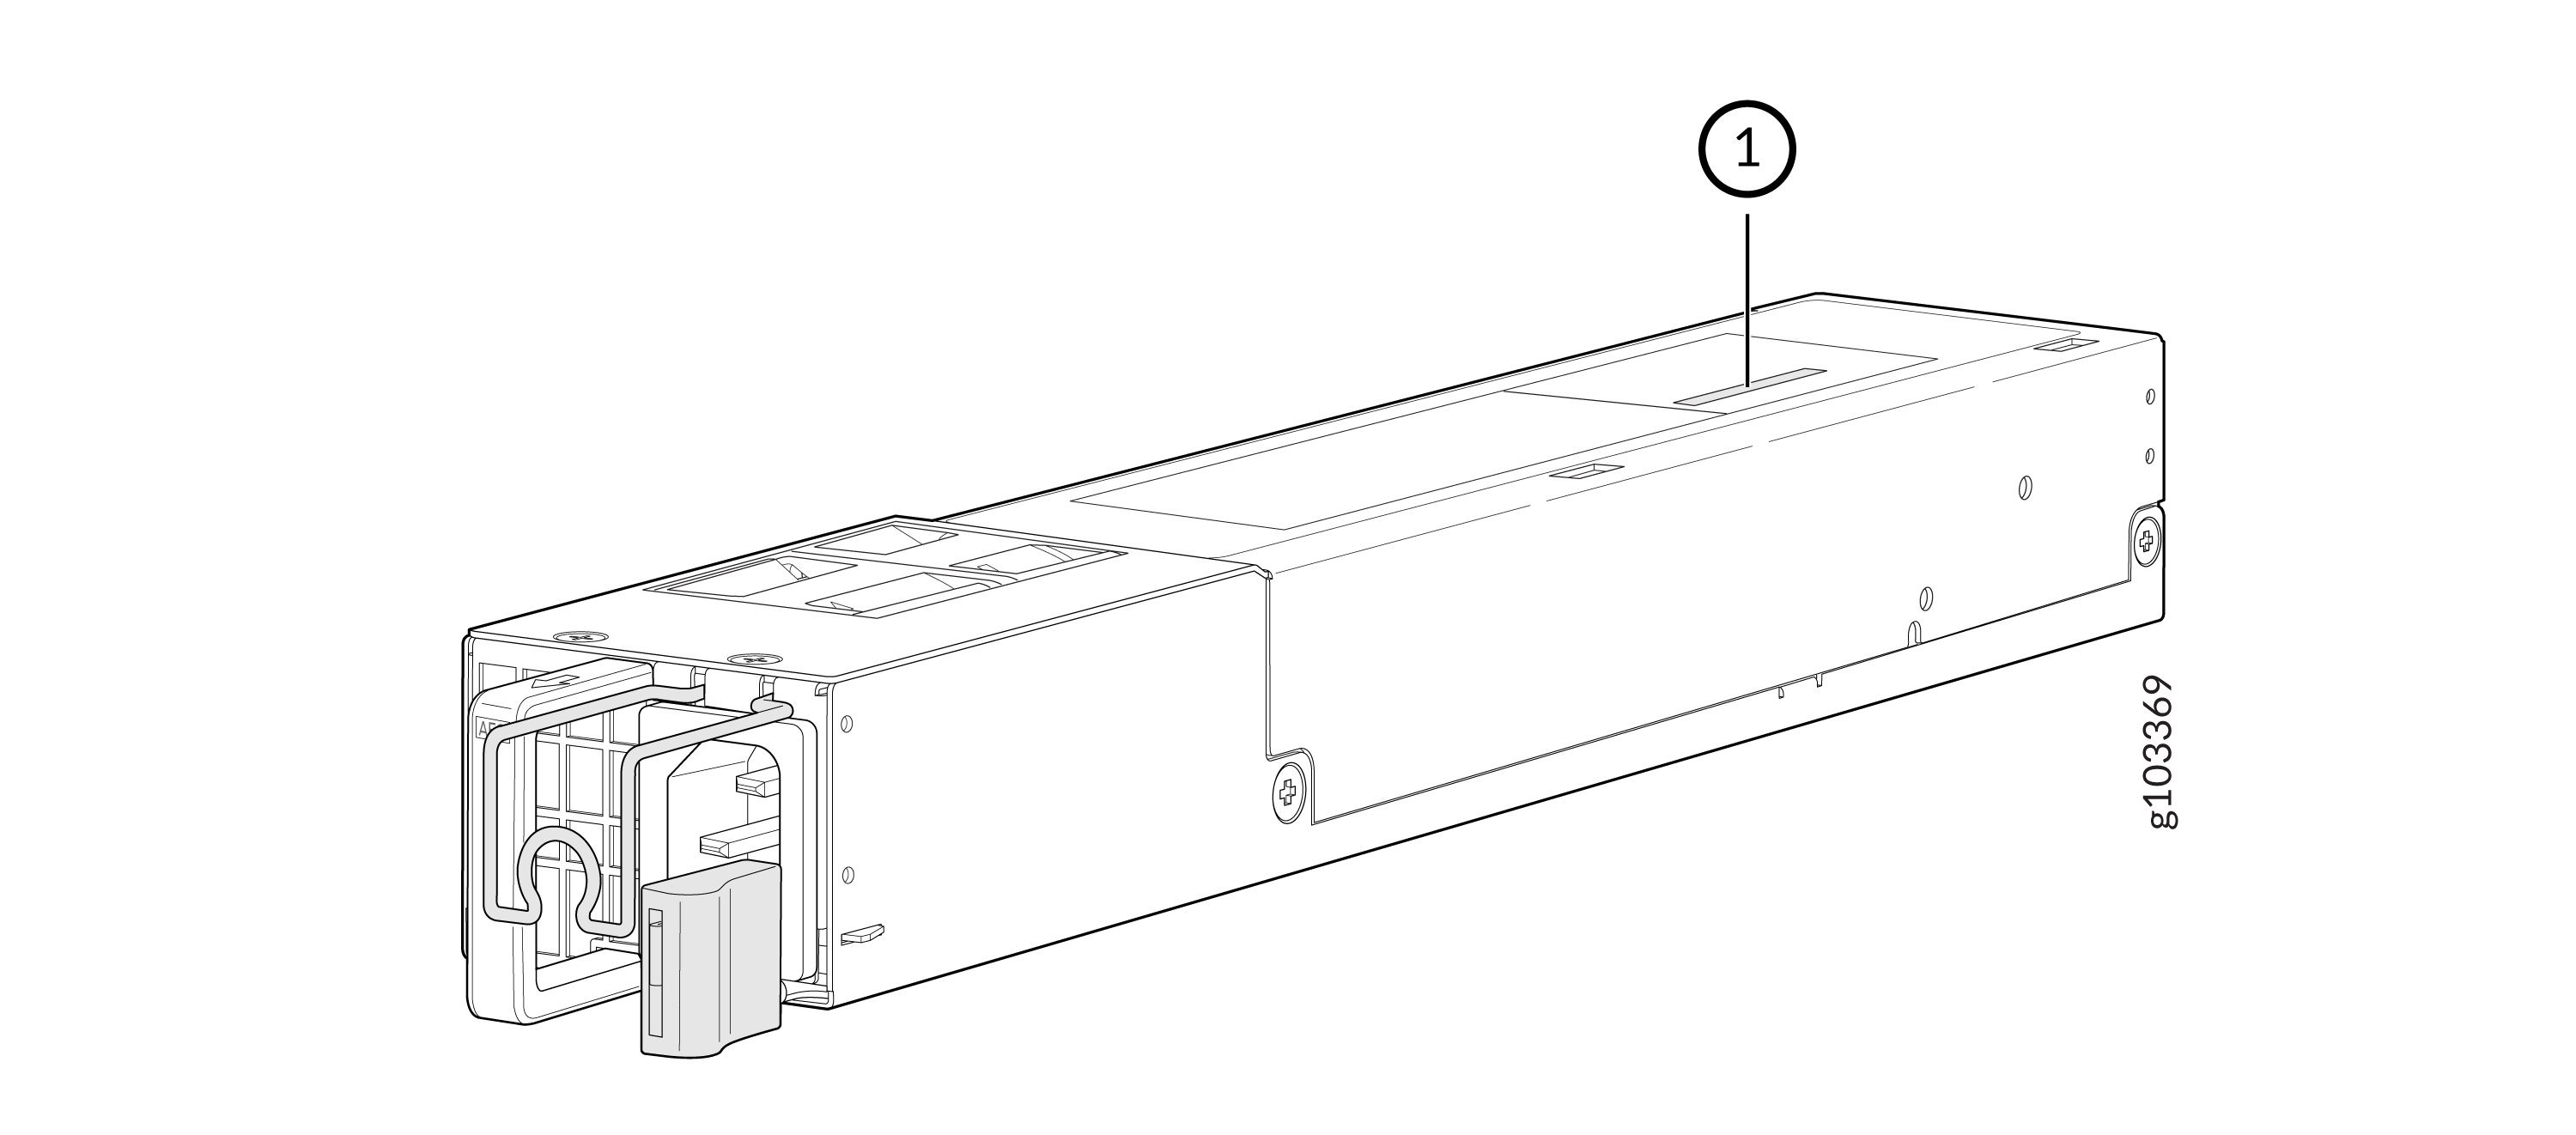 1—
1—Serial number ID label
Figure 3: Serial Number ID Label on MX301 DC PSU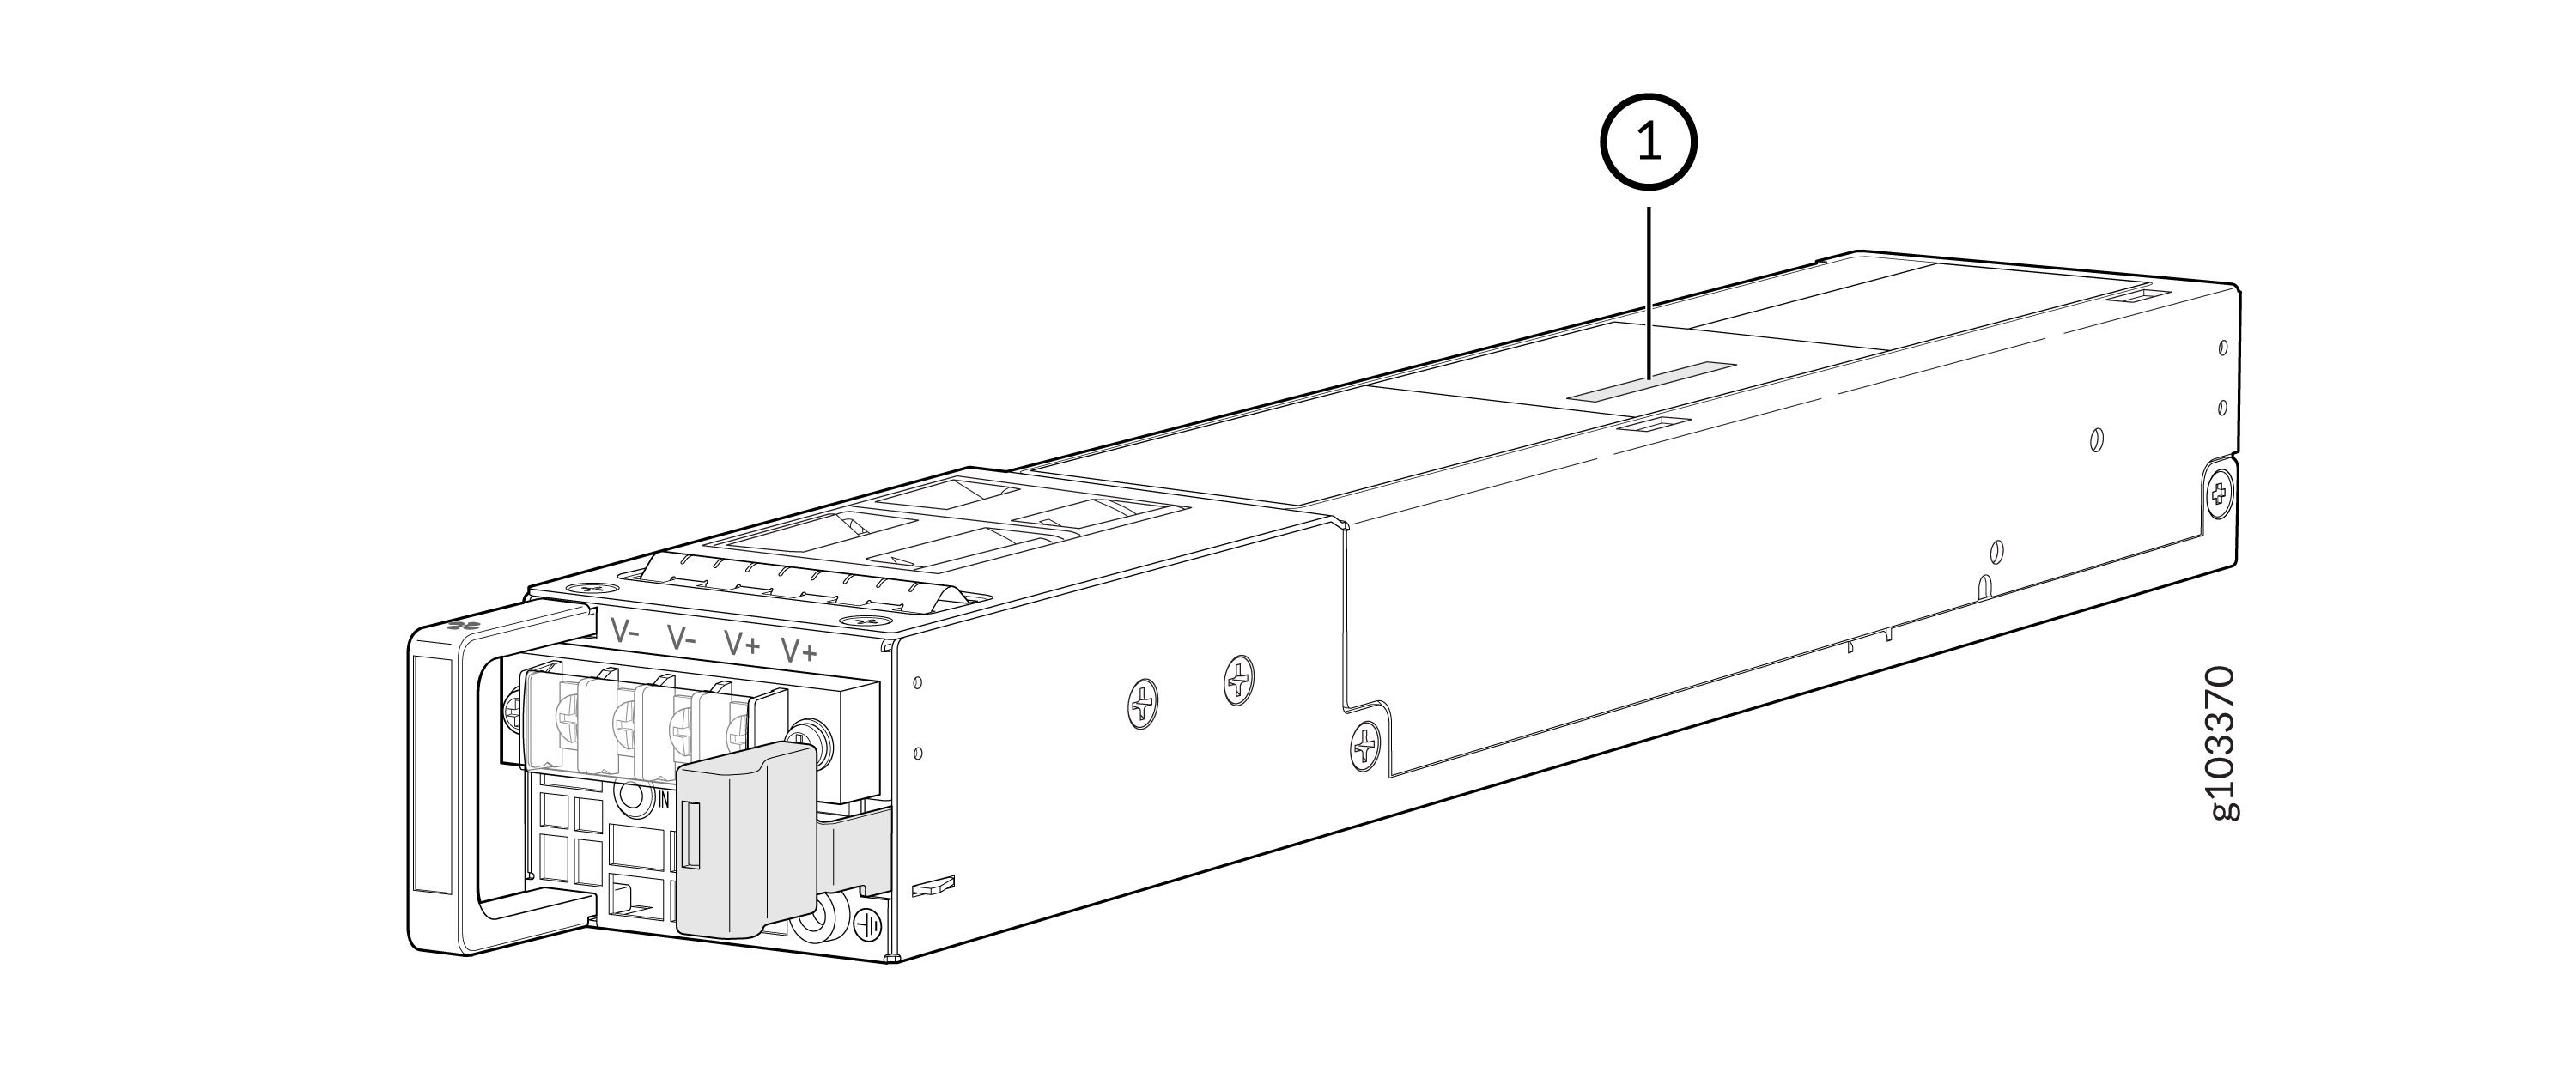 1—
1—Serial number ID label
Figure 4: Serial Number ID Label on MX301 HVAC/DC PSU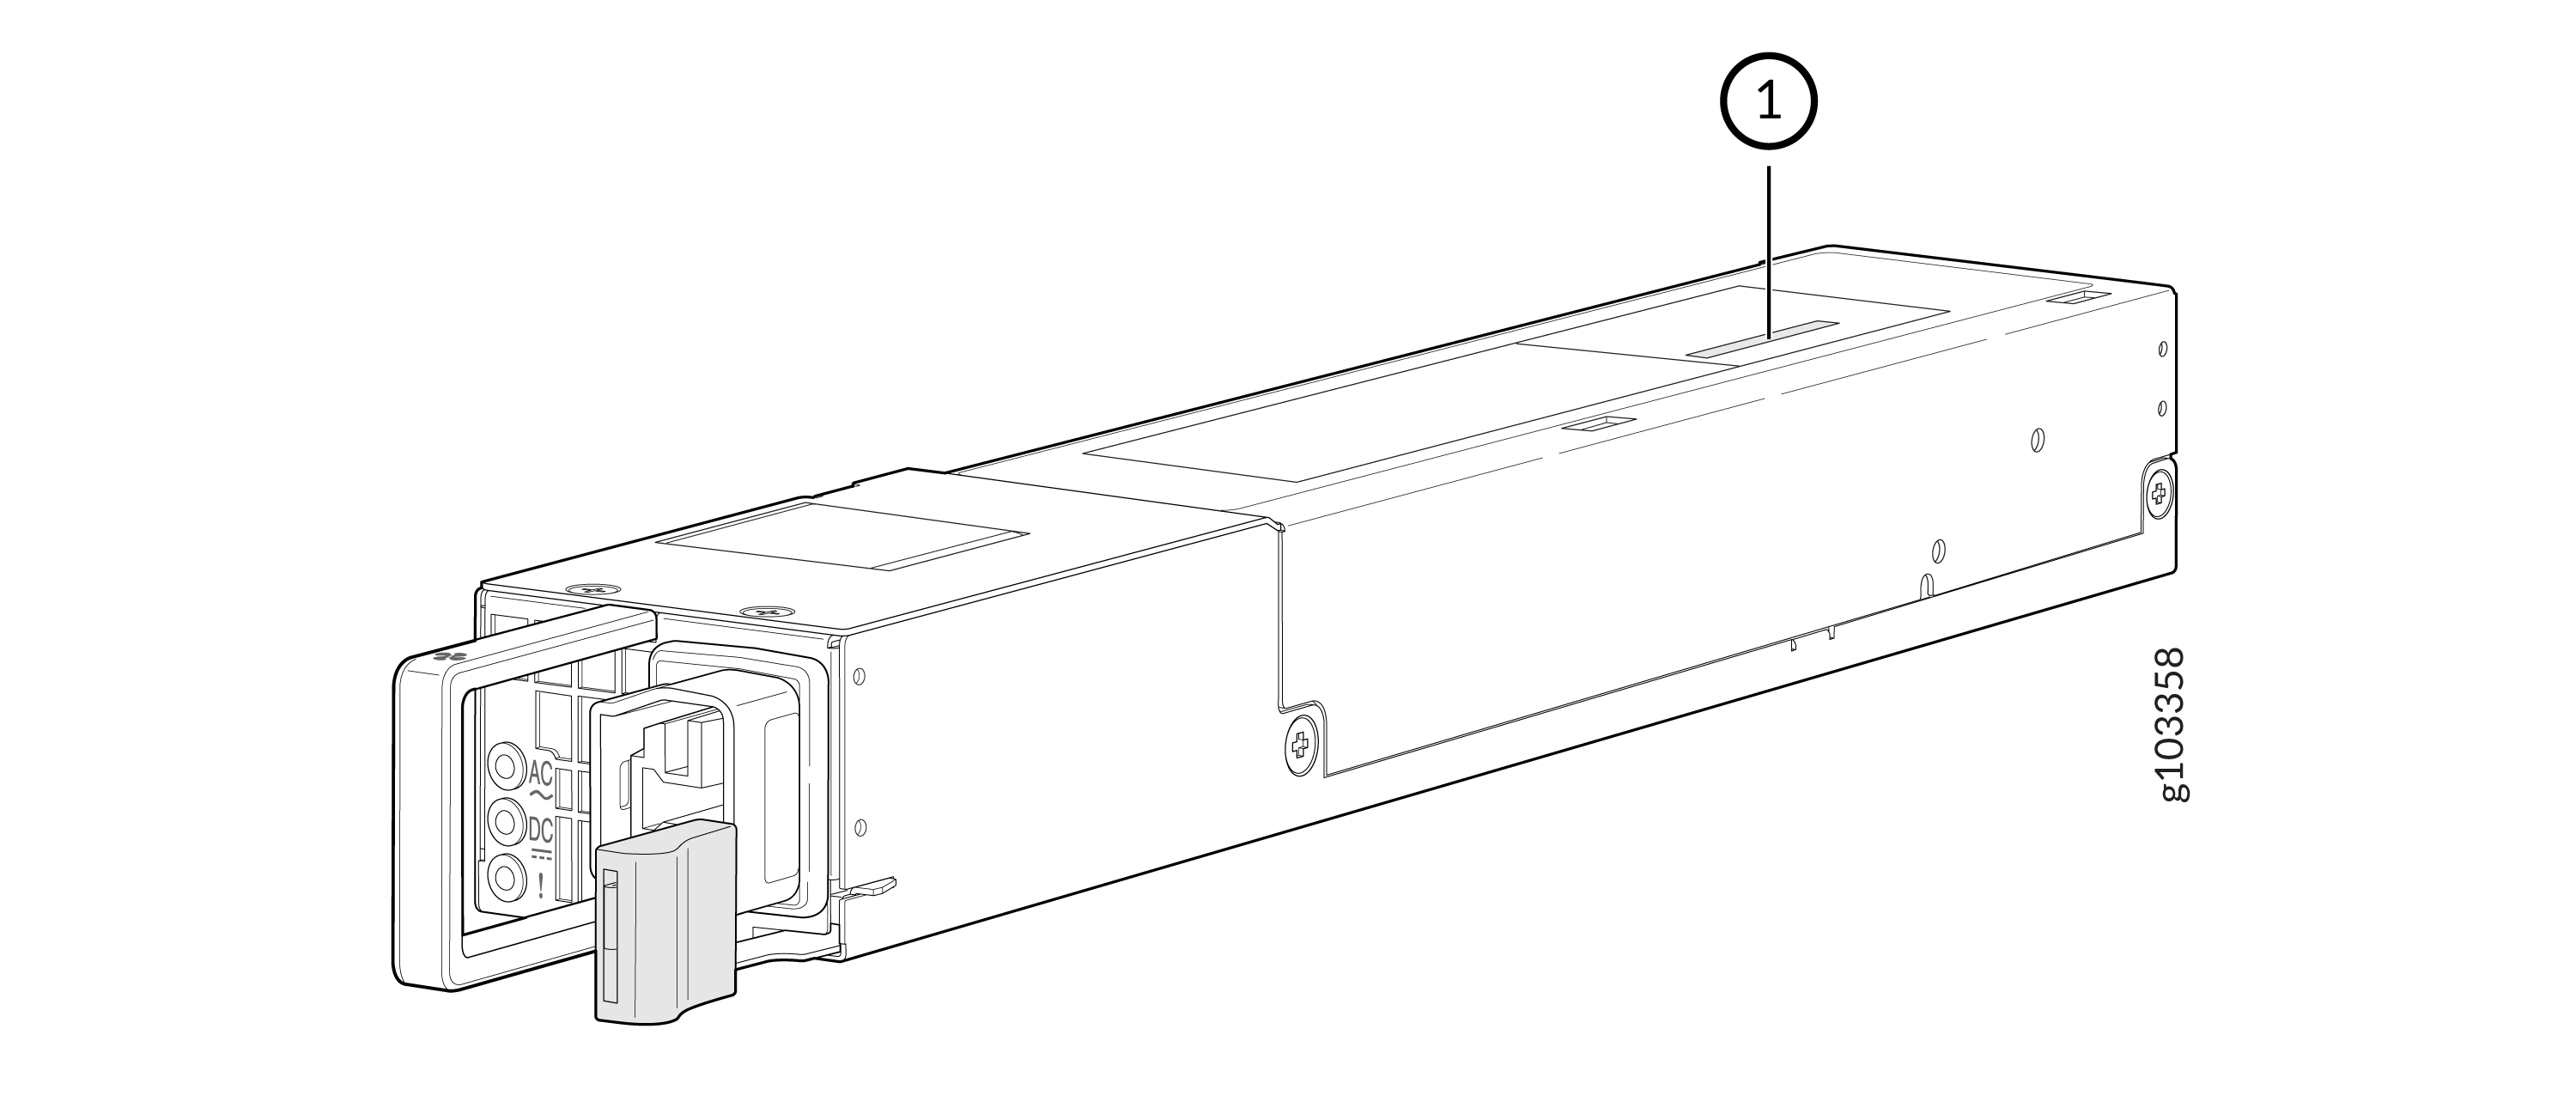 1—
1—Serial number ID label
-
Fan module—The serial number ID label is located on top of the fan module for an MX301.
Figure 5: Serial Number ID Label on MX301 Fan Module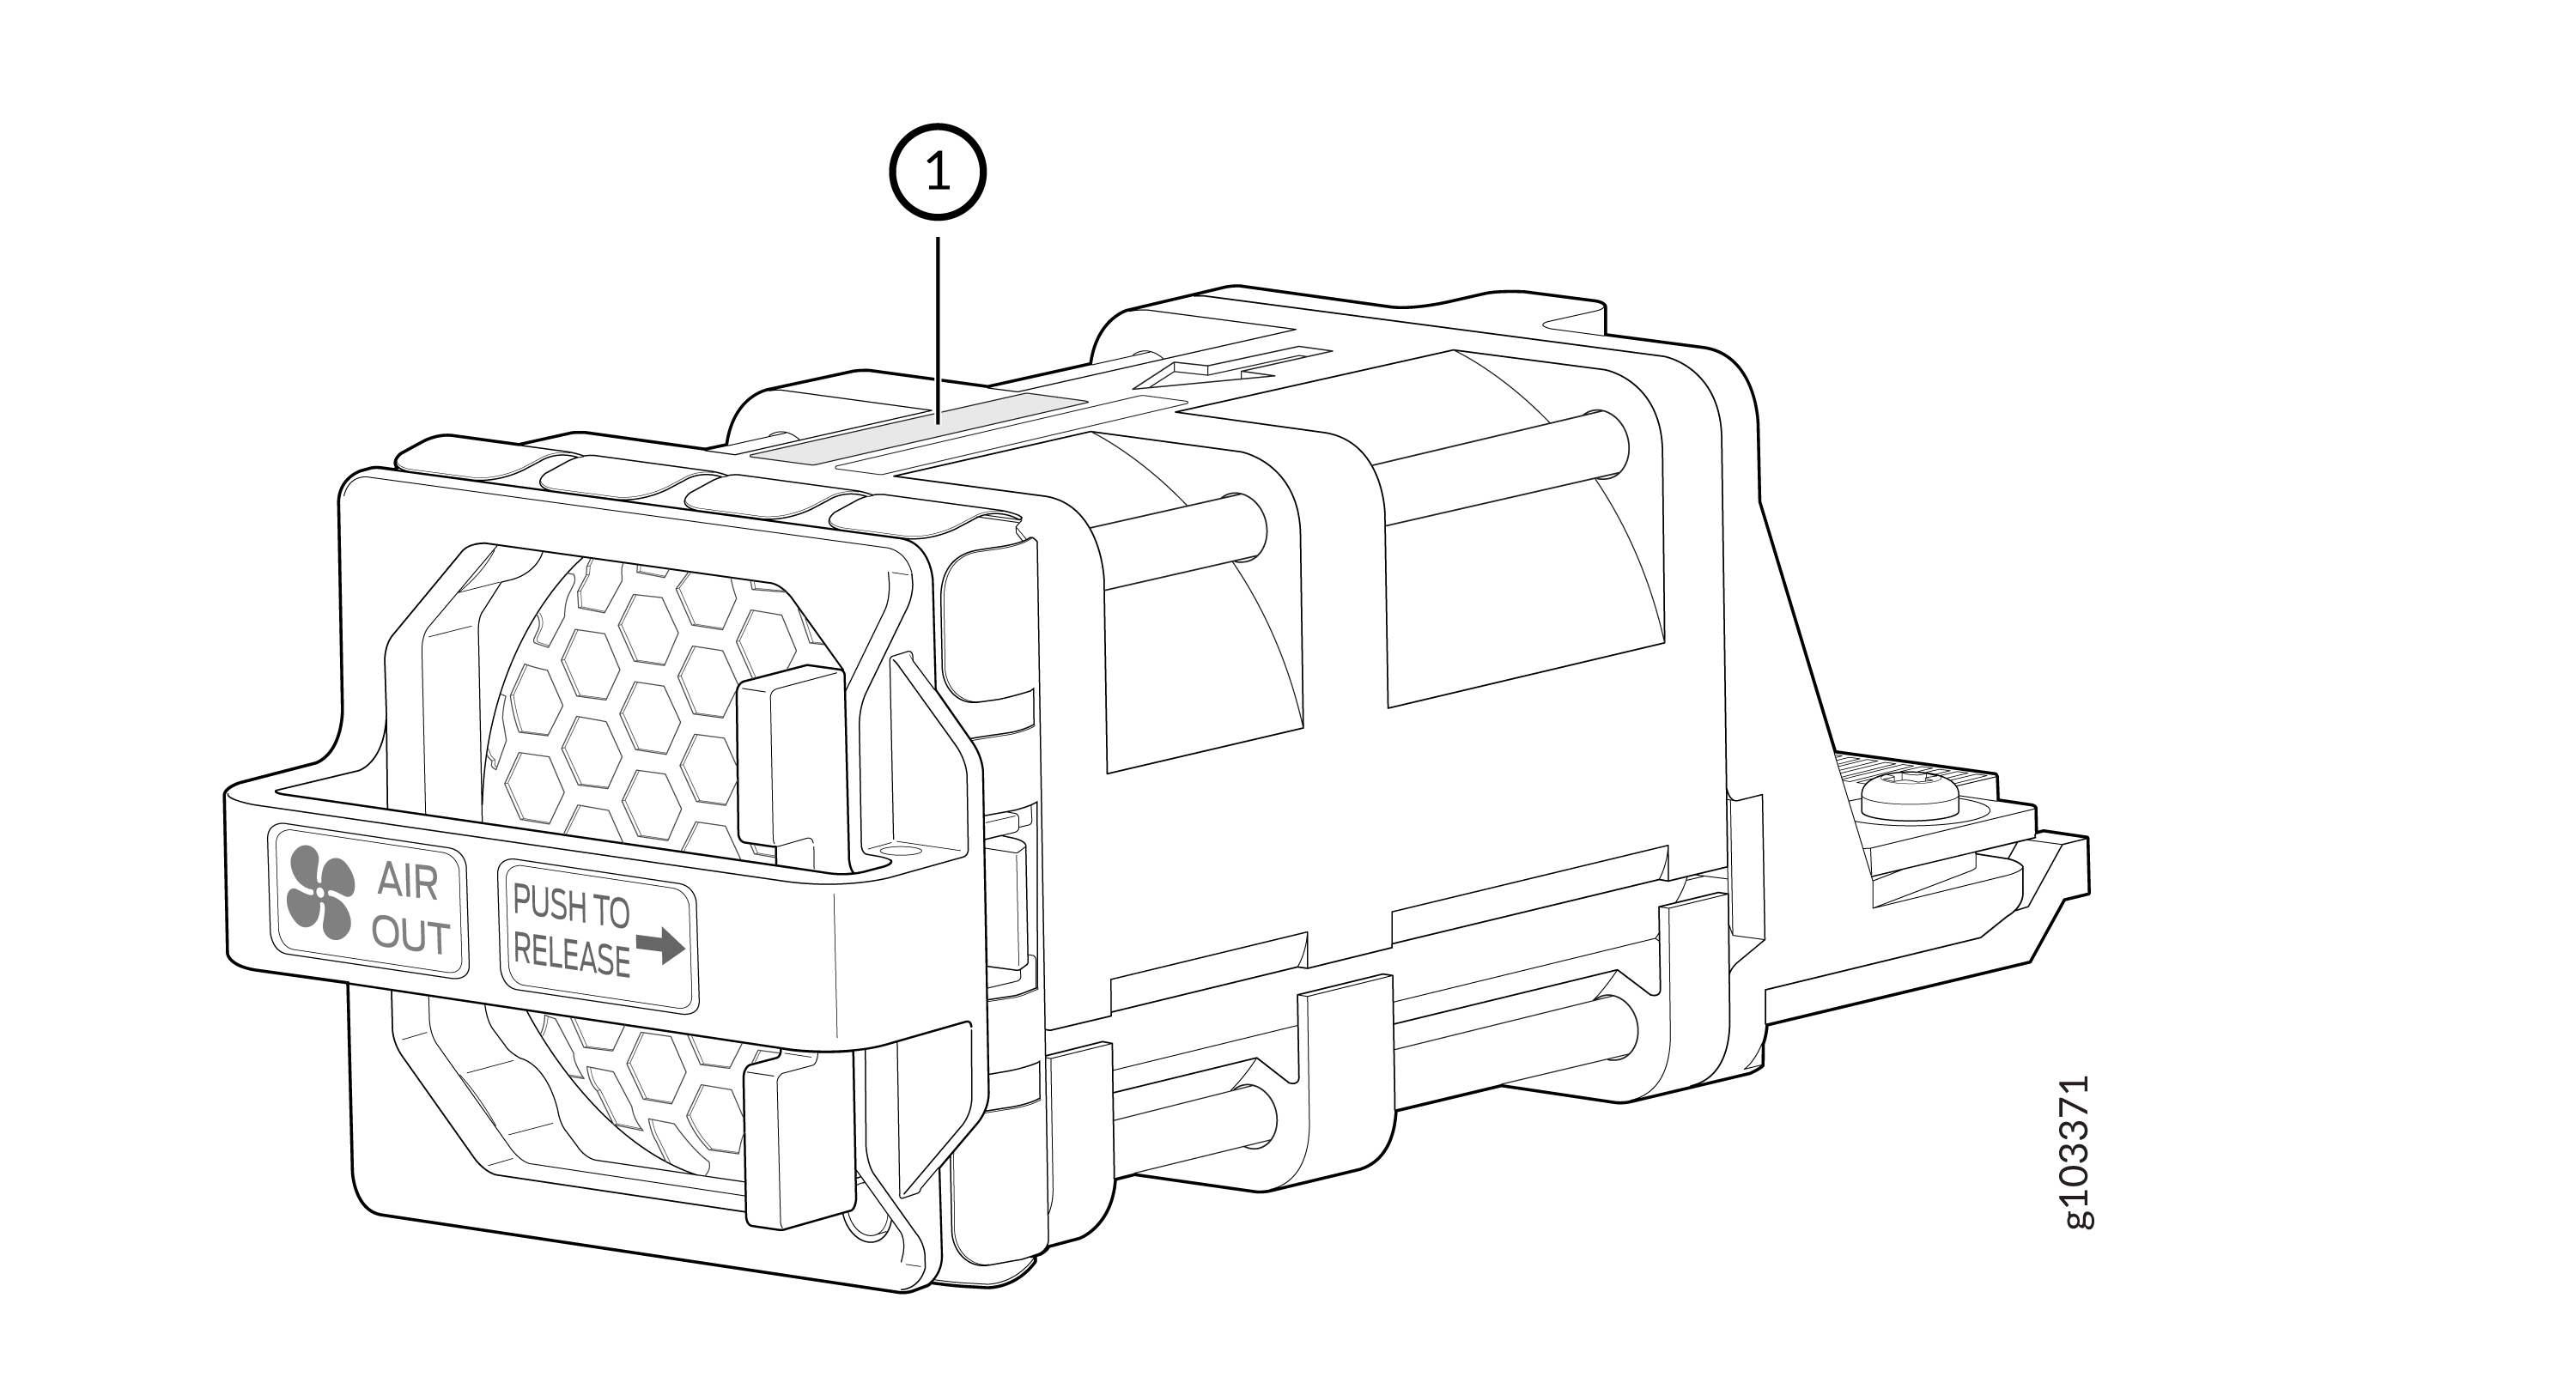 1—
1—Serial number ID label
Remove the Solid State Drives for RMA on the MX301
The MX301 Router has two solid-state drives (SSDs) stacked on top of each other that store the software images, system logs, and the configuration files. Before returning a chassis to Juniper Networks as part of a Return Material Authorization (RMA), you have the option to remove the SSDs and secure or dispose them according to your own company’s security policies.
Before you begin this procedure, ensure you have a Philips (+) screwdriver, number 2.
Use this optional procedure to remove the SSDs from the MX301 Router after the device has shut down and you’ve removed it from the rack. The single SSD door is located on top of the device.
-
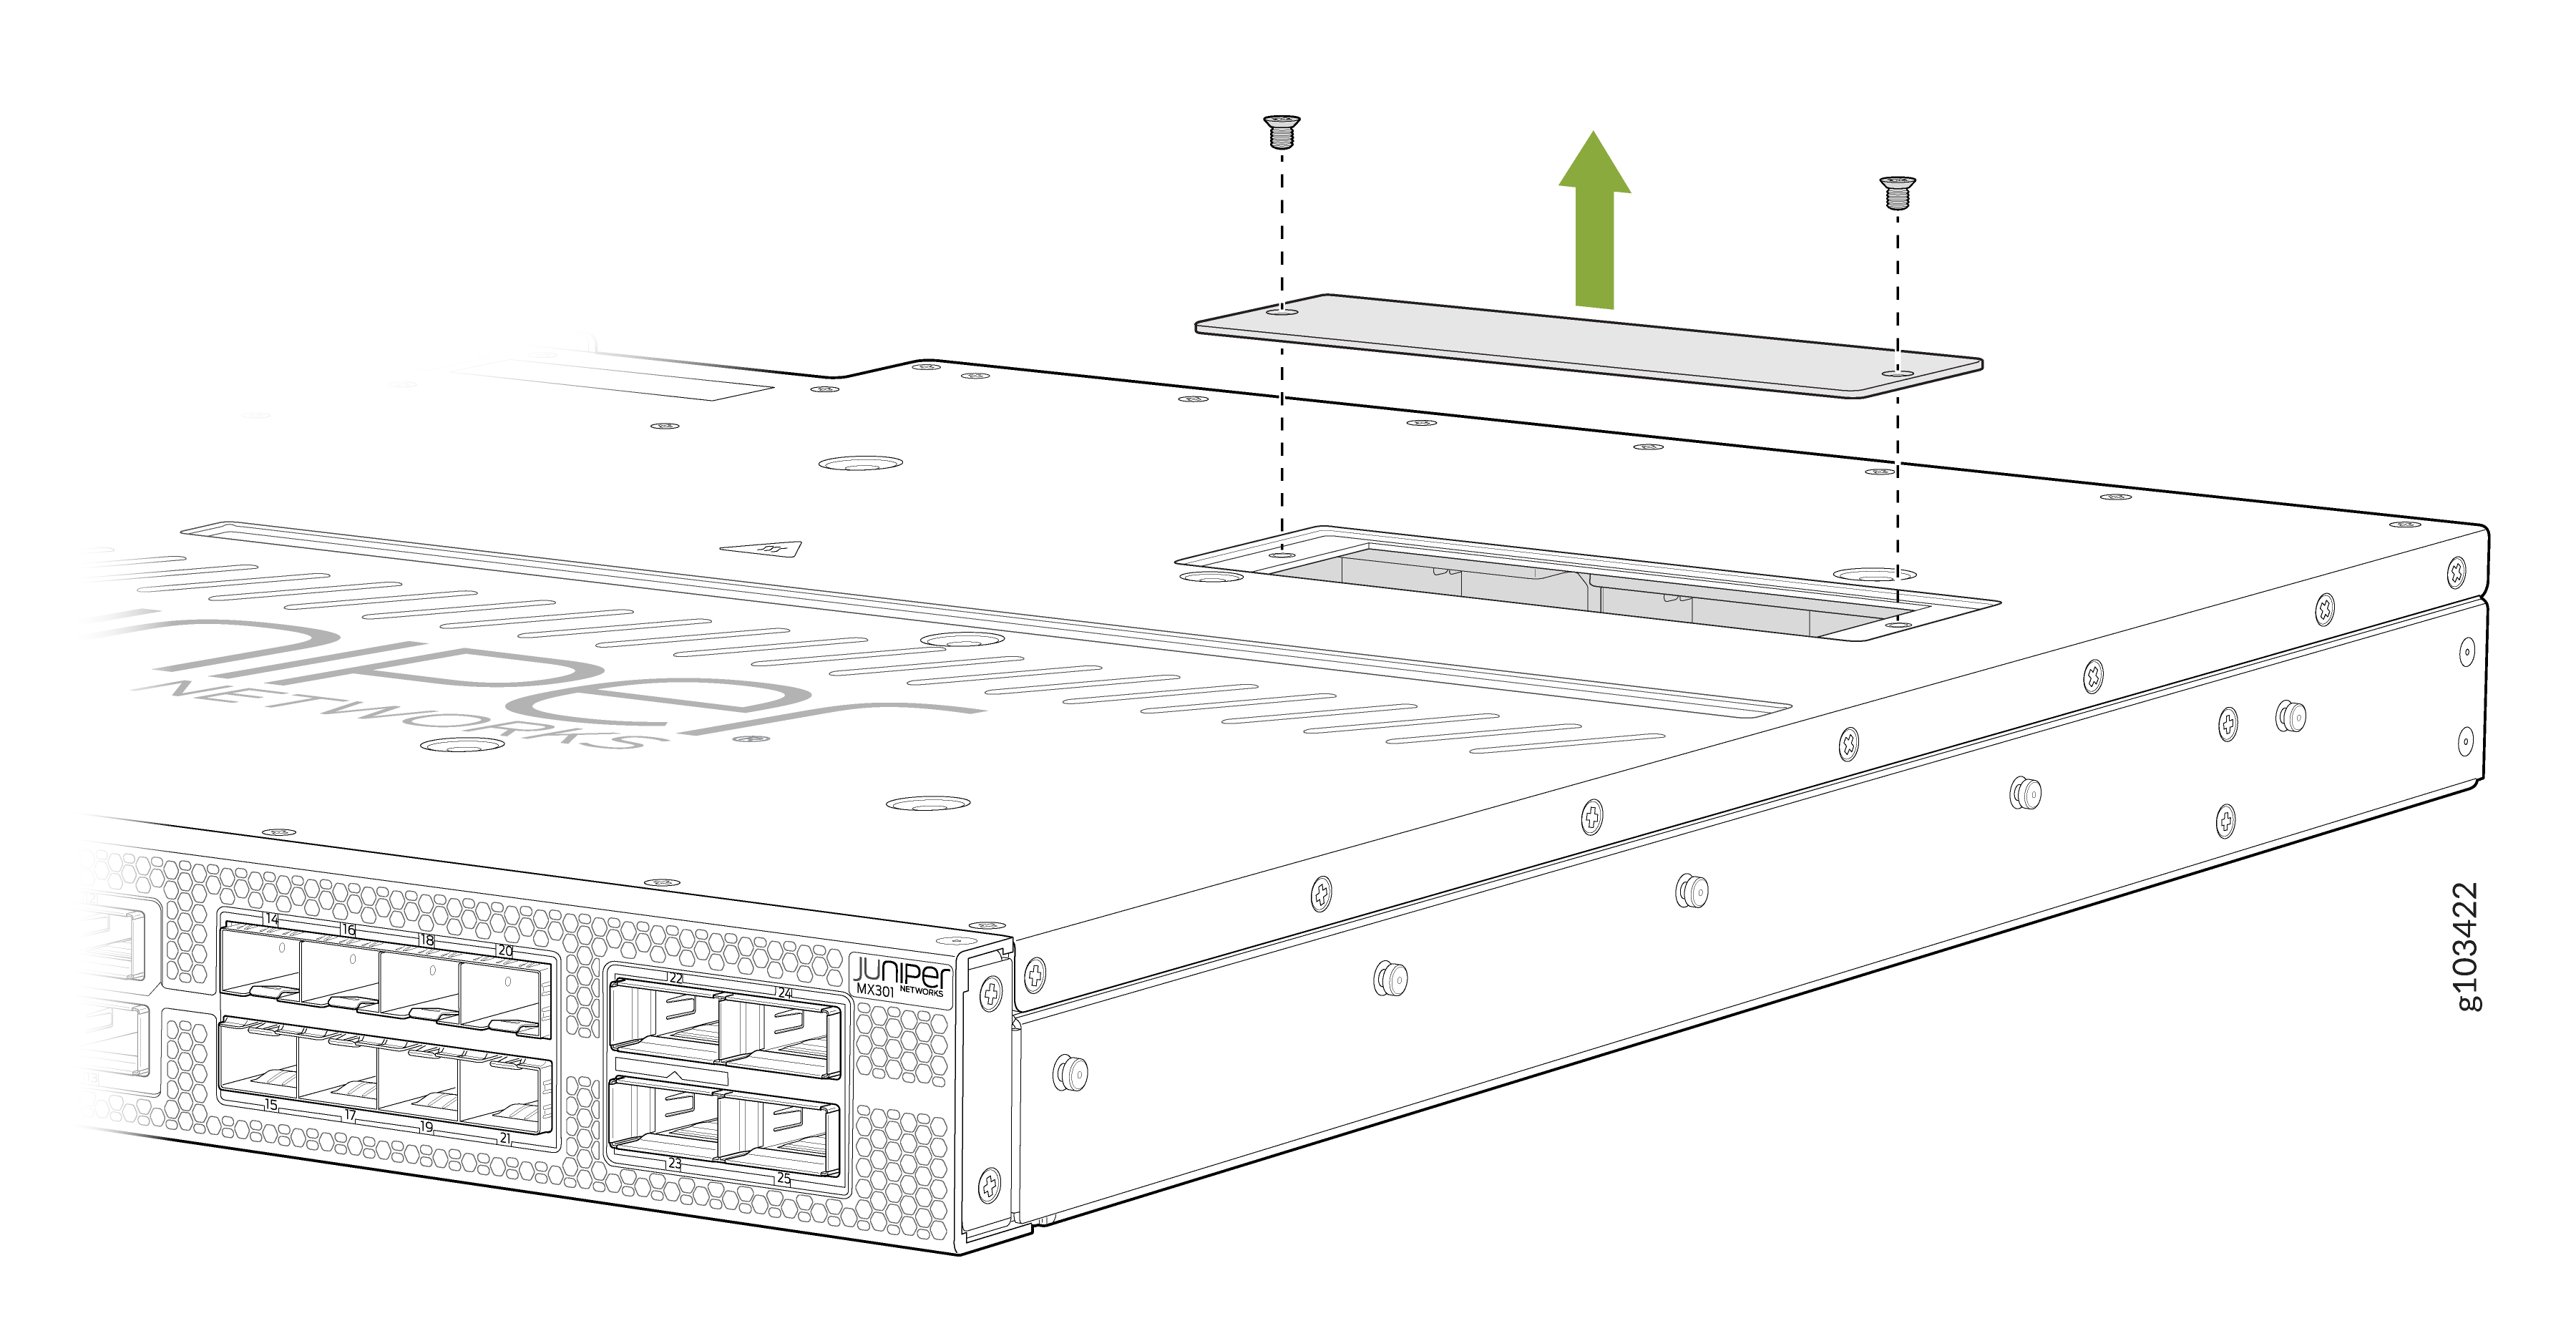
Use the Philips screwdriver to remove the two flat-head screws from the SSD door on top
of the device. Set the screws aside in a safe place.
Figure 6: Remove Screws from SSD Door on MX301
-
Remove the top SSD using the following procedure:
-
Lift the top SSD at the end that is furthest from the connector and remove from the
cavity.
Figure 7: Remove the Screw and Lift the Top SSD Out of MX301
 1—
1—Remove the screw
2—Lift the top SSD
-
Lift the top SSD at the end that is furthest from the connector and remove from the
cavity.
-
Remove the bottom SSD using the following procedure:
-
Lift the bottom SSD at the end that is furthest from the connector and remove from
the cavity.
Figure 8: Remove the Standoff Screw and Lift the Bottom SSD Out of MX301
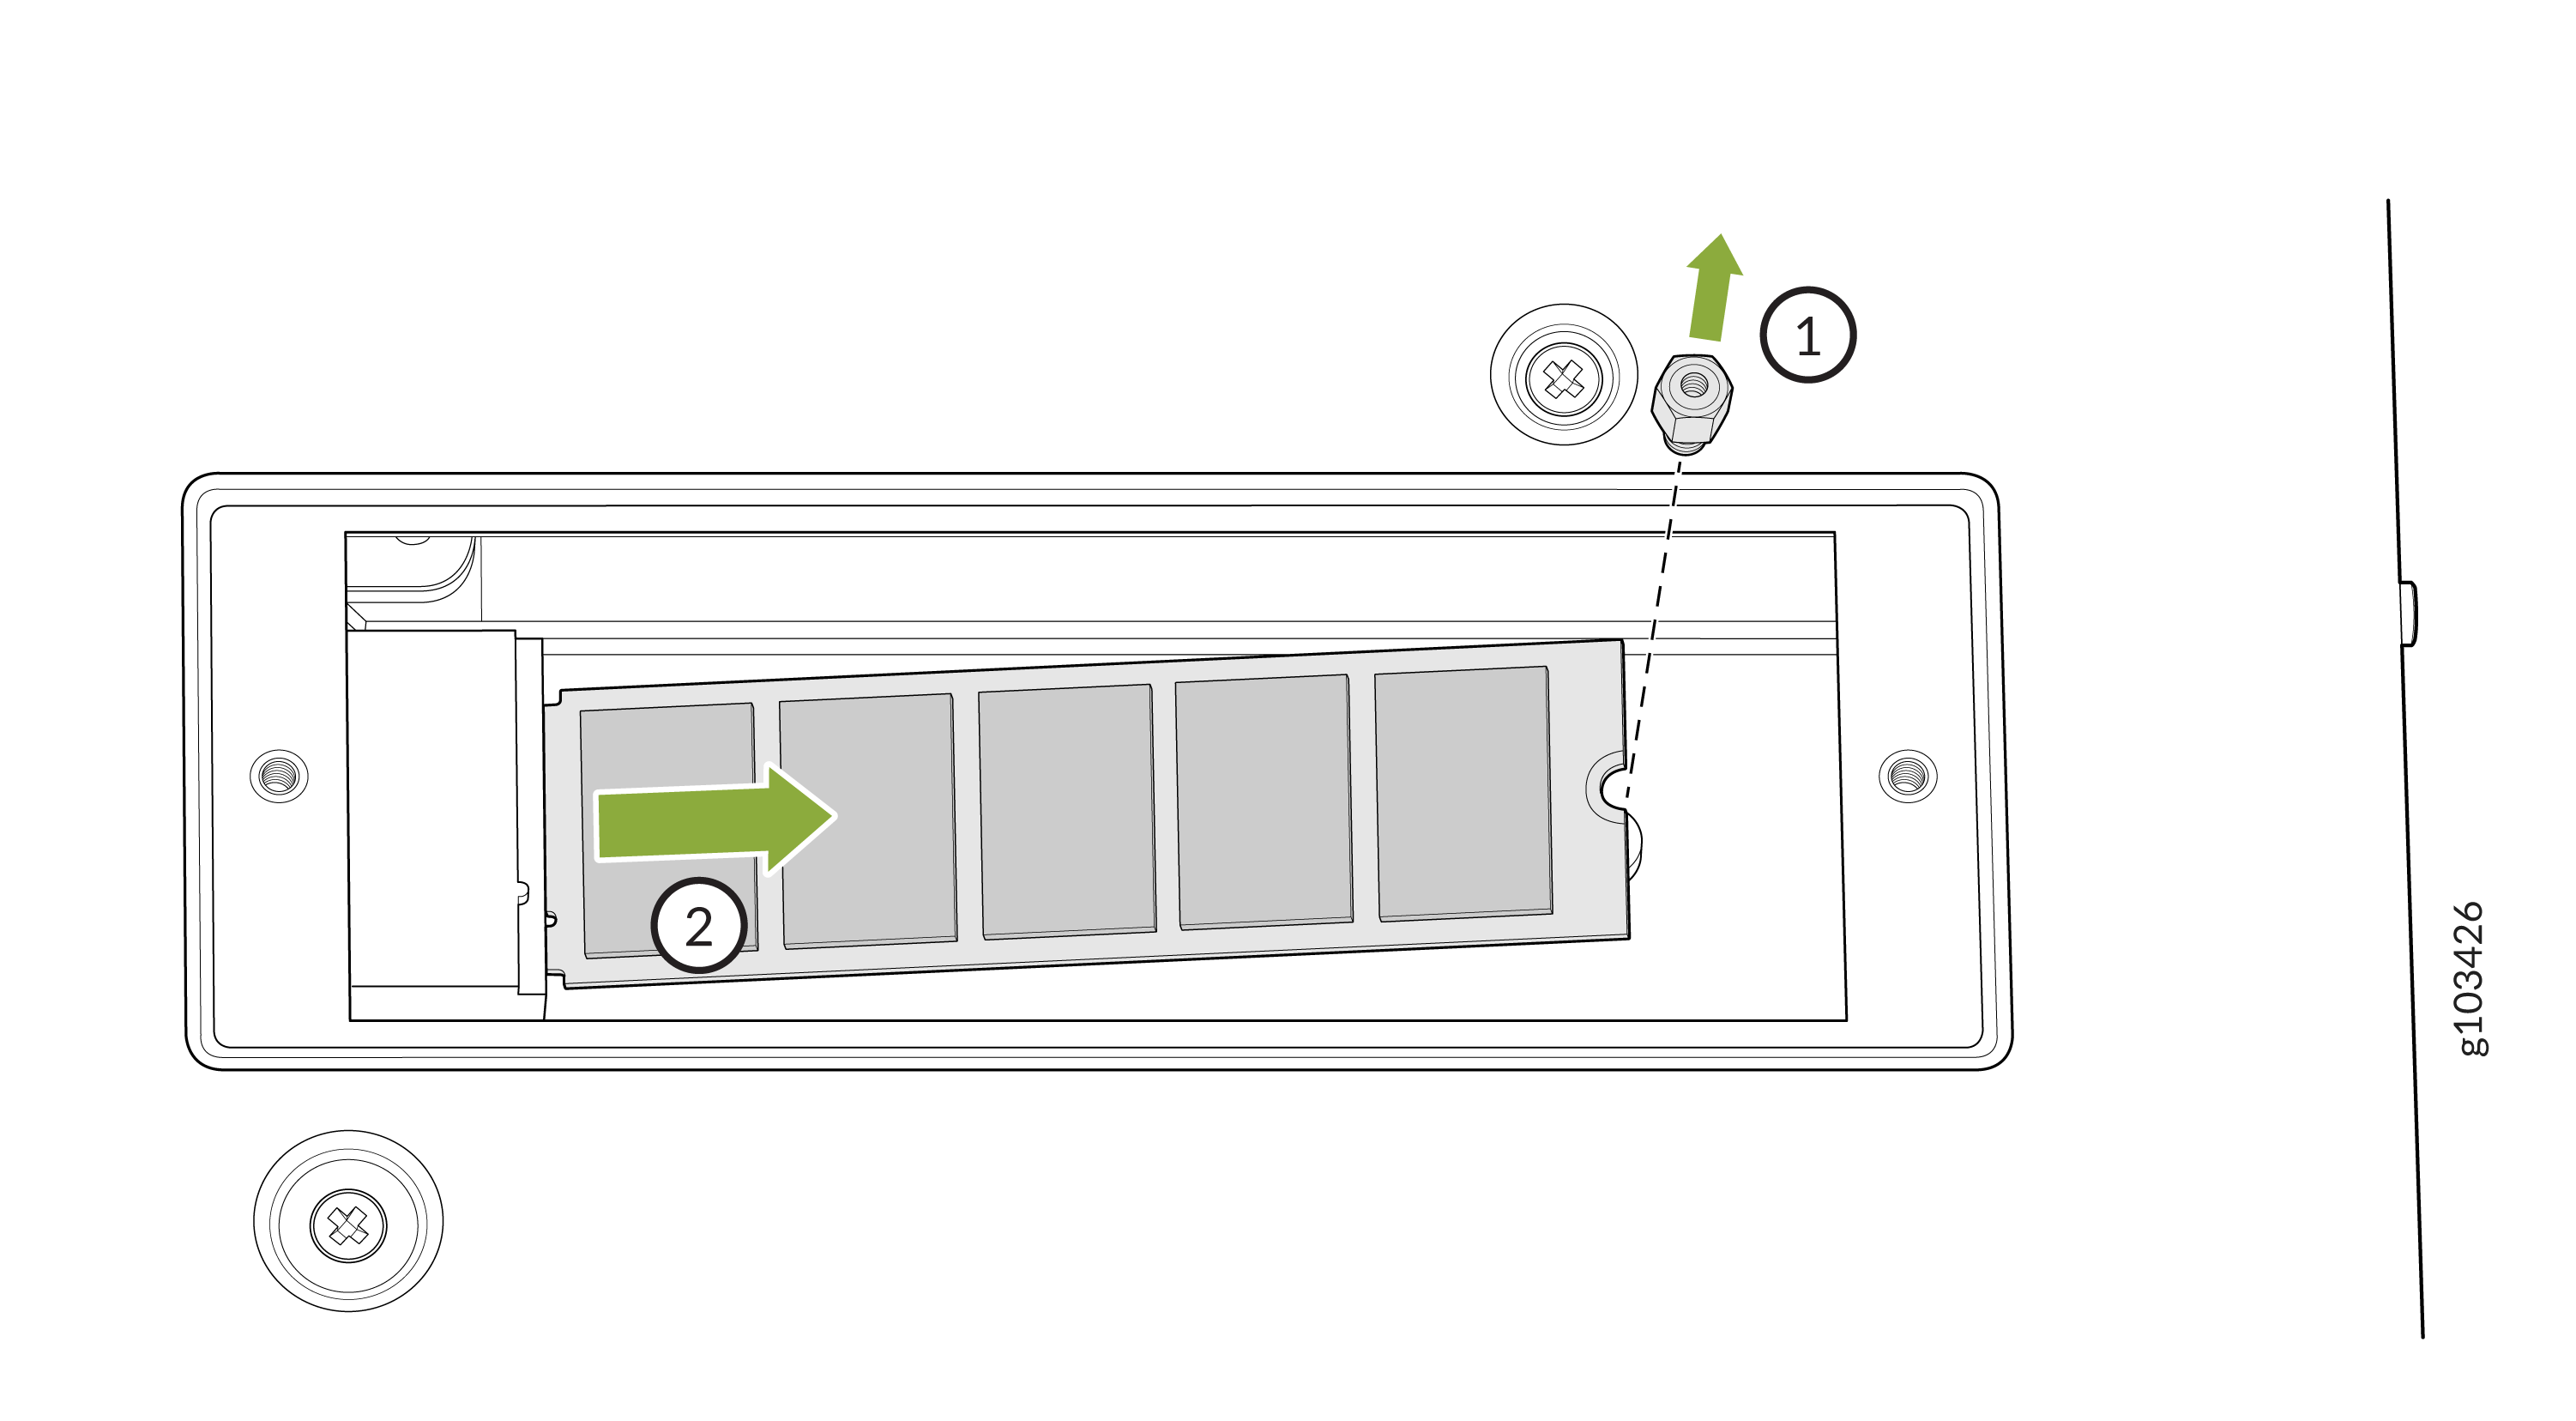 1—
1—Remove the standoff screw
2—Lift the bottom SSD
-
Lift the bottom SSD at the end that is furthest from the connector and remove from
the cavity.
-
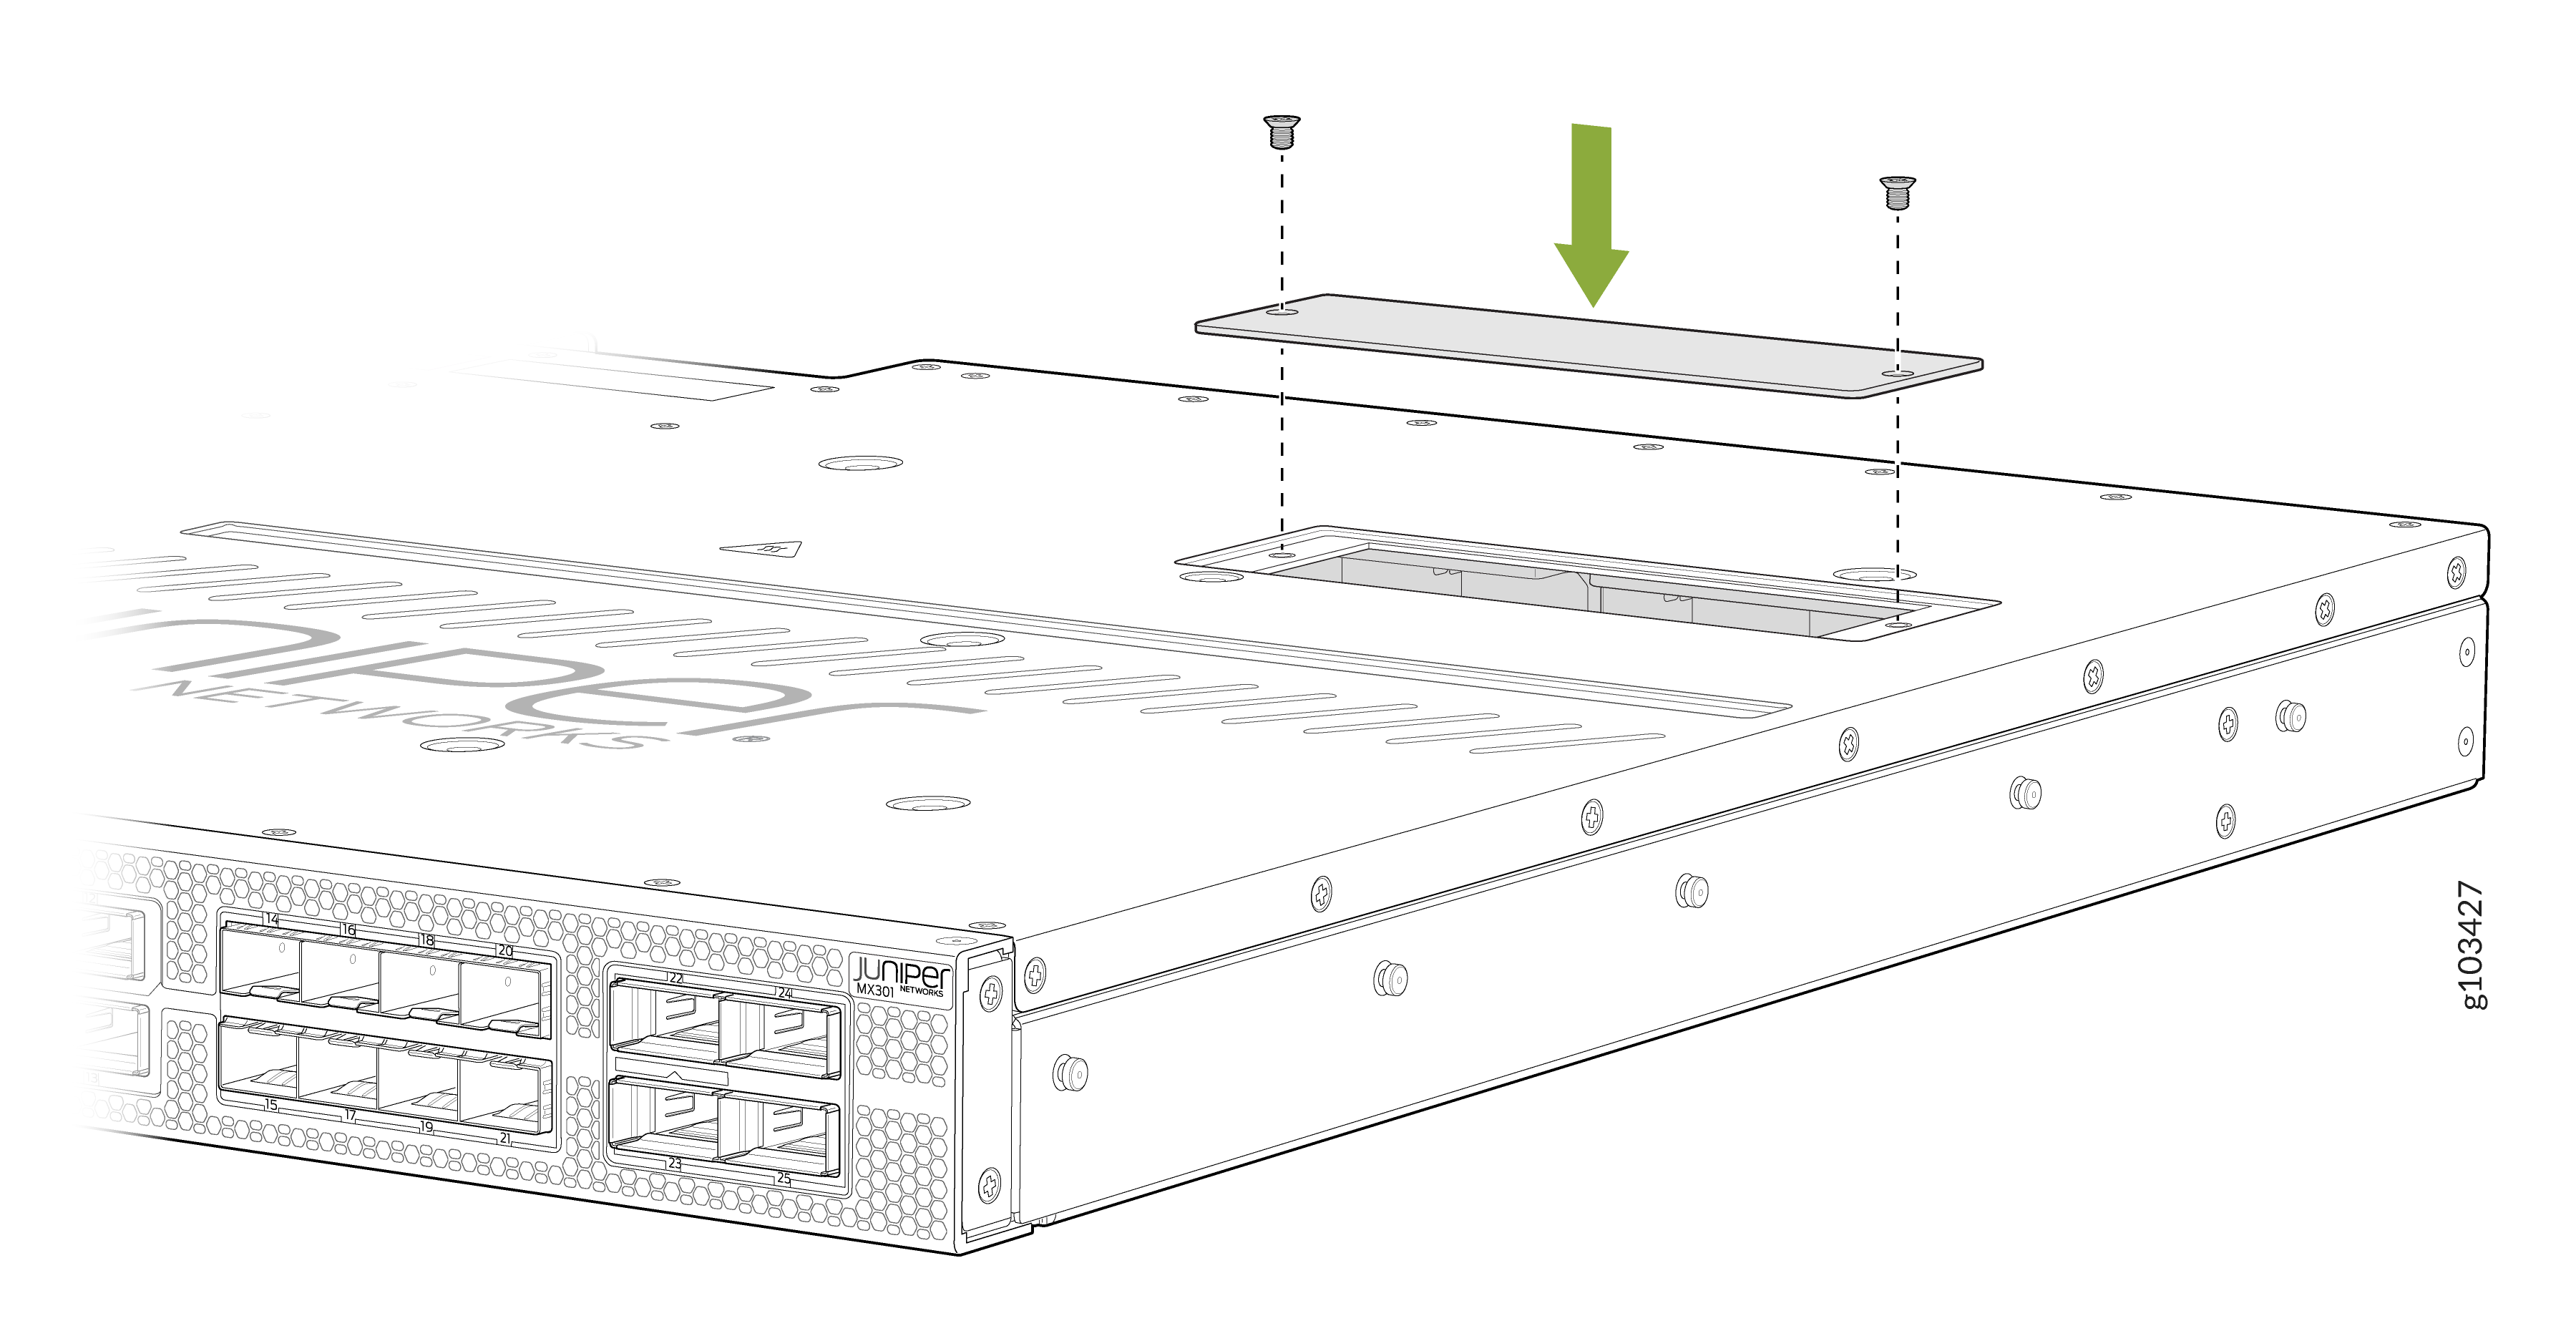
Tighten the two flat-head screws using the Philips screwdriver.
Figure 9: Replace the Screws on the SSD Door on MX301
Request a Return Material Authorization
If you are returning a device or hardware component to Juniper Networks for repair or replacement, obtain an RMA number from JTAC.
Before you request an RMA from JTAC, be prepared to provide the following information:
-
Your existing service request number, if you have one
-
Serial number of the device or component
-
Your name, organization name, telephone number, fax number, and shipping address
-
Details of the failure or problem
-
Type of activity you were performing on the device when the problem occurred
-
Configuration data displayed by one or more
showcommands
If you're contacting JTAC by telephone:
-
To report a new incident, press the star (*) key to be routed to the next available support engineer.
-
To enquire about an existing case, enter your 12-digit service request number followed by the pound (#) key.
The support representative validates your request and issues an RMA number for return of the device or component.
Guidelines for Packing and Shipping Hardware Components
To pack and ship individual components:
- When you return the chassis or components, make sure to adequately protect them with packing materials. Pack them properly to prevent the pieces from moving around the carton.
- Use the original shipping materials, if they are available.
- Place the individual components in antistatic bags.
- Write the RMA number on the exterior of the box to ensure proper tracking.