Installing the MX2020 Mounting Hardware for a Four-Post Rack or Cabinet
Installing Cage Nuts, If Needed
Insert cage nuts, if needed, into the holes listed in Table 1 and Table 2. The hole distances are relative to the standard U division on the rack that is aligned with the bottom of the mounting shelf.
To install cage nuts in a four-post rack:
- On the rear side of both rack rails, insert cage nuts in the holes specified for the four-post mounting shelf. Install the cage nuts in the front of the front rail (see Table 1).
- On the front side of both rack rails, insert cage nuts in the holes specified for mounting the chassis. Install the cage nuts in the front of the front rail (see Table 2).
Hole |
Distance Above U Division |
|---|---|
6 |
3.25 in. (8.3 cm) |
5 |
2.63 in. (6.7 cm) |
4 |
2.00 in. (5.1 cm) |
3 |
1.50 in. (3.8 cm) |
2 |
0.88 in. (2.2 cm) |
1 |
0.25 in. (0.6 cm) |
Hole |
Distance Above U Division |
|---|---|
111 |
64.5 in. (163.8 cm) |
102 |
59.25 in (150.5 cm) |
93 |
54 in (127.2 cm) |
84 |
48.75 in (123.8 cm) |
75 |
43.5 in (110.5 cm) |
66 |
38.25 in (97.15 cm) |
57 |
33 in (83.8 cm) |
48 |
27.75 in (70.5 cm) |
39 |
22.5 in. (57.1 cm) |
30 |
17.25 in. (43.8 cm) |
25 |
14.25 in (36.2 cm) |
12 |
6.75 in. (17.1cm) |
7 |
3.75 in (9.5 cm) |
The holes in the front-mounting flanges are space at 3 U (5.25 in. (13.3 cm)).
See Also
Installing the Four-Post Mounting Shelf
To install the four-post mounting shelf (see Figure 1):
-
Tighten all the screws completely.
Figure 1: Installing a Four-Post Mounting Shelf
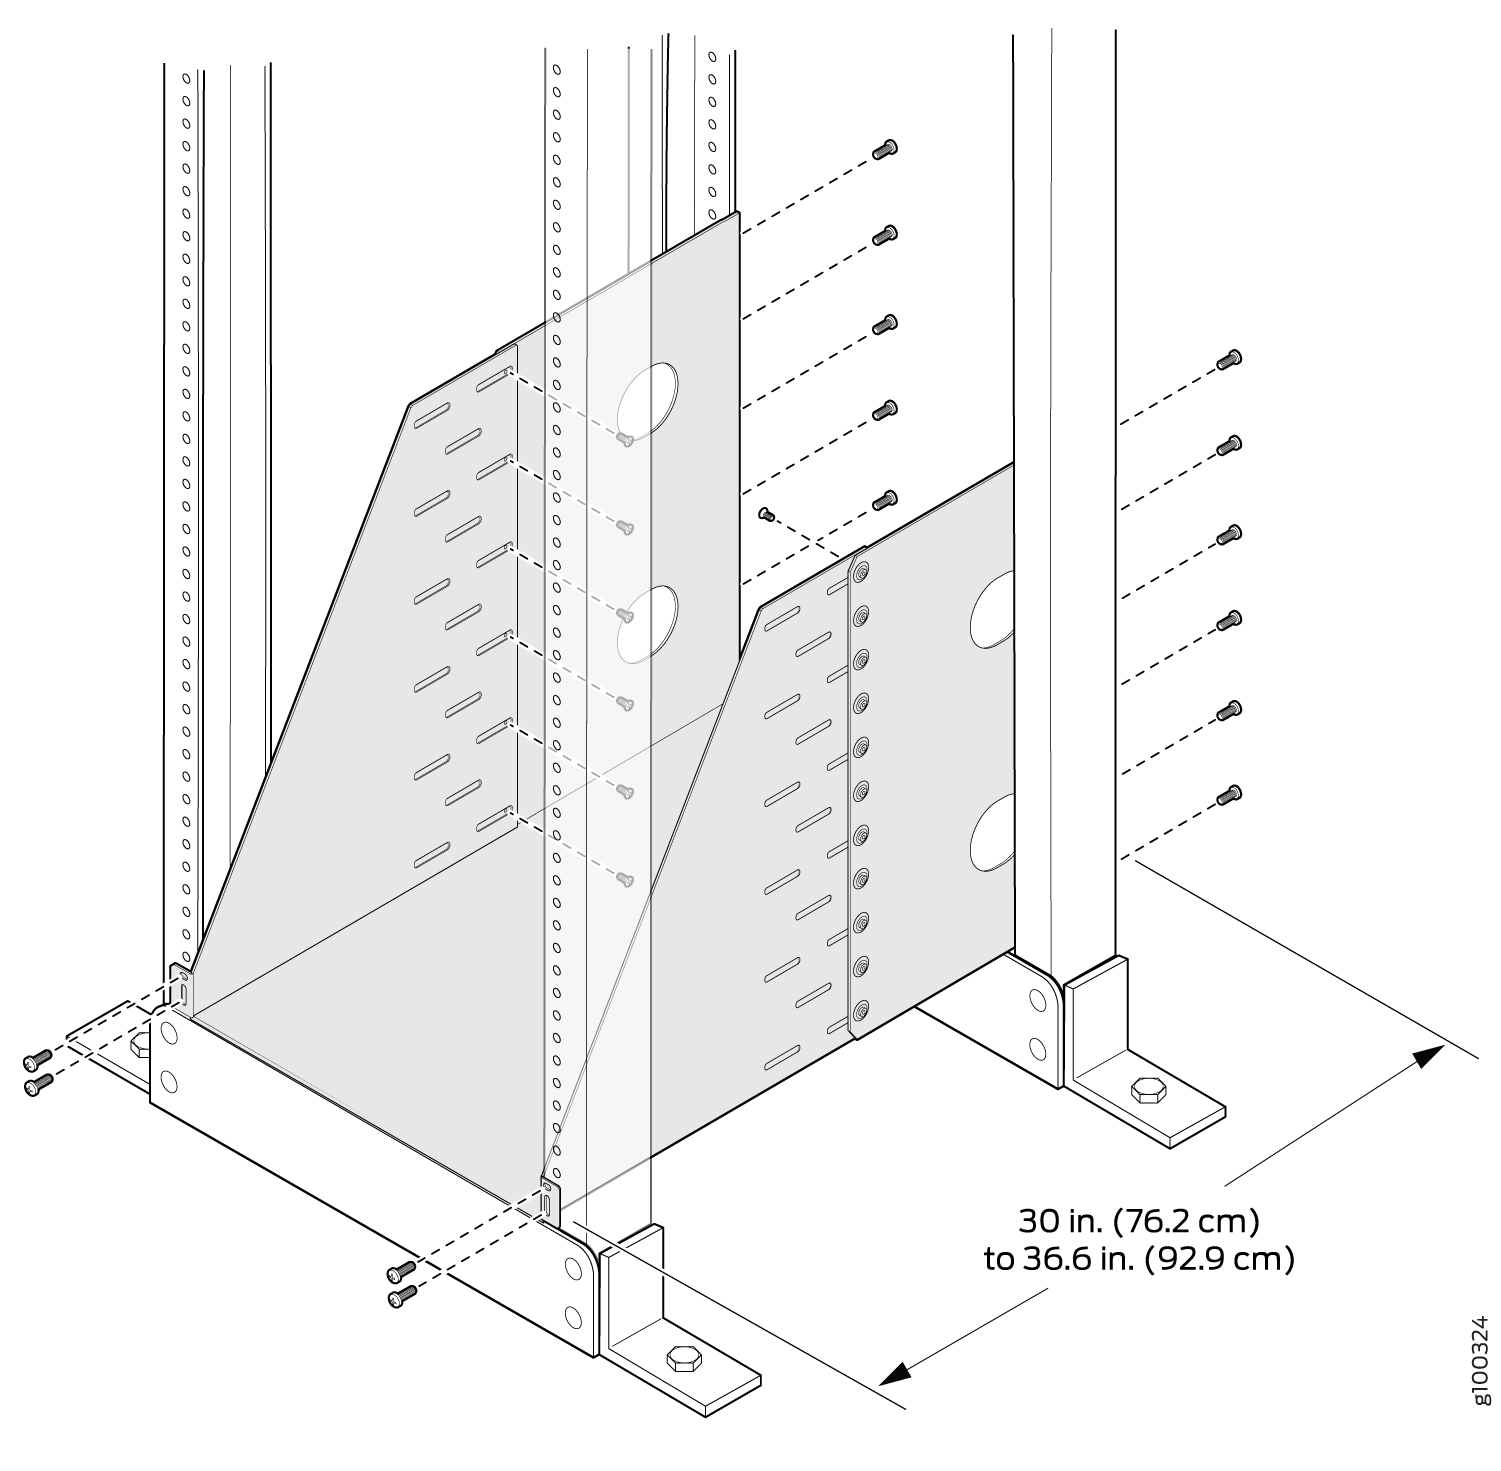
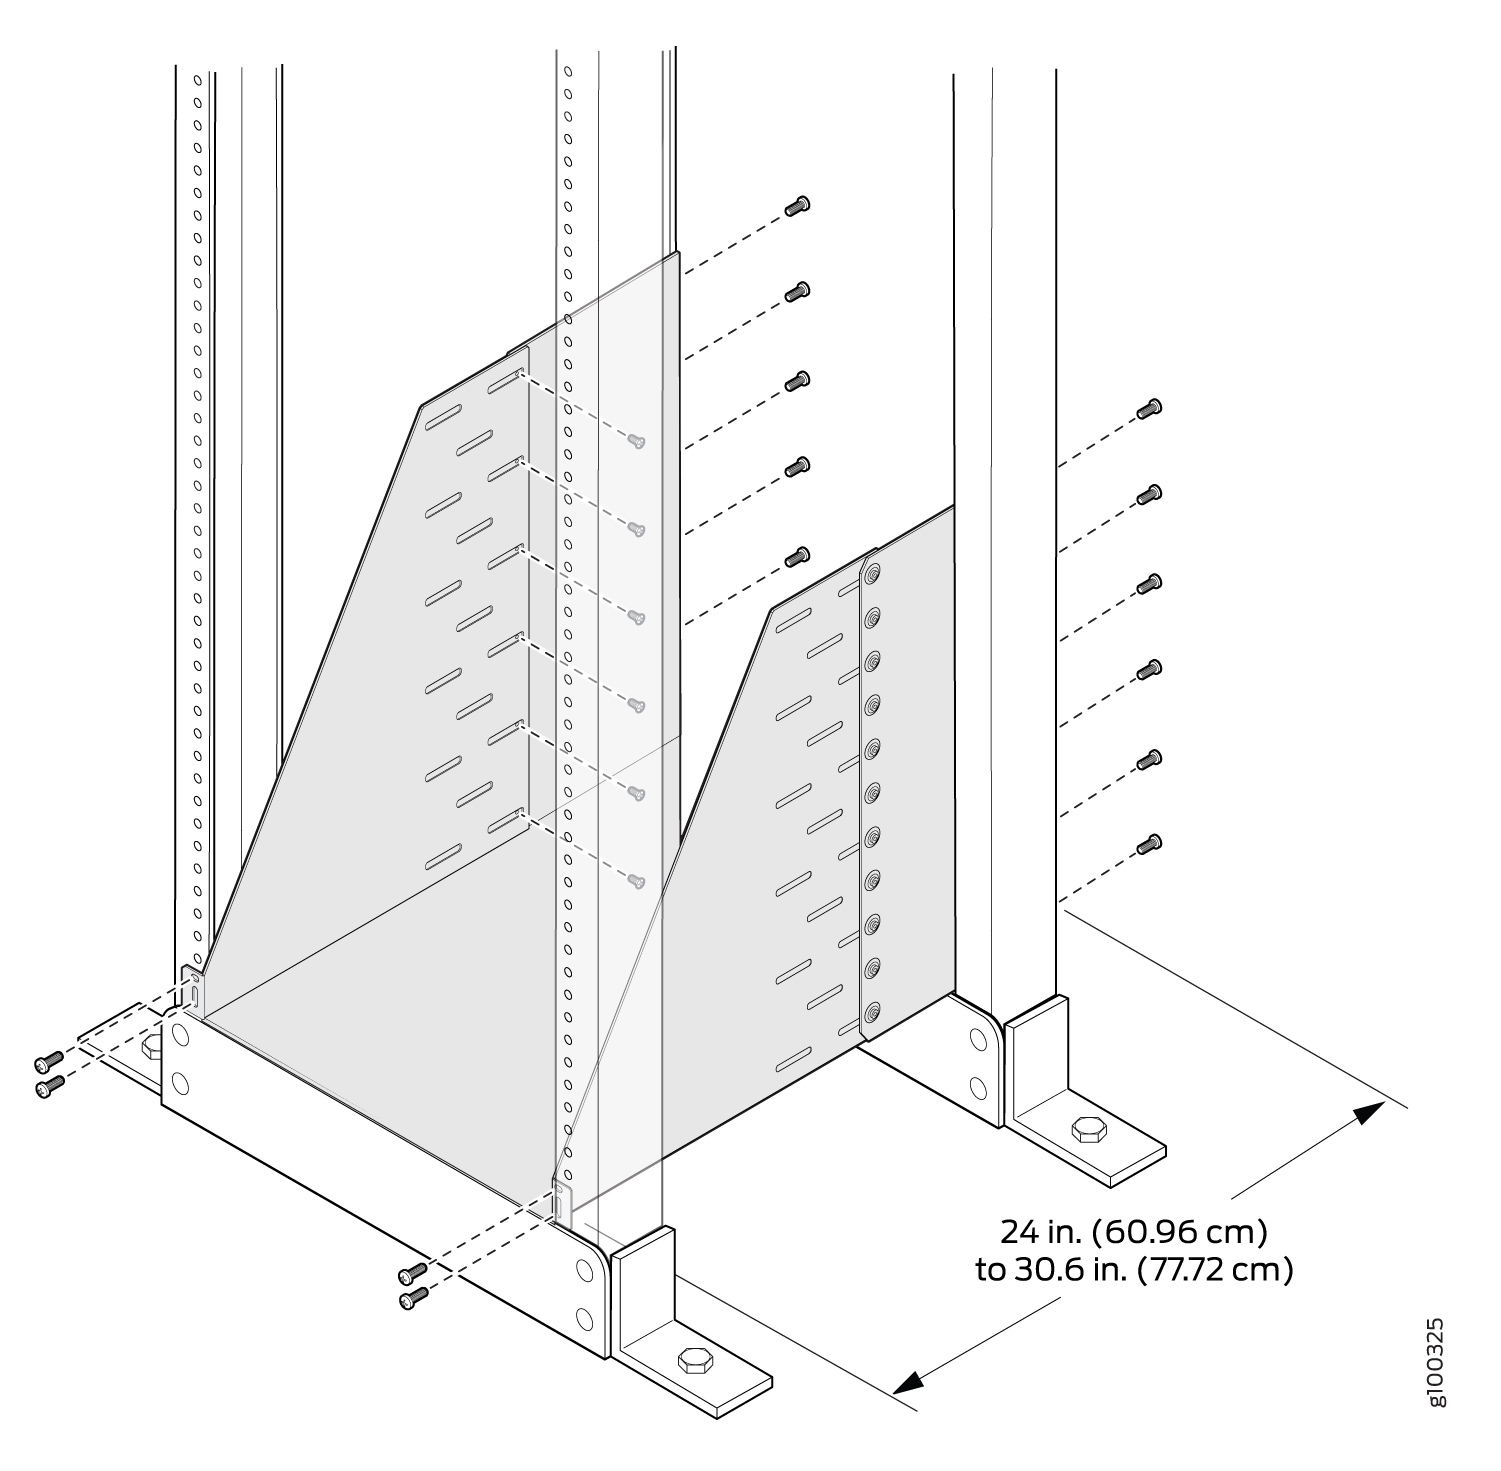 Note:
Note:The two rear flanges on the four-post mounting shelf are adjustable from 24in (60.96cm) to 30.6in (77.72cm) to accommodate different types of racks rails. If you need to extend the depth of the rack, you can purchase an extended mounting kit (MX2K-TRAY-XTND-S). The kit contains rack mount tray brackets that have an adjustable range from 30in (76.2cm) to 36.6in (92.9cm). Figure 2 illustrates how to install an extended rack.