Replacing the MX2010 Air Baffle
Removing the MX2010 Air Baffle
To remove the upper air baffle—MX2000-UPR-BAFFLE-A:
- Grasp the air baffle, and pull straight out from the upper
fan tray access door as shown in Figure 1.Figure 1: Removing the Air Baffle
See Also
Installing the MX2010 Air Baffle
To install the upper air baffle—MX2000-UPR-BAFFLE-A:
- Attach an electrostatic discharge (ESD) grounding strap to your bare wrist, and connect the strap to one of the ESD points on the chassis.
- Close the upper fan tray access door.
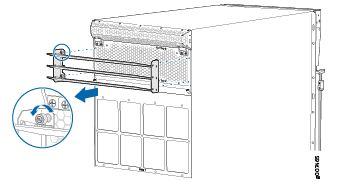
- Align the holes on the air baffle with the holes located on either side of the upper fan tray access door, (see Figure 2).
- Tighten the four captive screws to secure the air baffle to the upper fan tray access door. Use #2 Phillips screwdriver. Do not overtighten. Do not apply more than 8.0 lb-in (0.90 Nm) of torque to the captive screws.
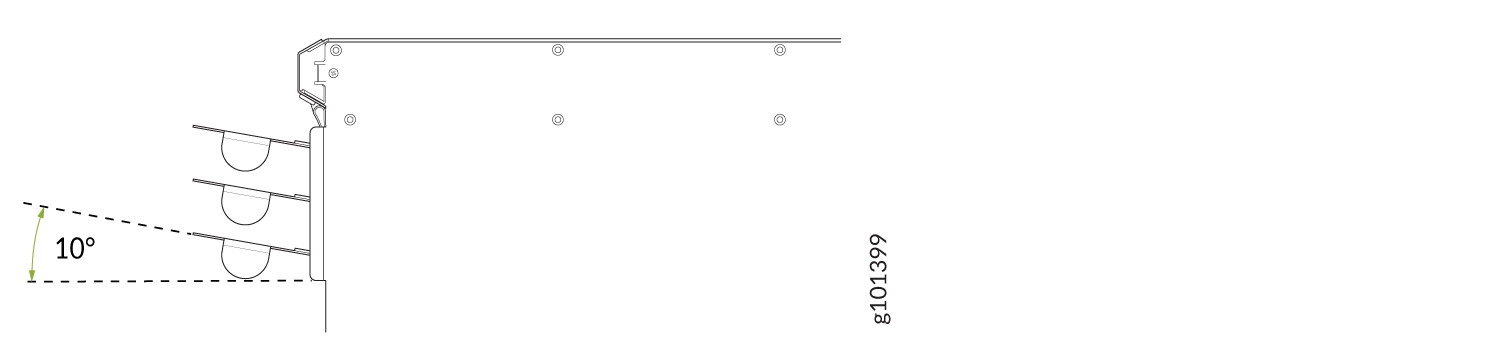
- An air baffle can have fixed or adjustable louvers. Fixed louvers are set at an angle of 10-degrees. You must set adjustable louvers at a 10-degree upward tilt/angle to direct the exhaust air away from the router, (see Figure 3).
Figure 2: Installing the Air Baffle
Figure 3: Air Baffle Louvers Adjusted at 10 Degrees Angle