An adapter card weighs up to 15 lb (6.80 kg). Be prepared
to accept its full weight.
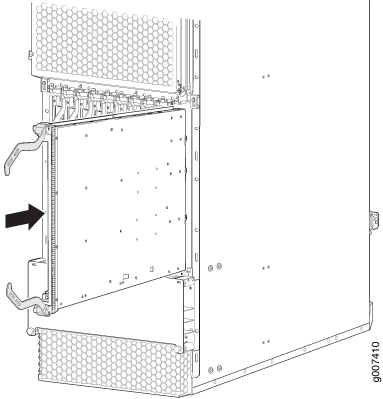
To install an adapter card (see Figure 1):
- Attach an electrostatic discharge (ESD) grounding strap
to your bare wrist, and connect the strap to one of the ESD points
on the chassis.
- Remove the adapter card from its electrostatic bag.
- Identify the slot on the router where it will be installed.
- Orient the adapter card so that the faceplate faces you
vertically.
- Lift the adapter card into place, and carefully align
the sides of the adapter card with the guides inside the card cage.
- Slide the adapter card all the way into the card cage
until you feel resistance.
- Grasp both ejector handles, and gently close them inward
simultaneously until the adapter card is fully seated.
- Issue the following CLI command to bring the adapter card
online:
user@host>request chassis adc slot slot-number online
For more information about the command, see the Junos OS System
Basics and Services Command Reference.
Note: When you issue the request chassis adc slot slot-number online command, the FRU gains power,
and the system’s total power decreases.
Figure 1: Installing an Adapter
Card