Replacing an MX2000 High-Voltage Universal (HVAC/HVDC) Power Distribution Module
Installing an MX2000 Router High-Voltage Universal (HVAC/HVDC) Power Distribution Module
Depending on whether you are connecting to AC or DC power, these warnings apply to the universal HVAC/HVDC power distribution module (PDM):
Before performing DC power procedures, disconnect all power sources. To ensure that all power is off, locate the circuit breaker on the panel board that services the DC circuit, switch the circuit breaker to the off position, and tape the switch handle of the circuit breaker in the off position.
Before performing AC power procedures, disconnect all power sources. To ensure that all power is OFF, locate the circuit breaker on the panel board that services the AC circuit, switch the circuit breaker to the OFF position, and tape the switch handle of the circuit breaker in the OFF position.
Before working on the device or near power supplies, unplug all the power cords from an AC-powered device.
To install a universal HVAC/HVDC power distribution module (PDM) in an MX2000 Router:
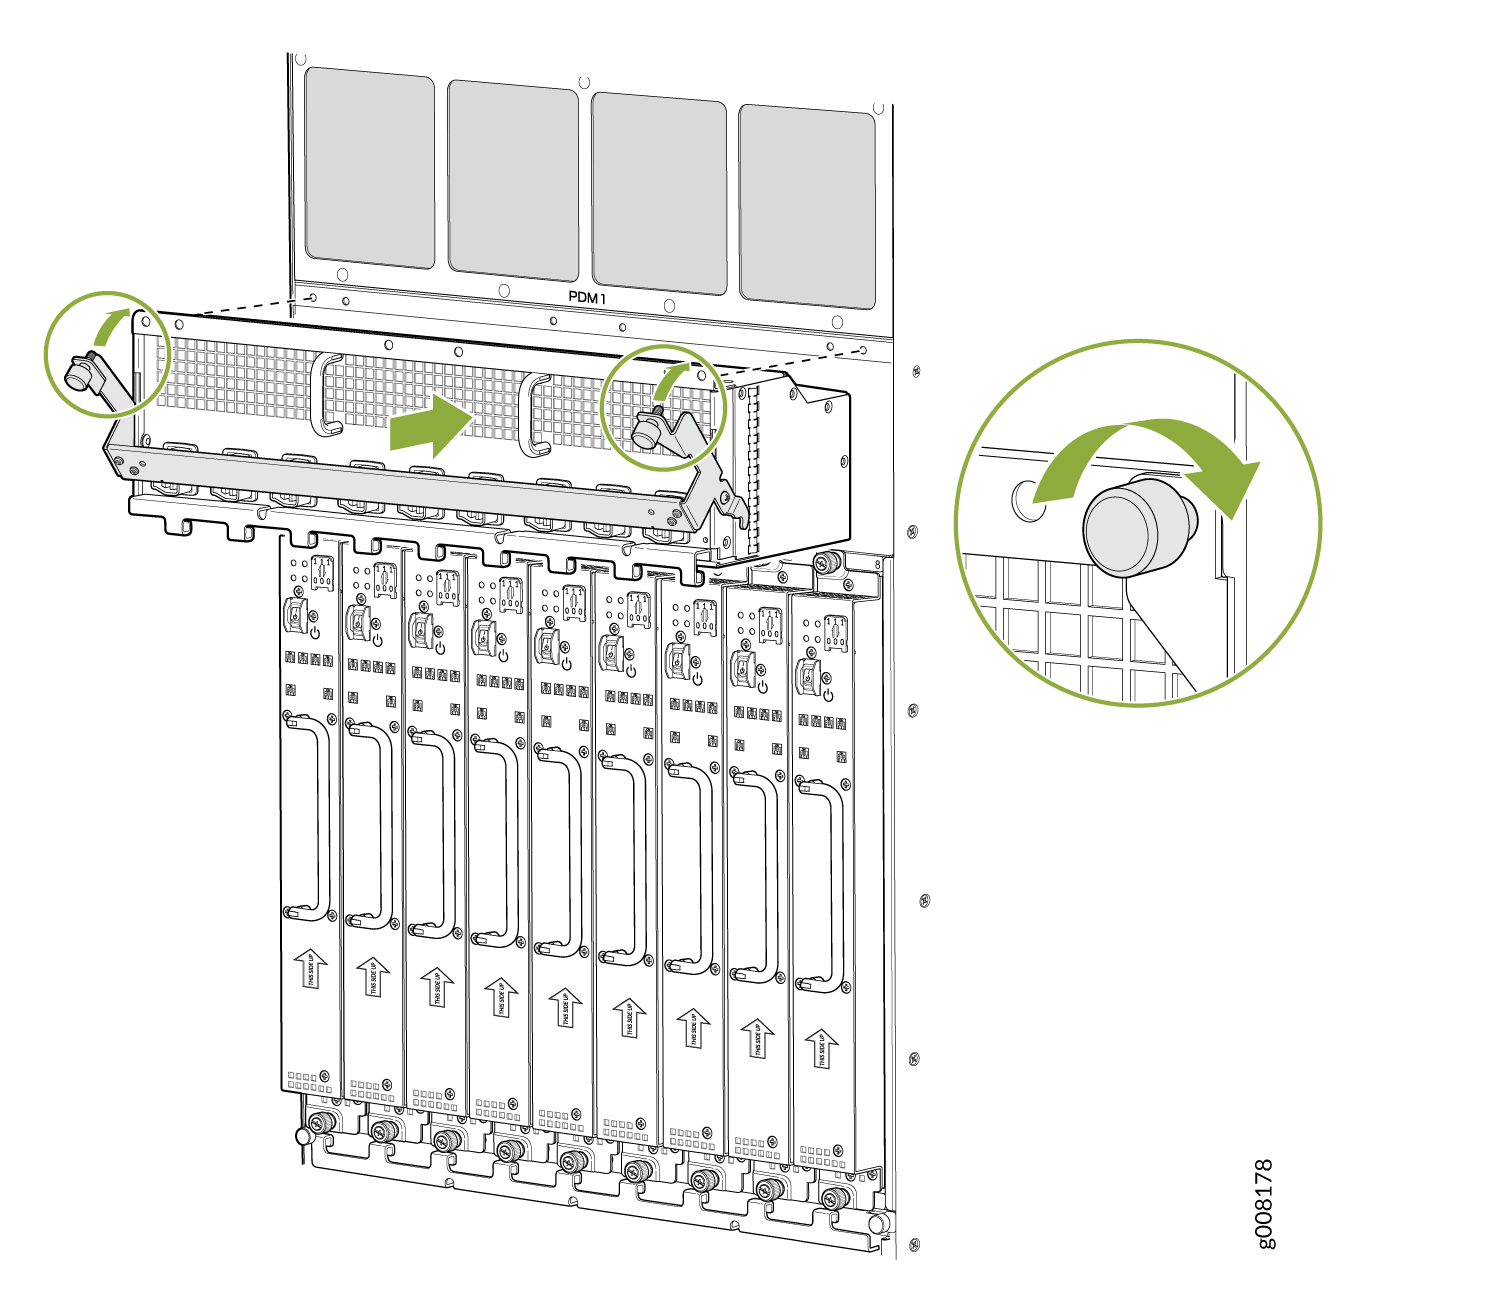
- While holding both handles, guide the PDM until the locking
levers are inserted into the chassis. With both hands push the locking
levers simultaneously until the PDM is fully seated into the chassis
(see Figure 1).Figure 1: Installing an MX2000 Router Universal (HVAC/HVDC) Power Distribution Module
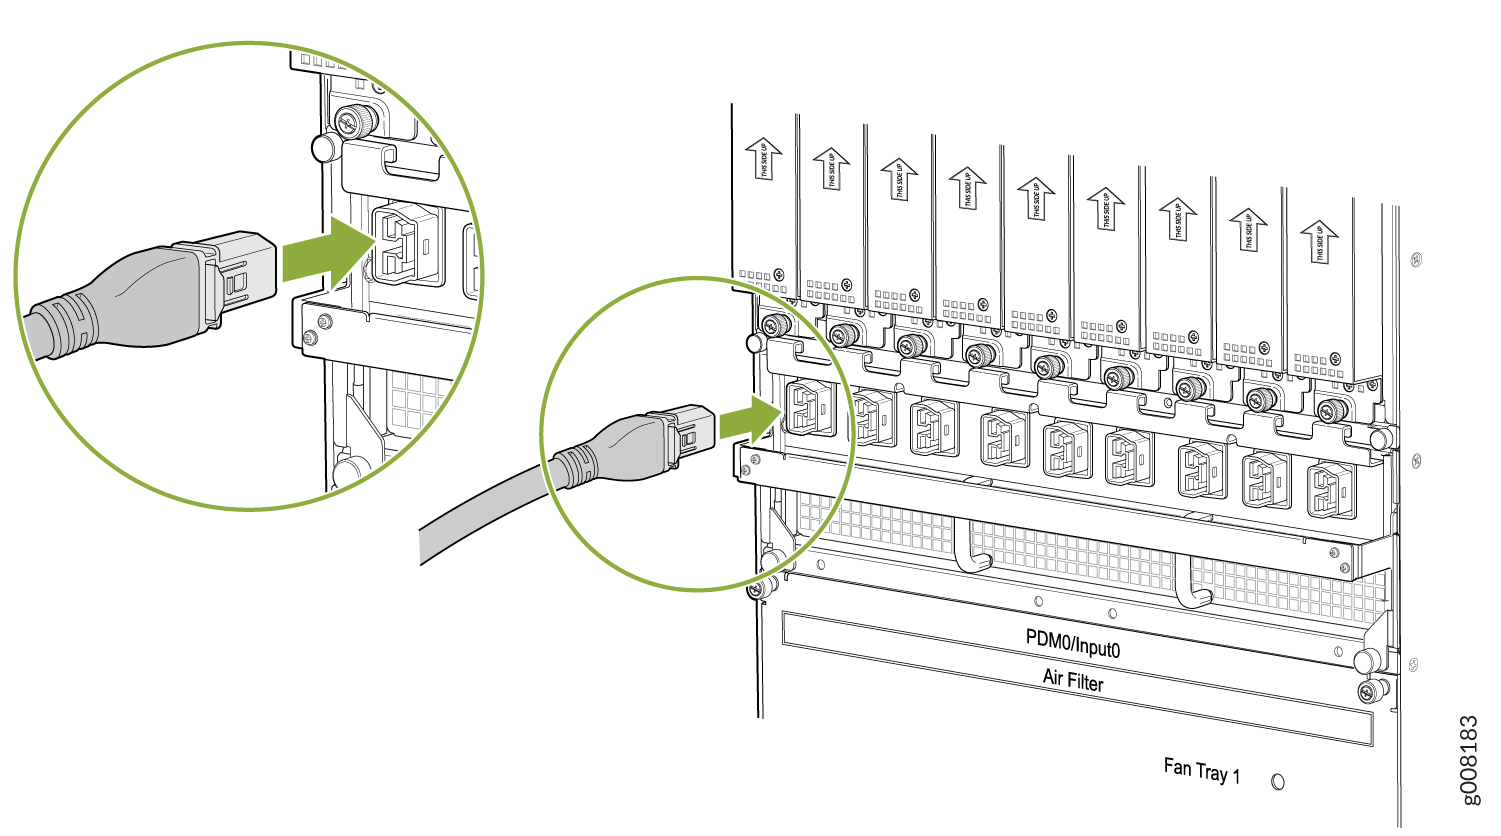
- Starting at one end of the PDM, plug the power cords into
the power sockets on the PDM. Press the latch on the side of the power
cable before pushing it in. Apply slight pressure so that the power
cord is firmly seated in the power socket until you feel it engage.
As you plug in each power cord, the power LED for the socket lights
up green. See Figure 2.Figure 2: Plugging the Universal (HVAC/HVDC) Power Cord an MX2000 Router
Removing an MX2000 Router High-Voltage Second Generation Universal (HVAC/HVDC) Power Distribution Module
Before you remove a PDM, be aware of the following:
The minimum number of PDMs must be present in the router at all times while it is operating.
Depending on whether you are connecting to AC or DC power, these warnings apply to the universal HVAC/HVDC power distribution module (PDM):
Before performing DC power procedures, disconnect all power sources. To ensure that all power is off, locate the circuit breaker on the panel board that services the DC circuit, switch the circuit breaker to the OFF position, and tape the switch handle of the circuit breaker in the OFF position.
These warnings apply to the HVAC/HVDC universal PDM:
Before performing AC power procedures, disconnect all power sources. To ensure that all power is OFF, locate the circuit breaker on the panel board that services the AC circuit, switch the circuit breaker to the OFF position, and tape the switch handle of the circuit breaker in the OFF position.
Before working on the device or near power supplies, unplug all the power cords from an AC-powered device.
To maintain proper cooling and prevent thermal shutdown of the operating power supply unit, each PDM slot must contain either a PDM or a blank panel. If you remove a PDM, you must install a replacement PDM or a blank panel shortly after the removal.
After powering off a PDM, wait at least 60 seconds before turning the circuit breaker back on.
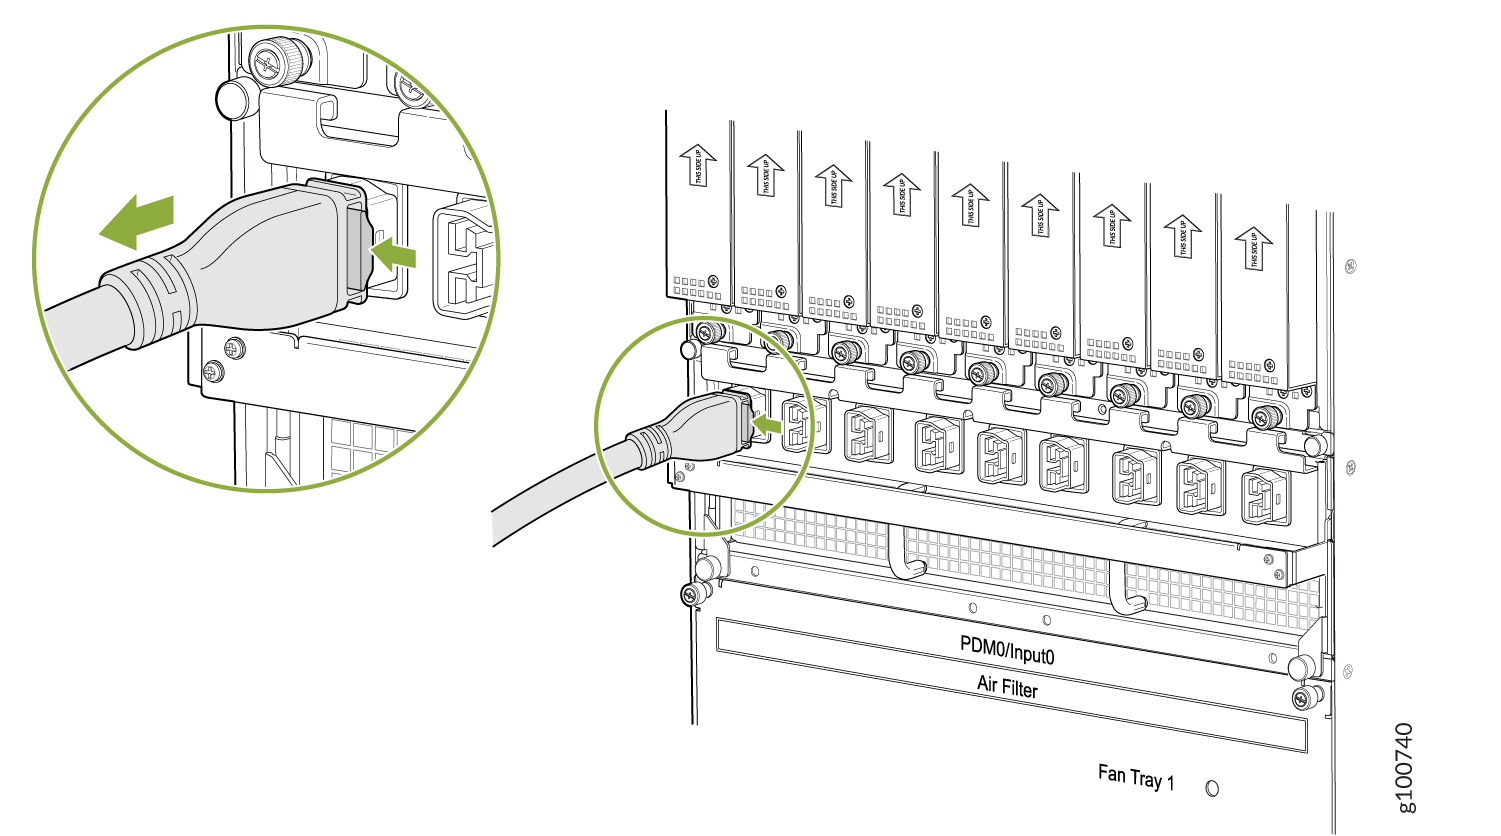
- Starting at one end of the PDM, unplug all the power cords.
Press the latch on the side of the power cable before pulling it out.
See Figure 3.Figure 3: Unplugging the Universal HVAC/HVDC Power Cord an MX2000 Router
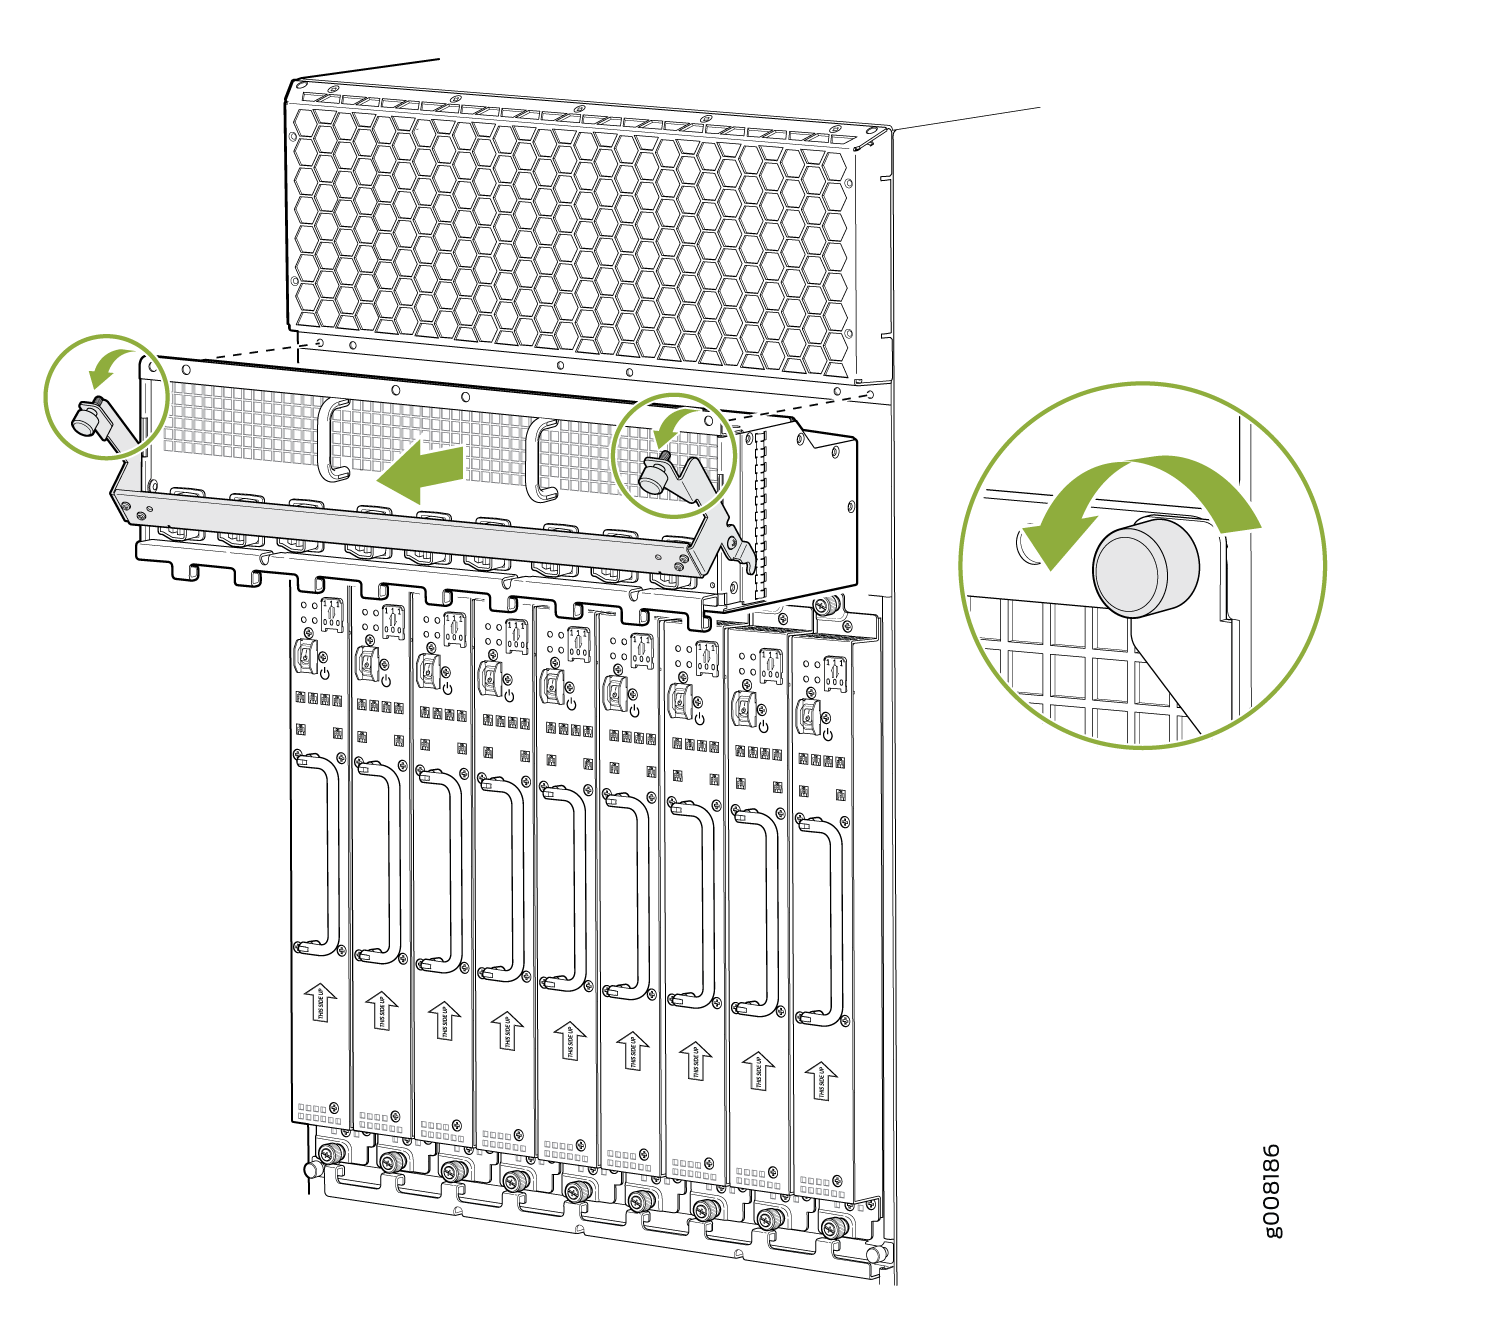
- Loosen the two captive screws on the locking levers, and
pull away from the chassis. See .Note:
For the MX2020 Router, pull down the PDM3/Input1 and PDM1/Input1 locking levers to release the PDM from the chassis, and pull up the PDM0/Input0 and PDM2/Input0 locking levers to release the PDM from the chassis.
Note:For the MX2010 and MX2008 Routers, pull down the PDM1/Input1 locking levers to release the PDM from the chassis, and pull up the PDM0/Input0 locking levers to release the PDM from the chassis.
Figure 4: Removing a Universal (HVAC/HVDC) PDM from an MX2020 Router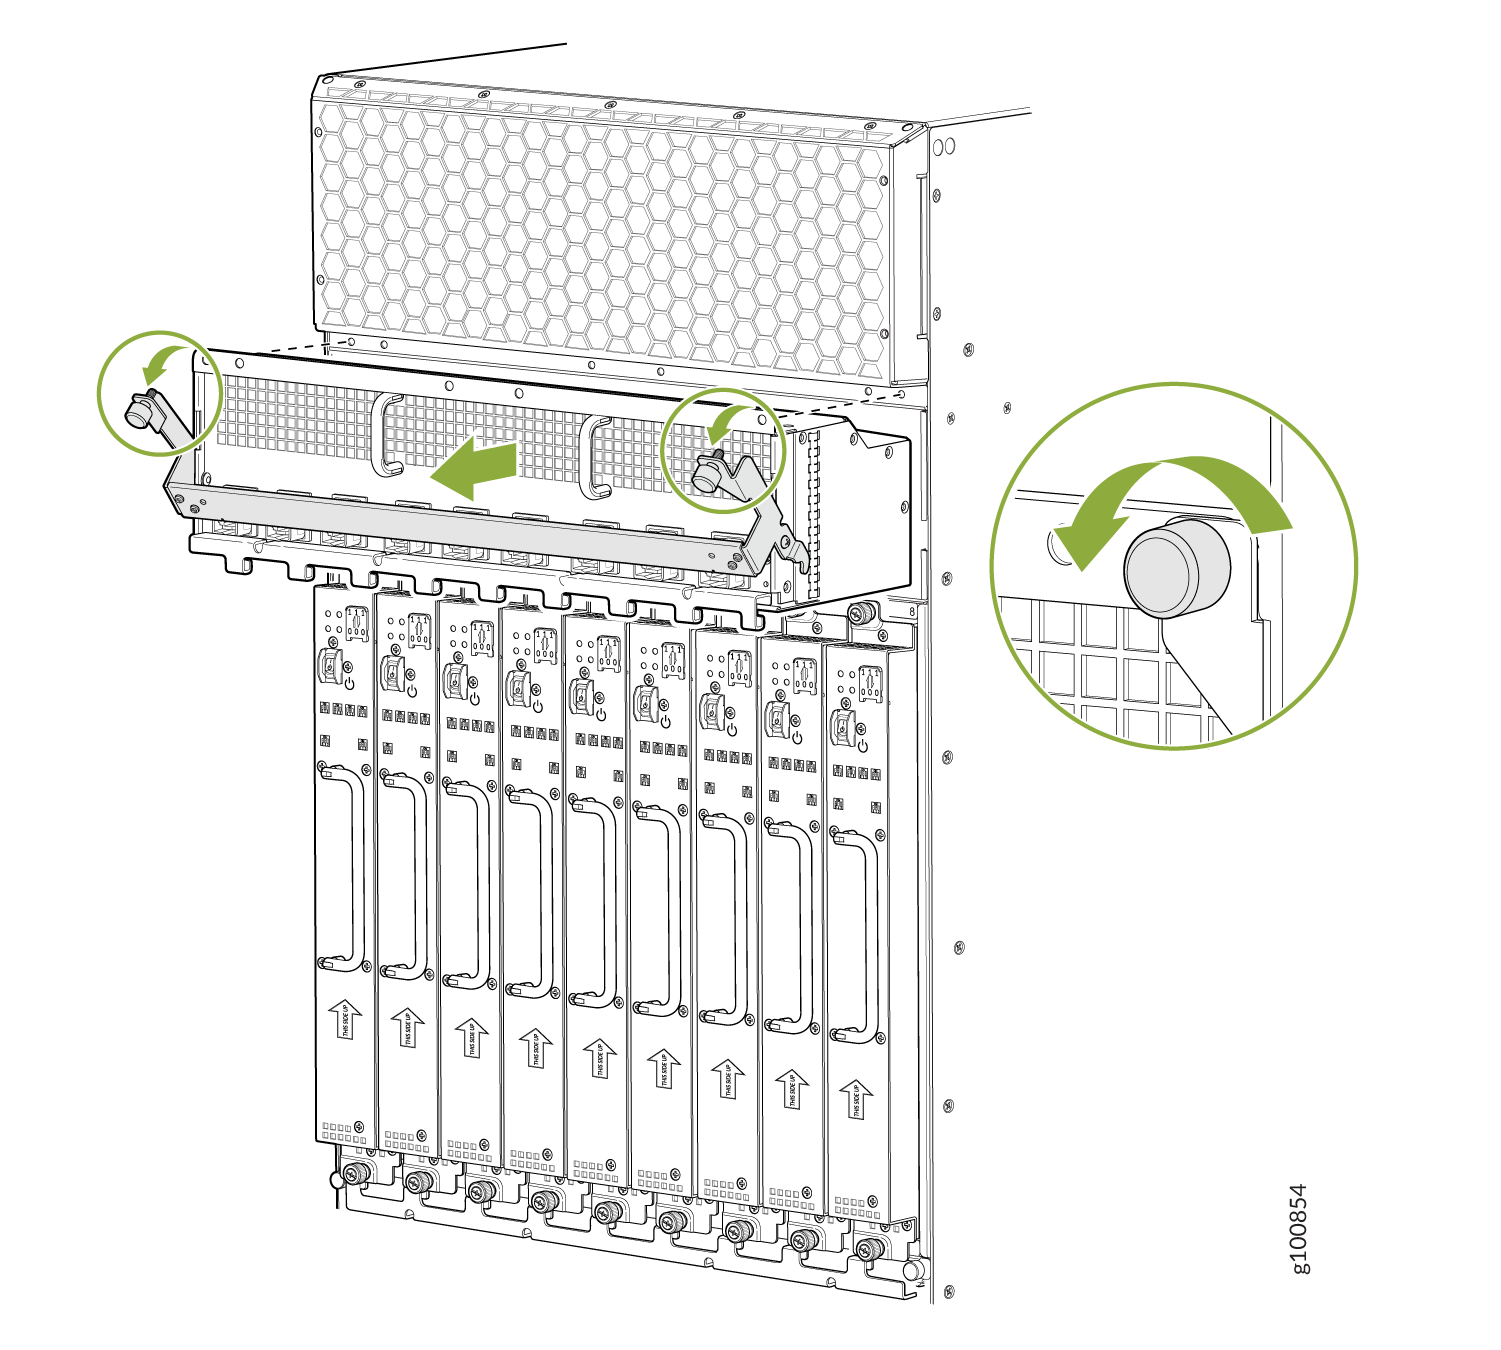 Figure 5: Removing a Universal (HVAC/HVDC) PDM from an MX2010 Router
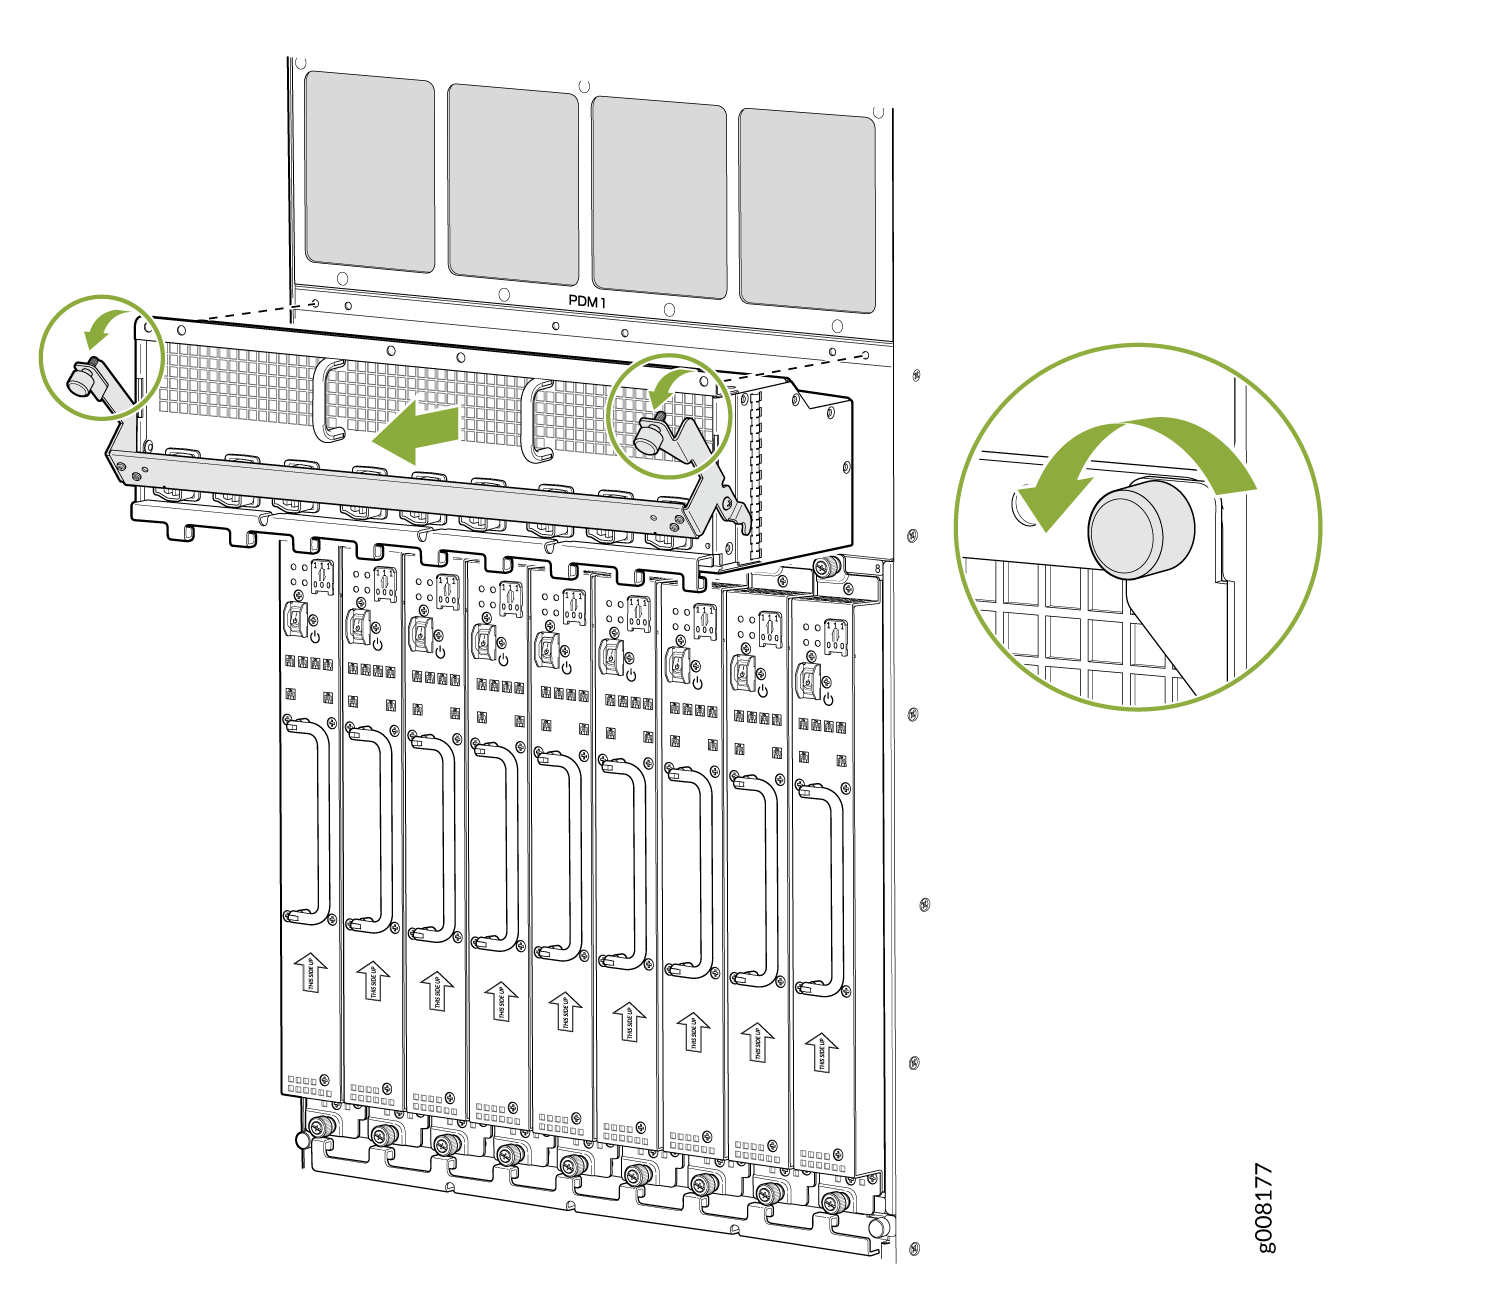 Figure 6: Removing a Universal (HVAC/HVDC) PDM from an MX2008 Router