Installing the Mounting Hardware
Ensure that you have the following parts and tools available to install the mounting hardware:
A Phillips (+) screwdriver, number 1, 2, or 3, depending on the size of your rack screws
A Phillips (+) screwdriver, number 2, to install the screws that connect the rear and base brackets
12 Phillips flat-head screws (provided)
14 rack screws appropriate for your rack to attach the mounting hardware to the rack (not provided)
An MX10008 can be installed in a four-post rack or in an open-frame rack. Install the mounting hardware on the rack before installing the router.
To mount the chassis on a four-post rack, you must first install the mounting hardware in the rack. The MX10008 and MX10016 routers come with a four-piece set of brackets that supports the chassis in the rack. This rack mount kit, EX-MOD-RMK-4POST, can be ordered as a spare.
An MX10008 cannot be installed in a two-post installation rack.
The main pieces of the rack mount kit are:
One left base bracket. The bracket is labeled LEFT FRONT on the side of the bracket that faces the interior of the rack, near the holes for attaching the bracket to the rack.
One right base bracket. The bracket is labeled RIGHT FRONT on the side of the bracket that faces the interior of the rack, near the holes for attaching the bracket to the rack.
Two rear brackets. These brackets are labeled REAR on the side of the bracket that faces the interior of the rack, near the holes for attaching the bracket to the rack. The rear brackets are interchangeable; you can use either of the rear brackets with the right or left base bracket.
When you install the base and rear brackets, the adjustable portion of the brackets overlap. Use the overlap area to adjust the total bracket length to fit any of the four standard rack sizes: 19 in. (483 mm), 23.62 in. (600 mm), 30 in. (762 mm), or 31.5 in. (800 mm).
To install the mounting hardware in a four-post rack:
- Connect left base bracket and rear brackets (see Figure 1):
- Insert six of the flat-head screws provided with the mounting brackets into the overlapping bracket holes.
- Tighten the screws fully (to 12–16 in.-lb torque) using a number 2 Phillips screwdriver.
Figure 1: Mounting Brackets for Four-Post Rack Installation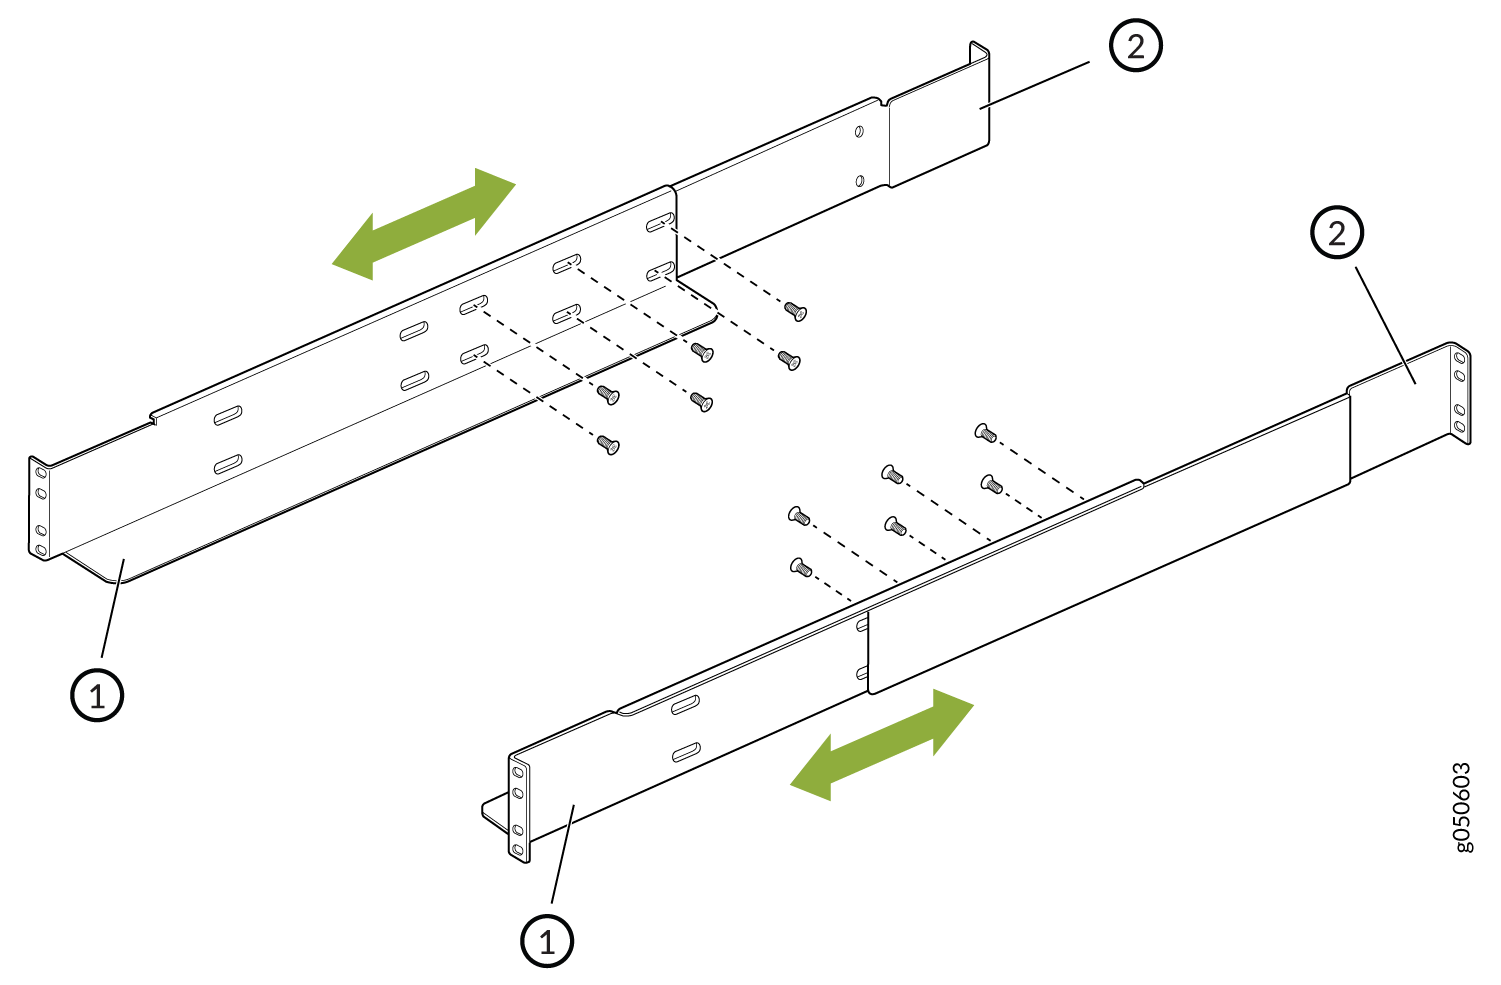 1—
1—Right and left base brackets
2—Rear brackets