Replace the System Battery
Remove the System Battery
Before you begin, remove the cover panel as described in Remove the Cover Panel.
To remove the system battery:
-
Remove the air shroud. Hold the air shroud at both ends and carefully lift it out of
the system.
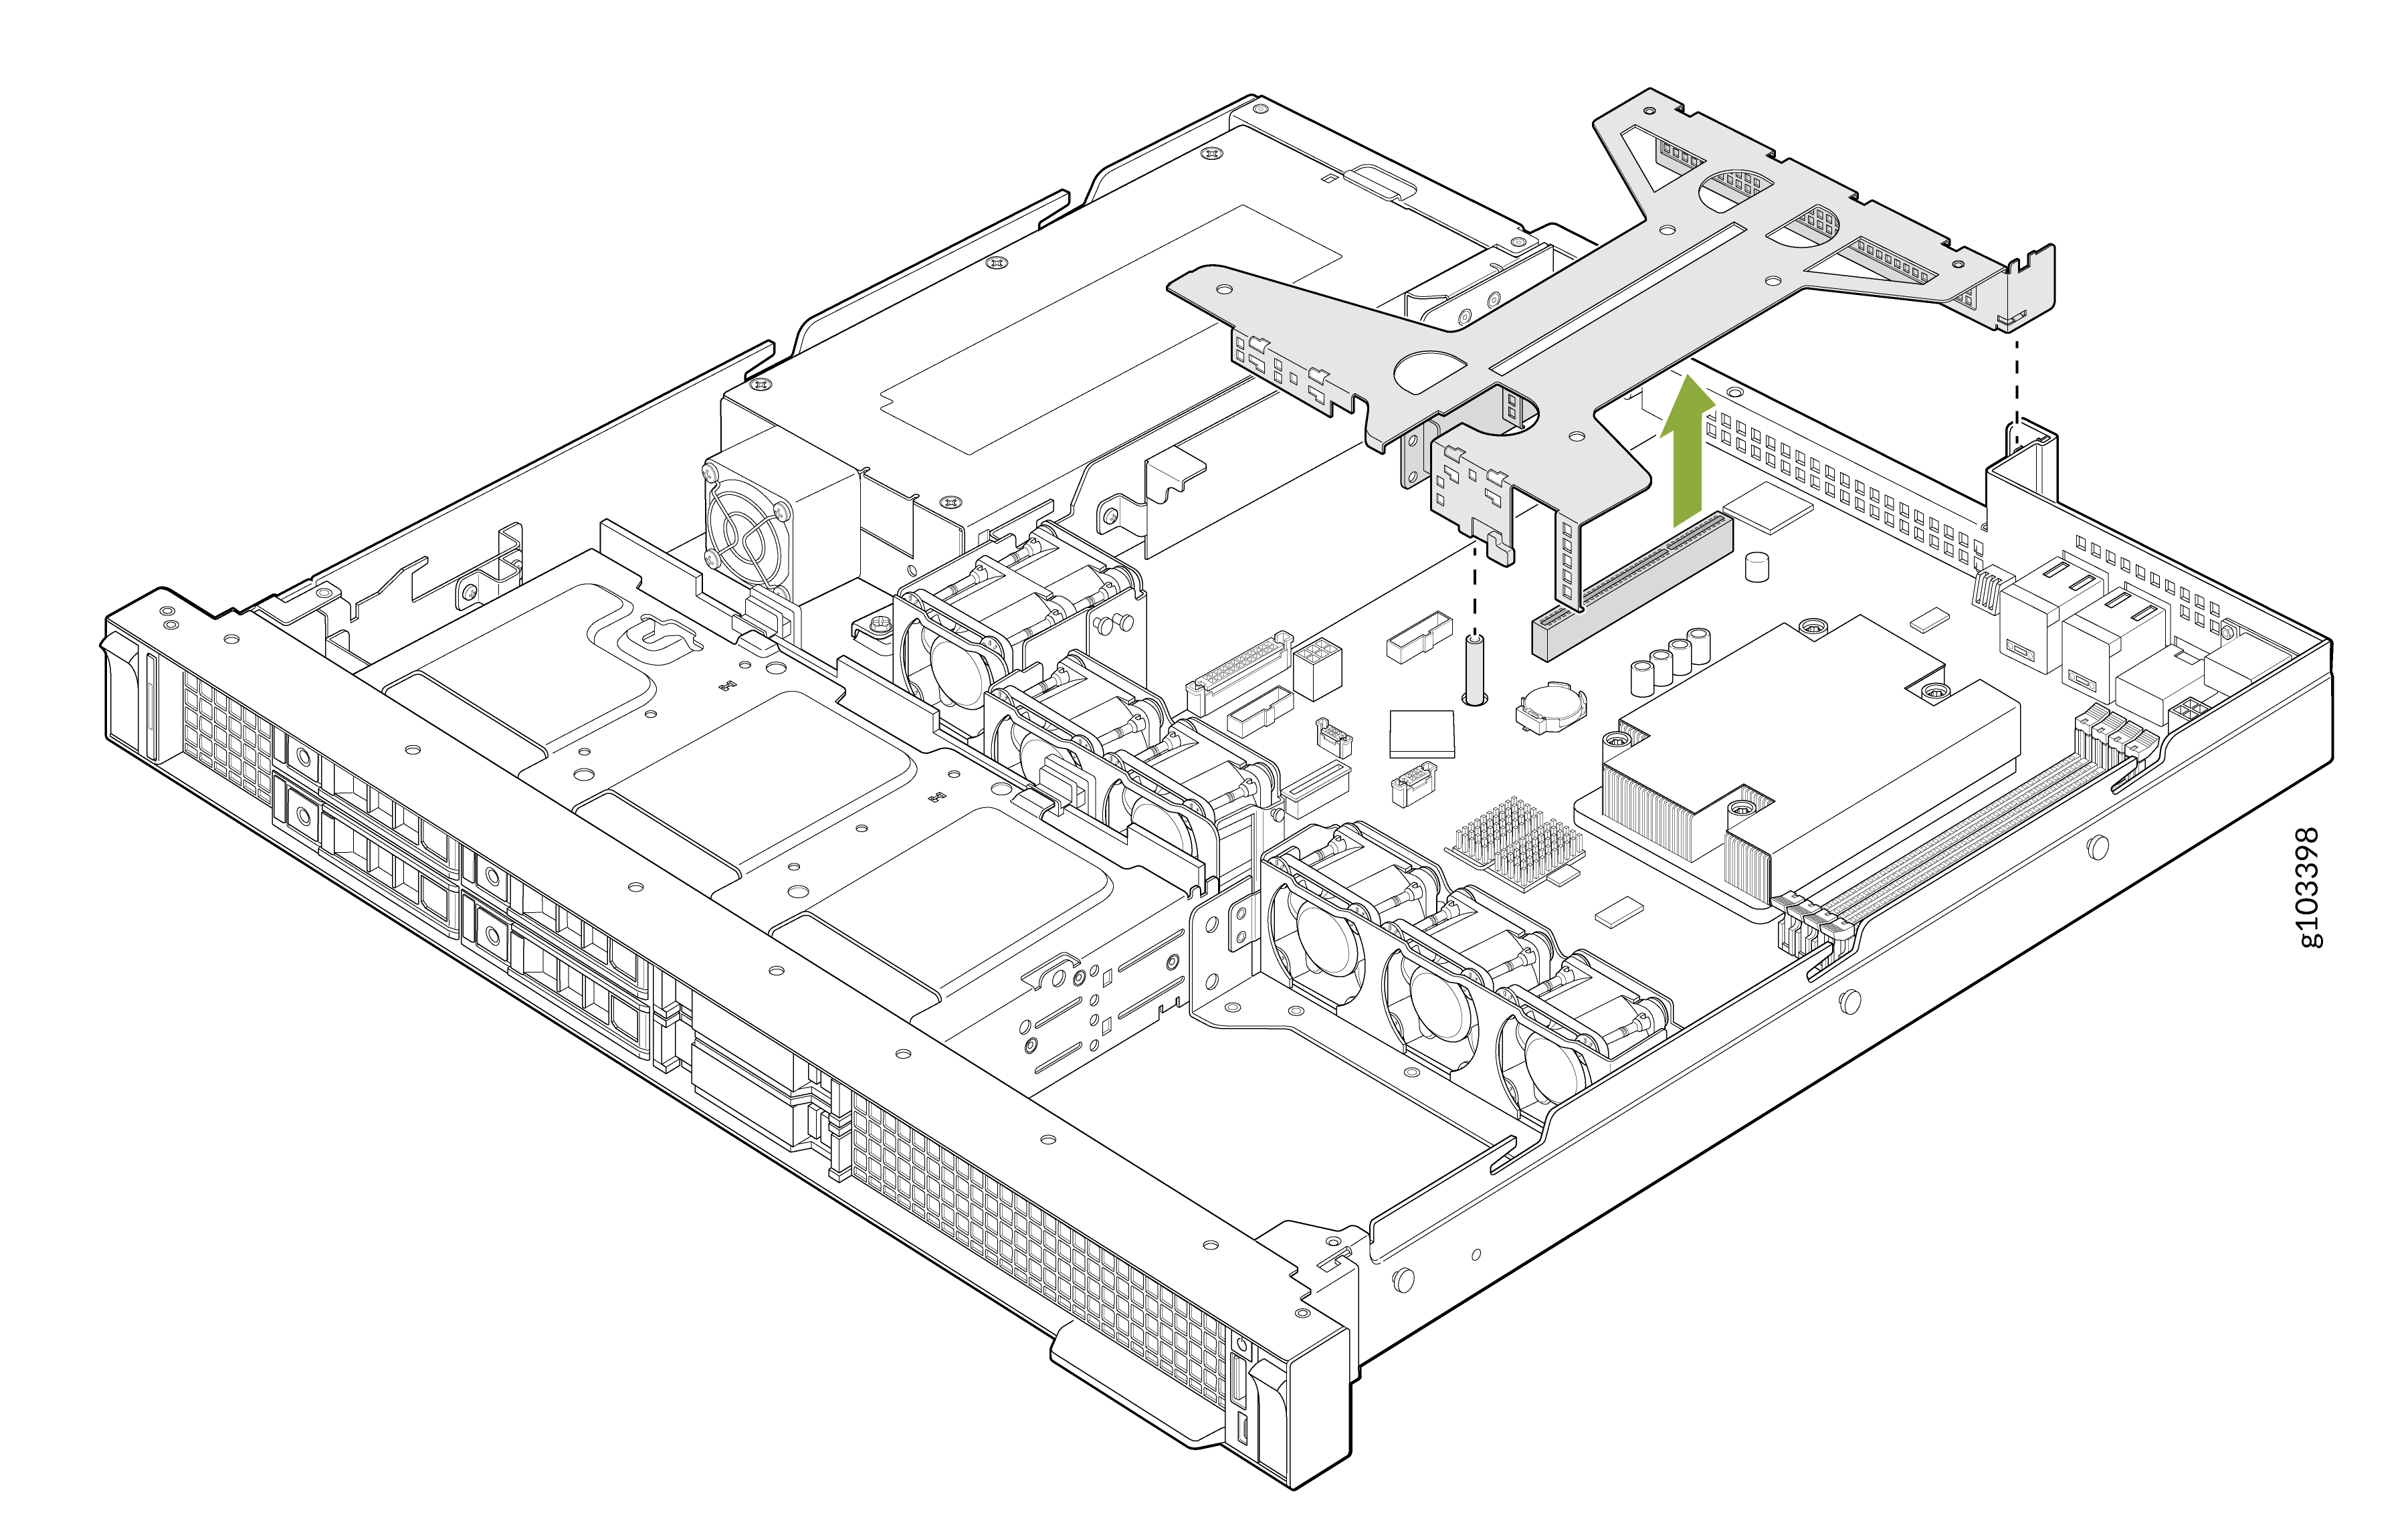
-
Hold the butterfly riser by the blue touch points and lift it out of the system.
-
Press and hold the battery retention latch. The battery pops out.
If the battery does not pop out, carefully lift it out of the socket.
 CAUTION:
To avoid damage to the battery connector, you must firmly support the connector while installing or removing a battery.
Install the System Battery
-
Press the battery into the socket until the latch locks into place.
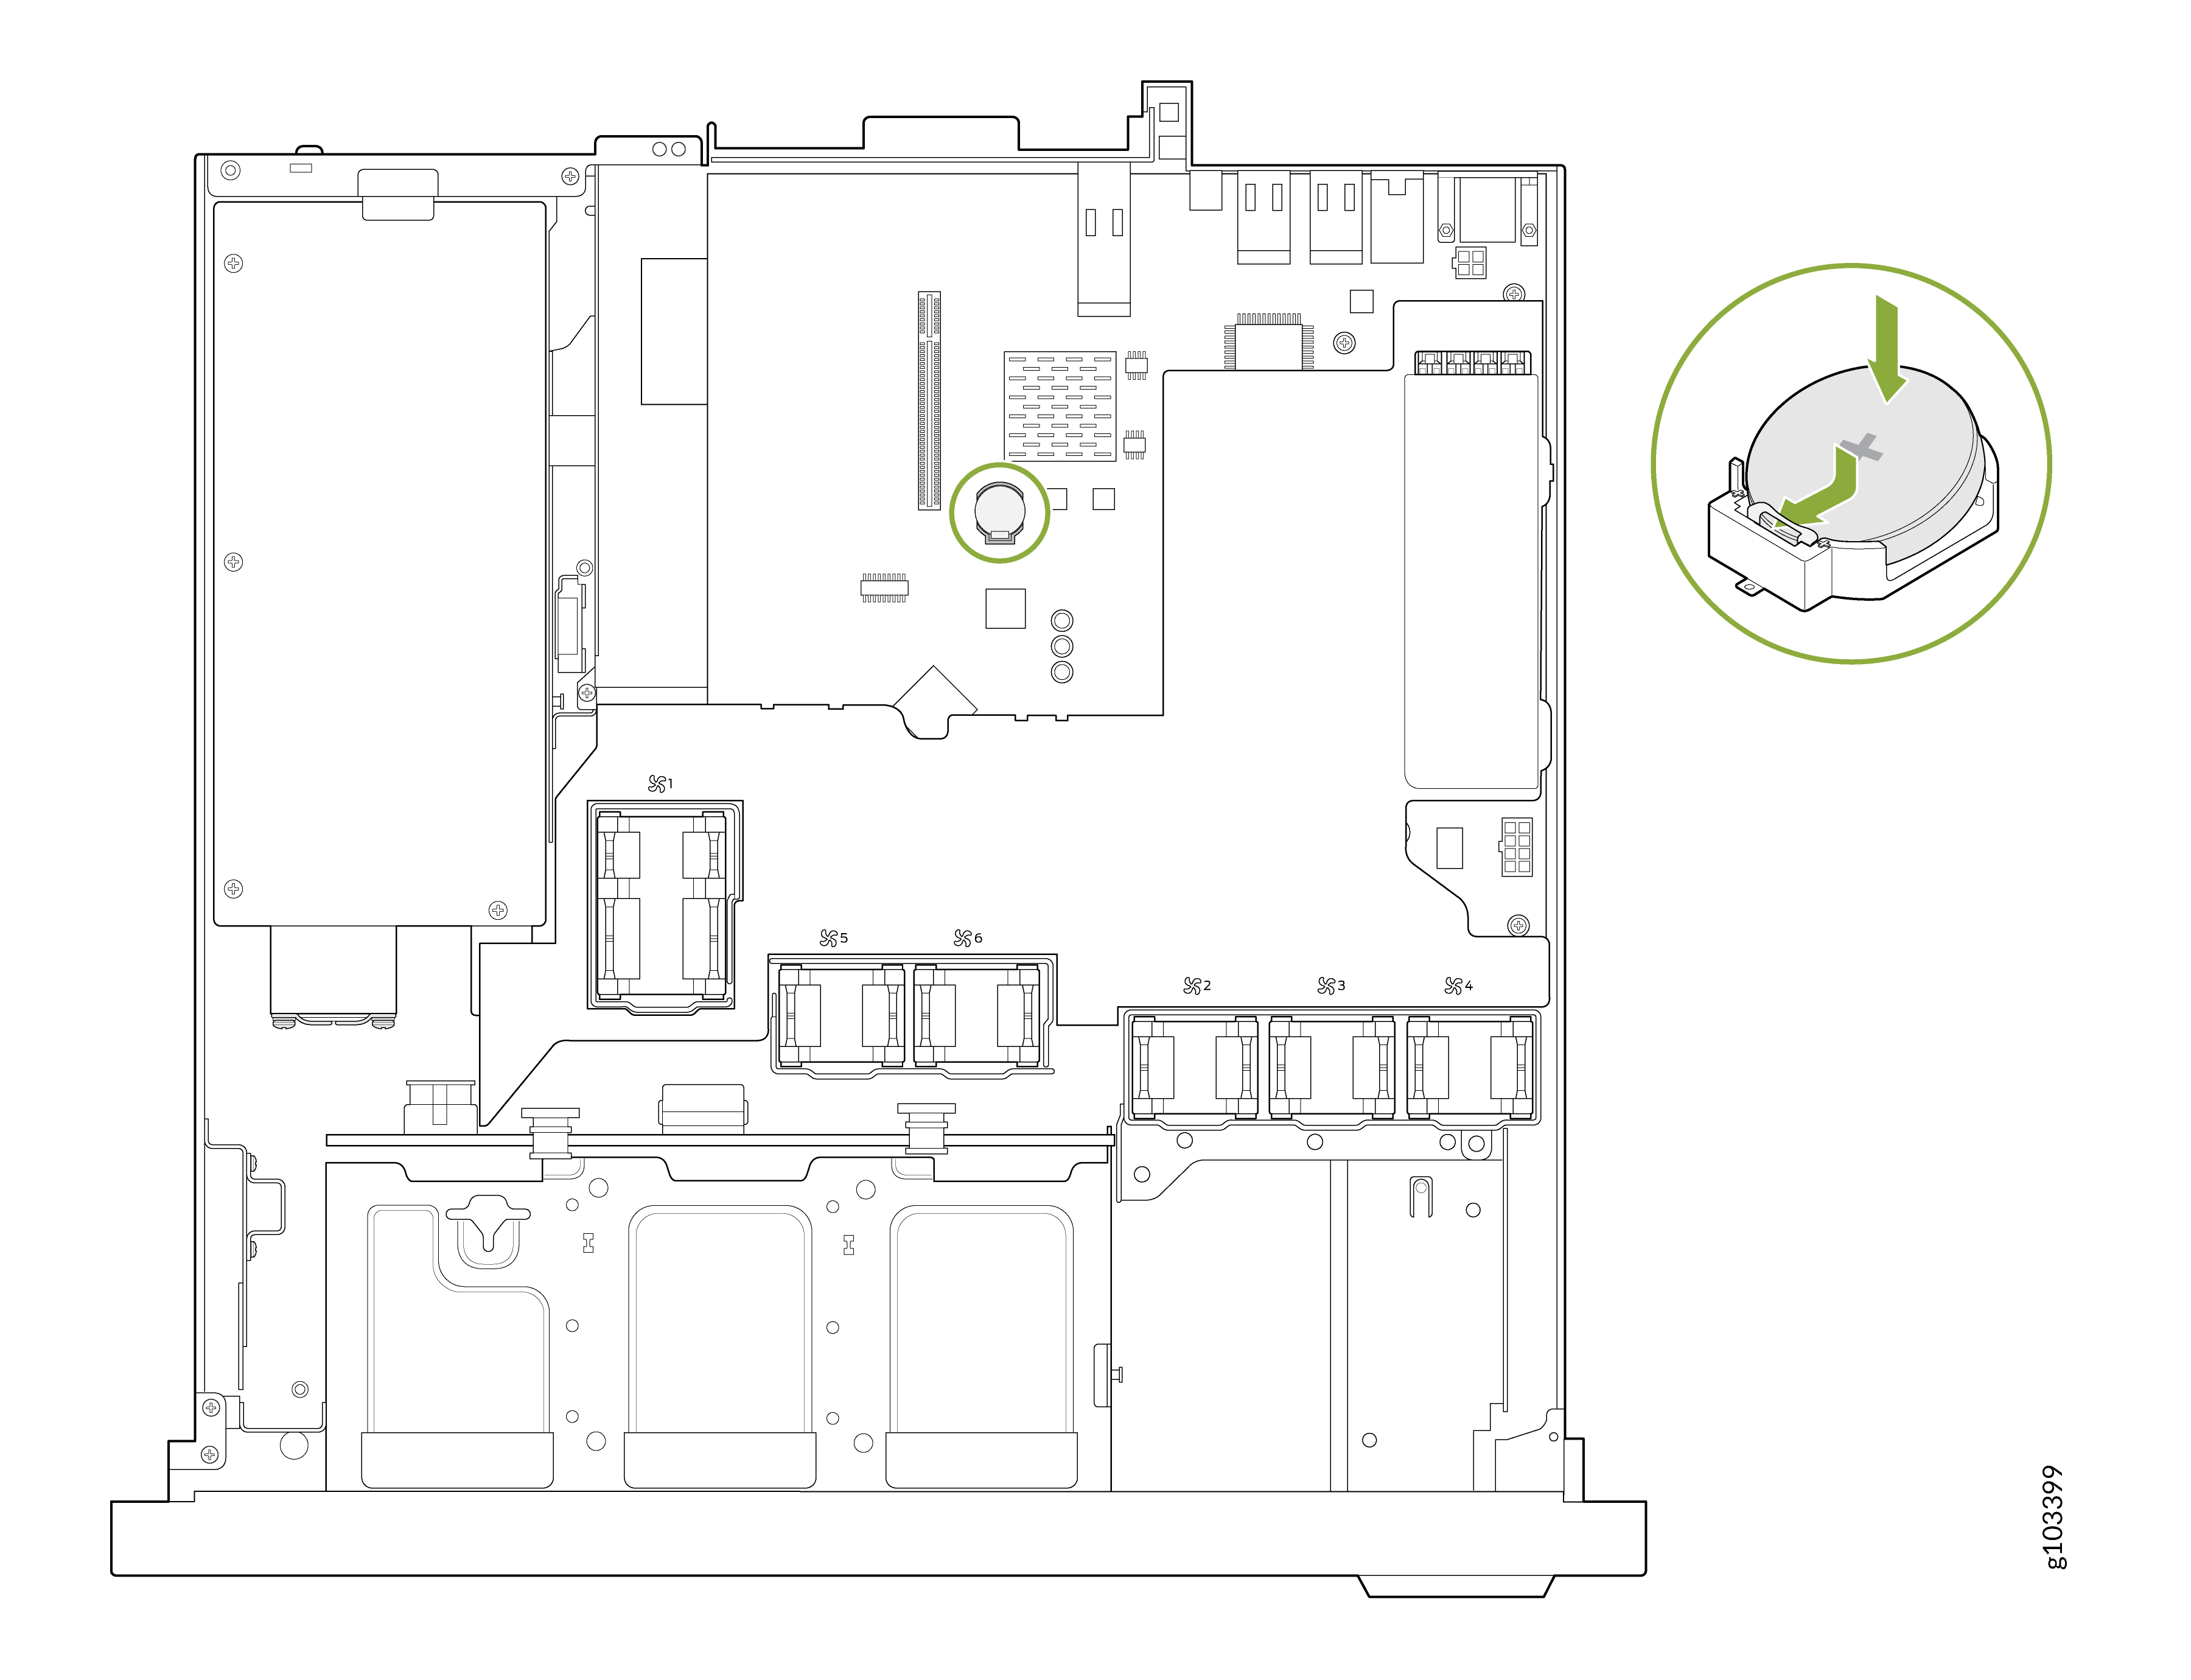 CAUTION:
To avoid damage to the battery connector, you must firmly support the connector while installing or removing a battery.
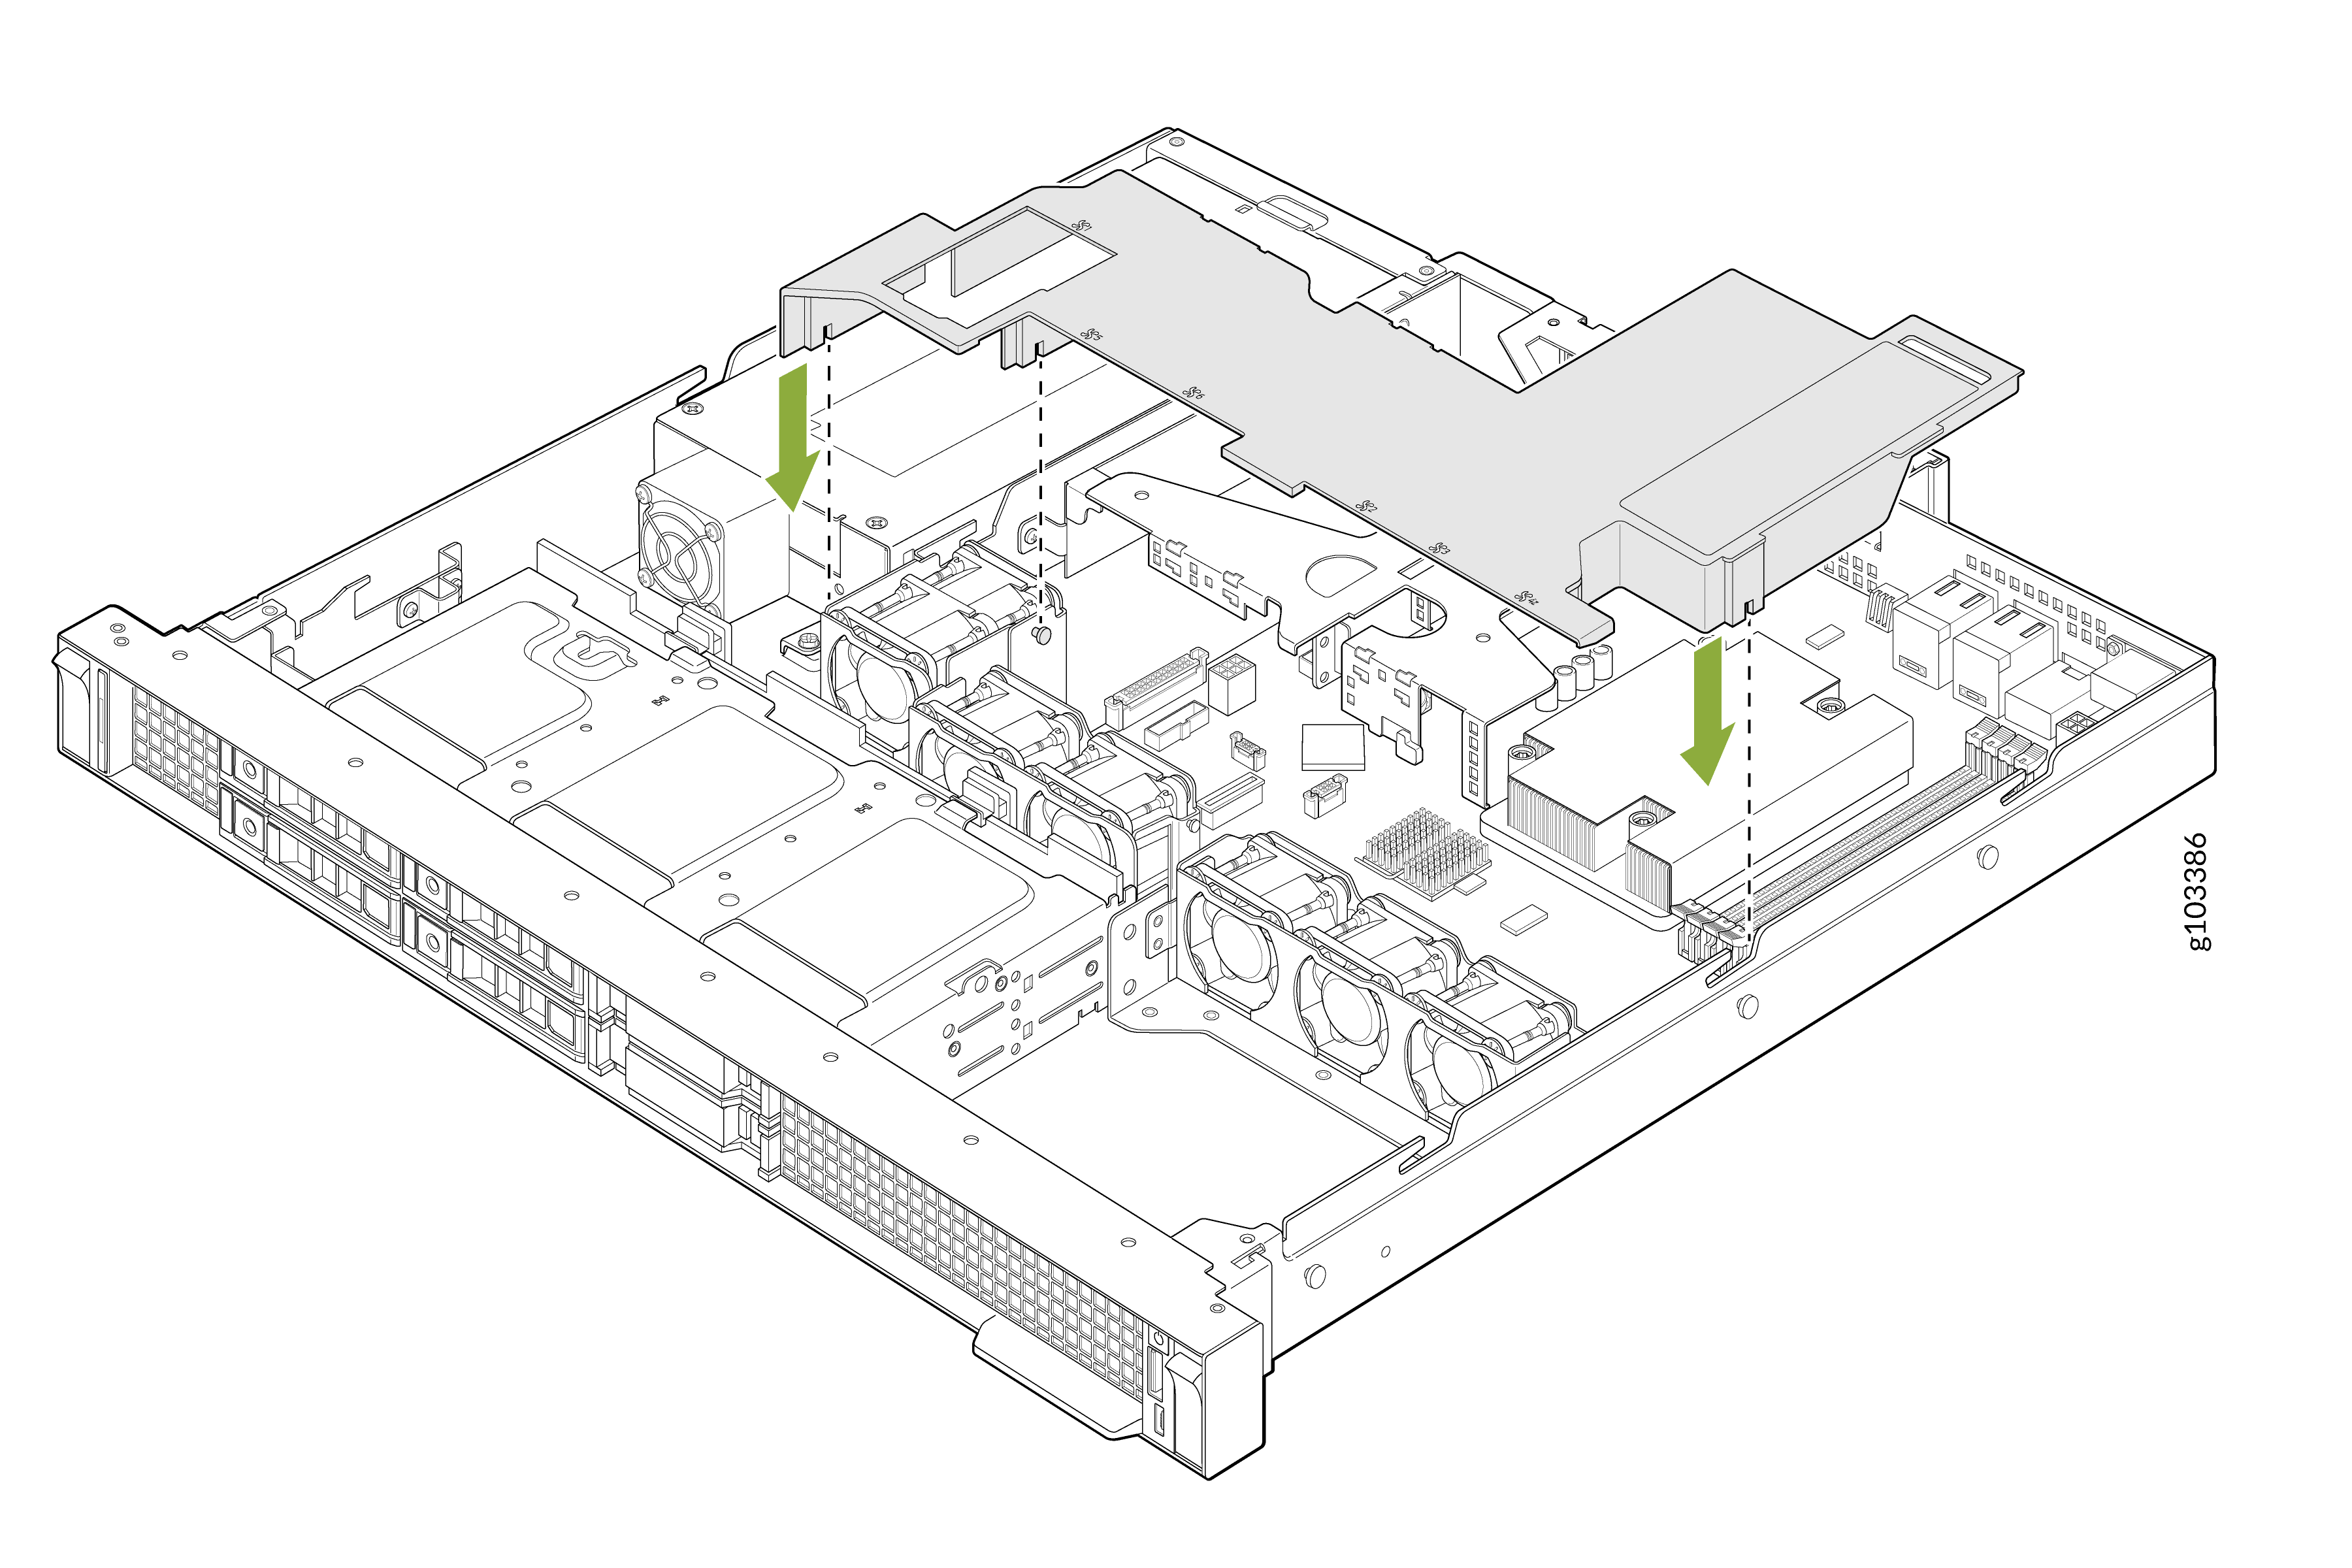
-
Lower the riser into place so that it is firmly seated on the connector.
 CAUTION:
While installing the expansion card riser assembly, ensure the connector and pins are aligned with the slot on the system board. Press down on the contact area and gently insert it straight down to avoid damage to the pins or slot.
After you have installed the system battery and expanison card riser:
-
Install the air shroud.
Align the tabs on the air shroud with the slots on the system board and lower the air shroud until it is firmly seated.
-
Install the cover panel as described in Install the Cover Panel.