Maintaining the EX9214 Cable Management Bracket
Removing the Cable Management Bracket from an EX9214 Switch
Before you remove a cable management bracket from the switch:
-
Ensure you understand how to prevent Electrostatic discharge (ESD) damage. See Prevention of Electrostatic Discharge Damage.
Ensure that you have the following parts and tools available:
-
ESD grounding strap
-
7/16 in. (11 mm) nut driver
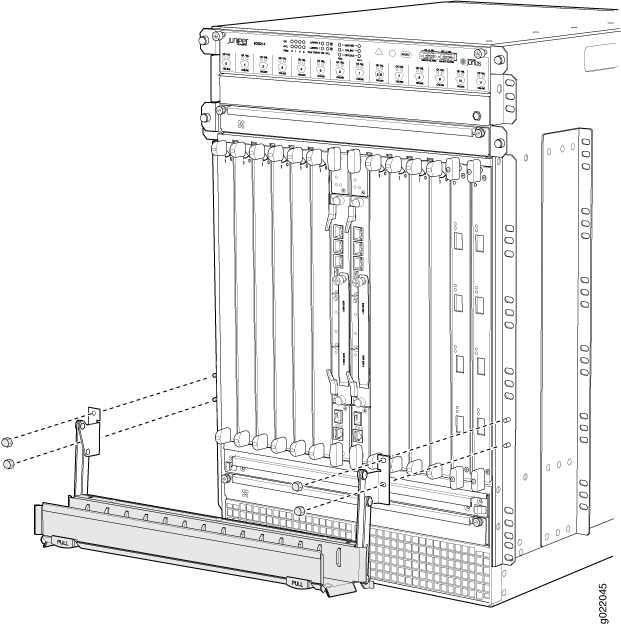
The cable management bracket is installed below the line card and SF module slots on the front panel.
To remove the cable management bracket:
-
Unscrew the nuts on the corners of the cable management
bracket by using the 7/16 in. (11 mm) nut driver. See Figure 1.
Figure 1: Removing the Cable Management Bracket
Installing the Cable Management Bracket in an EX9214 Switch
Before you install a cable management bracket in the switch:
-
Ensure you understand how to prevent Electrostatic discharge (ESD) damage. See Prevention of Electrostatic Discharge Damage.
Ensure that you have the following parts and tools available:
-
ESD grounding strap
-
7/16 in. (11 mm) nut driver
You can install the cable management bracket below the line card and SF module slots on the front panel.
To install the cable management bracket:
- Attach the ESD grounding strap to your bare wrist and connect the strap to the ESD point on the chassis.
- Position the cable management bracket on the studs on the lower part of the front panel. See Figure 2.
- Insert the nuts on the corners in the cable management bracket into the studs on the chassis.
- Tighten the captive screws using a 7/16 in. (11 mm) nut driver.