Help us improve your experience.

Let us know what you think.

Do you have time for a two-minute survey?


ACX7509 Forwarding Engine Board Maintenance

SUMMARY Maintaining an ACX7509 router includes removing and installing the Forwarding Enginer Board (FEB).

The ACX7509 router is shipped with one or two Forwarding Engine Boards (FEBs) preinstalled horizontally, mid-chassis, between the Flexible PIC Concentrators (FPCs) and the Routing and Control Boards (RCBs) in the front and the fan trays in the rear.

You must remove and install the appropriate fan tray to install and remove FEBs. See ACX7509 Fan Tray Maintenance to install and remove a fan tray.

In redundant configurations, an ACX7509 FEB is a hot-removable and hot-insertable field-replaceable unit (FRU). In base configurations, you need to install a second FEB before removing a failing FEB.

Note:

Replace a failed FEB with a blank panel or new FEB within 60 minutes of removal.

Ensure you have the following equipment on hand before replacing a FEB:

  • Antistatic bag or antistatic mat

  • Electrostatic discharge (ESD) grounding strap to wrap around your bare wrist.

    Figure 1: ESD Point on Rear of the ACX7509 Router
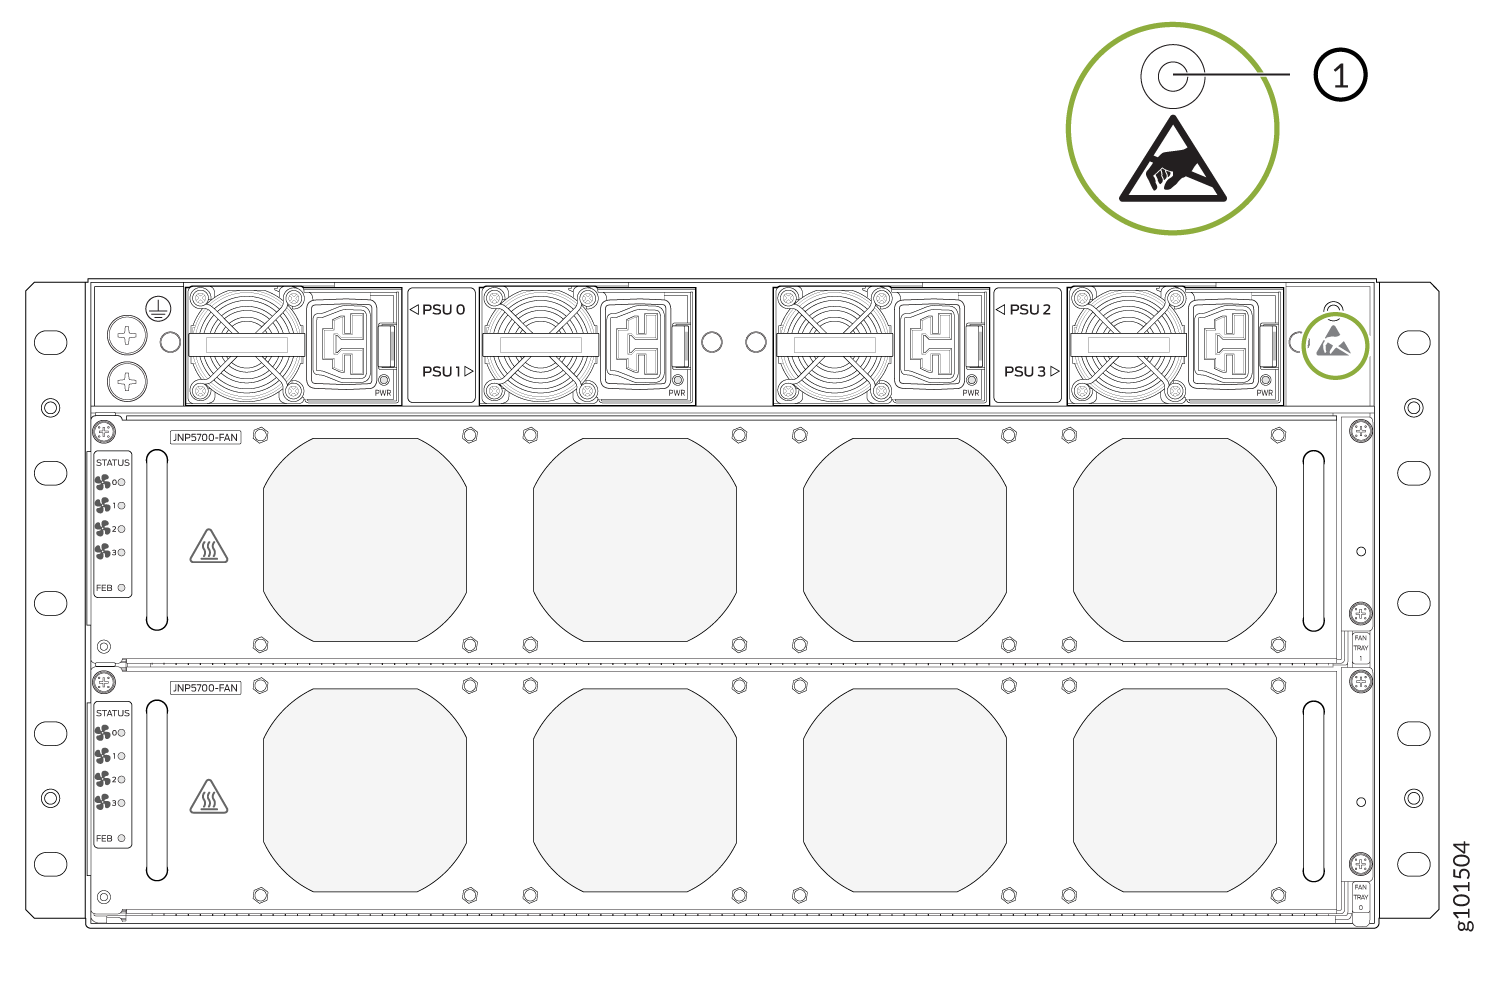
 ESD Point on Rear of the ACX7509 Router
      1

    ESD point

     
  • Replacement FEB or a cover for the empty slot

Remove the Forwarding Engine Board from the ACX7509 Router

To remove a FEB from an ACX7509 router chassis:

  1. Take the FEB offline using the request chassis feb slot slot number offline command.
    Note:

    In the CLI, if you make the primary FEB offline using the command request chassis feb slot slot number offline, a traffic loss warning message is displayed and the FEB offline request is rejected. If offline/restart is still intended for primary FEB, use force option in addition to the command.

    WARNING message displayed in the CLI: "warning: RCB and FEB work in the paired slot mode. FEB %s offline/restart will result in traffic loss and does not cause a switchover. Please re-try after initiating a mastership switchover using 'request chassis routing-engine master switch' CLI. If offline/restart is still intended, use 'force' option in addition to this CLI."

    Note:

    If you suspect that the FEB is faulty and want to ensure that packets do not flow through the FEB, power off the FEB instead of taking the FEB offline. To power down the FEB, use the set chassis feb power-off slot slot number command. Before you bring a new FEB in that slot online, you must delete the old configuration using the delete chassis feb power-off slot slot number command.

  2. Place an antistatic bag or an antistatic mat on a flat, stable surface.
  3. Wrap and fasten one end of the ESD grounding strap around your bare wrist, and connect the other end of the strap to an ESD point on the chassis. An ESD point is located on the rear of the ACX7509 router (see Figure 1).
  4. Remove the appropriate fan tray (see Figure 1).
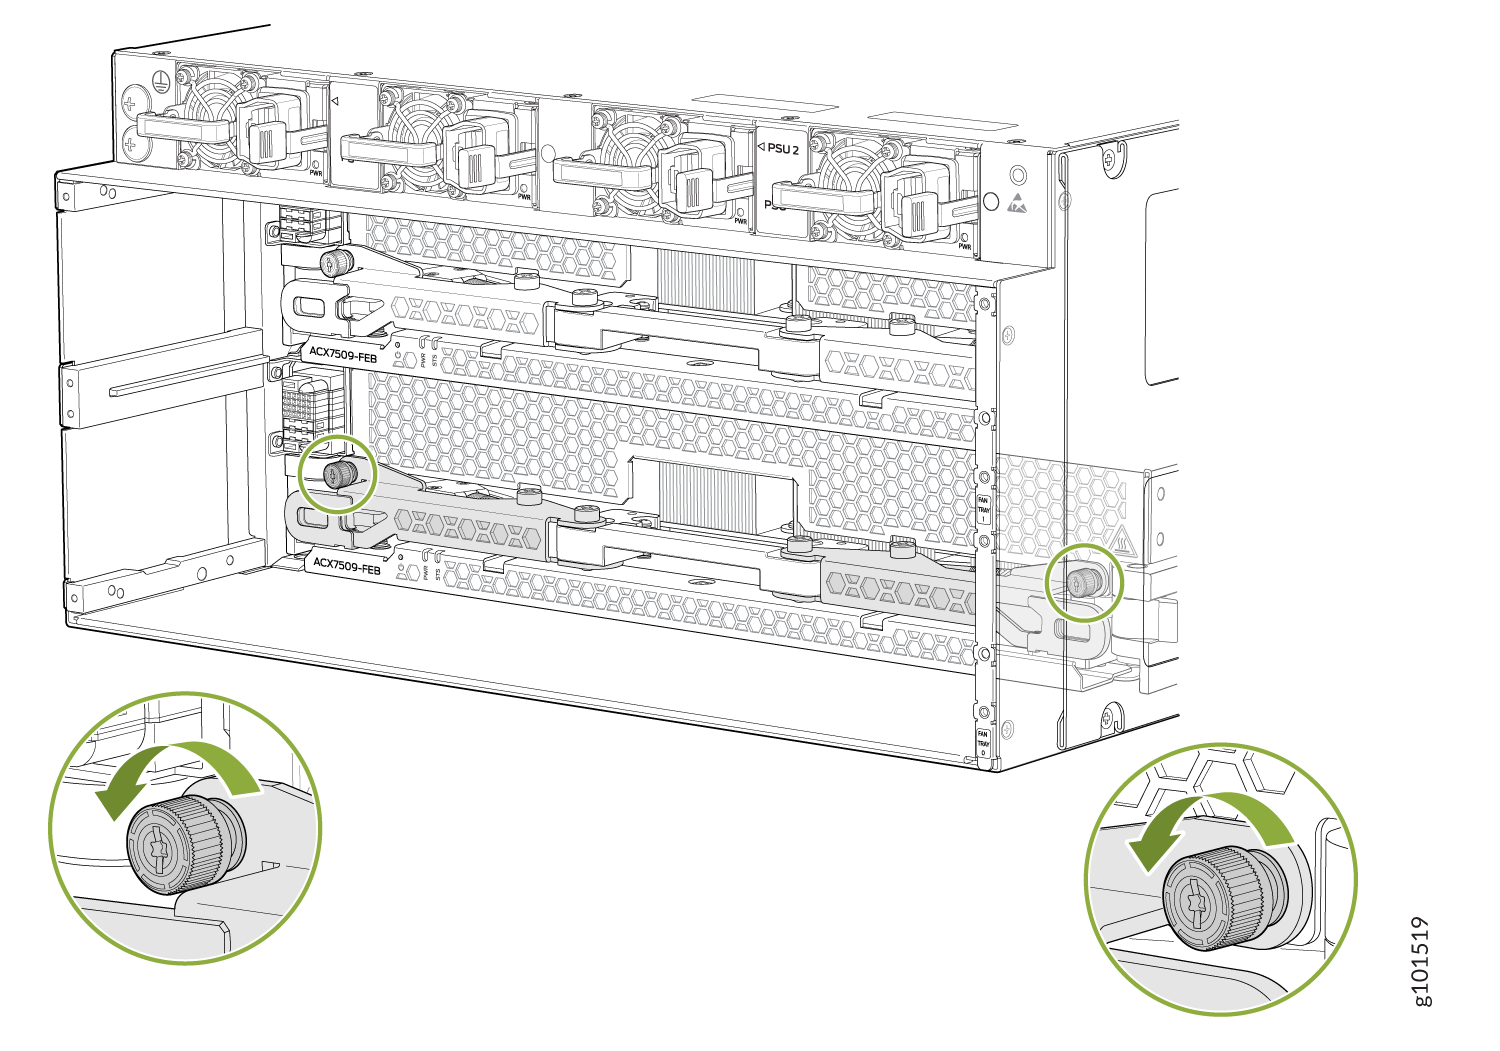
  5. Using your fingers, loosen the captive screws of the FEB. See Figure 2.
    Figure 2: Loosen the Captive Screws Loosen the Captive Screws
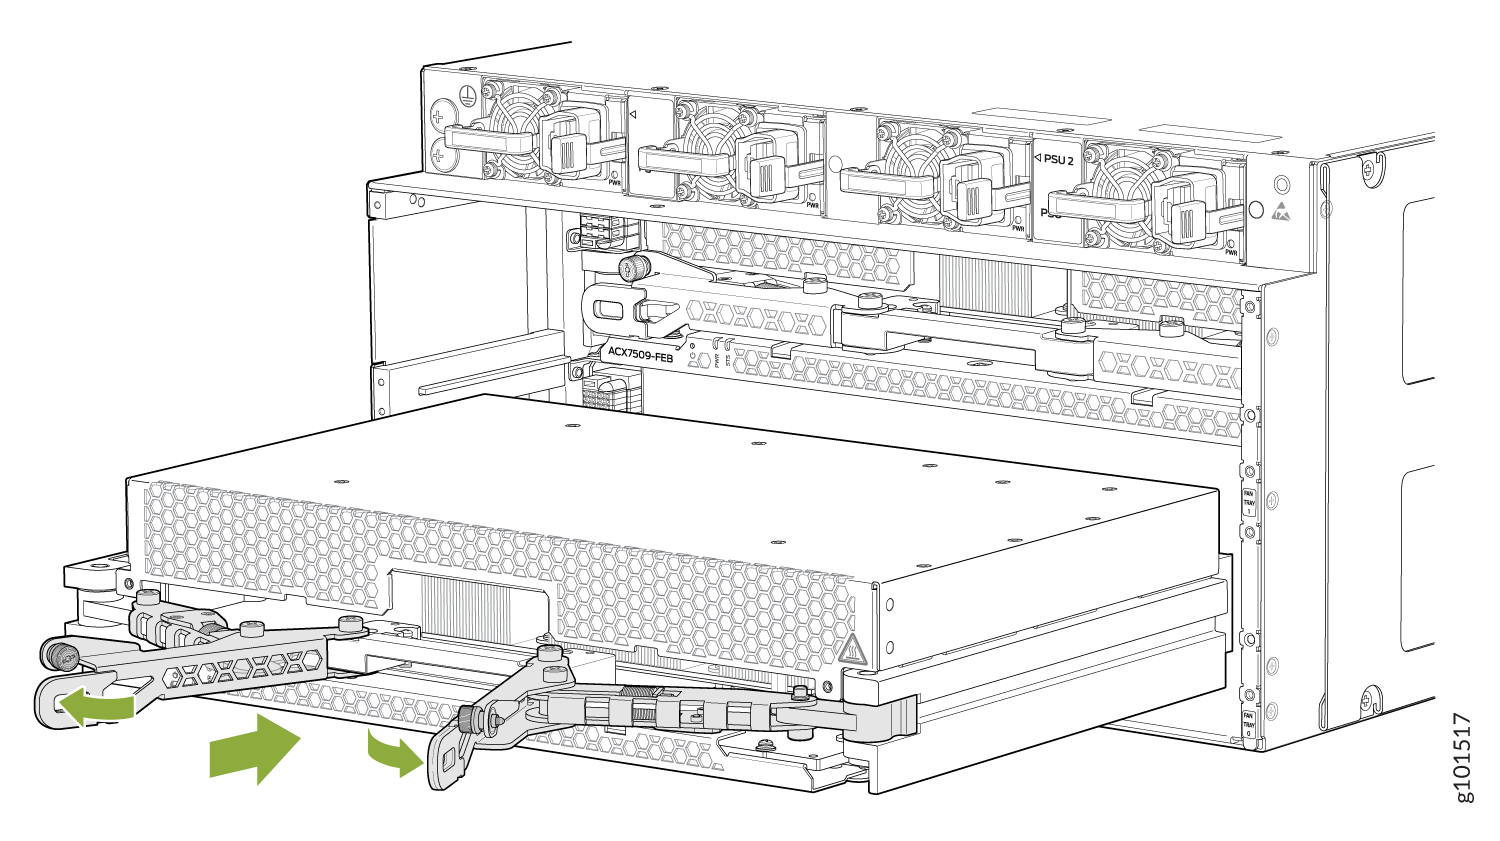
  6. Unlatch the ejector handles, and spread them apart. The FEB slides about a quarter of the way out of the slot. See Figure 3.
    Figure 3: Spreading the Ejector Handles and Removing the FEB from the ACX7509 Chassis Spreading the Ejector Handles and Removing the FEB from the ACX7509 Chassis
  7. Grasp the ejector handle with one hand, and place your other hand under the FEB for support as you slide the FEB out of the slot.
  8. Place the FEB on the antistatic mat with the printed circuit board (PCB) facing upward. Be careful not to bump or handle the FEB by the connectors. If you do not have an antistatic mat, have another person help you slide the antistatic bag over the FEB before placing it on a stable surface.
    CAUTION:

    Do not stack hardware components on top of one another after you remove them. Place each component on an antistatic mat resting on a stable, flat surface.

Install the Forwarding Engine Board in the ACX7509 Router

To install a FEB:

  1. Place an antistatic bag or an antistatic mat on a flat, stable surface.
  2. Wrap and fasten one end of the ESD grounding strap around your bare wrist, and connect the other end of the strap to an ESD point on the chassis. An ESD point is located on the rear of ACX7509 router (see Figure 1).
  3. Remove the appropriate fan tray (see Figure 1).
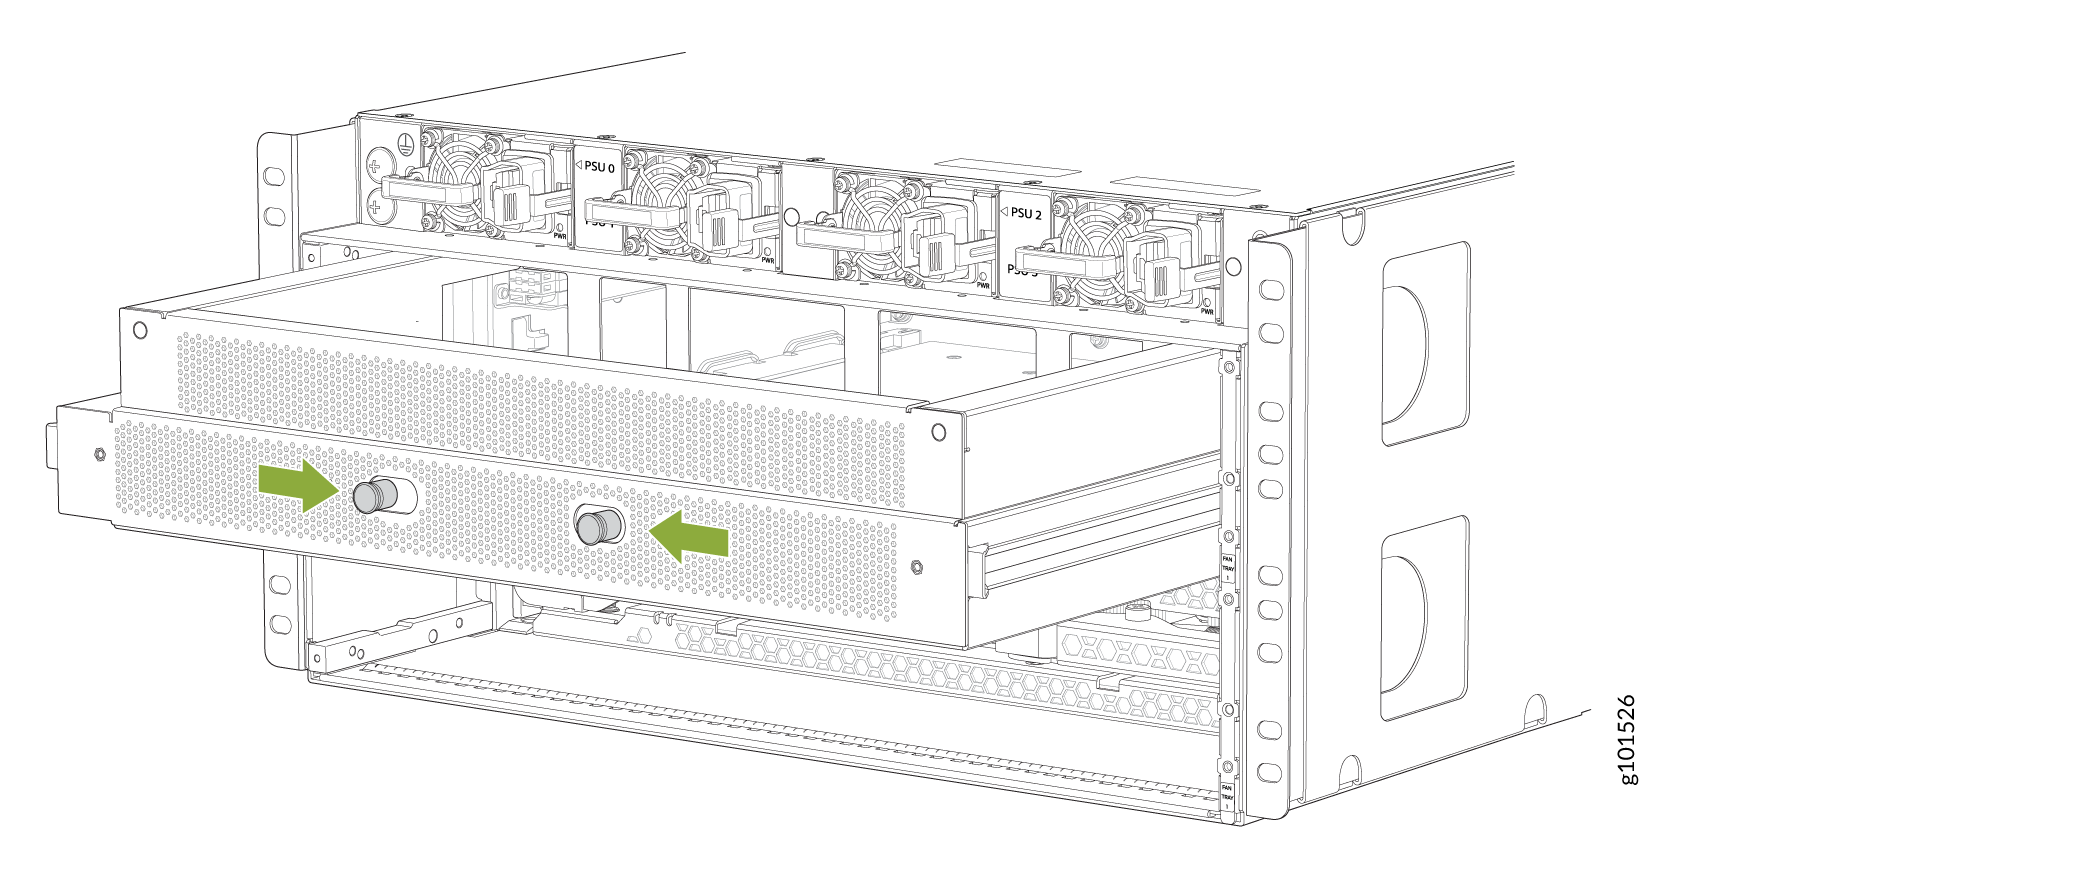
  4. Either remove the failing FEB (see Remove the Forwarding Engine Board from the ACX7509 Router) or, if an FEB blank is installed, pull the quarter-turn knobs on the blank, press them, and gently pull the blank out of the slot (see Figure 4).
    Figure 4: Removing a FEB Blank Removing a FEB Blank
  5. Lift the FEB by the handle with one hand, and support the lower edge with the other hand.
  6. Gently slide the FEB into the open slot until the ejector handles engage and start to close.
  7. Grasp the two ejector handles, and fold them inward until they latch to seat the FEB (see Figure 5).
    Figure 5: Installing an ACX7509 FEB Installing an ACX7509 FEB
  8. Hand-tighten the captive screws.
    Note:

    After you install FEB0, install Fan Tray 0 and after you install FEB1, install Fan Tray 1. Both the fan trays must be attached back to the chassis after installation to ensure uninterrupted services.

  9. Bring the FEB online using the request chassis feb slot slot number online command.

    You can check the status of the FEB using the show chassis fabric febs and the show chassis fabric plane-location commands.

    Note:

    If you completely powered off the FEB using the set chassis feb power-off slot slot command, you must delete the configuration in order to bring the FEB online. To delete the configuration and bring a replacement FEB online, use the delete chassis feb power-off slot slot number command.