Unpack and Mount an ACX710 Router
Unpack an ACX710 Router
The ACX710 router chassis is a rigid sheet-metal structure that houses the hardware components. An ACX710 router is shipped in a cardboard carton, secured with foam packing material. The carton also contains an accessory box and quick start instructions.
ACX710 routers are maximally protected inside the shipping carton. Do not unpack the router until you are ready to begin installation.
To unpack an ACX710 router:
-
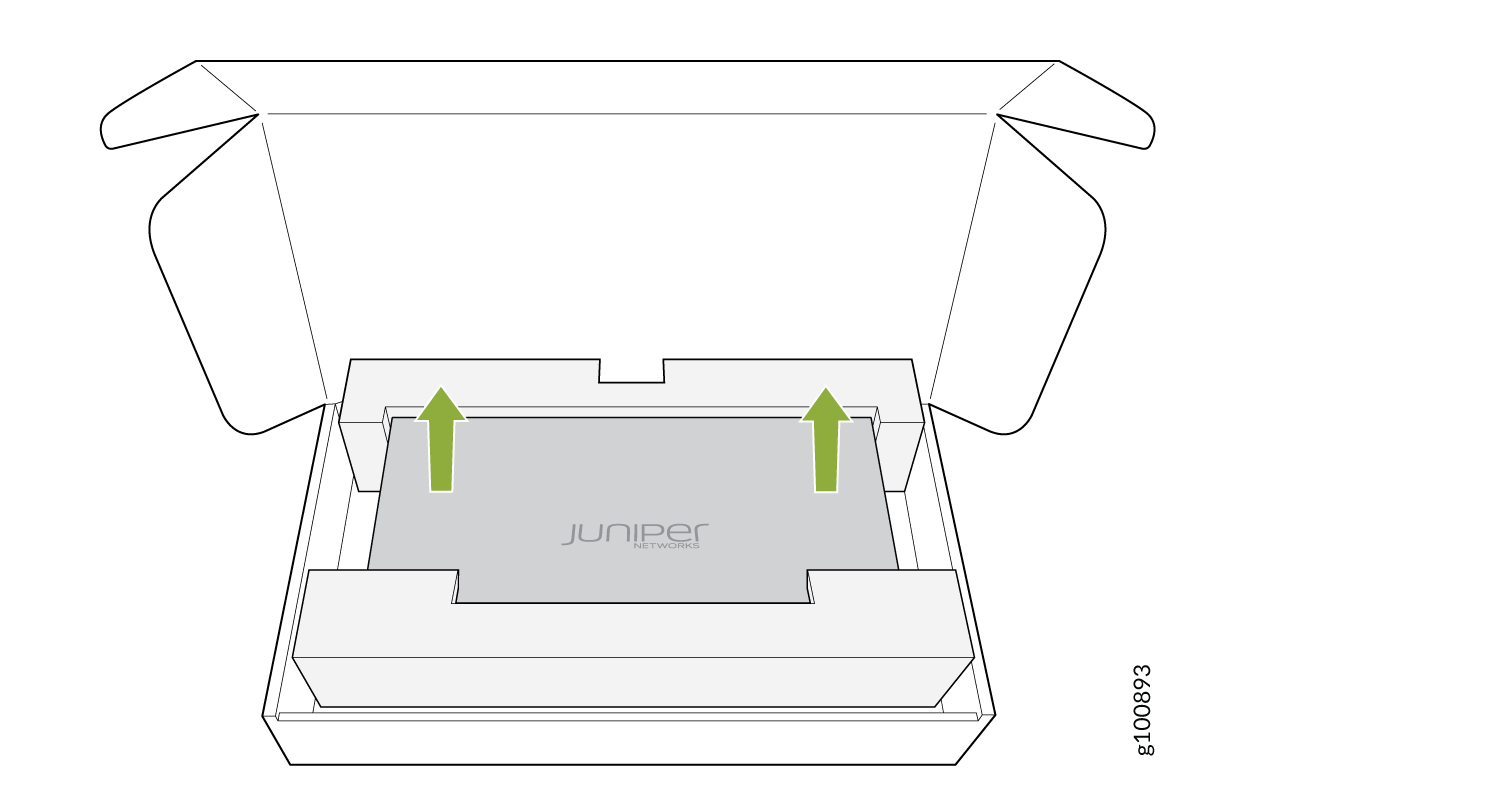
Open the top flaps on the shipping carton.
Figure 1: Open the Shipping Carton
|
Component |
Quantity |
|---|---|
|
Chassis with one fan tray |
1 |
|
19-in. rack mount kit with fasteners |
1 |
|
5 m 14 AWG, three-wire DC power cord |
2 |
|
5 m 6 AWG grounding cable |
1 |
|
End User License Agreement (EULA) |
1 |
|
Documentation roadmap card |
1 |
See Also
Mount an ACX710 Router in a Rack
You can mount an ACX710 router on a rack using the mounting kit provided with the device.
Before You Begin Rack Installation
Before you begin mounting an ACX710 router in the rack:
We no longer include the RJ-45 console cable with the DB-9 adapter as part of the device package. If the console cable and adapter are not included in your device package, or if you need a different type of adapter, you can order the following separately:
-
RJ-45 to DB-9 adapter (JNP-CBL-RJ45-DB9)
-
RJ-45 to USB-C adapter (JNP-CBL-RJ45-USBC)
-
RJ-45 to USB-A adapter (JNP-CBL-RJ45-USBA)
If you want to use RJ-45 to USB-A or RJ-45 to USB-C adapter, you must have an X64 (64-bit) Virtual COM port (VCP) driver installed on your PC. See https://ftdichip.com/drivers/vcp-drivers/ to download the driver.
If you are mounting multiple units on a rack, mount the heaviest unit at the bottom of the rack and mount the other units from the bottom of the rack to the top in decreasing order of the weight of the units.
Install an ACX710 Router in a Rack
To install the router in a four-post rack:
-
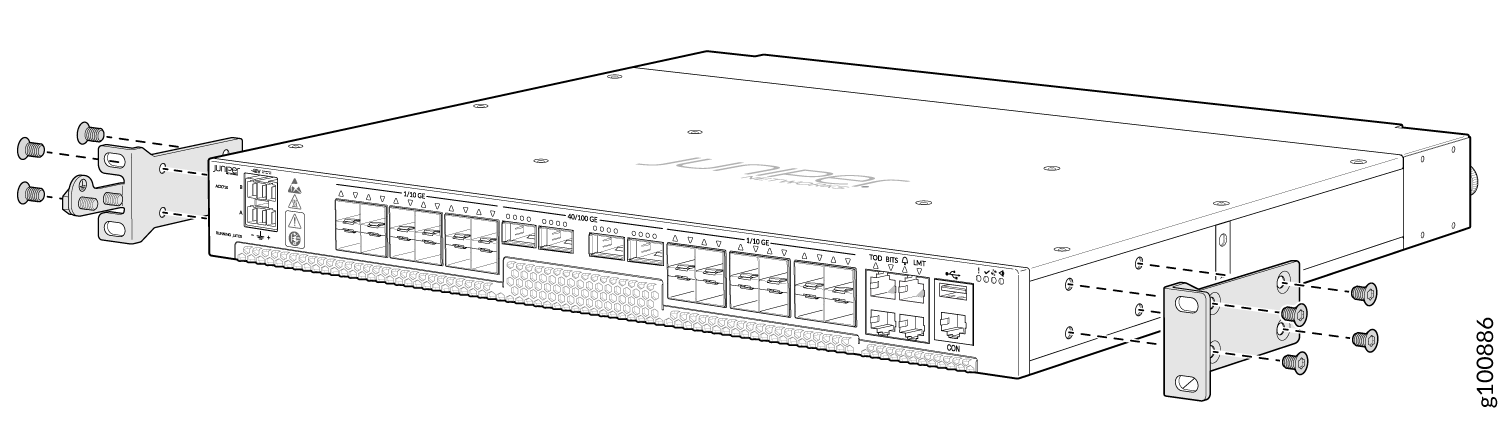
Align the holes in the front-mounting brackets with the holes on the side
of the chassis (see Figure 2).
Figure 2: Install the Mounting Brackets on an ACX710 Router
-
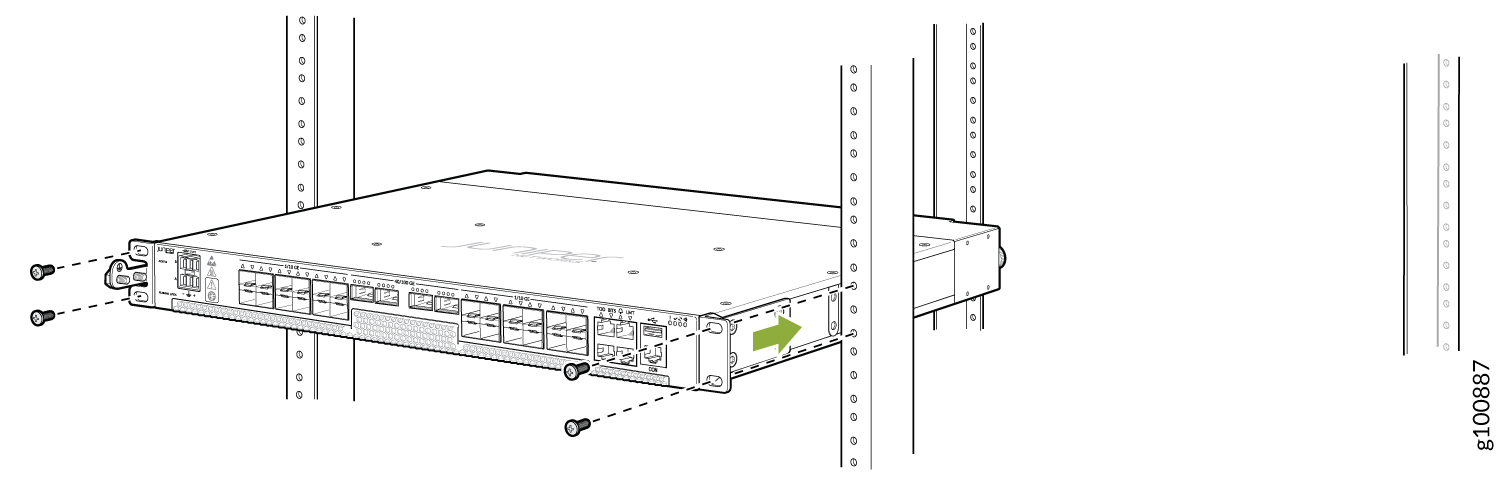
Carefully slide the chassis with the brackets attached on to the rack rails
(see Figure 3).
Figure 3: Install the ACX710 Router in a Four-Post Rack
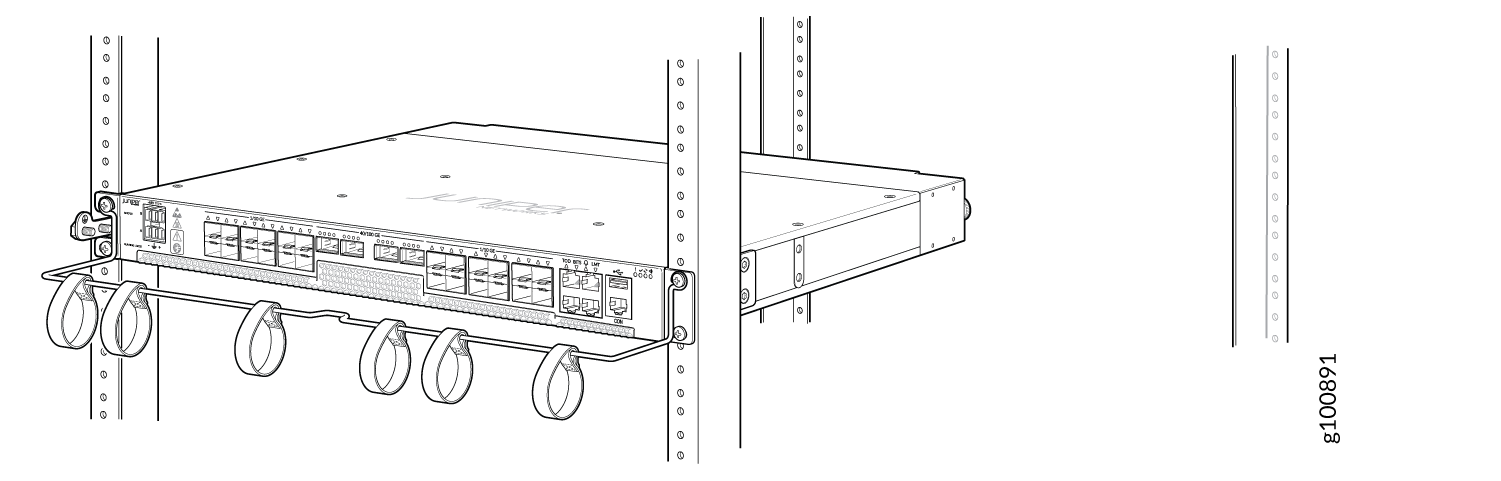
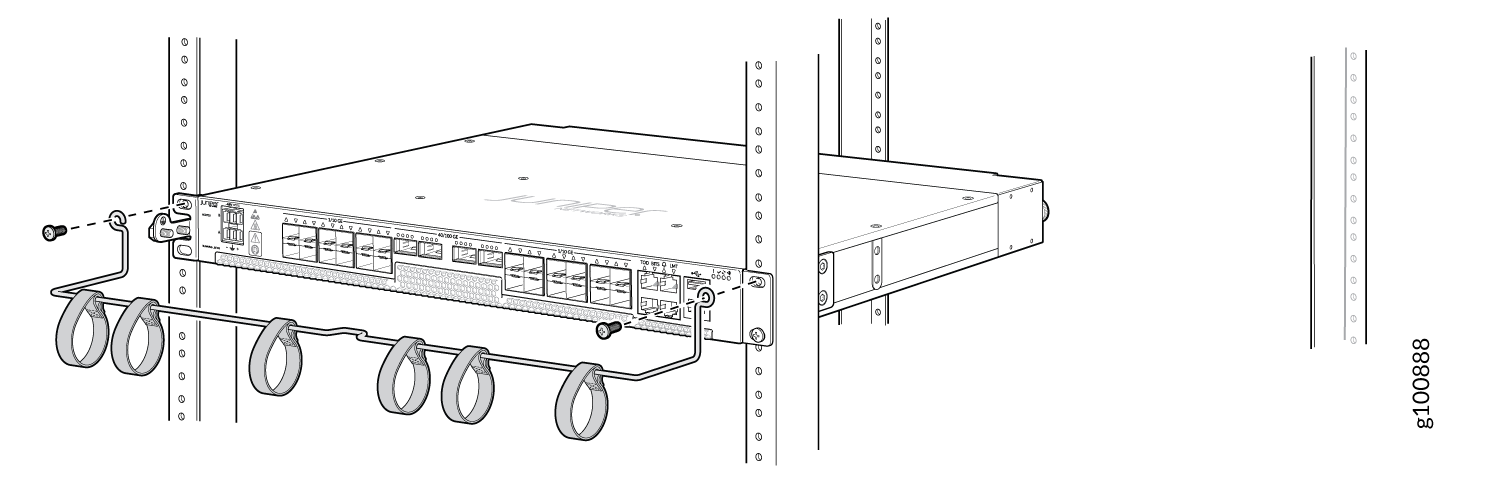
- Align the holes in the cable bar with the holes at the
top of the mounting bracket, and tighten the screws to attach the
cable bar.Figure 4: Install the Cable Bar
- Visually inspect the alignment of the chassis.
If you’ve installed the chassis properly in the rack, all the mounting screws on one side of the rack are aligned with the mounting screws on the opposite side, and the router is level. Figure 5 shows the router fully secured and installed in a four-post rack.
Figure 5: ACX710 Router Installed in a Four-Post Rack