평면도 축척
위치 정확도를 보장하려면 평면도를 조정하십시오.
비디오 개요
Okay. So now let's scale the image. So let's click setup floor plan.
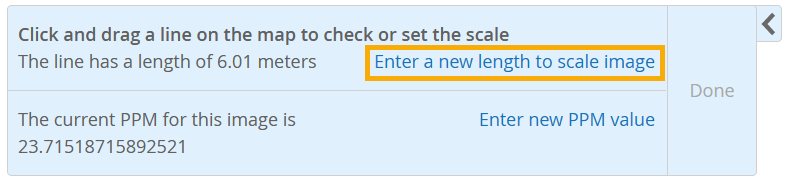
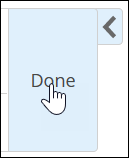
Click set scale and drag and drop between two points. So now what I'm doing here is I'm selecting two points that I know the distance between in real life. And I have very high confidence that I know that the distance between these two points is 12.15 meters. So now I'm gonna click right here and say, enter a new length, 12.15 and click okay and click done. And then once we've saved the image, that's all we need to do. You just need to know two points that you know the distance between and then enter in that value like I just did.
Now click save and that's it. Now we've uploaded and we have scaled our image.
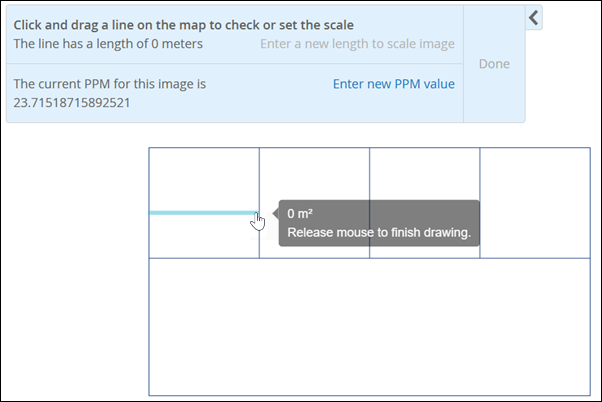
- 평면도의 두 점 사이에 선을 끕니다.
예를 들어, 방의 너비나 복도의 길이를 가로질러 선을 그릴 수 있습니다.
 팁:
팁:실제 치수를 모르는 경우 평면도에서 표준 문을 찾아 해당 문을 0.91미터(3피트)로 조정합니다. 이렇게 하면 실제 규모에 가까워집니다.
- Enter a new length to scale image(이미지 배율을 조정할 새 길이 입력)를 클릭합니다.
- 완료를 클릭합니다.
이제 평면도에 액세스 포인트를 추가할 준비가 되었습니다.