間取り図を拡大
位置の精度を確保するには、フロアプランをスケーリングします。
ビデオの概要
Okay. So now let's scale the image. So let's click setup floor plan.
Click set scale and drag and drop between two points. So now what I'm doing here is I'm selecting two points that I know the distance between in real life. And I have very high confidence that I know that the distance between these two points is 12.15 meters. So now I'm gonna click right here and say, enter a new length, 12.15 and click okay and click done. And then once we've saved the image, that's all we need to do. You just need to know two points that you know the distance between and then enter in that value like I just did.
Now click save and that's it. Now we've uploaded and we have scaled our image.
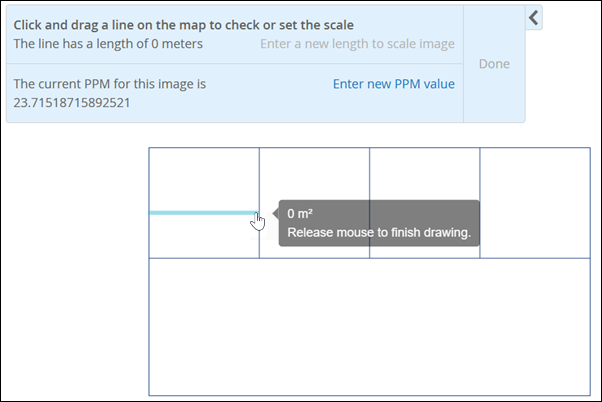
- 平面図上の 2 点間の線分をドラッグします。
たとえば、部屋の幅や廊下の長さを横切る線を引くことができます。
 先端:
先端:実際の寸法がわからない場合は、間取り図で標準のドアを探し、そのドアを 0.91 メートル (3 フィート) に拡大縮小します。これにより、実際の縮尺に近づくことができます。
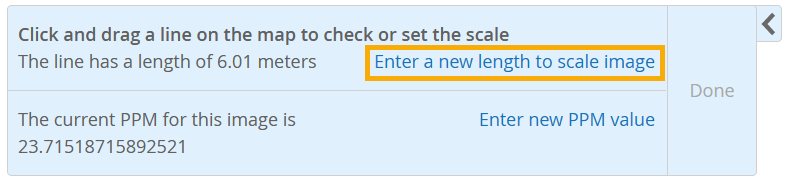
- [画像を拡大縮小する新しい長さを入力] をクリックします。
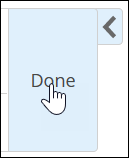
- 「完了」をクリックします。
これでフロアプランにアクセスポイントを追加する準備が整いました。