デジタル証明書を使用する
これらの手順に従って、組織ごとにジュニパー Mist Access Assurance と統合されている RADIUS サーバーの証明書を生成して使用します。
EAP認証を使用する場合、クライアントとサーバーの両方が互いのIDを確認する必要があります。クライアントは通信しているサーバーを信頼する必要があり、サーバーはクライアントを認証する必要があります。サーバー証明書は、この相互認証プロセスの最初のステップであり、クライアントは通信を続行する前にサーバー証明書を検証または信頼する必要があります。
EAPトランザクション(EAP-TLSやEAP-TTLSなど)を見てみると、無線か有線認証かに関わらず、最初のステップは、サーバーがクライアントデバイスに「Server Hello」メッセージを送信して自身を識別することです。
クライアントデバイスがサーバー証明書を受信すると、Wi-FiまたはLANプロファイル内の信頼できる認証局(CA)のリストを確認し、サーバー証明書が信頼できるCAのいずれかによって署名されているかどうかを確認します。オプションで、設定されている場合、サーバー名がクライアント構成の信頼できるサーバー名のリストと一致するかどうかをチェックします。
検証手順と信頼サーバー証明書をバイパスしないことをお勧めします。これはセキュリティリスクが高く、MITM(中間者)攻撃を引き起こす可能性があります。
以下の方法のいずれかを使用して、組織ごとにジュニパー Mist Access Assurance と統合されている RADIUS サーバー用の証明書を生成して使用できます。
- CA証明書—ジュニパーMistでは、クライアントデバイスとの信頼を確立するために特定のCA証明書が必要です。信頼できる認証局(CA)によって発行されるこれらの証明書により、ジュニパー Mist Access Assuranceはクライアントデバイスにネットワークアクセスを許可できます。ジュニパー Mistによるクライアントデバイスの検証は、デバイスによる証明書の提示に基づいています。証明書は同じCAによって署名される必要があります。
- デフォルトのジュニパーMist Access Assurance証明書—Mist組織は、Access アシュアランスサーバー証明書の発行を担当する独自のプライベートMist認証機関(CA)を維持しています。特定の設定がない場合、クライアントはそれぞれのMist組織CAによって認証されたデフォルト証明書を受け取ります。この証明書はドメイン「auth.mist.com」に対応します。
- カスタムサーバー証明書—現在のクライアント設定を変更したくなく、クライアント証明書を提供したのと同じ認証機関(CA)が発行したサーバー証明書をクライアントに信頼させたい場合、カスタムサーバー証明書が優先されます。RADIUSサーバーから取得したプライベートキーと署名済み証明書を入力する必要があります。
以下の手順を読んで、上記の証明書の使用方法を理解してください。
認証機関(CA)証明書を使用する
拡張認証プロトコル - トランスポート層セキュリティ(EAP-TLS)証明書ベースの認証を機能させるには、ジュニパー Mistポータルに信頼できるCA証明書を追加する必要があります。
この手順により、ジュニパー Mistアクセス認証は、追加したCAによって署名されたクライアント証明書を信頼できるようになります。
外部CAから証明書を取得できます。CA は、既知のパブリック CA またはエンタープライズ CA です。
次のビデオを見て、テストまたはラボで使用する証明書を生成する方法を確認してください。
How to create certificates both CA certificates and client certificates that you could use for lab testing to repeat all the steps in our tutorials. So in order to do things easily and quickly, assuming there is no existing infrastructure, assuming there is nothing you can use that you're available on-hand, you could use some open source tools that are out there on the internet. I will use degree-based certificate authority and key management called XCA.
You can Google it. You can download it. It's available for everyone to use. So now, when we will use XCA tool, first thing we will need to do, we'll need to create a new database. You could think of this creating a specific BQ infrastructure right on your laptop. So we can just say missed access insurance tutorial. Database, save it in there, it will ask you to encrypt it, which is a good thing. Click OK. So now we have the database created.
So the first thing we will need to create our certificate infrastructure is the certificate authority. That's the thing that will sign all the certificates of all your client devices that you will be using for testing. And that's the ultimate source of trust in your BQ infrastructure. So I'm going to click on new certificate. I'm going to select that, this is going to be a self-signed certificate because technically, every certificate authority, the root certificate authority is a self-signed.
Has a self-signed certificate. We'll select the template called CA from this list, will then go to subject. We can give it some internal name but doesn't matter, we could just say lab mist CA. You can fill in some of the data in there. Again, it doesn't really matter what you will put in there. But for testing purposes, just use anything you really like, organization name. Common name is important. This is how you identify certificates in real life. So one of the important attributes is common name. And we will take a look at the other one later, which is called the subject alternative name.
So common name, let's just call it lab-mist-ca@justify.com. Maybe something like this. I'm going to click that. We'll need to create a private key. A private key is what will prove that the certificate-- oh, owned and certificate holder is actually that same device or it's same CA. So we'll generate a new key, we'll set it to be 4,000 bytes, create. It will automatically selected here. It's good. We'll go to extensions. The type will be certification authority. It will add a few attributes in the certificate saying this is a CA cert.
This is where we will add the subject to alternative name. So typically what you'll do is you click edit, you will say I want to copy common name and there. Click apply. That's it. This will typically go and take your common name and copy it into a assign attribute.
Nowadays, many clients are using SAN to validate-- certificate validity. And the key usage, what do we need there? We need certificate signs, CRL sign. That's pretty much it. So we'll click OK. This now created our certificate authority in here. So we have the certificate. This is a CA cert, it has a common name.
The expiry date is, well, next year, but typically CA cert would be valid for like 10 years or something like that. For our intents and purposes, this is just a lot testing one year is more than enough.
So what will then need to do is will create a client cert. So click select our CA, will click new certificate. Now see under signing section, we are going to use this CA cert for signing certificates. It's not going to be self-signed anymore. So now our certificate authority will sign a new certificate that will be issued by the client. This is how we will establish this chain of trust. So create, select the template-- TLS client. We'll go to subject. That just say this is going to be a test lab client. Doesn't matter.
So common name is important. So this is where I would recommend you to use something that is an actual username that you want to use later on with your testing, whether you have an identity provider with your test username or things like that. So in my case, I will use one username I have in my Okta IdP that I will use later on. So I'm going to just use my Juniper email address. I'm going to copy it. We'll need to generate a private key, again, 4,000 bits.
We'll go to extensions, we'll select end entity. We'll click on subject, alternative name. Again, we'll just say copy common name. We'll go to key usage, will now need to select that this is a client certificate not the service certificate. And we will need key encipherments, digital signature, it should be OK. Now we click OK. We now have a client certificate.
So now we see there is a little dropdown in there. So we have a CA but now sign the client certificate. So now we have a CA and now we have a client certificate. What we'll do will need to export the CA. I will click on export. The CA cert, we are only exporting the public certificate, we are not touching the private key. Private Key stays untouched. It it is never exported anywhere. This is the only thing that protects the ownership of that certificate.
So we are exporting the private key in our test folder-- .mistCRT that's all we need. Click OK. The next thing we'll need is we'll need to export the certificate and the private key that we will use for client testing. Again, normally in production environment, you're not going to export private keys, they will be automatically pushed and distributed through MDM securely so they're never exposed to the network or anybody. But in our case, since we're testing, that's OK to do for now. So we'll click export.
In this case, the export format is pfx. That's the format that will include the client certificate, the client private key, and the CA cert in one package. So you can later on imported to one of your testing clients. And generally, this format is well understood by different operating systems.
It will ask you to encrypt that package. So just do a very secure password of 1234. Now we have to search, export it. We have a CA cert and we have a client cert. For now, this is good enough for our testin
CA証明書を追加するには:
- 認証機関の追加をクリックします。
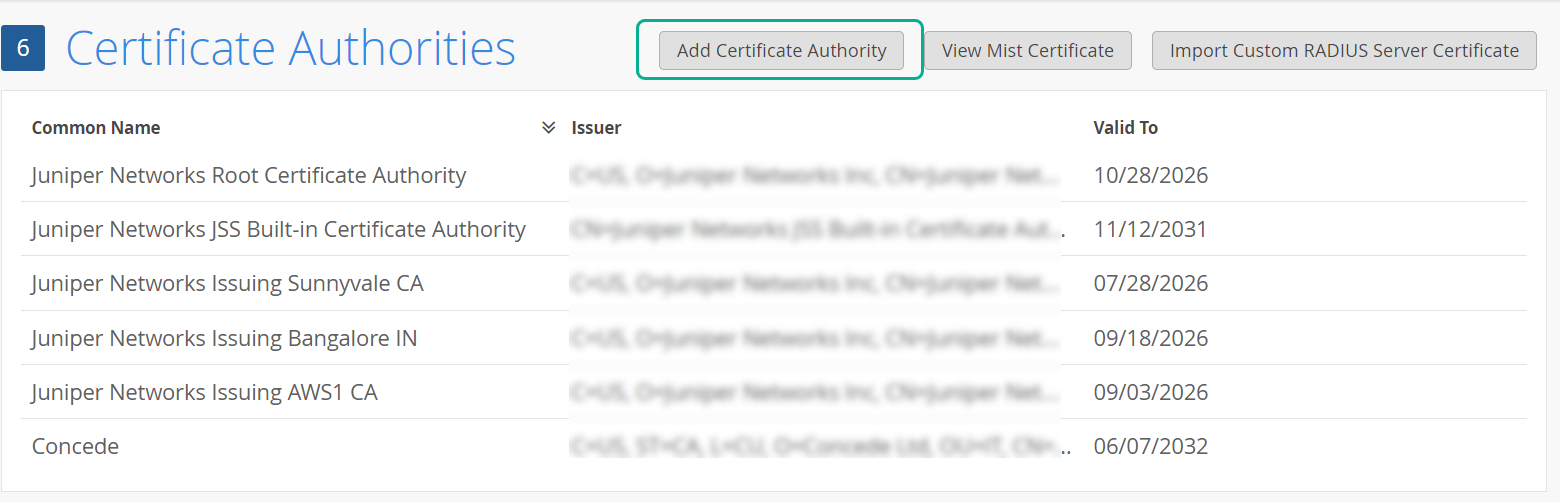
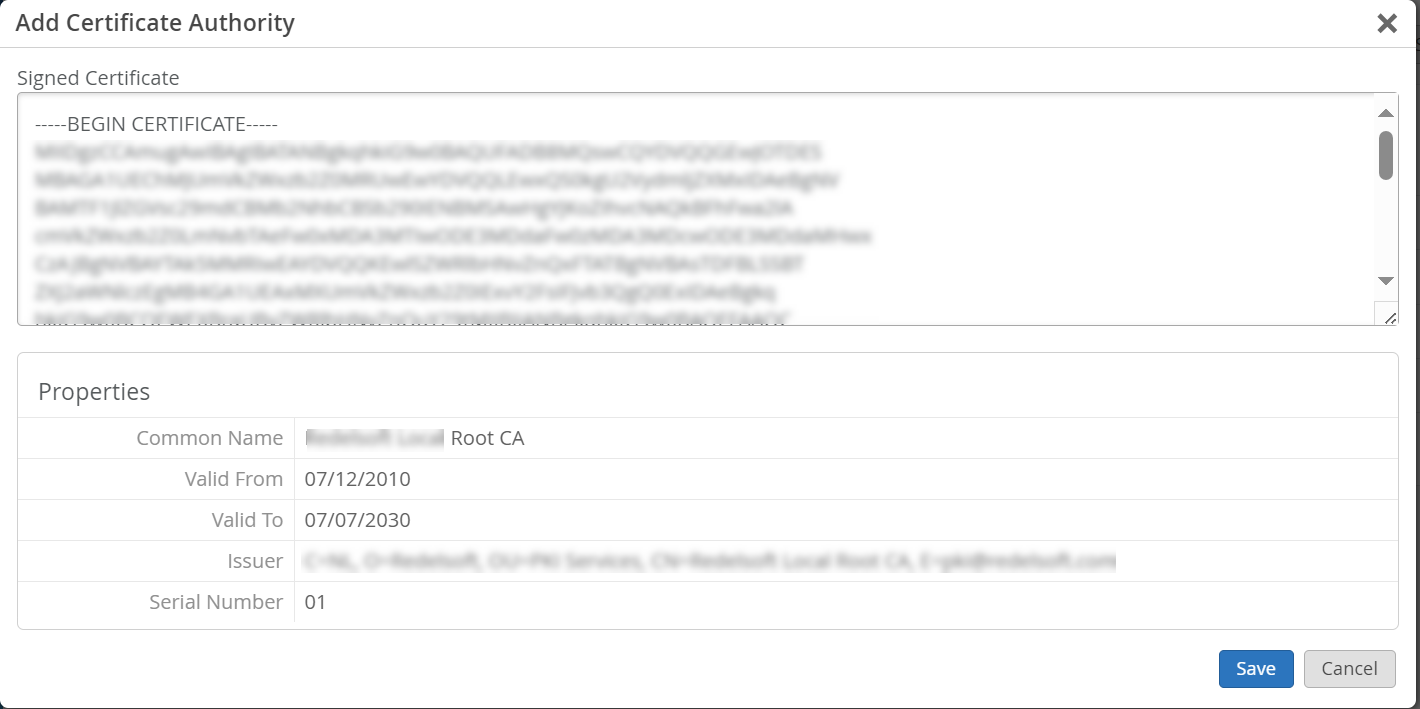
- 署名 済み証明書フィールドにCA証明書を貼り付けます。
図1:認証機関
 の追加
の追加
テキストには、
—–BEGIN CERTIFICATE—–行と—–END CERTIFICATE—–行を含める必要があります。インポートされたCA証明書を解析およびデコードし、 プロパティペイン に証明書のプロパティを表示します。ルート CA に加え、すべての中間 CA または発行証明書を追加することをお勧めします。
ジュニパー Mist Access Assuranceによるデフォルトサーバー証明書を使用
ジュニパー Mist クラウドは、ジュニパー Mist クラウドに追加された各組織のプライベート認証機関(CA)として機能します。ジュニパーMistがサーバー証明書を発行します。証明書が設定されていない場合、ジュニパー Mist ポータルは、ジュニパー Mist CA によって署名されたデフォルトのサーバー証明書をクライアントデバイスに提示します。
名前 auth.mist.com に対して証明書が発行され、 図2に示すような情報が表示されます。
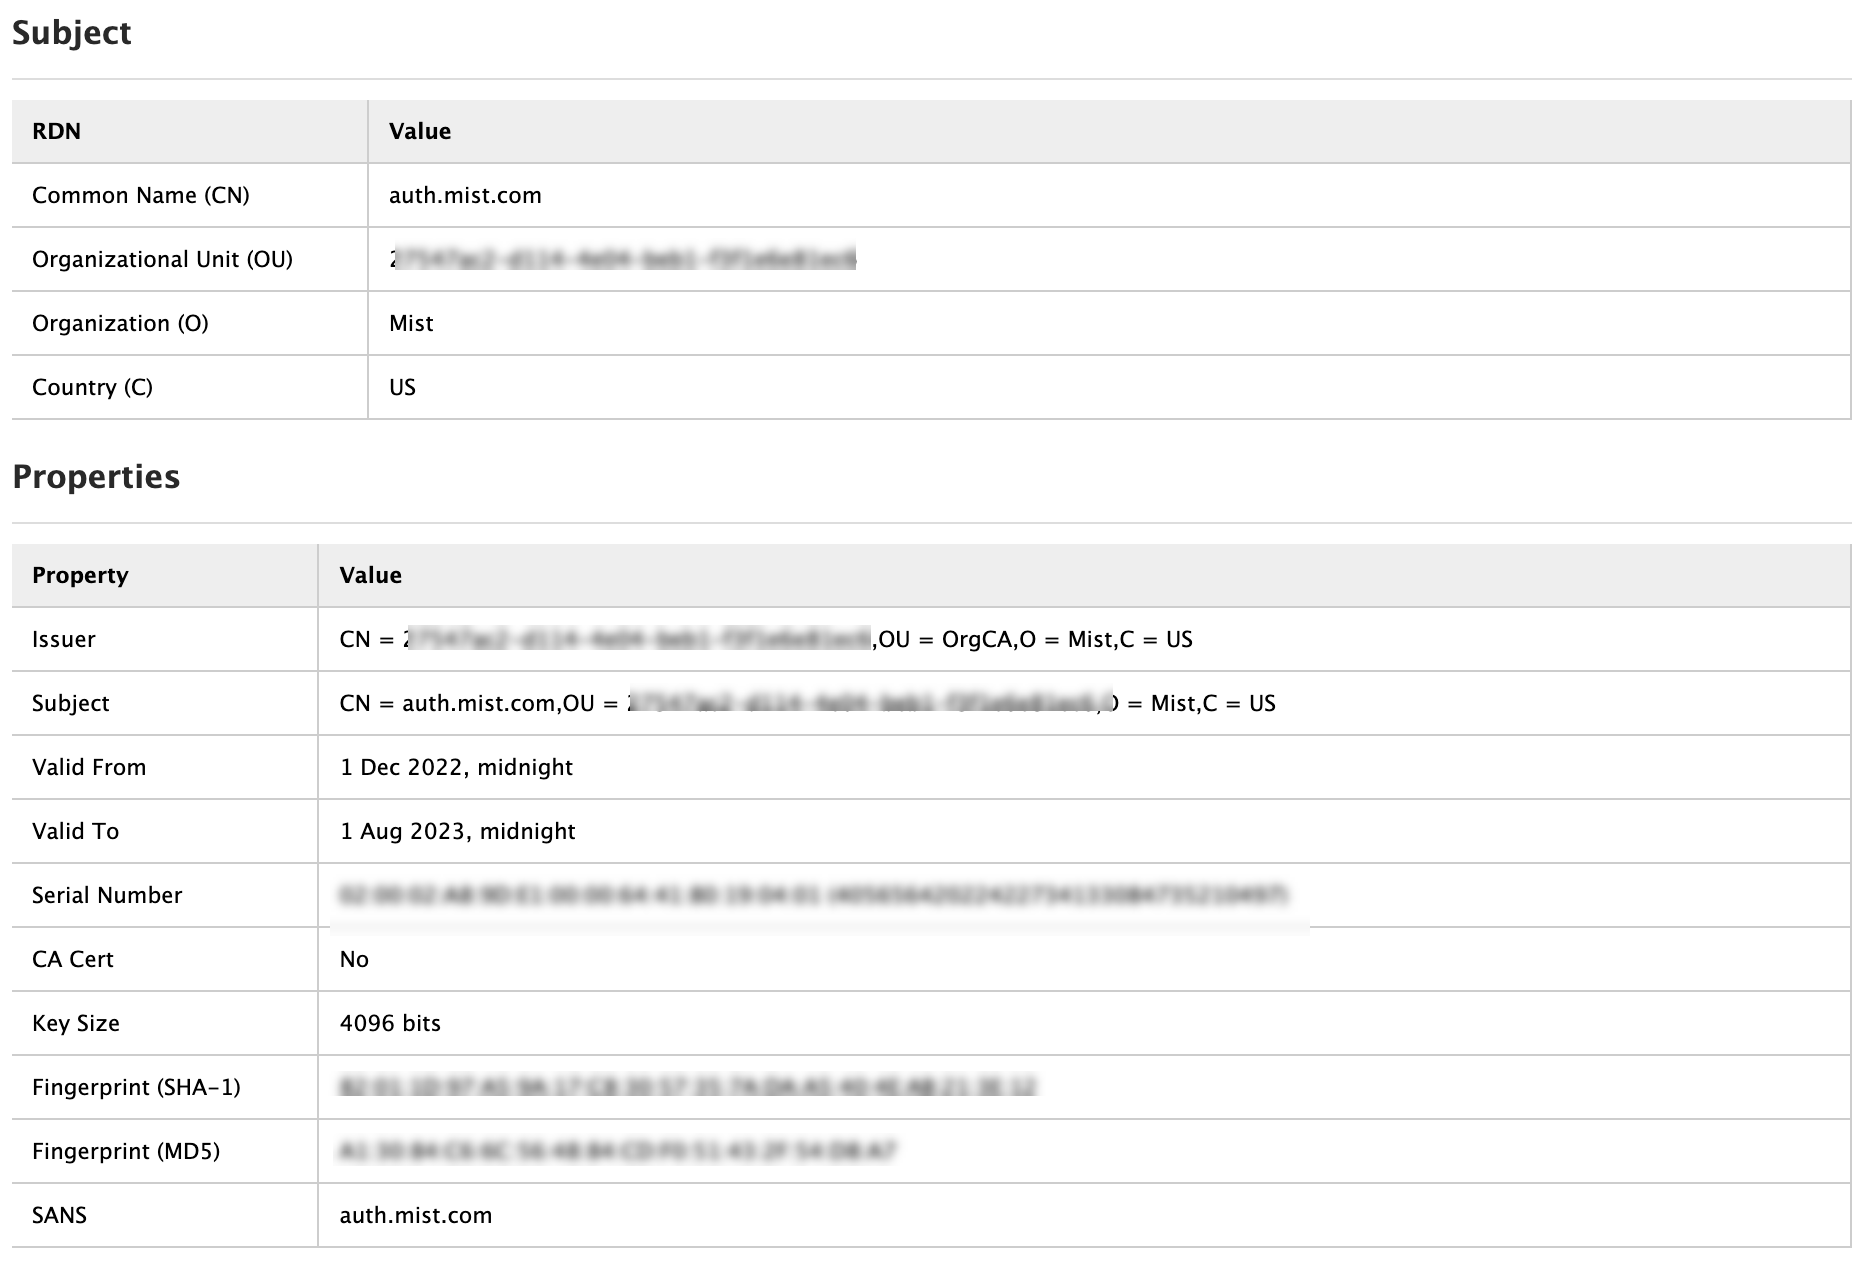 が発行するサーバー証明書
ジュニパーMistサーバー証明書をダウンロードするには:
- Mist証明書を表示をクリックします。
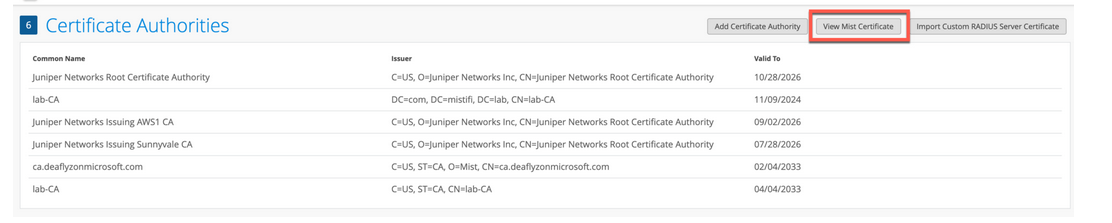 画面に 署名証明書 の詳細が表示されます。 署名付き証明書 フィールドから証明書の内容をコピーします。図3:証明書
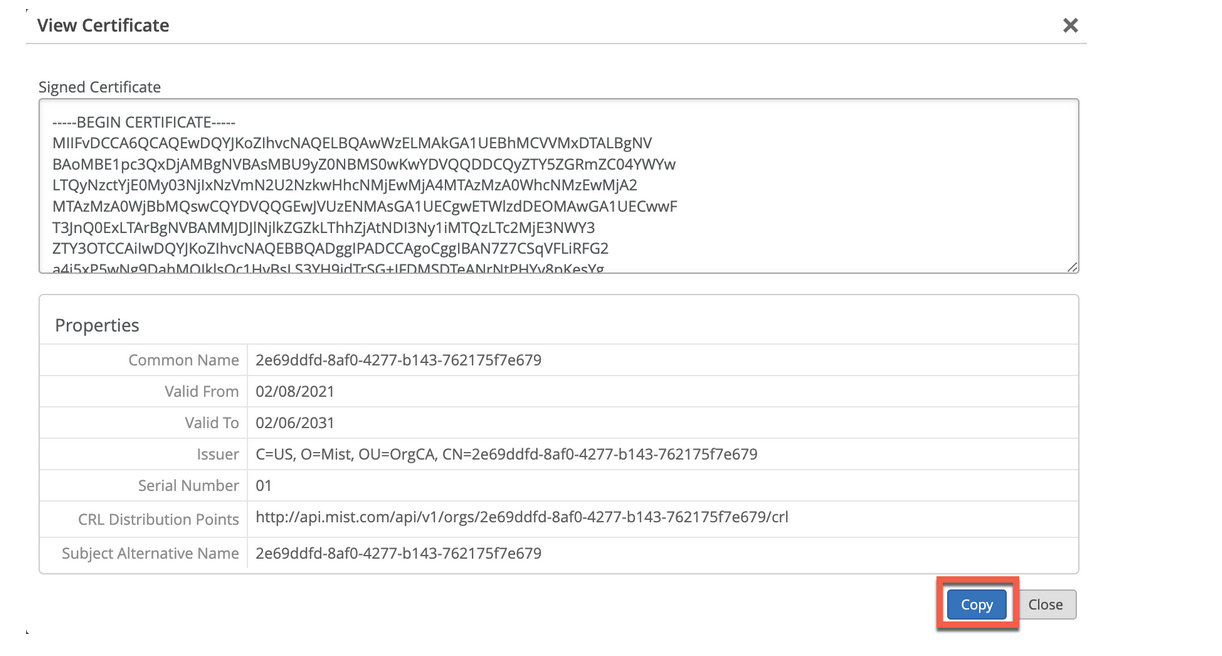 Mist表示およびコピーする
カスタムサーバー証明書を使用する
すでにPKIがあり、既存の設定をそのまま維持したい場合があります。このようなシナリオでは、ルートCAの公開証明書とRADIUSサーバーの公開/秘密キーペアをジュニパーMistポータルにアップロードする必要があります。
RADIUSサーバーが各クライアント(サプリカント)の証明書を検証できるように、クライアントデバイスも同じ証明書を使用していることを確認してください。クライアントの現在の設定を変更せず、証明書を発行したのと同じ CA によって発行されたサーバー証明書をクライアントが信頼する場合は、このタスクを実行します。
証明書をジュニパー Mistポータルにアップロードするには:
- カスタムRADIUS証明書をインポートをクリックして、証明書ページを開きます。
図4:カスタムRADIUSサーバー証明書
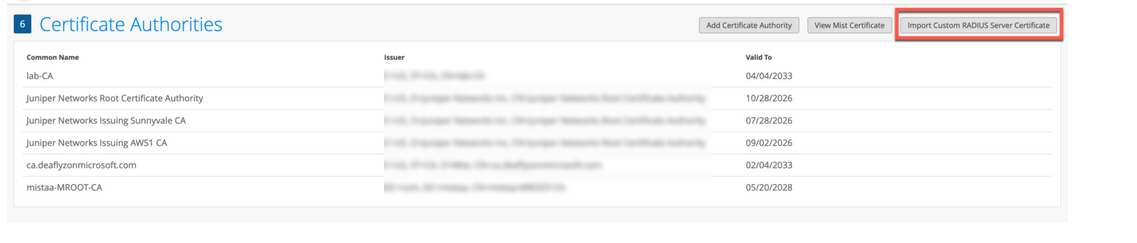 をインポートする
- カスタムRADIUSサーバー証明書のインポートページで、CA証明書の詳細を入力します。
図5:カスタムサーバー証明書の詳細を入力し
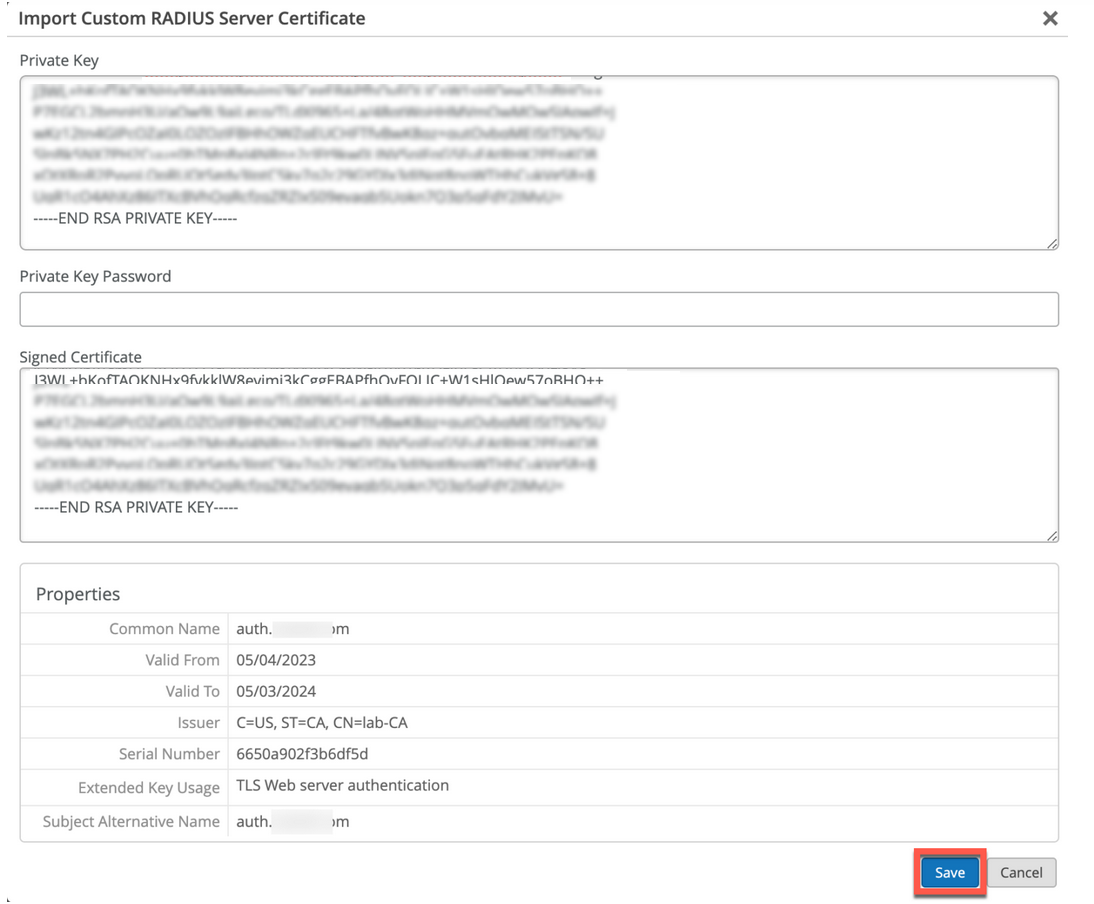
- プライベートキー—プライベートキー情報をコピーアンドペーストします。テキストには
BEGIN RSA PRIVATE KEY行とEND RSA PRIVATE KEY行を含める必要があります。 - プライベートキーパスワード—プライベートキーのパスフレーズを入力します(利用可能な場合)。
- 署名済み証明書—証明書をテキストとしてコピーアンドペーストします。すべての中間CAとルートCA証明書が含まれていることを確認してください。テキストには、
—–BEGIN CERTIFICATE—–行と—–END CERTIFICATE—–行を含める必要があります。
- プライベートキー—プライベートキー情報をコピーアンドペーストします。テキストには
- Do not use a wildcard certificate, for example: *.abc.com for 802.1X authentication.
- You can use a certificate that contains a common name (CN) or a subject alternative name (SAN) for 802.1X authentication..
- We recommend the following x509 extension attributes. The majority of the client device operating systems support these extensions.
- Use certificate version 3 or v3 (not legacy v1)
- If the server name is being used as a validation criterion on the client side, then the certificate should include the SAN extension with the DNS name of the server.
- Include Extended Key Usage as a TLS web server authentication criterion (required for most Android devices).
Guidelines for using custom server certificates:
これで、証明書ベースの認証プロセスを進めることができます。
関連項目
クライアント証明書の要件
ジュニパー Mist Access Assuranceで証明書ベースの認証を実装する場合、IdPルックアップやMDM統合などの機能全体で適切な機能を確保するために、クライアント証明書が特定の要件を満たす必要があります。
セキュリティ要件
クライアント証明書は、次の最小セキュリティ基準を満たす必要があります。
- 証明書タイプ:X.509 v3証明書
- キー長:2048ビット以上(4096ビットを推奨)またはECDSA(P-256以上)
- シグネチャアルゴリズム:SHA-256以上(SHA-384、SHA-512)
- 必要な拡張機能:クライアント認証での拡張キー使用(1.3.6.1.5.5.7.3.2)
IDプロバイダールックアップの要件
ユーザーIDをIdPと正常に照合するには、クライアント証明書に次のいずれかのフィールドが含まれていることを確認してください。ルックアップは、クラウドIdP( フォーマット user@domain.xyz)のユーザープリンシパル名を使用して実行する必要があります。以下のフィールドは、以下の順序でチェックされます。
- サブジェクト共通名(CN)
- 件名の代替名 - UPN(SAN:UPN)
- 件名の代替名 - 電子メール(SAN:Email)
マシン証明書のIDプロバイダールックアップ動作
IdPとマシンIDの照合に成功するには(他のクラウドIdPはマシンIDを持たないため、主にEntra IDに関係します)、クライアント証明書に次のいずれかのフィールドが含まれていることを確認してください。
ルックアップは、EntraIDのデバイス名(ドメイン名を除く)を使用して実行する必要があります。以下のフィールドは、以下の順序でチェックされます。
- サブジェクト共通名(CN)
- サブジェクトの代替名 - DNS(SAN:DNS)
MDM 統合に関する考慮事項
MDM ソリューションで証明書を使用する場合:
- デバイスベースのルックアップ用に、証明書にデバイス識別子(SAN:DNSフィールドのDeviceIdやUDIDなど)を含めます。
- ジュニパーのドキュメントポータルで、各MDMベンダーの関連統合ドキュメントを参照してください。 ジュニパー Mist Access Assurance NAC
Access アシュアランスの機能全体で機能が適切であることを確認するために、企業全体に展開する前に、少数のデバイスで証明書の設定をテストします。