Configure Security Director Insights High Availability
Security Director Insights supports two-node high availability (HA) with the following specifications:
Once you enable HA, one Security Director Insights virtual machine (VM) becomes the active node and another Security Director Insights VM becomes the standby node.
You must specify the virtual IP address assigned to the HA system to inject logs through the virtual IP address.
If the active node is abnormal or down, the failover to the standby node occurs automatically. You need not change anything when you inject logs.
This topic explains how to setup Security Director Insights HA.
Before You Begin
Before you enable HA:
- Read Security Director Insights High Availability Deployment Architecture.
Note If you are using Policy Enforcer inside Security Director Insights and Policy Enforcer is not in HA, you must not deploy Security Director Insights in HA.
- The two Security Director Insights VMs must have the same
Security Director Insights software versions. In each Security Director
Insights VM, configure the following network interfaces to enable
HA:
Eth0—For normal Security Director Insights data and management
Eth1—For HA monitoring
Without the HA feature, Security Director Insights VM requires only a single network interface, eth0, for data and management. The standard Security Director Insights OVA deployment configures only the eth0 interface.
- Use the following procedure to configure IP addresses
for the network interfaces:
Go to Security Director Insights CLI.
# ssh admin@${security-director-insights_ip}
Enter the Settings menu.
# server
View already configured IP addresses.
# show ip
Configure the eth0 IP address.
# set ip interface management address ${eth0_ip} gateway ${eth0_gateway} netmask ${eth0_netmask}
Configure the eth1 IP address.
# set ip interface ha-monitoring address ${eth1_ip} gateway ${eth1_gateway} netmask ${eth1_netmask}
Verify the configured IP addresses.
# show ip
Note You must ensure that:
On each node, the IP addresses of the eth0 and eth1 interfaces are in different subnets.
The IP address of the eth0 interface of the active and standby nodes are in the same subnet.
The IP address of the eth1 interface of the active and standby nodes are in the same subnet.
Enable HA
Before you enable HA, you must add the active node.
- To add the active node:
Select Security Director > Administration > Insights Management > Insights Nodes.
The Insights Nodes page appears.
Enter the IP address of the active node, admin password, and click Save.
- Once the active node is added successfully, toggle the
Enable HA option on, as shown in Figure 1.
Figure 1: Enable HA 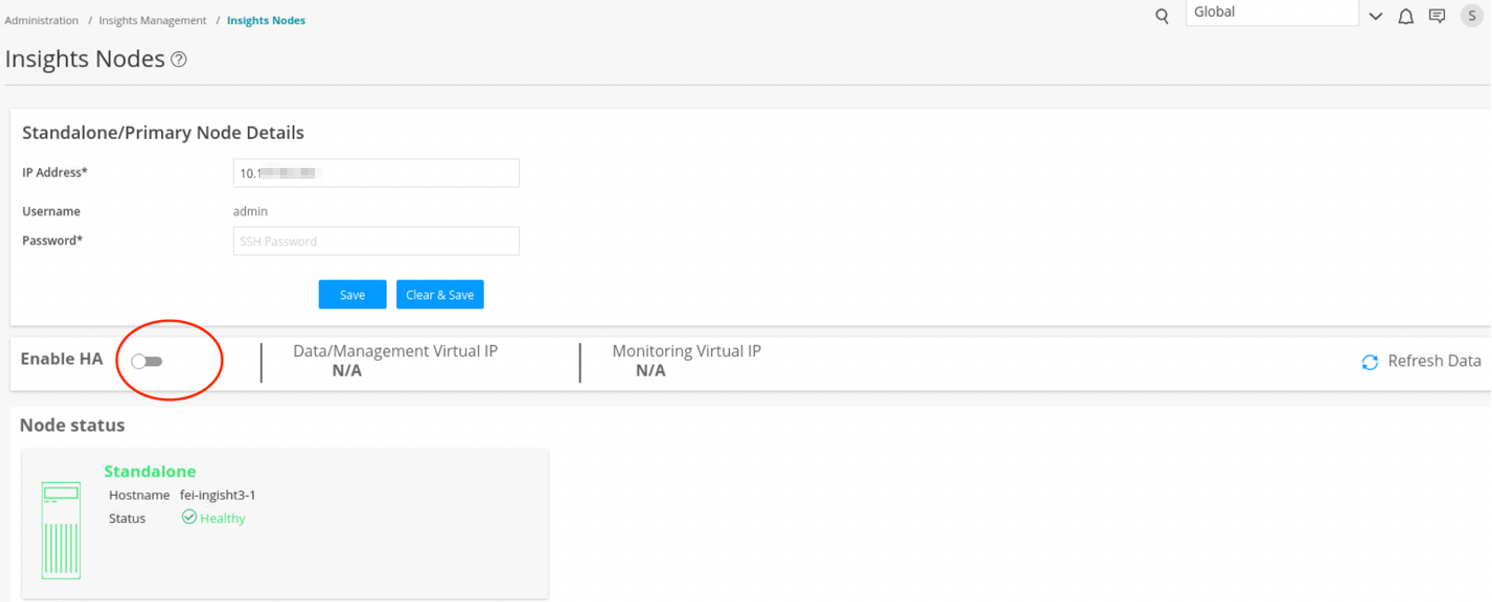
The HA Setup page appears.
- Complete the configuration according to the guidelines
provided in Table 1,
and click Save & Enable.
Table 1: Fields on the HA Setup Page
Setting
Guideline
Secondary Node Details
Secondary system IP
Enter the IP address of the eth0 interface of the standby node.
Username
Username is “admin” and you cannot modify it.
Password
Enter the Security Director Insights VM password.
HA Settings
Data Virtual IP/Netmask
Enter the virtual IP address of the HA management interface.
HA monitor Virtual IP/Netmask
Enter the virtual IP address of the HA monitoring interface.
Ping IPs
(Optional) Enter one or more IP addresses that both nodes can reach to check the connectivity.
You are taken back to the Insights Nodes page. You will see the status messages, as shown in Figure 2. Note that the HA enabling takes several minutes.
Figure 2: Enable HA in Progress 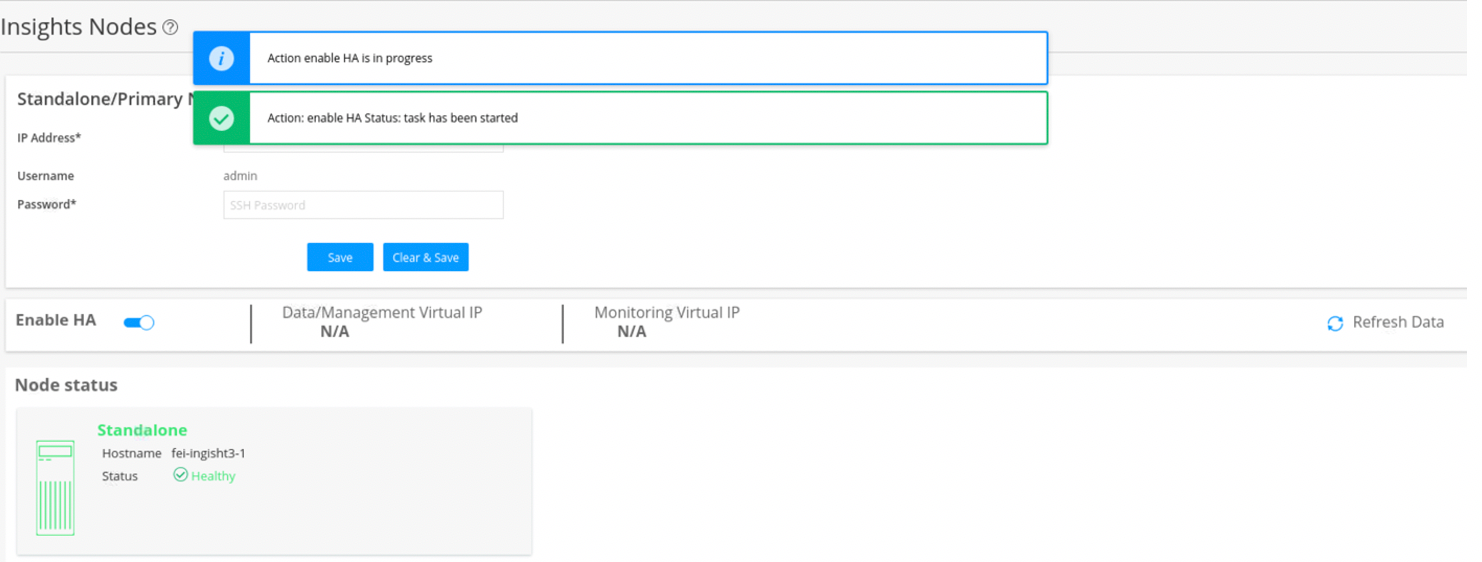
- Click Refresh Data.
You will see intermittent status messages, as shown in Figure 3.
Figure 3: Enable HA Intermittent Status 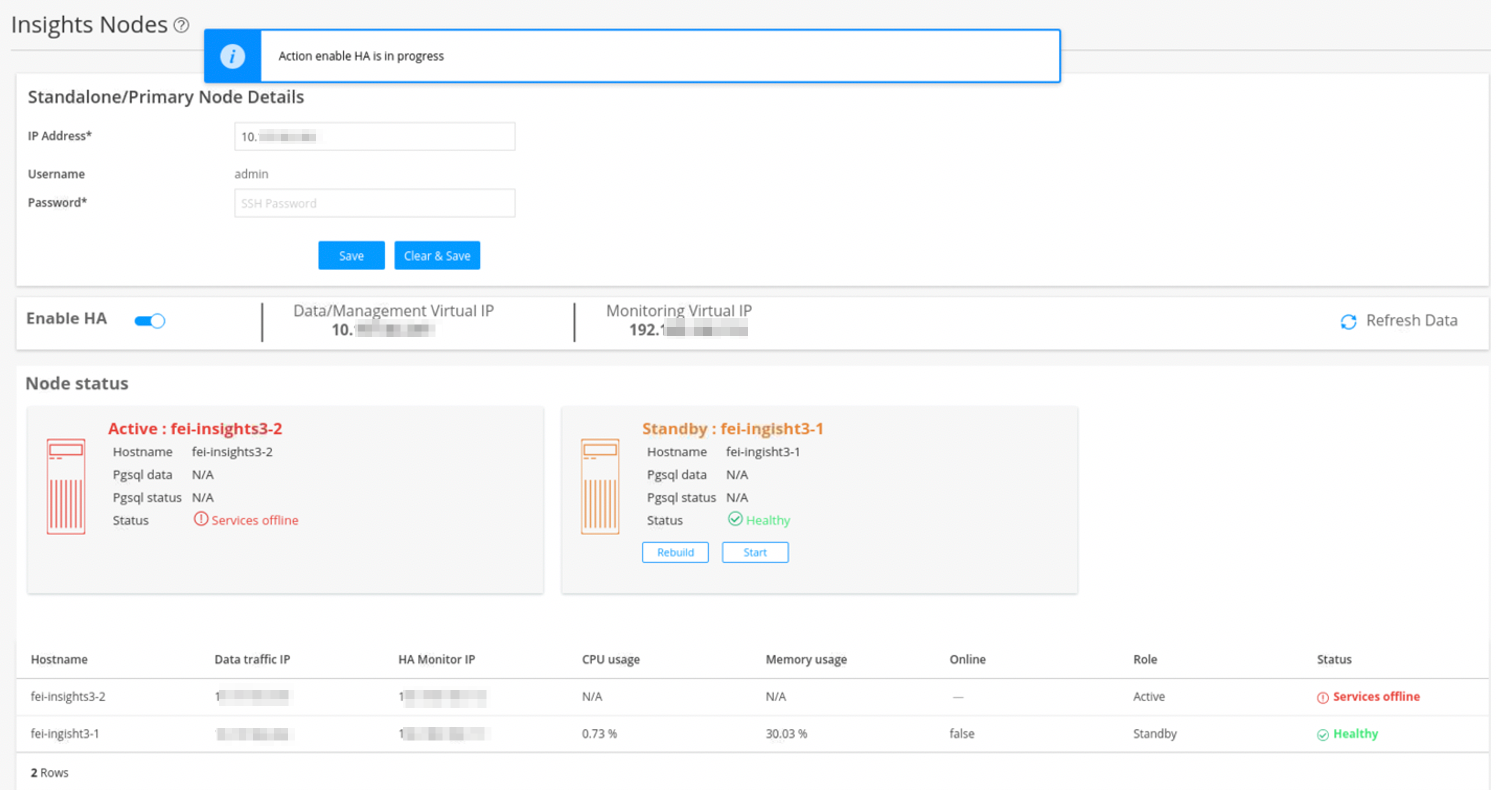
- Keep clicking the Refresh Data option until
you see that:
Both nodes are healthy.
Data and management virtual IP addresses are the same as the ones configured on the HA Setup page.
Figure 4 shows the status of the nodes once the HA is enabled successfully.
Figure 4: HA Enabled 
Manually Trigger Failover
You can initialize the HA failover if the active node encounters any issues.
To enable failover to the standby node:
- In the Insights Node page, click Failover under
the active node, as shown in Figure 5.
Figure 5: Initiate Failover 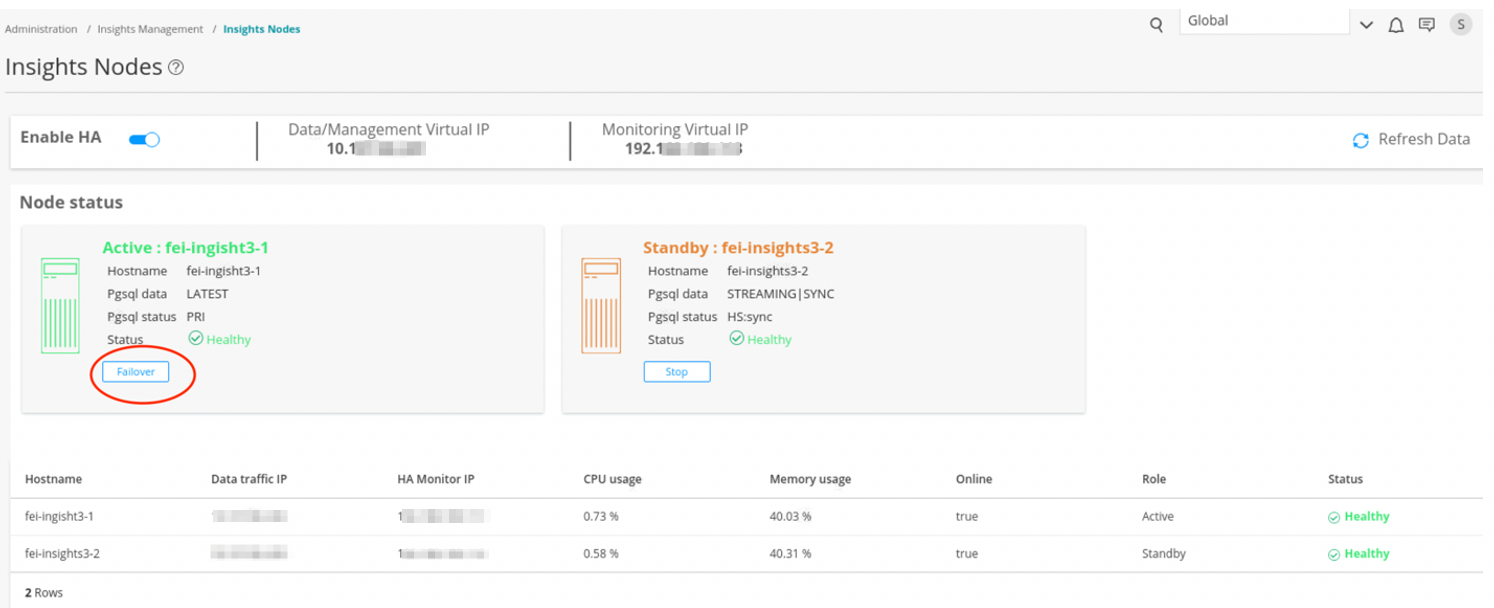
A confirmation message appears, as shown in Figure 6.
Figure 6: Failover Confirmation Message 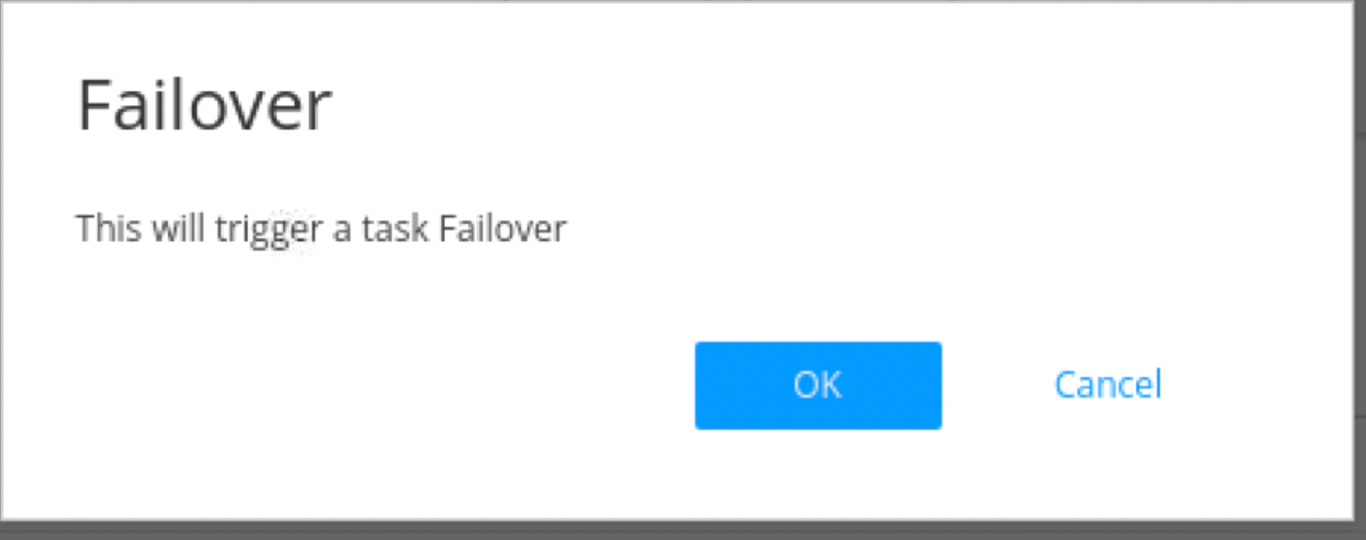
- Click OK.
The failover action takes several minutes to complete. During the process, you will see intermittent status messages, as shown in Figure 7.
Figure 7: Failover Intermittent Status 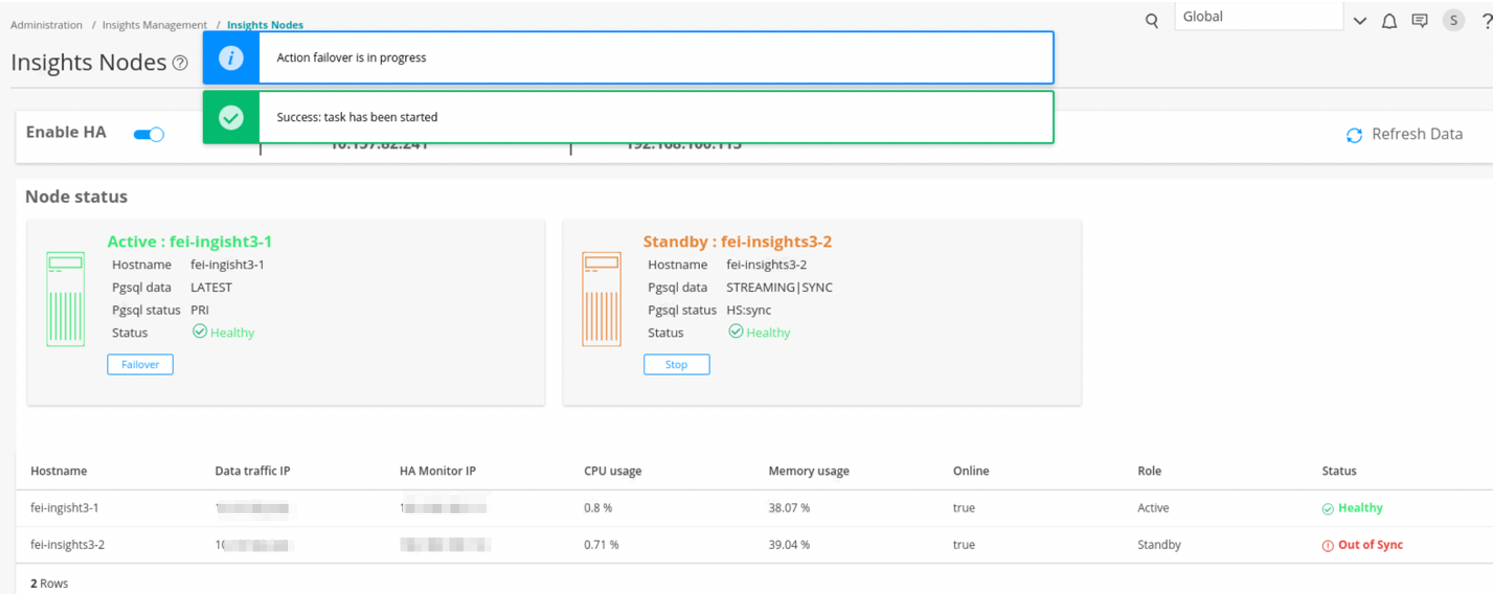
Once the failover is enabled, the original standby node becomes the new active node and the original active node is put in an offline mode, as shown in Figure 8.
Figure 8: Standby Node Offline 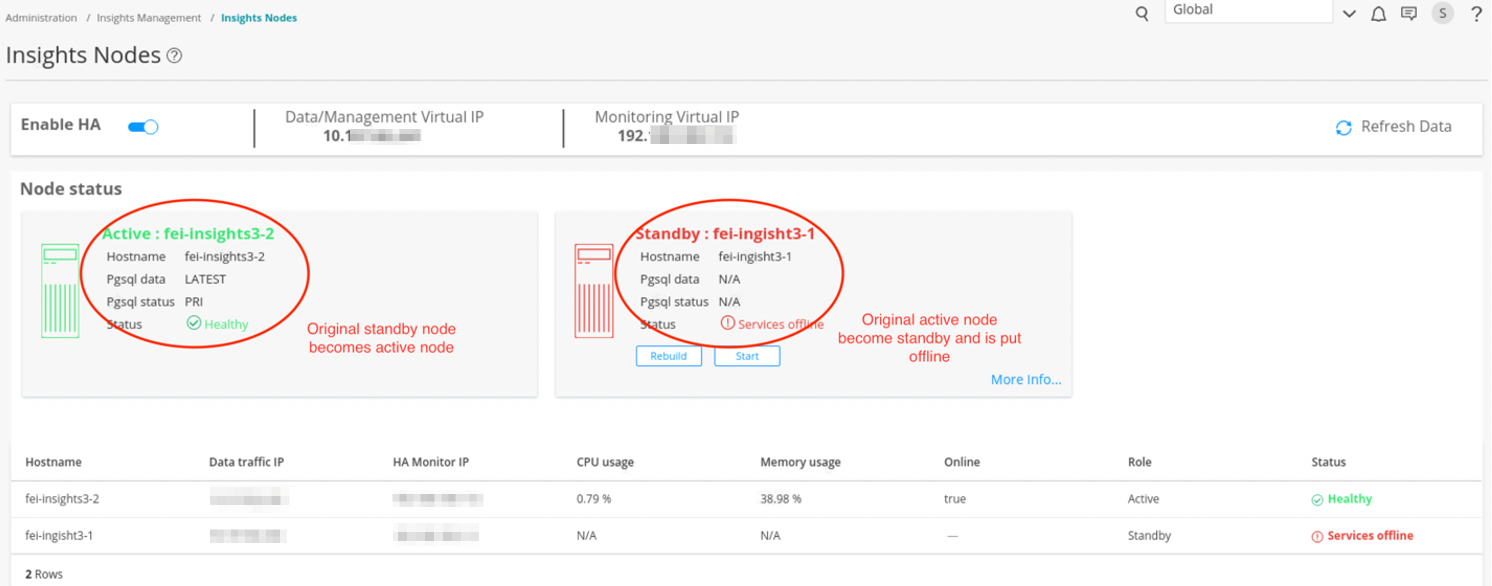
- To bring the new standby node back online, click Start, as shown in Figure 9.
Figure 9: Start Standby Node 
A confirmation message appears, as shown in Figure 10.
Figure 10: Start Standby Confirmation 
- Click OK to continue.
The Start action takes several minutes to complete.
Once the Start action is complete, the status of both the nodes shows online and healthy. The original active node is now online as a standby node, as shown in Figure 11.
Figure 11: Standby Start Action 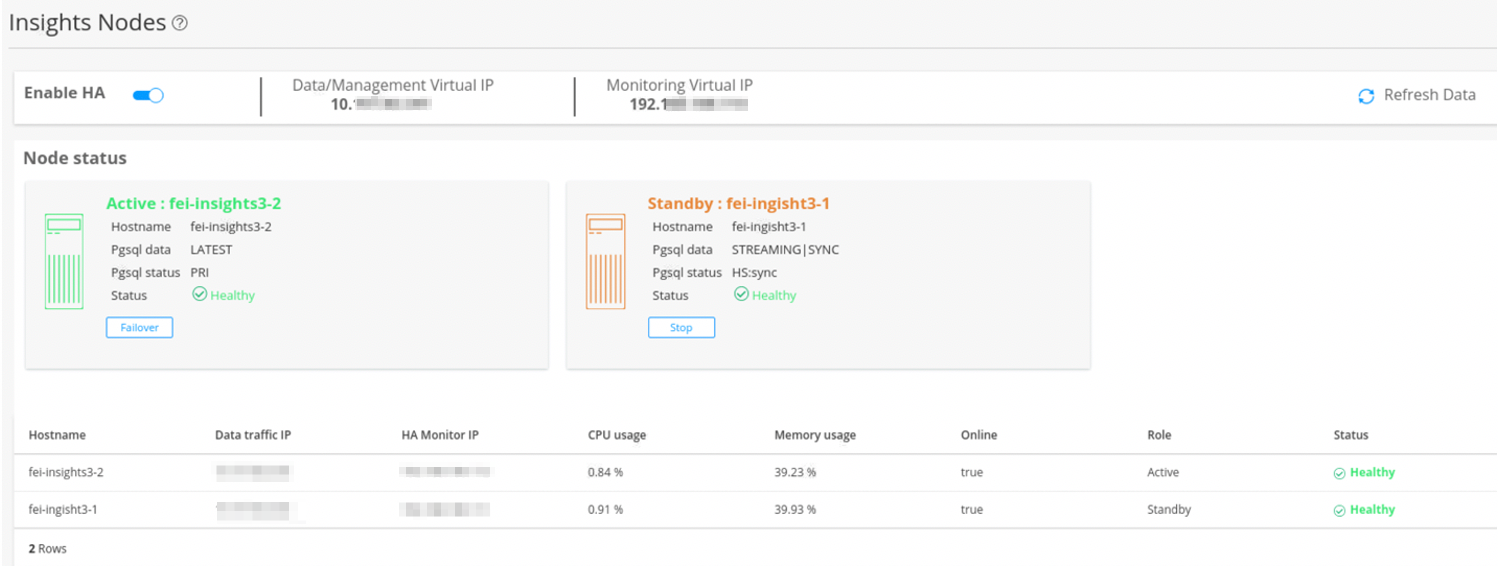
- If the standby node encounters any synchronization issues with the active node, click Stop under the Standby node.
- Click Rebuild to synchronize data between the two nodes.
Disable HA
To disable HA:
- In the Insights Nodes page, toggle the Enable HA option
off.
A confirmation message appears before HA is disabled, as shown in Figure 12.
Figure 12: Disable HA Confirmation 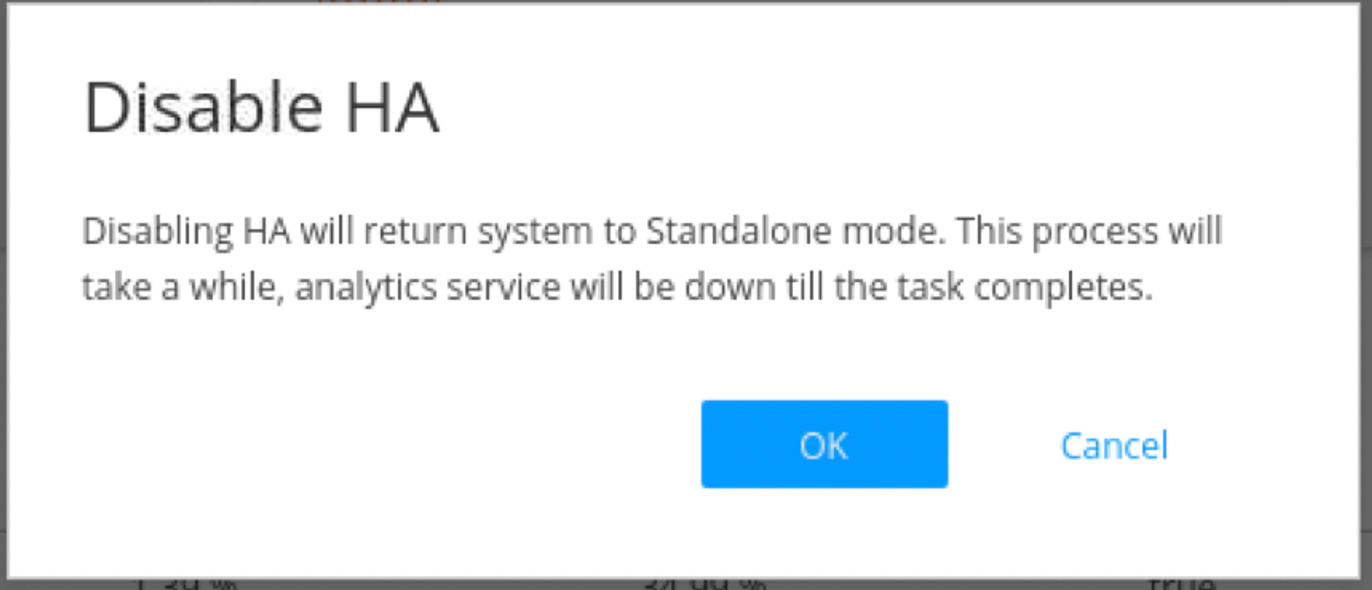
- Click OK to confirm the HA disabling.
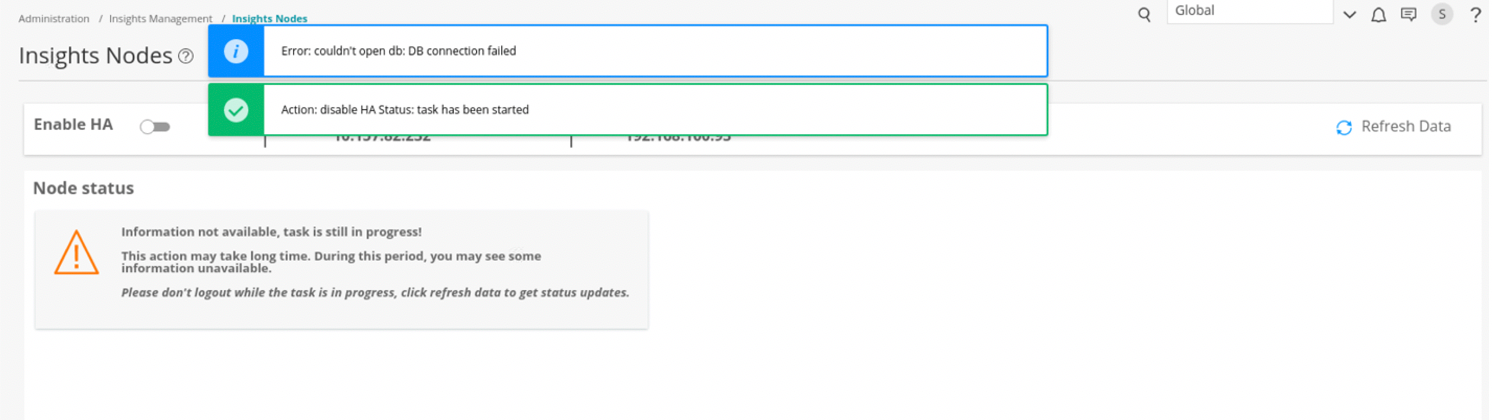
Disabling HA takes several minutes. During the process, intermittent status messages are displayed, as shown in Figure 13. Keep clicking Refresh Data until HA is disabled successfully.
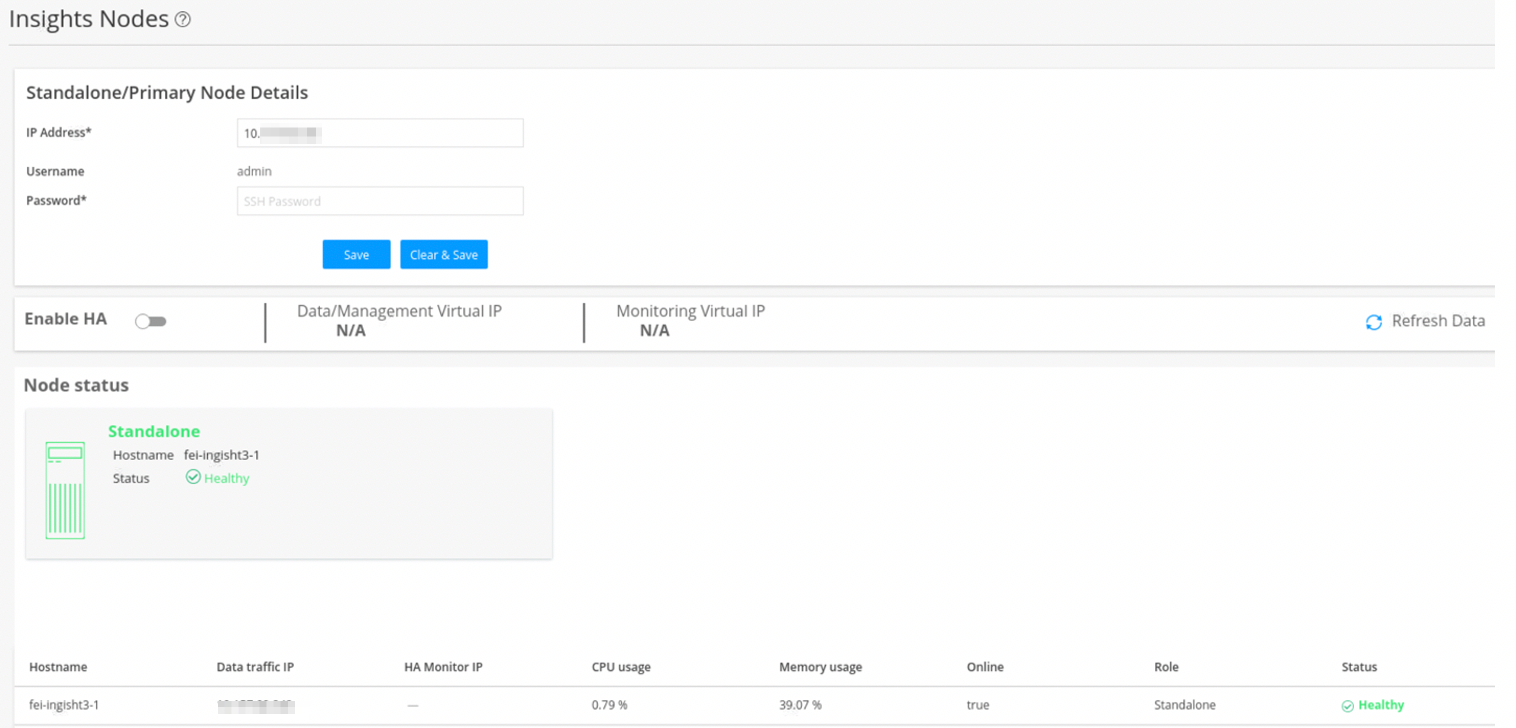
Once HA is disabled successfully, you can see only the active node VM in the Insights Nodes page, as shown in Figure 14.
Upgrade HA
When a new Security Director Insights software version is available, perform the following procedure to upgrade the HA nodes. You must upgrade HA only from the active node for both the nodes to be upgraded.
- Go to Security Director Insights CLI.
ssh admin@${active_node_ip}
- Enter the Settings menu.
#server
- Obtain the software upgrade package.
#set system-update copy user@${pkg_location_ip}:/${package_file_path/name}
- View the software upgrade package version.
# show system-update versions
- Initiate the upgrade.
# set system-update start software ${new_version}

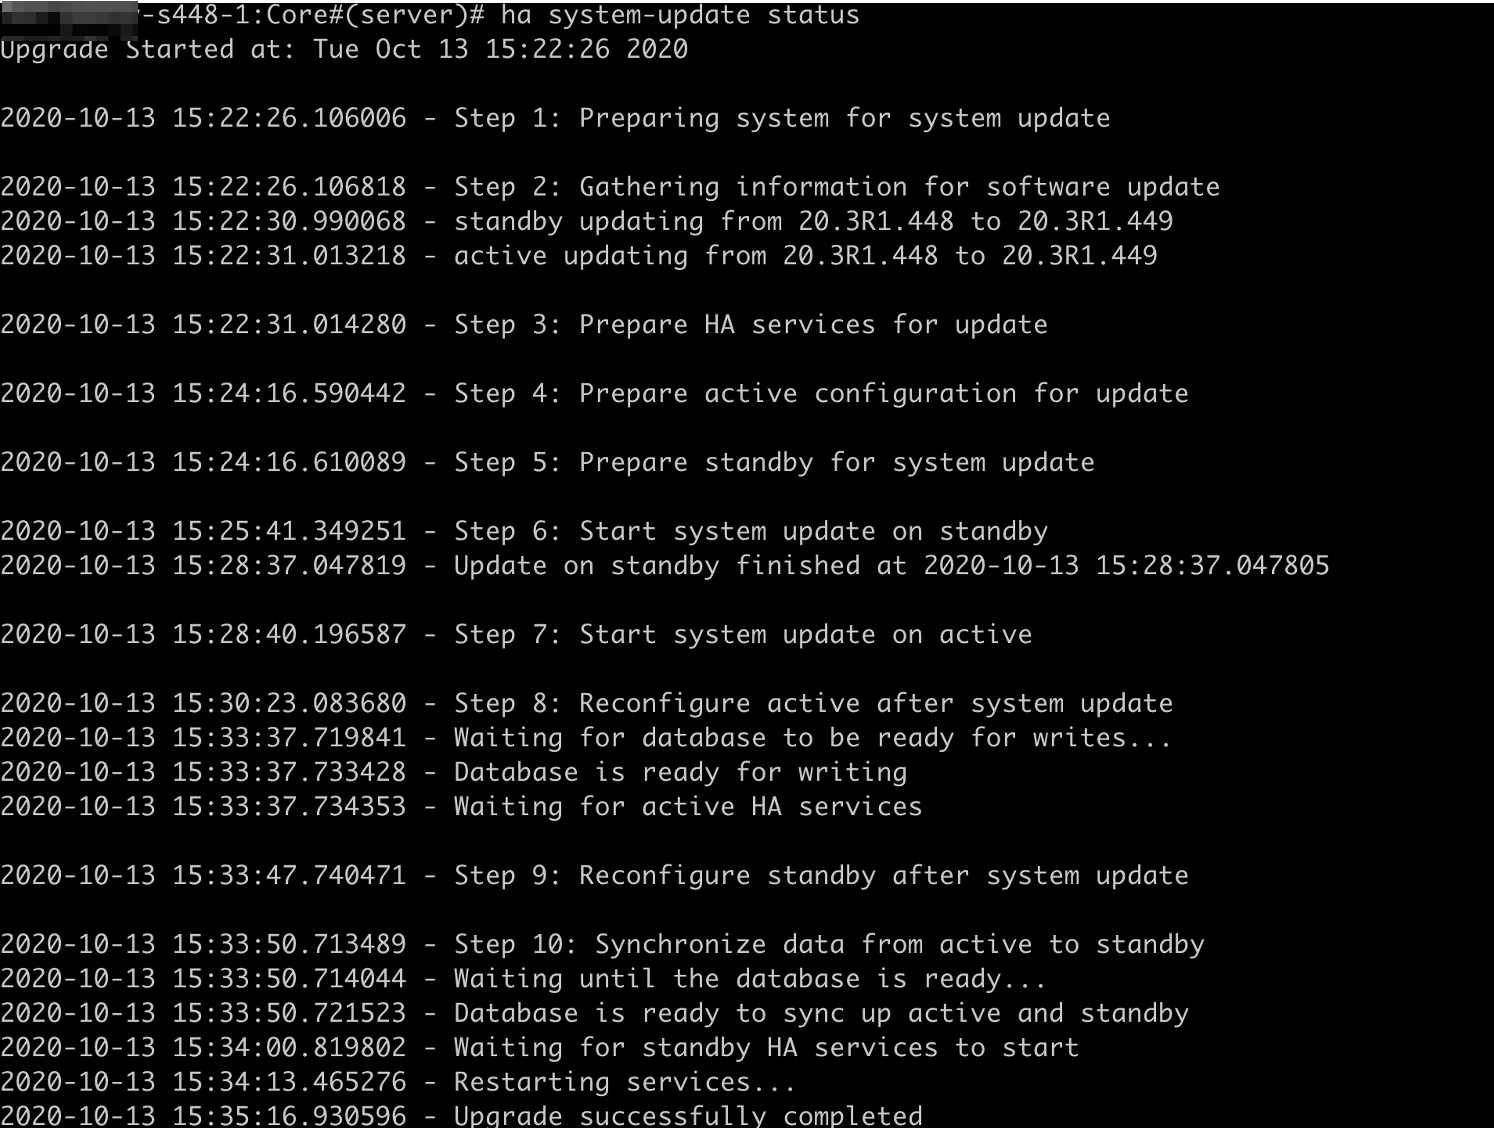
- Verify the HA upgrade status.
# ha system-update status
Wait until the upgrade is finished successfully in both active and standby nodes, as shown in Figure 15.
Figure 15: HA Upgrade