Install Security Director Insights With KVM virt-manager
You can install and launch Security Director Insights with the KVM virt-manager GUI package.
Before you begin, you must ensure:
You have already installed KVM, qemu, virt-manager, and libvirt on your host OS.
You have created a bridge network to access KVM through SSH.
In this document, a bridge network br0 is created with Netplan. Figure 1 shows an example configuration from the /etc/netplan/00-installer-config.yaml file.
Figure 1: Example Configuration of br0 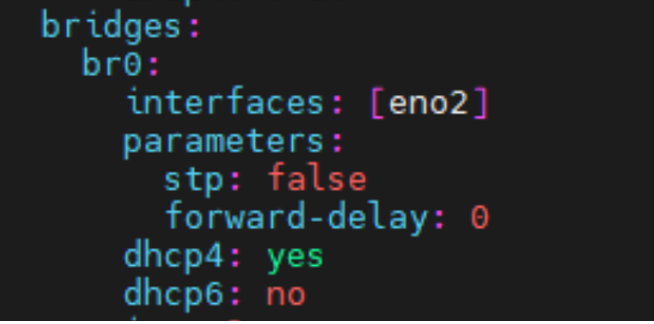
To install Security Director Insights with virt-manager:
- Download the Security Director Insights KVM image from the Juniper software download site.
- On your host OS, type virt-manager.
The Virtual Machine Manager page appears, as shown in Figure 2.
Figure 2: Virtual Machine Manager Page 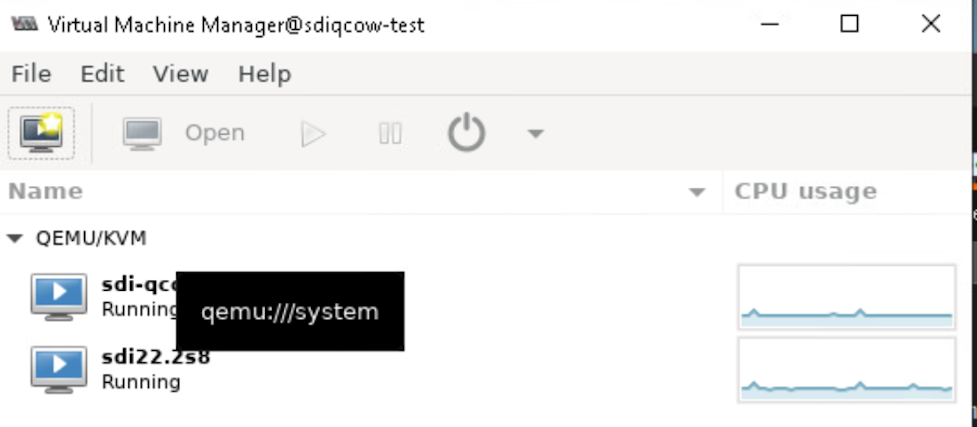
Note You must have admin rights on the host OS to use virt-manager.
- Click the Create a new virtual machine icon, as shown
in Figure 3.
The Create a new virtual machine page appears.
Figure 3: Create a New Virtual Machine 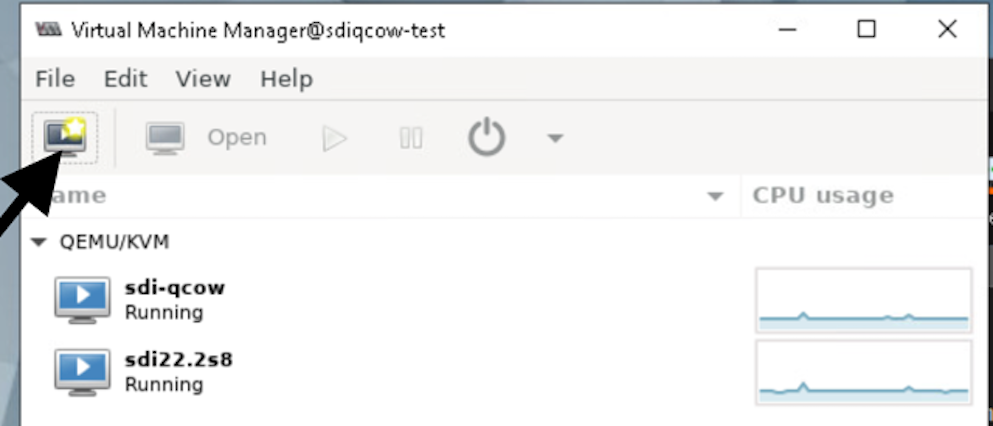
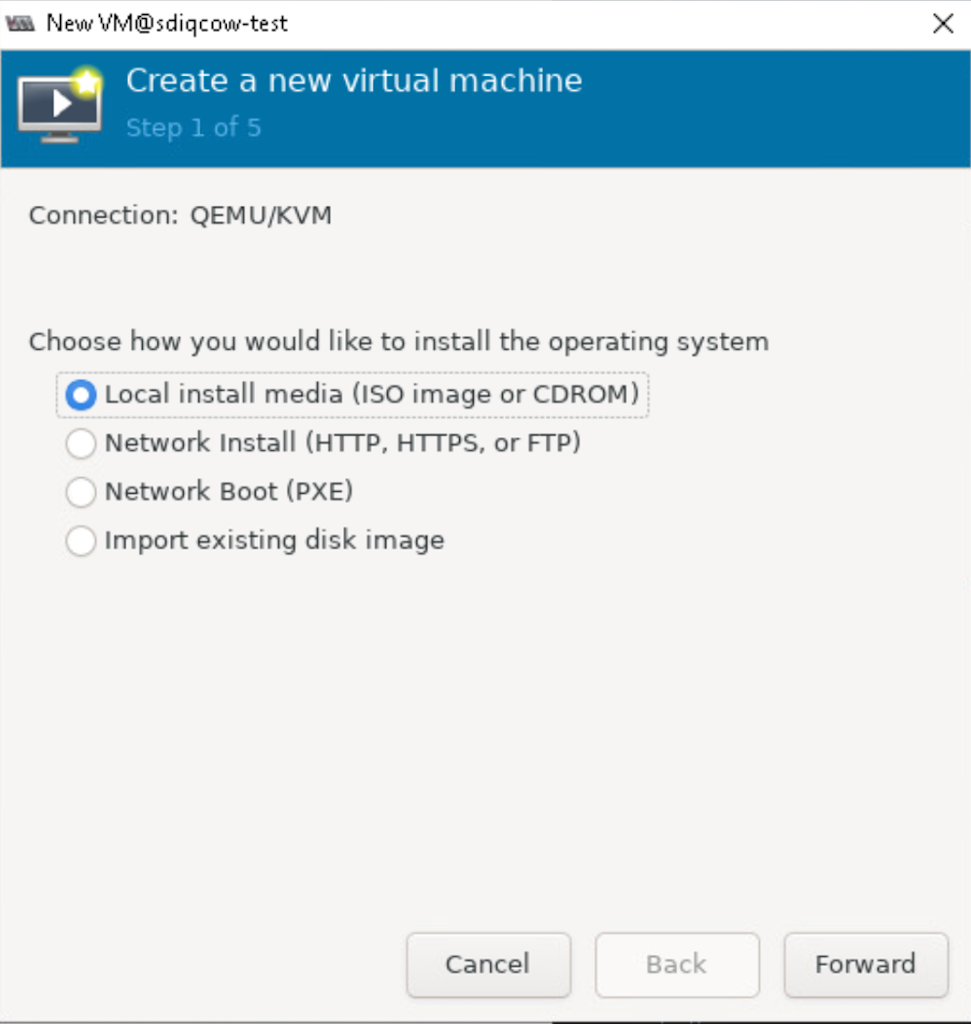
- Select Import existing disk image, and click Forward.
- Browse to the location of the downloaded Security Director
Insights image and select the image.
Figure 4: Select Storage Path And Operating System 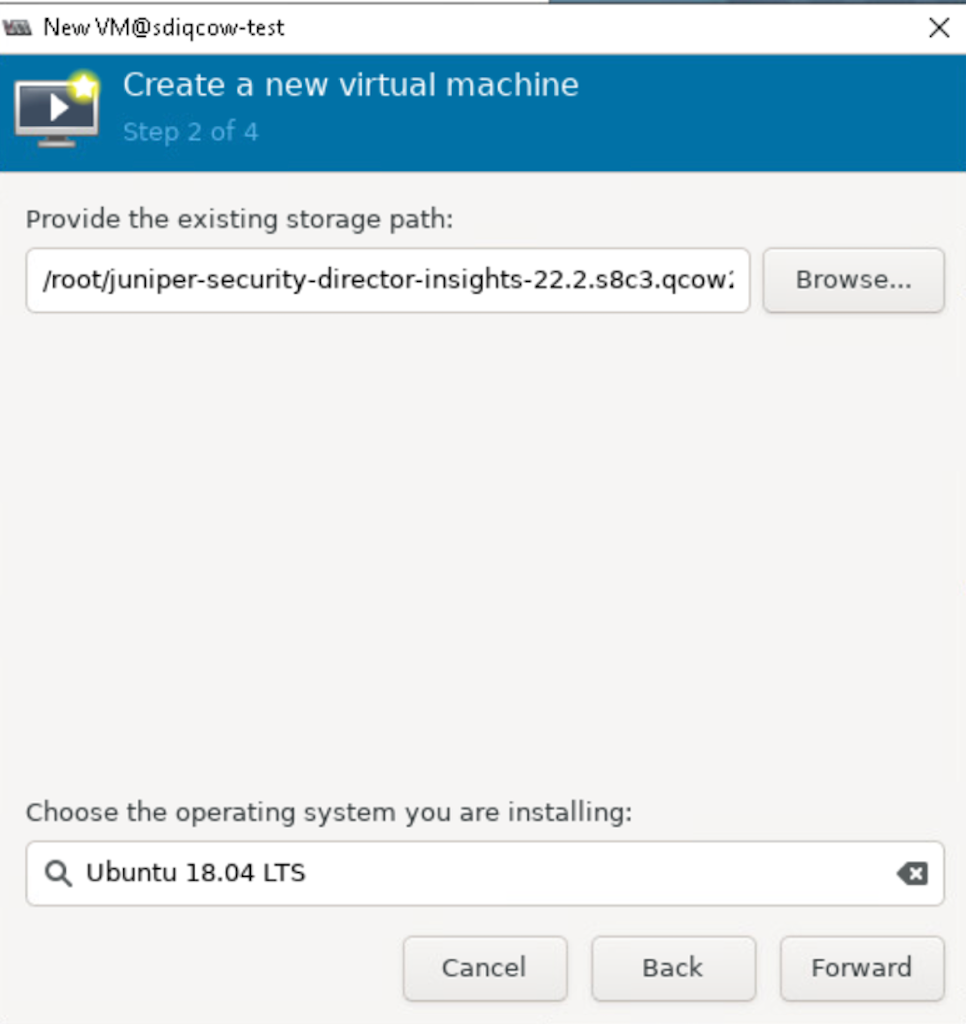
- In the Choose the operating system you are installing field, select Ubuntu 18.04 version, as shown in Figure 4.
- Click Forward.
- Set the RAM to 16384 MB and set CPUs to 8, as shown in Figure 5.
Figure 5: Configure Memory And CPUs 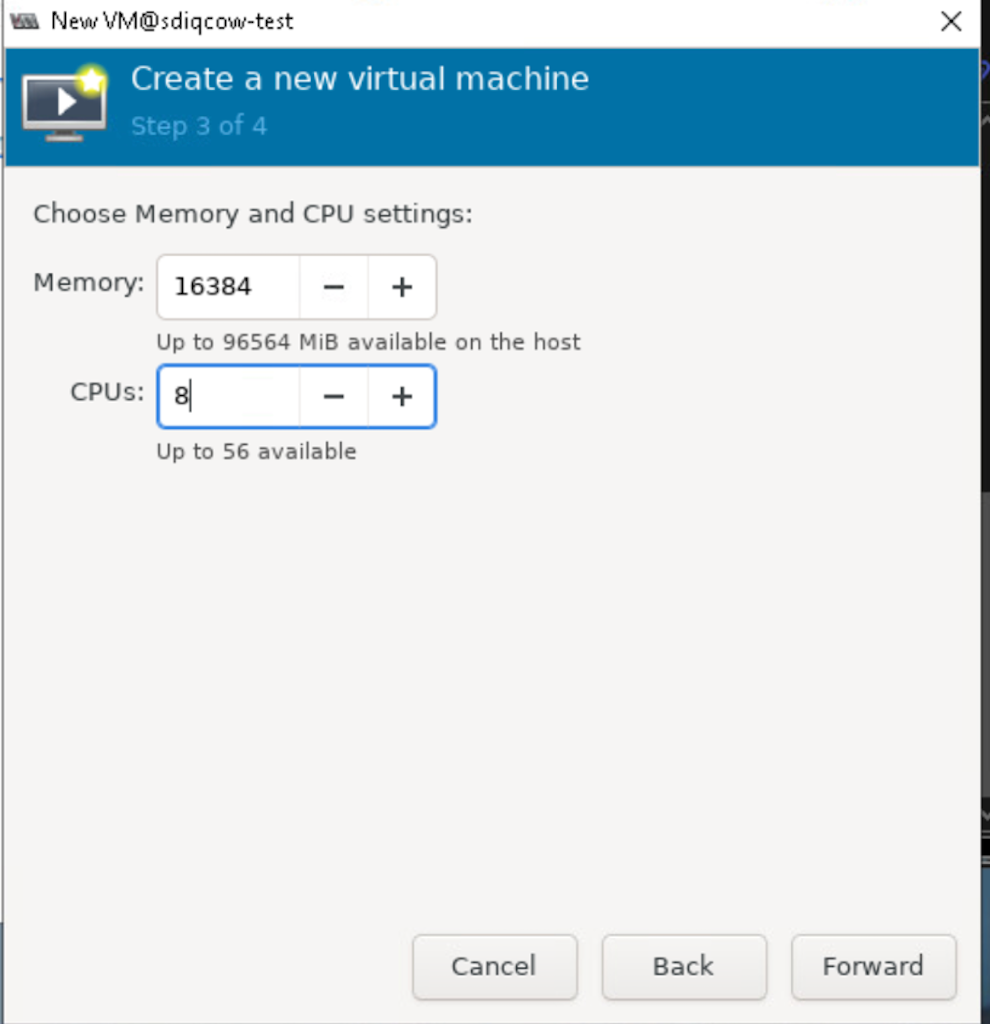
Click Forward.
- Select the Customize configuration before install option, as shown in Figure 6.
Figure 6: Network Selection Page 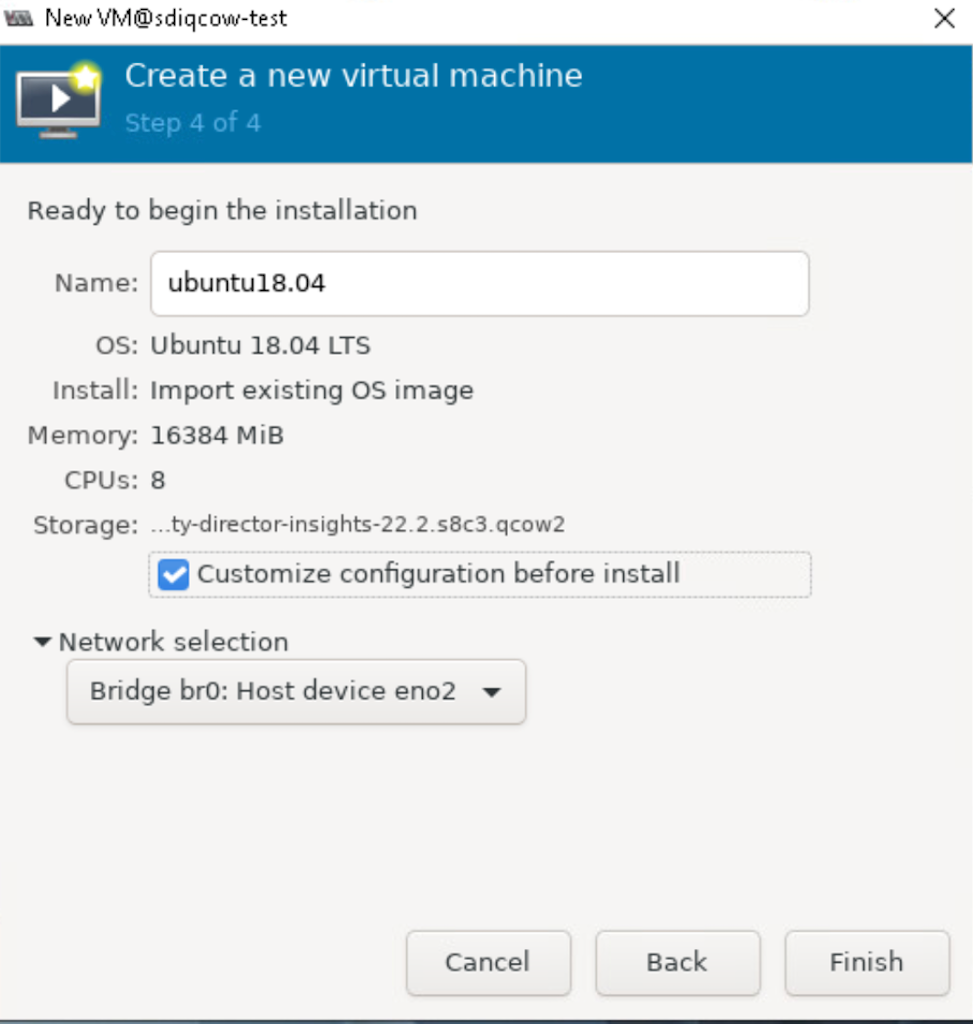
- In the Network selection field, select the bridge network (typically br0) from the list.
- Click Finish.
- Click Add Hardware, as shown in Figure 7.
The Add New Virtual Hardware page appears.
Figure 7: Add Hardware Option 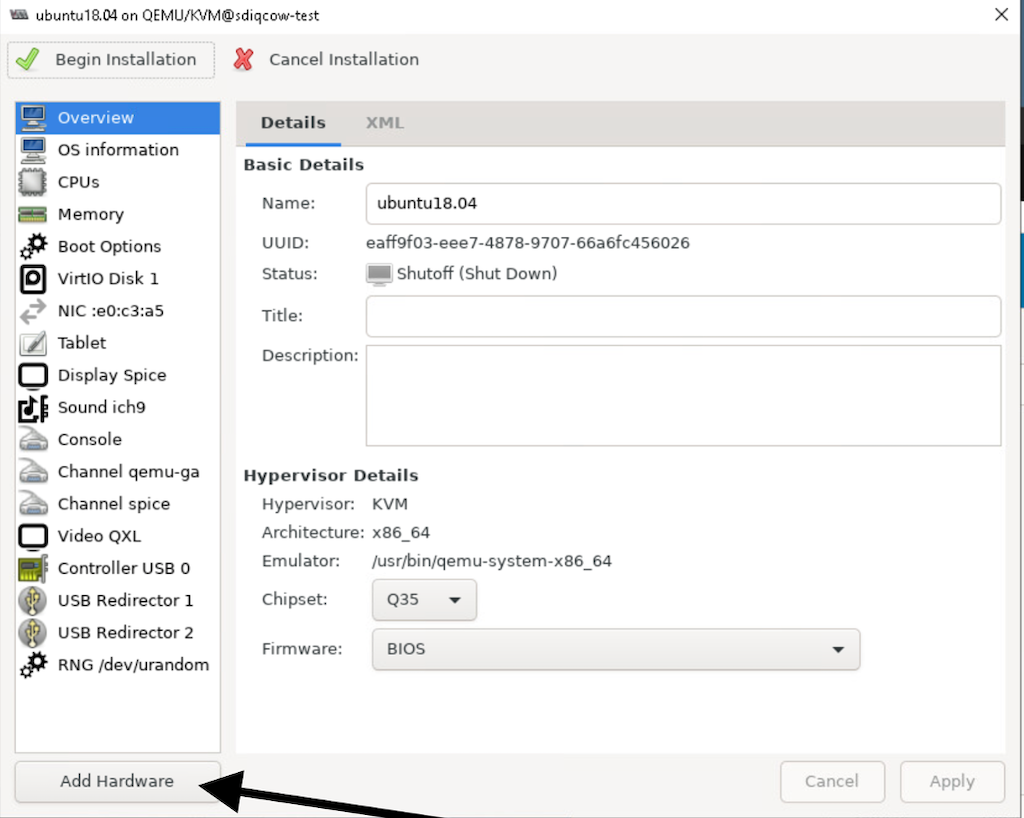
- Select Network from the left side menu and
click Finish.
Figure 8: Network Details Page 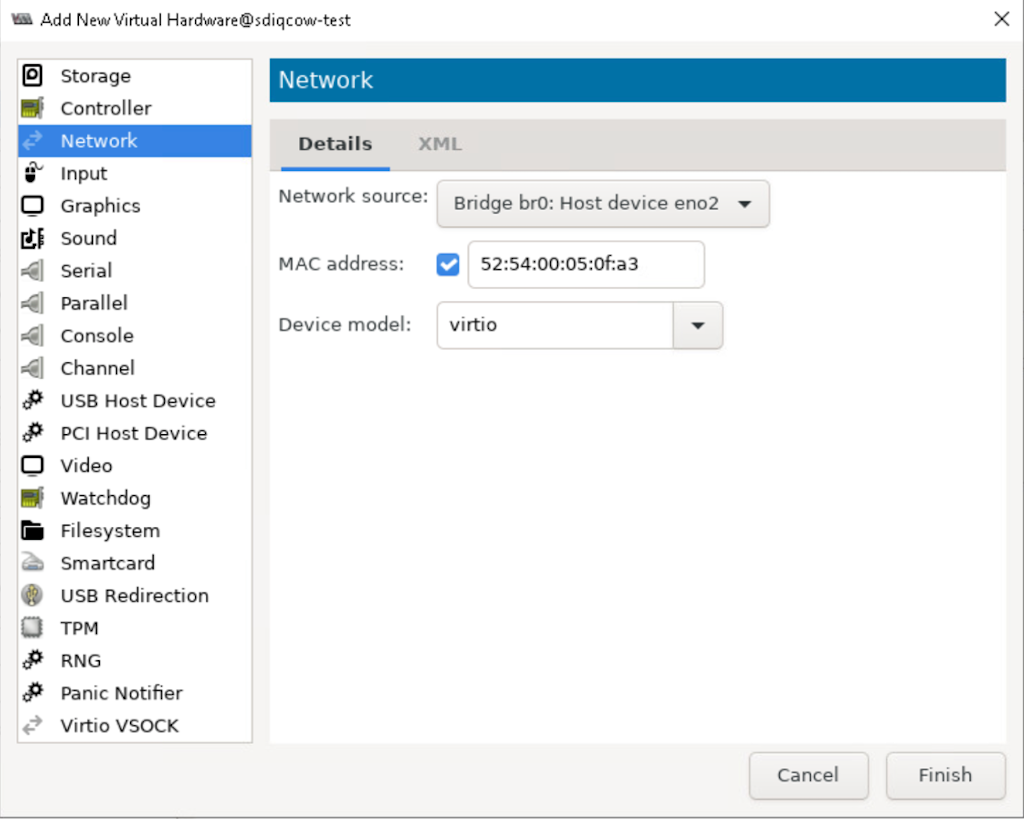
- Click Begin Installation.
Figure 9: Begin Installation 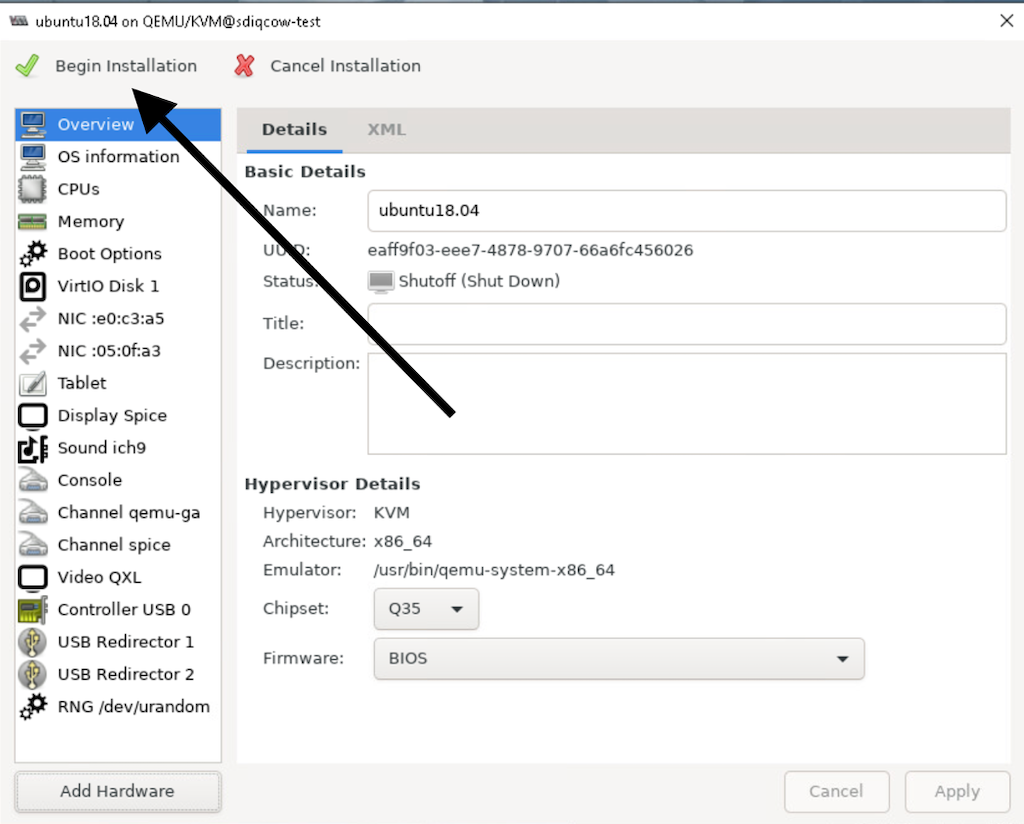
The VM manager creates the virtual machine and launches the Security Director Insights console.