Using the Upgrade CompactFlash Card
The 4-GB CompactFlash script shipped in the upgrade kit can be used to either (1) migrate a system running a previous operating system to CTPOS 7.0R1 and later, or (2) prepare a system for firstboot in CTPOS 7.0R1 or later.
The CompactFlash script runs an application that checks for the proper BIOS and upgrades the BIOS if necessary. The application checks for proper FPGAs on the cards and daughter cards installed and upgrades them as necessary.
When used to prepare a system for firstboot into CTPOS 7.0R1 or later, all cards and daughter cards intended to be run on the system should be installed before booting the flash for the first time.
If the system is migrating from an old CompactFlash card running CTPOS 4.6R7 or 5.4R3 through 5.4R6, the application transfers all necessary information from the old CompactFlash card to the new CompactFlash card and leaves the system in a state with all configured and activated circuits running.
Use one of the following procedures after completing either Upgrading with the PP310 Upgrade Kit or Upgrading with the PP332 Upgrade Kit.
Migrating from a Previous Operating System
You should see the following upgrade script output when you complete the steps described in Upgrading with the PP310 Upgrade Kit. The upgrade script output produced when you complete the steps described in Upgrading with the PP332 Upgrade Kit is very similar, and you must respond to the same prompts.
Gathering system information.
* Please wait this could take up to 45 seconds.
Found:
	System type      PP310
	Bios             2.21
	Memory installed 1024 MB
	Slot 0:		 Type	T1E1
			 FPGA	0xea	 * needs 0xea
	Slot 1:		 Type	Serial
			 FPGA	0x73
	Slot 2:		 Type	FXS
			 FPGA	0x5010150
	ID restored	 No

Hit return to continue...

This application will prepare the installed hardware for CTPOS 6.0R1. It will
upgrade FPGAs if necessary, upgrade the bios if necessary, and can migrate
the ID of a system running CTPOS 4.6R7 or 5.4R3.

This application will reboot the system multiple times. Please continue the
process through to completion. Failure to do so can leave the system in an
unknown state.

Hit return to continue...

The bios configuration needs to be changed.
Hit return to setup the bios configuration and reboot.
The set and reboot for the BIOS appears only for the PP310 processor.
For the PP332 processor, the BIOS version is 2.14 and a BIOS upgrade is not required.
- Press Enter. For the PP310, the BIOS configuration is
updated and the device reboots. The following upgrade script output
is displayed for the PP310. The upgrade script output for the PP332
is very similar, and you must respond to the same prompts.
Gathering system information.
* Please wait this could take up to 45 seconds.
Found:
	System type      PP310
	Bios             2.21
	Memory installed 1024 MB
	Slot 0:		 Type	T1E1
			 FPGA	0xea	 * needs 0xea
	Slot 1:		 Type	Serial
			 FPGA	0x73
	Slot 2:		 Type	FXS
			 FPGA	0x5010150
	ID restored	 No

Hit return to continue...

Do you want to restore the ID from a CTPOS 4.6R7 or 5.4R3 system?
Note For the PP332 processor, the BIOS version is 2.14 and a BIOS upgrade is not required.
- Enter y. The following output is displayed:
Please insert the old flash into the compact flash to USB
adapter and plug the adapter into the usb slot on the CPU.

Hit return when you are finished.
- Insert the old (256 MB) CompactFlash card into the CompactFlash
adapter (see Figure 4).
Figure 4: CompactFlash Adapter with CompactFlash Card Inserted 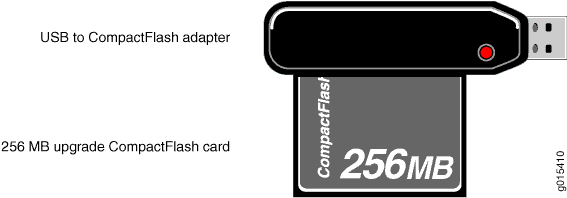
- Connect the adapter to the CTP2000 USB port.
- Press Enter to indicate that you are finished inserting
the CompactFlash card into the adapter and connecting the adapter.
Follow the onscreen instructions.
Got old CTPOS version: 4.6R7

Gathering old system information.

Please remove the old flash, hit return when finished.

Migrating system ID to new flash.
* The system will reboot when finished.

INIT: Sending processes the TERM signal
Gathering system information.
* Please wait this could take up to 45 seconds.
Found:
	System type      PP310
	Bios             2.21
	Memory installed 1024 MB
	Slot 0:		 Type	T1E1
			 FPGA	0xea	 * needs 0xea
	Slot 1:		 Type	Serial
			 FPGA	0x73
	Slot 2:		 Type	FXS
			 FPGA	0x5010150
	ID restored	 Yes

Hit return to continue...
Restarting syslog.

. done.
Upgrading T1E1 card in slot 0 to FPGA rev 0xea.

Upgrading FPGA on card 0. Please wait for completion.

. done.
Upgrading FPGA on card 0 complete.

Upgrading Winmon. Please wait for completion.

..... . done.
Upgrading Winmon complete.

Upgrading Daughter cards. Please wait for completion.

. done.
Upgrading Daughter cards complete.


**** ****
Finished preparing system for running CTPOS 6.0R1.
Finished migrating ID from CTPOS . Reboot required.
**** ****

**** ****
Please verify that all circuits and system setting are
correct after the system reboots.
**** ****
Hit return to reboot the system.
Note For the PP332 processor, the BIOS version is 2.14 and a BIOS upgrade is not required.
- Press Enter to reboot the system.
Preparing a System for Firstboot Using CTPOS 7.0R1 and Later
You should see the following upgrade script output when you complete the steps described in Upgrading with the PP310 Upgrade Kit. The upgrade script output produced when you complete the steps described in Upgrading with the PP332 Upgrade Kit is very similar, and you must respond to the same prompts.
Gathering system information.
* Please wait this could take up to 45 seconds.
Found:
	System type      PP310
	Bios             2.21
	Memory installed 1024 MB
	Slot 0:		 Type	T1E1
			 FPGA	0xea	 * needs 0xea
	Slot 1:		 Type	Serial
			 FPGA	0x73
	Slot 2:		 Type	FXS
			 FPGA	0x5010150
	ID restored	 No

Hit return to continue...


This application will prepare the installed hardware for CTPOS 6.0R1. It will
upgrade FPGAs if necessary, upgrade the BIOS if necessary, and can migrate
the ID of a system running CTPOS 4.6R7 or 5.4R3.

This application will reboot the system multiple times. Please continue the
process through to completion. Failure to do so can leave the system in an
unknown state.
Hit return to continue...

The BIOS configuration needs to be changed.
Hit return to setup the BIOS configuration and reboot.
The set and reboot for the BIOS appears only for the PP310 processor.
For the PP332 processor, the BIOS version is 2.14 and a BIOS upgrade is not required.
- Press Enter. The BIOS configuration is updated, the device
reboots, and the following output is displayed:
Gathering system information.
* Please wait this could take up to 45 seconds.
Found:
	System type      PP310
	Bios             2.21
	Memory installed 1024 MB
	Slot 0:		 Type	T1E1
			 FPGA	0xea	 * needs 0xea
	Slot 1:		 Type	Serial
			 FPGA	0x73
	Slot 2:		 Type	FXS
			 FPGA	0x5010150
	ID restored	 No

Hit return to continue...
Note For the PP332 processor, the BIOS version is 2.14 and a BIOS upgrade is not required.
- Reboot the device. The following output is displayed:
- Enter n when you receive the following prompt
(PP310 only):
Do you want to restore the ID from a CTPOS 4.6R7 or 5.4R3 system? [n]
The upgrade continues to completion, displaying the following information:
Upgrading T1E1 card in slot 0 to FPGA rev 0xea.
Upgrading FPGA on card 0. Please wait for completion.

. done.
Upgrading FPGA on card 0 complete.

Upgrading Winmon. Please wait for completion.

..... . done.
Upgrading Winmon complete.

Upgrading Daughter cards. Please wait for completion.

. done.
Upgrading Daughter cards complete.


**** ****
Finished preparing system for running CTPOS 6.0R1.
The system needs to be powered down.
**** ****
Hit return to power down the system.
- Press Enter to power off the system.
Creating Dual Image Partitioning and Upgrading One of the Images on CTP Node (CTP Menu)
CTPOS 9.0R1 and later releases support creating dual image partitioning on the CompactFlash card. Dual image on the CompactFlash contains two logical images, where the first image consists first five partitions (1,5,6,7,8) and the second image consists five partitions (1,9,10,11,12). The first partition (bootable) is common to both images. You can upgrade any one of the images anytime after creating the dual image partitioning.
The following are the prerequisites to create dual image partitioning on the CompactFlash card:
Use Secure Copy Protocol (SCP) to copy the dual_image_upgrade.sh script to the /tmp directory on the CTP node.
Change the dual_image_upgrade.sh script permission to 755 by executing chmod 755 /tmp/dual_image_upgrade.sh. Otherwise, the permission will be denied.
Run the dual_image_upgrade.sh script as root.
The dual image upgrade feature is only supported on the CTP150 and CTP2000 (only PP332 and PP833 processors are supported, PP310 is not supported) platforms.
The dual image upgrade feature is supported on CTP 7.1R3, 7.2R1, and 7.3x releases. If you want to upgrade an older CTP, then you need to first upgrade to one of these releases.
To create dual image partitioning on the CompactFlash card, execute the ./dual_image_upgrade.sh -y script, where the -y option is used to start the dual image upgrade in non-interactive mode.
[root@ctp_71:/tmp 3]# ./dual_image_upgrade.sh -y
Unmounting all partitions of /dev/sda
mounting tmpfs at /mnt/ramdisk[  OK  ]
==============================================================
No. of partitions on /dev/sda   : 5
CTPOS installed on              : Image1 only
Running Image                   : Image1 (9.0R1-comp-190503-160652-load-190518-164510))

NOTE:
9.0R1-comp-YYMMDD-HHMMSS-load-YYMMDD-HHMMSS decoded as :
        9.0R1 : Release Name
        comp-YYMMDD-HHMMSS : Root-FS/Kernel compile timestamp
        load-YYMMDD-HHMMSS : Image upgrade timestamp

Currently single partition exists on the Flash card
You can create Dual partitions which would have Dual Images
Dual Image on Flash has two logical images as :
        Image1 - consists Five partitions (1,5,6,7,8)
        Image2 - consists Five partitions (1,9,10,11,12)
        First partition(bootable) is common to both Image1 and Image2
You can only upgrade either images(Image1 or Image2) anytime
after creation of Dual Image partitions
==============================================================
***Re-partition for dual image upgrade started***
***This may take few minutes***
Mounting Image1 to /mnt/ ...[  OK  ]
Checking flash partition Tarball sizes...
        /boot partition Tarball size            : 20472 K
        /flash_root partition Tarball size      : 123375 K
        /flash_home partition Tarball size      : 3 K
        /flash_var partition Tarball size       : 86 K
        /flash_local partition Tarball size     : 6821 K
Flash partion Tarball size      : 150757 K or 147 M
Unmounting all partitions of /dev/sda
Mounting Image1 to /mnt/ ...[  OK  ]
Free space on the system        : 7632 M
Backing up flash partions to ramdisk...
        /boot [  OK  ]
        /flash_root [  OK  ]
        /flash_home [  OK  ]
        /flash_var [  OK  ]
        /flash_local [  OK  ]
********** Re-partitioning flash for dual image **********
Creating new flash partitions... [  OK  ]
Creating ext3 file system on new partitions...
        CTP_BOOT...[  OK  ]
        CTP_ROOT...[  OK  ]
        CTP_HOME...[  OK  ]
        CTP_VAR...[  OK  ]
        CTP_LOCAL...[  OK  ]
        CTP_ROOT_2...[  OK  ]
        CTP_HOME_2...[  OK  ]
        CTP_VAR_2...[  OK  ]
        CTP_LOCAL_2...[  OK  ]
***Re-partition of flash card complete ***
Mounting Image1 to /mnt/ ...[  OK  ]
Restoring Image1 archives to new flash partions ...
        boot.tgz to /boot  [  OK  ]
        flash_root.tgz to /flash_root  [  OK  ]
        flash_home.tgz to /flash_home  [  OK  ]
        flash_var.tgz to /flash_var  [  OK  ]
        flash_local.tgz to /flash_local  [  OK  ]
Unmounting Image1...[  OK  ]
Unmounting all partitions of /dev/sda
Mounting Image1 to / ...[  OK  ]
!!!!!!!!!!!!!!!!!!!!!!!!!!!!!!!!!!!!!!!!!!!!!!!!!!!!!!!!!!!!!!!!!!!!!!
!!!!!!!!!!!!!!!!!!!!!!!!!!!!!!!!!!!!!!!!!!!!!!!!!!!!!!!!!!!!!!!!!!!!!!
  RAM disk /mnt/ramdisk has been created on RAM(total-8044 MB)
  You must now transfer your flash image .tgz file to /mnt/ramdisk,
  and then re-execute this script to complete the installation.
  NOTE: There is 7629 MB available space in /mnt/ramdisk(RAM)
  Please enter the size of your flash image tarball in MB: 147
  This image will fit in the available RAM.
  Please proceed with transfer.
!!!!!!!!!!!!!!!!!!!!!!!!!!!!!!!!!!!!!!!!!!!!!!!!!!!!!!!!!!!!!!!!!!!!!!
!!!!!!!!!!!!!!!!!!!!!!!!!!!!!!!!!!!!!!!!!!!!!!!!!!!!!!!!!!!!!!!!!!!!!!
Exiting...
This creates the /mnt/ramdisk directory on RAM memory. You must now transfer your image archive CTPOS_9.0R1_partitions.tgz file to the /mnt/ramdisk directory, and then you have to execute this script again to complete the installation.
Ensure that you have enough memory to store the image archive CTPOS_9.0R1_partitions.tgz file in /mnt/ramdisk (RAM). If the CTPOS_9.0R1_partitions.tgz file size is larger than the available RAM memory, you should not continue with this image upgrade process. Contact JTAC for assistance.
To upgrade the dual image using the CTP Menu:
- Download the image archive (CTPOS_9.0R1_partitions.tgz) file and copy it to the /mnt/ramdisk directory.
- Execute the ./dual_image_upgrade.sh script again for dual image upgrade.
[root@ctp_71:/tmp 6]# ./dual_image_upgrade.sh -y Unmounting all partitions of /dev/sda ============================================================== No. of partitions on /dev/sda : 9 CTPOS installed on : Image1 only Running Image : Image1 (9.0R1-comp-190503-160652-load-190518-164510)) Non-Running Image : Image2 (Empty) NOTE: 9.0R1-comp-YYMMDD-HHMMSS-load-YYMMDD-HHMMSS decoded as : 9.0R1 : Release Name comp-YYMMDD-HHMMSS : Root-FS/Kernel compile timestamp load-YYMMDD-HHMMSS : Image upgrade timestamp Dual Image on Flash has two logical images : Image1 - consists Five partitions (1,5,6,7,8) Image2 - consists Five partitions (1,9,10,11,12) First partition(bootable) is common to both Image1 and Image2 ============================================================== CTPOS_9.0R1_partitions.tgz Image archive file found at /mnt/ramdisk Verifying CTPOS_9.0R1_partitions.tgz archive ... CTPOS_9.0R1_partitions.tgz md5sum - Matched !!! There is 7484 MB free space available on /mnt/ramdisk(RAM) ***Upgrading Image2 partition with CTPOS_9.0R1_partitions.tgz *** Mounting Image2 to /mnt/ ...[ OK ] Extracting CTPOS_9.0R1_partitions.tgz to Image2 ... flash_root.tgz to /mnt/flash_root [ OK ] flash_home.tgz to /mnt/flash_home [ OK ] flash_var.tgz to /mnt/flash_var [ OK ] flash_local.tgz to /mnt/flash_local [ OK ] flash_boot.tgz to /boot [ OK ] Unmounting Image2...[ OK ] Updating grub conf files... [ OK ] Unmounting all partitions of /dev/sda *** *** Upgrading Image2 partition with CTPOS_9.0R1_partitions.tgz complete The system needs to be rebooted *** *** - Enter y to reboot the system
automatically.
Do you want to reboot system now [y/n]?: y
Going for system[root@ctp_71:/tmp 7]# Stopping CTP daemon         [  OK  ]
This successfully upgrades the second image partition with the image archive CTPOS_9.0R1_partitions.tgz file. You can now see dual entries in the GRUB menu, and you can select any one of the images from the GRUB menu during the bootup process.
If the dual image upgrade fails multiple times, reboot the CTP node and then try upgrading the dual image again.
You can change the primary boot option for the dual image by selecting the 7) Dual Image Boot Operations option from the CTP Main Menu on the CTPOS 9.0R1 release.
CTPOS 7.x release does not have the 7) Dual Image Boot Operations option in the CTP Main Menu. However, you can select or change the booting image from the GRUB menu during the CTPOS bootup process.
To configure dual image boot operations:
- Select 7) Dual Image Boot Operations from the CTP Main Menu.
==========================================================================
= (ctp_95 01/29/19 00:56:24  UTC) | CTP Main Menu
==========================================================================

Please select a number from the following list:
-------------------------------------
0) Exit to Shell
1) Bundle Operations
2) Node Synchronization
3) Node Summary
4) Node Diagnostics
5) Node Operations
6) Save Running Database to Flash
7) Dual Image Boot Operations
------------ Your choice [3]: 7
- Select 1) Configure Primary Boot option for
Dual Image from the Dual Image Boot Operations menu and then enter y to confirm the
change.
========================================================================== = (ctp_95 01/29/19 00:56:26 UTC) | Dual Image Boot Operations ========================================================================== Please select a number from the following list: ------------------------------------- 0) Back to Previous Menu 1) Configure Primary Boot option for Dual Image ------------ Your choice [0]: 1 *** *** You are about to modify a system parameter that will require *** a system reboot when complete. *** *** If you decide to continue, the system will automatically *** reboot upon leaving these menus. *** *** Note: If these parameters are changed incorrectly, *** system may not be reachable via the network *** after the system reboots. *** Are you sure? y[n]: y Primary Boot Image : 9.0R1-comp-xxxx-xxxx Secondary Boot Image : 2.4.29 - Enter y to set the existing
secondary boot image as the primary boot image.
Set Primary Boot to 2.4.29 (y/n)? [n] y
*******************************************************
*** Primary Boot: changed to 2.4.29
- Select 0) Back to Previous Menu from the Dual Image Boot Operations menu
and then enter y to confirm the system
reboot.
==========================================================================
= (ctp_95 01/29/19 00:56:32  UTC) | Dual Image Boot Operations
==========================================================================

Please select a number from the following list:
-------------------------------------
0) Back to Previous Menu
1) Configure Primary Boot option for Dual Image
------------ Your choice [1]: 0

***
*** The system will reboot now
***
        Are you sure? y[n]: y
Waiting for system to reboot...