使用数字证书
请按照以下步骤为每个组织生成和使用与瞻博网络 Mist Access Assurance 集成的 RADIUS 服务器的证书。
使用 EAP 身份验证时,客户端和服务器都必须相互验证身份。客户端必须信任与之通信的服务器,并且服务器必须对客户端进行身份验证。服务器证书是此相互身份验证过程的第一步,客户端在继续通信之前必须验证或信任它。
如果我们查看任何 EAP 事务(例如 EAP-TLS 或 EAP-TTLS),无论是无线还是有线身份验证,第一步是让服务器通过向客户端设备发送“Server Hello”消息来识别自身身份。
当客户端设备收到服务器证书时,它会查看 Wi-Fi 或 LAN 配置文件中的受信任证书颁发机构 (CA) 列表,并检查服务器证书是否由其中一个受信任的 CA 签名。(可选)检查服务器名称是否与客户端配置中的可信服务器名称列表匹配。
建议不要绕过验证步骤和信任服务器证书。这是一种高安全风险,可能会引发 MITM(中间人)攻击。
您可以使用以下方法之一为每个组织生成和使用与瞻博网络 Mist Access Assurance 集成的 RADIUS 服务器的证书。
- 证书颁发机构证书 — 瞻博网络 Mist 需要特定的证书颁发机构证书才能与您的客户端设备建立信任。这些证书由受信任的证书颁发机构 (CA) 颁发,使瞻博网络 Mist Access Assurance 能够向客户端设备授予网络访问权限。瞻博网络 Mist 对客户端设备的验证基于设备出示的证书,而证书必须由同一 证书颁发机构签名。
- 默认瞻博网络 Mist Access Assurance 证书 — Mist 组织保留其独特的专用 Mist 证书颁发机构 (证书颁发机构),负责颁发 Access Assurance 服务器证书。在没有特定配置的情况下,客户端将收到由其各自的 Mist 组织 证书颁发机构验证的默认证书。该证书对应于域“auth.mist.com”。
- 自定义服务器证书 - 当您不想修改当前客户端配置,并且希望客户端信任由提供客户端证书的同一证书颁发机构 (证书颁发机构) 颁发的服务器证书时,首选自定义服务器证书。您必须输入从 RADIUS 服务器获取的私钥和签名证书。
请阅读以下过程,了解如何使用上述证书。
使用证书颁发机构 (证书颁发机构) 证书
要使基于可扩展身份验证协议 - 传输层安全性 (EAP-TLS) 证书的身份验证正常工作,您必须在瞻博网络 Mist 门户上添加受信任的 证书颁发机构证书。
此步骤使瞻博网络 Mist 访问身份验证能够信任由您添加的 CA 签名的客户端证书。
可以从外部证书颁发机构获取证书。证书颁发机构可以是众所周知的公共证书颁发机构或企业证书颁发机构。
观看以下视频,了解如何生成证书供测试或实验室使用:
How to create certificates both CA certificates and client certificates that you could use for lab testing to repeat all the steps in our tutorials. So in order to do things easily and quickly, assuming there is no existing infrastructure, assuming there is nothing you can use that you're available on-hand, you could use some open source tools that are out there on the internet. I will use degree-based certificate authority and key management called XCA.
You can Google it. You can download it. It's available for everyone to use. So now, when we will use XCA tool, first thing we will need to do, we'll need to create a new database. You could think of this creating a specific BQ infrastructure right on your laptop. So we can just say missed access insurance tutorial. Database, save it in there, it will ask you to encrypt it, which is a good thing. Click OK. So now we have the database created.
So the first thing we will need to create our certificate infrastructure is the certificate authority. That's the thing that will sign all the certificates of all your client devices that you will be using for testing. And that's the ultimate source of trust in your BQ infrastructure. So I'm going to click on new certificate. I'm going to select that, this is going to be a self-signed certificate because technically, every certificate authority, the root certificate authority is a self-signed.
Has a self-signed certificate. We'll select the template called CA from this list, will then go to subject. We can give it some internal name but doesn't matter, we could just say lab mist CA. You can fill in some of the data in there. Again, it doesn't really matter what you will put in there. But for testing purposes, just use anything you really like, organization name. Common name is important. This is how you identify certificates in real life. So one of the important attributes is common name. And we will take a look at the other one later, which is called the subject alternative name.
So common name, let's just call it lab-mist-ca@justify.com. Maybe something like this. I'm going to click that. We'll need to create a private key. A private key is what will prove that the certificate-- oh, owned and certificate holder is actually that same device or it's same CA. So we'll generate a new key, we'll set it to be 4,000 bytes, create. It will automatically selected here. It's good. We'll go to extensions. The type will be certification authority. It will add a few attributes in the certificate saying this is a CA cert.
This is where we will add the subject to alternative name. So typically what you'll do is you click edit, you will say I want to copy common name and there. Click apply. That's it. This will typically go and take your common name and copy it into a assign attribute.
Nowadays, many clients are using SAN to validate-- certificate validity. And the key usage, what do we need there? We need certificate signs, CRL sign. That's pretty much it. So we'll click OK. This now created our certificate authority in here. So we have the certificate. This is a CA cert, it has a common name.
The expiry date is, well, next year, but typically CA cert would be valid for like 10 years or something like that. For our intents and purposes, this is just a lot testing one year is more than enough.
So what will then need to do is will create a client cert. So click select our CA, will click new certificate. Now see under signing section, we are going to use this CA cert for signing certificates. It's not going to be self-signed anymore. So now our certificate authority will sign a new certificate that will be issued by the client. This is how we will establish this chain of trust. So create, select the template-- TLS client. We'll go to subject. That just say this is going to be a test lab client. Doesn't matter.
So common name is important. So this is where I would recommend you to use something that is an actual username that you want to use later on with your testing, whether you have an identity provider with your test username or things like that. So in my case, I will use one username I have in my Okta IdP that I will use later on. So I'm going to just use my Juniper email address. I'm going to copy it. We'll need to generate a private key, again, 4,000 bits.
We'll go to extensions, we'll select end entity. We'll click on subject, alternative name. Again, we'll just say copy common name. We'll go to key usage, will now need to select that this is a client certificate not the service certificate. And we will need key encipherments, digital signature, it should be OK. Now we click OK. We now have a client certificate.
So now we see there is a little dropdown in there. So we have a CA but now sign the client certificate. So now we have a CA and now we have a client certificate. What we'll do will need to export the CA. I will click on export. The CA cert, we are only exporting the public certificate, we are not touching the private key. Private Key stays untouched. It it is never exported anywhere. This is the only thing that protects the ownership of that certificate.
So we are exporting the private key in our test folder-- .mistCRT that's all we need. Click OK. The next thing we'll need is we'll need to export the certificate and the private key that we will use for client testing. Again, normally in production environment, you're not going to export private keys, they will be automatically pushed and distributed through MDM securely so they're never exposed to the network or anybody. But in our case, since we're testing, that's OK to do for now. So we'll click export.
In this case, the export format is pfx. That's the format that will include the client certificate, the client private key, and the CA cert in one package. So you can later on imported to one of your testing clients. And generally, this format is well understood by different operating systems.
It will ask you to encrypt that package. So just do a very secure password of 1234. Now we have to search, export it. We have a CA cert and we have a client cert. For now, this is good enough for our testin
要添加 CA 证书颁发机构证书:
- 单击添加证书颁发机构。
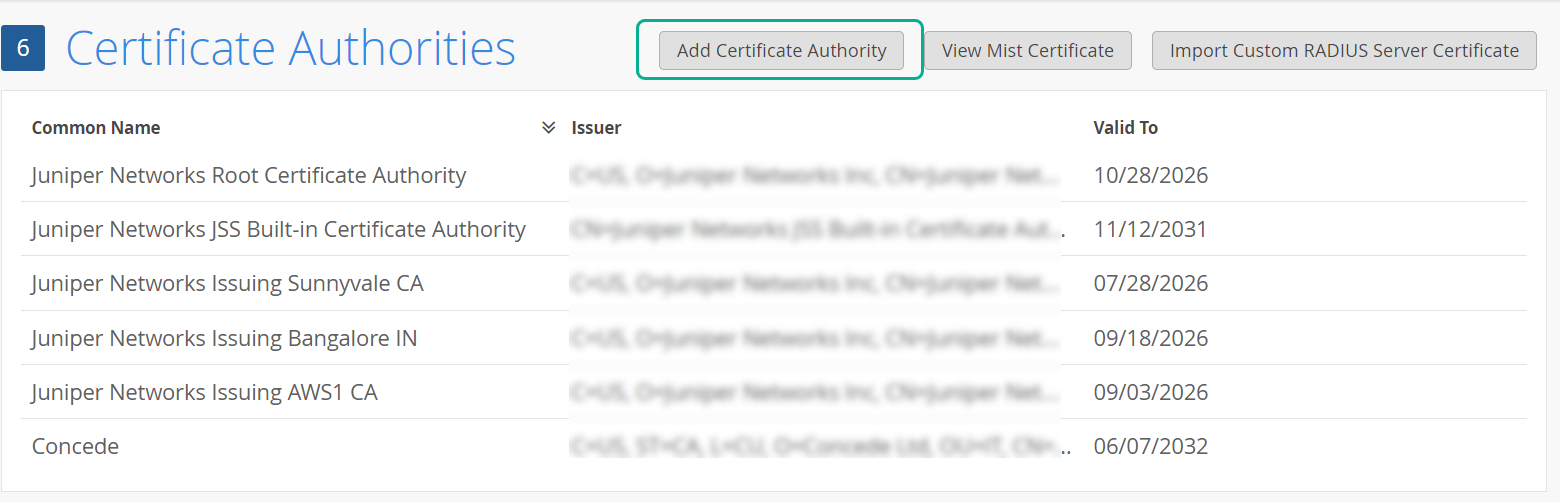
- 将 您的 证书颁发机构证书粘贴到“已签名的证书”字段中。
图 1:添加证书颁发机构
文本必须包含 和
—–END CERTIFICATE—–行—–BEGIN CERTIFICATE—–。系统解析和解码导入的证书颁发机构证书,并在 “属性” 窗格下显示证书属性。建议添加根证书颁发机构,以及所有中间 CA 或颁发证书。
使用瞻博网络 Mist Access Assurance 的默认服务器证书
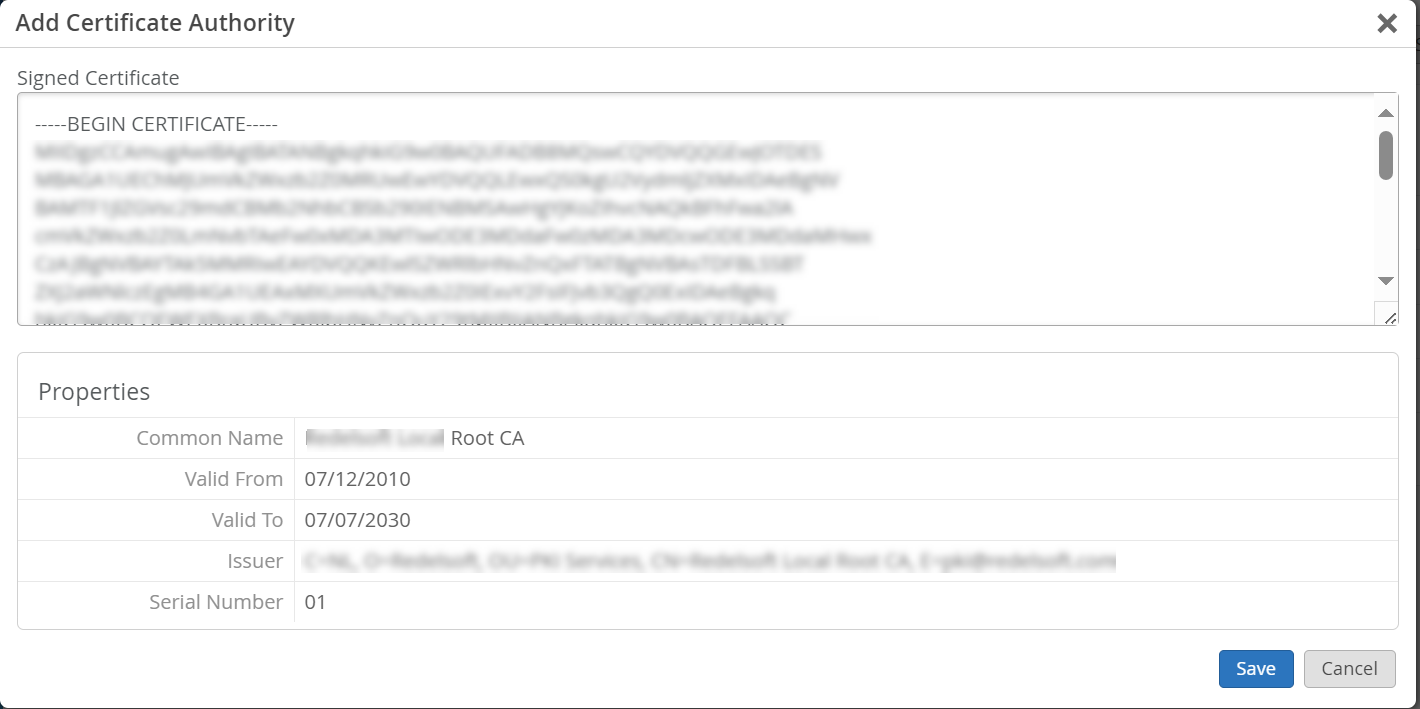
瞻博网络Mist云充当添加到瞻博网络Mist云中的每个组织的专用证书颁发机构 (证书颁发机构)。瞻博网络 Mist 颁发服务器证书。如果未配置任何证书,则瞻博网络 Mist 门户会向客户端设备显示由瞻博网络 Mist CA 签名的默认服务器证书颁发机构。
将为名称 auth.mist.com 颁发证书,并显示类似于 图 2 中所示的信息。
 颁发的服务器证书
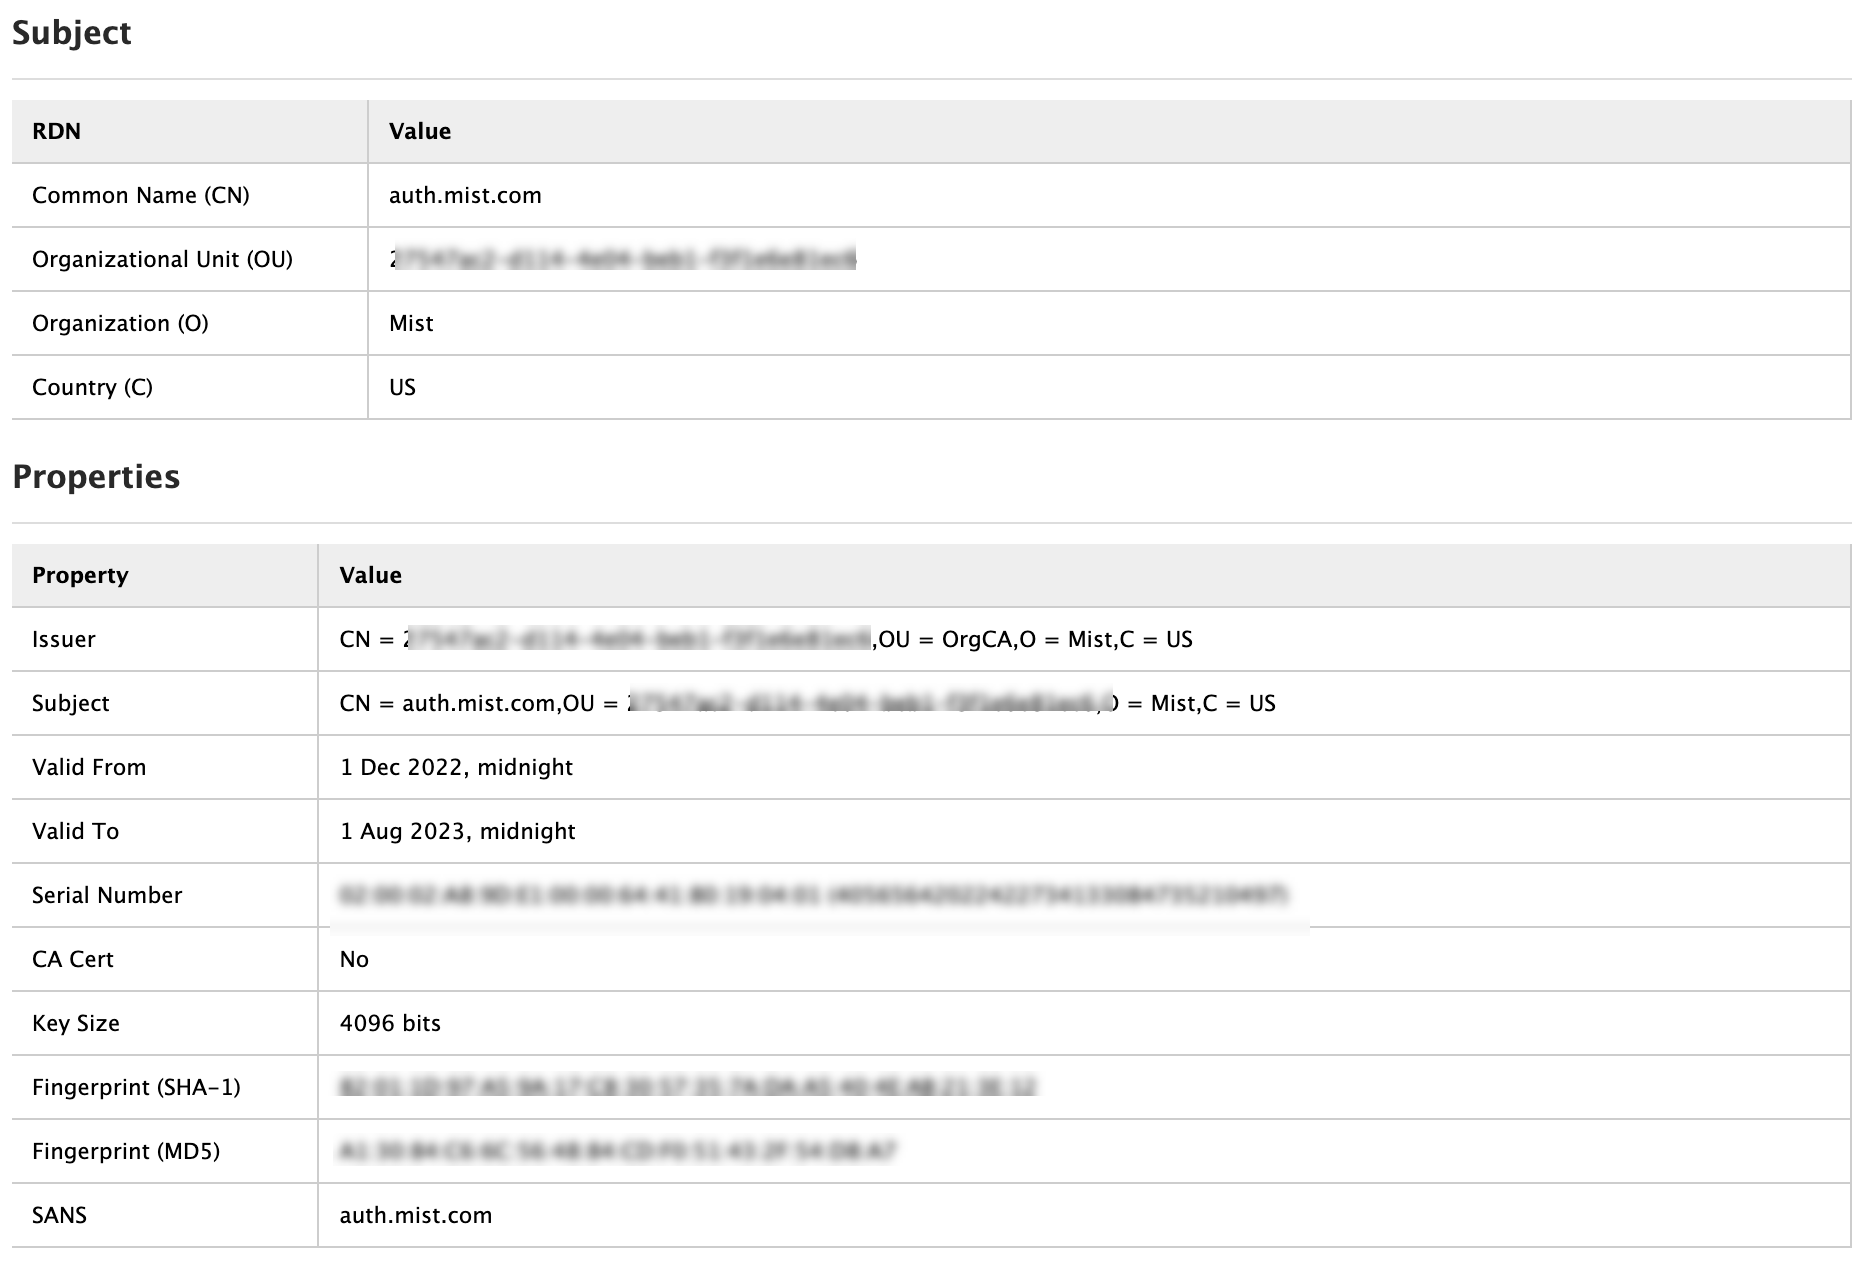
要下载瞻博网络 Mist 服务器证书,请执行以下作:
- 单击查看 Mist 证书。
 屏幕将显示 已签名证书 的详细信息。从“ 已签名的证书” 字段中复制证书内容。图 3:查看和复制 Mist 证书
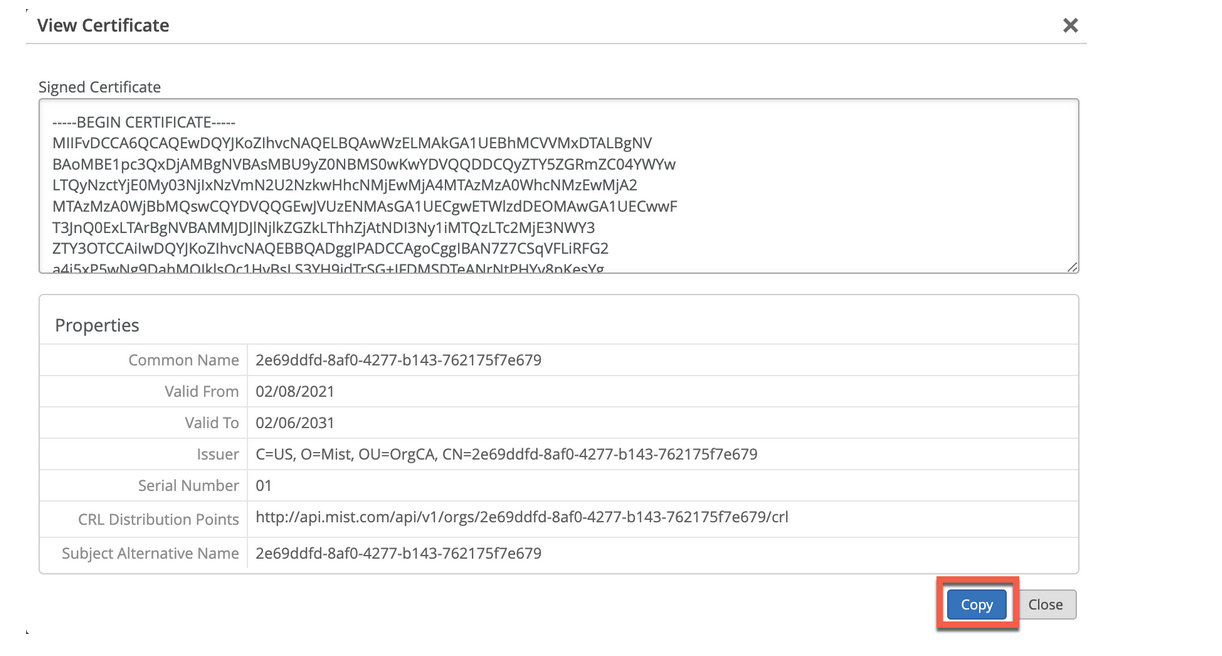
使用自定义服务器证书
您可能已经有一个 PKI,并希望保持现有配置不受干扰。在这种情况下,您必须在瞻博网络 Mist 门户上上传根 证书颁发机构的公共证书和 RADIUS 服务器的公钥/私钥对。
确保客户端设备也使用相同的证书,以便 RADIUS 服务器验证每个客户端(请求方)的证书。如果要保持客户端的当前设置不变,并且希望客户端信任由颁发其证书的同一证书颁发机构颁发的服务器证书,请执行此任务。
要将证书上传到瞻博网络 Mist 门户,请执行以下作:
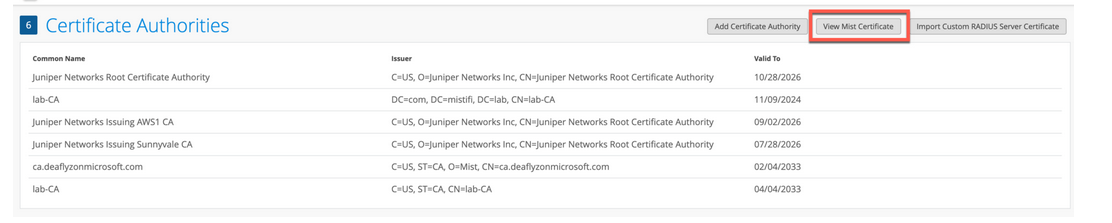
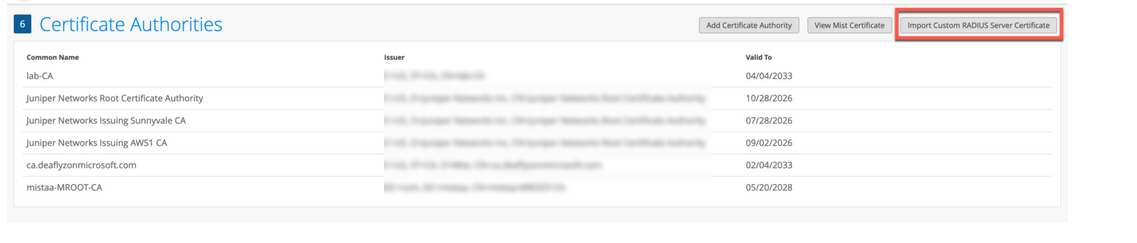
- 单击导入自定义 Radius 证书以打开证书页面。
图 4:导入自定义 RADIUS 服务器证书
- 在导入自定义 RADIUS 服务器证书页面上,输入您的 证书颁发机构证书详细信息:
图 5:输入自定义服务器证书详细信息
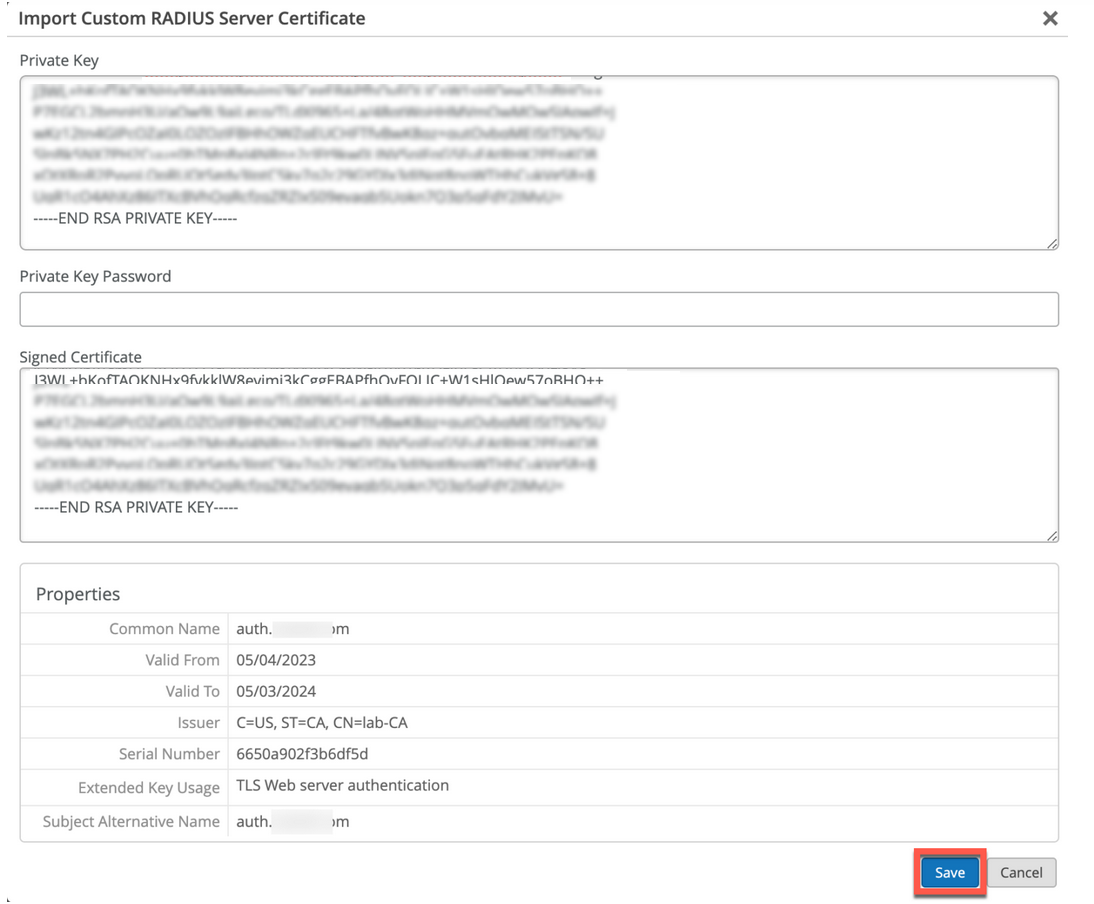
- 私钥 — 复制并粘贴私钥信息。文本必须包含 和
END RSA PRIVATE KEY行BEGIN RSA PRIVATE KEY。 - 私钥密码 — 输入私钥的密码(如果可用)。
- 签名证书 - 将证书复制并粘贴为文本。确保包含所有中间 CA 和根证书颁发机构证书。文本必须包含 和
—–END CERTIFICATE—–行—–BEGIN CERTIFICATE—–。
- 私钥 — 复制并粘贴私钥信息。文本必须包含 和
Guidelines for using custom server certificates:
- Do not use a wildcard certificate, for example: *.abc.com for 802.1X authentication.
- You can use a certificate that contains a common name (CN) or a subject alternative name (SAN) for 802.1X authentication..
- We recommend the following x509 extension attributes. The majority of the client device operating systems support these extensions.
- Use certificate version 3 or v3 (not legacy v1)
- If the server name is being used as a validation criterion on the client side, then the certificate should include the SAN extension with the DNS name of the server.
- Include Extended Key Usage as a TLS web server authentication criterion (required for most Android devices).
现在,您可以继续进行基于证书的身份验证流程。
也可以看看
客户端证书要求
使用瞻博网络 Mist Access Assurance 实施基于证书的身份验证时,客户端证书必须满足特定要求,以确保 IdP 查找和 MDM 集成等功能正常运行。
安全性要求
客户端证书应满足以下最低安全标准:
- 证书类型:X.509 v3 证书
- 密钥长度:2048 位或更大(建议 4096 位)或 ECDSA(P-256 或更强)
- 签名算法:SHA-256 或更强(SHA-384、SHA-512)
- 所需扩展:通过客户端身份验证扩展密钥使用 (1.3.6.1.5.5.7.3.2)
身份提供者查找的要求
为了使用户身份与您的 IdP 成功匹配,请确保您的客户端证书包含以下字段之一。需要使用 云 IdP 中的用户主体名称(格式 user@domain.xyz)进行查找。按以下顺序检查以下字段:
- 主题通用名 (CN)
- 主题备用名称 - UPN (SAN:UPN)
- 主题备用名称 - 电子邮件 (SAN:Email)
计算机证书的身份提供程序查找行为
为了与您的 IdP 成功匹配机器身份(主要涉及 Entra ID,因为其他云 IdP 没有机器身份),请确保您的客户端证书包含以下字段之一。
需要使用 EntraID 中的设备名称(不包括域名)进行查找。按以下顺序检查以下字段:
- 主题通用名 (CN)
- 主题备用名称 - DNS (SAN:DNS)
MDM 集成注意事项
将证书与 MDM 解决方案配合使用时:
- 在证书中包含设备标识符(例如 SAN:DNS 字段中的 DeviceId 或 UDID),以便进行基于设备的查找。
- 参阅瞻博网络文档门户上每个 MDM 供应商的相关集成文档: 瞻博网络 Mist Access Assurance NAC
在组织范围内进行部署之前,先使用一小组设备测试证书配置,以确保 Access Assurance 功能正常运行。