Deploy vSRX Virtual Firewall in a Hyper-V Host Using the Hyper-V Manager
Use this procedure to deploy and configure the vSRX Virtual Firewall as a virtual security appliance in the Hyper-V environment using Hyper-V Manager.
Note the following for deploying vSRX Virtual Firewall on a Microsoft Hyper-V server:
Starting in Junos OS Release 15.1X49-D80 and Junos OS Release 17.3R1, you can deploy the vSRX Virtual Firewall only on Microsoft Hyper-V Server 2012 R2 or 2012.
Starting in Junos OS Release 15.1X49-D100 and Junos OS Release 17.4R1, you can deploy the vSRX Virtual Firewall on Microsoft Hyper-V Server 2016.
To upgrade an existing vSRX Virtual Firewall instance, see Migration, Upgrade, and Downgrade in the vSRX Virtual Firewall Release Notes.
To deploy vSRX Virtual Firewall using Hyper-V Manager:
-
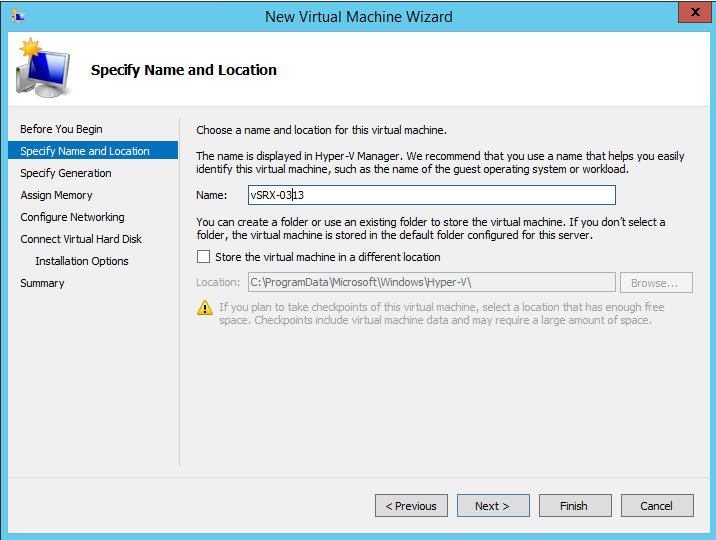
From the Specify Name and Location page (see Figure 1), enter a name and location for the vSRX Virtual Firewall VM that you are
creating and then click Next. We recommend that you keep
this name the same as the hostname you intend to assign to the vSRX Virtual
Firewall VM.
Figure 1: Specify Name and Location Page
-
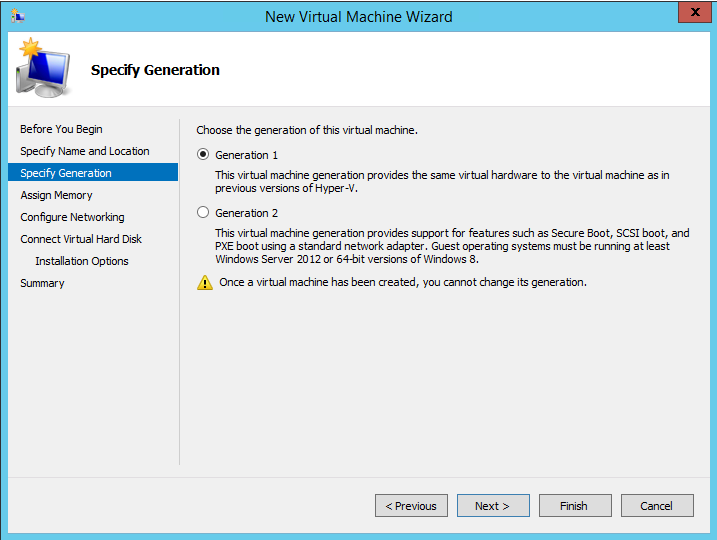
From the Specify Generation page (see Figure 2), keep the default setting of Generation 1 as the
generation of the vSRX Virtual Firewall VM and then click
Next.
Figure 2: Specify Generation Page
-
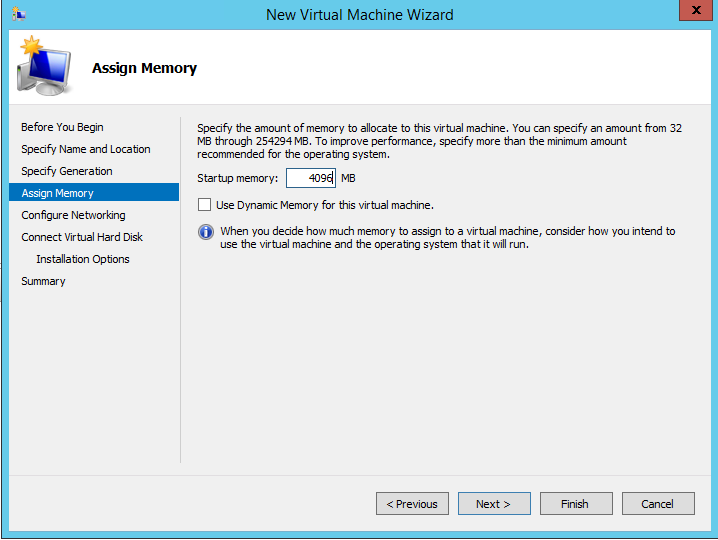
From the Assign Memory page (see Figure 3), enter 4096 MB as the amount of startup memory to
assign to the vSRX Virtual Firewall VM. Leave Use Dynamic Memory for
this virtual machine clear. Click Next.
Figure 3: Assign Memory Page
-
From the Configure Networking page (see Figure 4), select a virtual switch from a list of existing virtual switches on the
Hyper-V host computer to connect to the vSRX Virtual Firewall management
interface. The default is Not connected. Click
Next.
Note:
See Add vSRX Interfaces for the procedure on adding virtual switches for the vSRX Virtual Firewall VM using the Virtual Switch Manager.
Figure 4: Configure Networking Page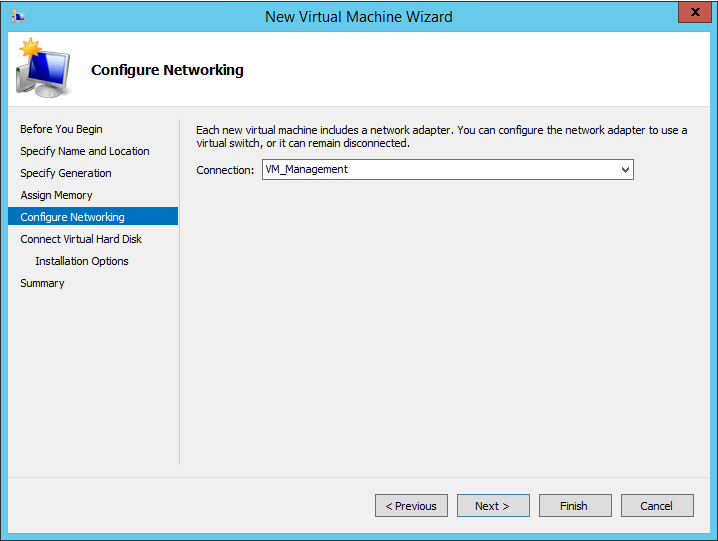
-
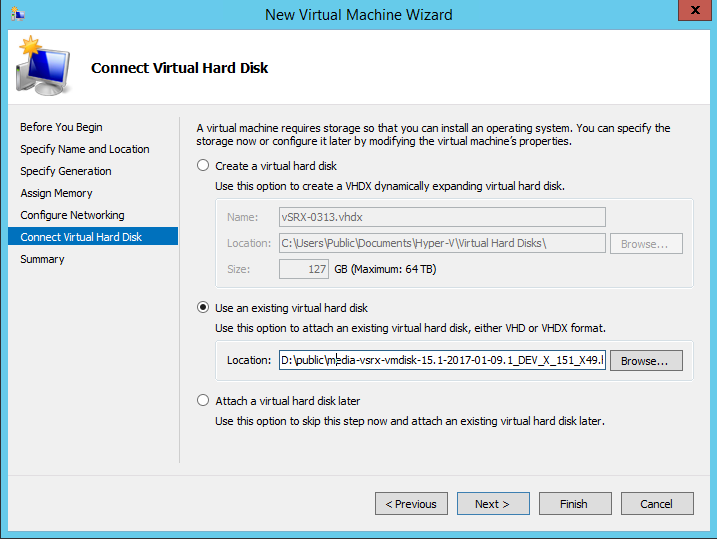
From the Connect Virtual Hard Disk page (see Figure 5), click Use an existing virtual hard disk and browse
to the location of the vSRX Virtual Firewall virtual hard disk (VHD) file
(downloaded in Step 1). Click Next.
Figure 5: Connect Virtual Hard Disk Page
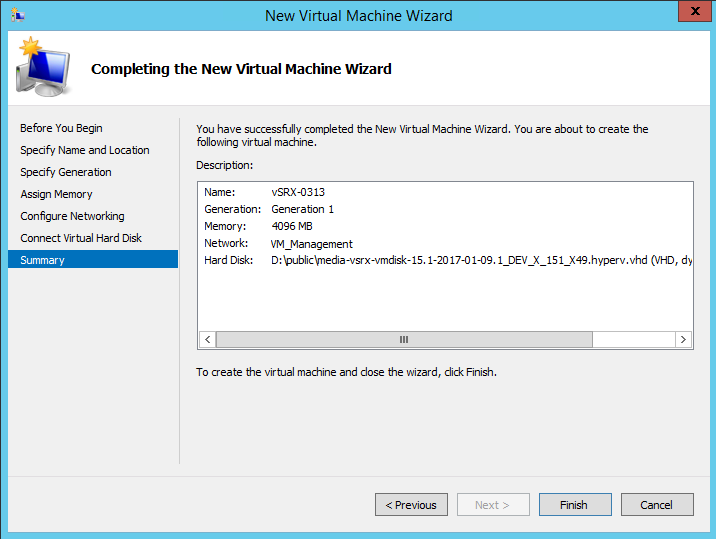
- After you have finished configuring the new virtual machine,
verify your selections in the Summary page (see Figure 6) and then click Finish to
complete the installation. Figure 6: Summary Page
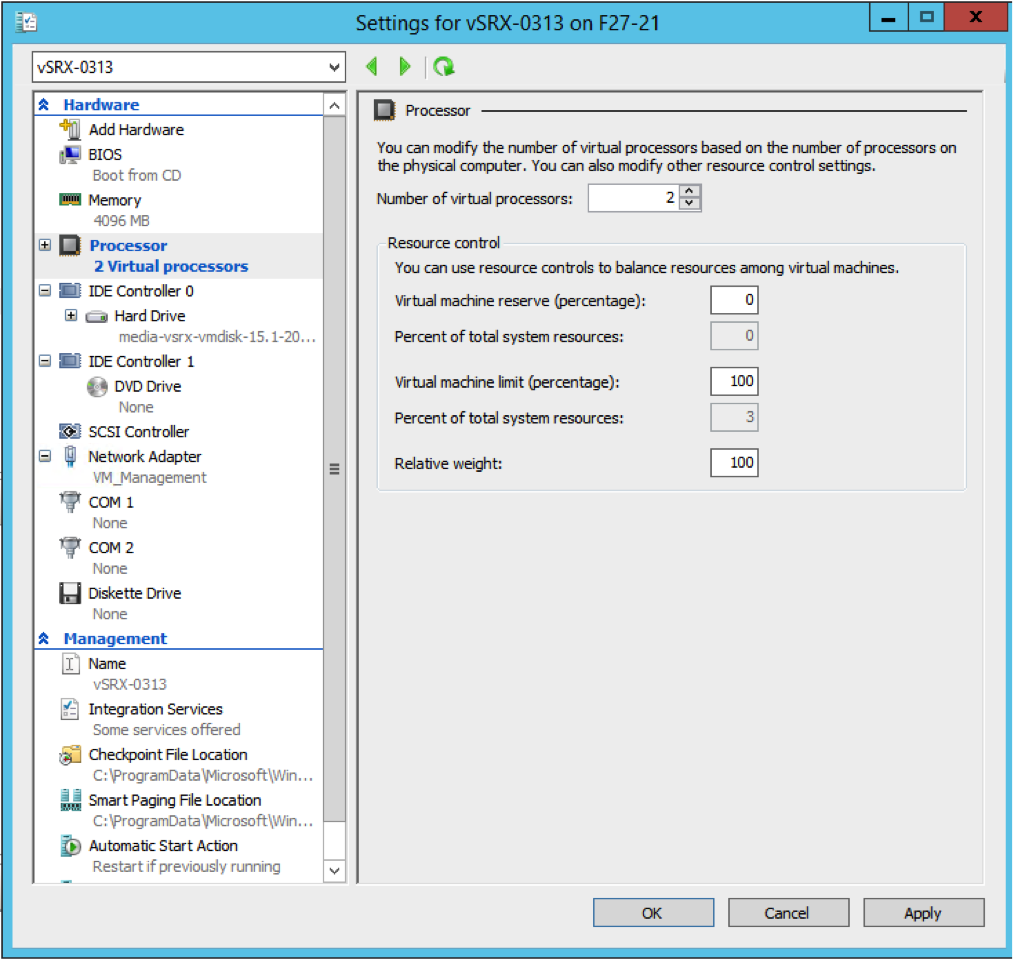
- From the Settings dialog box, under the Hardware section,
select Processor. The Processor pane appears (see Figure 7). Enter 2 in the Number of virtual processors field (the default is 1).Figure 7: Processor Pane
- From the Settings dialog box, under the Hardware section,
select Network Adapter. The Network Adapter pane appears
(see Figure 8).
From the Virtual switch drop-down list, select a virtual switch to assign to a network adapter to be used by the vSRX Virtual Firewall VM (see Add vSRX Interfaces for details on adding virtual switches). Each network adapter that is defined for a vSRX Virtual Firewall is mapped to a specific interface. See Requirements for vSRX on Microsoft Hyper-V for a summary of interface names and mappings for a vSRX Virtual Firewall VM.
Note:If you need to add a network adapter to assign to a virtual switch, click Add Hardware > Network Adapter > Add.
Figure 8: Network Adapter Pane
-
Enable the MAC address spoofing function for the vSRX Virtual Firewall VM if a
network adapter is to be used as an interface for Layer 2 mode
support on the vSRX
Virtual Firewall. From the Network Adapter pane select Advanced
Features. The Advanced Features pane appears (see Figure 9). Click the Enable MAC address spoofing check box.
MAC address spoofing allows each network adapter to change its source MAC address for outgoing packets to one that is not assigned to them. Enabling MAC address spoofing ensures those packets are not dropped by the network adapter if the source MAC address fails to match the outgoing interface MAC address.
Click OK when you complete your vSRX Virtual Firewall VM selections.
Figure 9: Network Adapter Advanced Features Pane
Change History Table
Feature support is determined by the platform and release you are using. Use Feature Explorer to determine if a feature is supported on your platform.