Prepare to setup vSRX Virtual Firewall Deployment on GCP
Before you begin, you need a Google account and an identity and access management (IAM) role, with all required permissions to access, create, modify, and delete Compute Engine Instances and Storage Service, and Google’s VPC objects. You should also create access keys and corresponding secret access keys, certificates, and account identifiers.
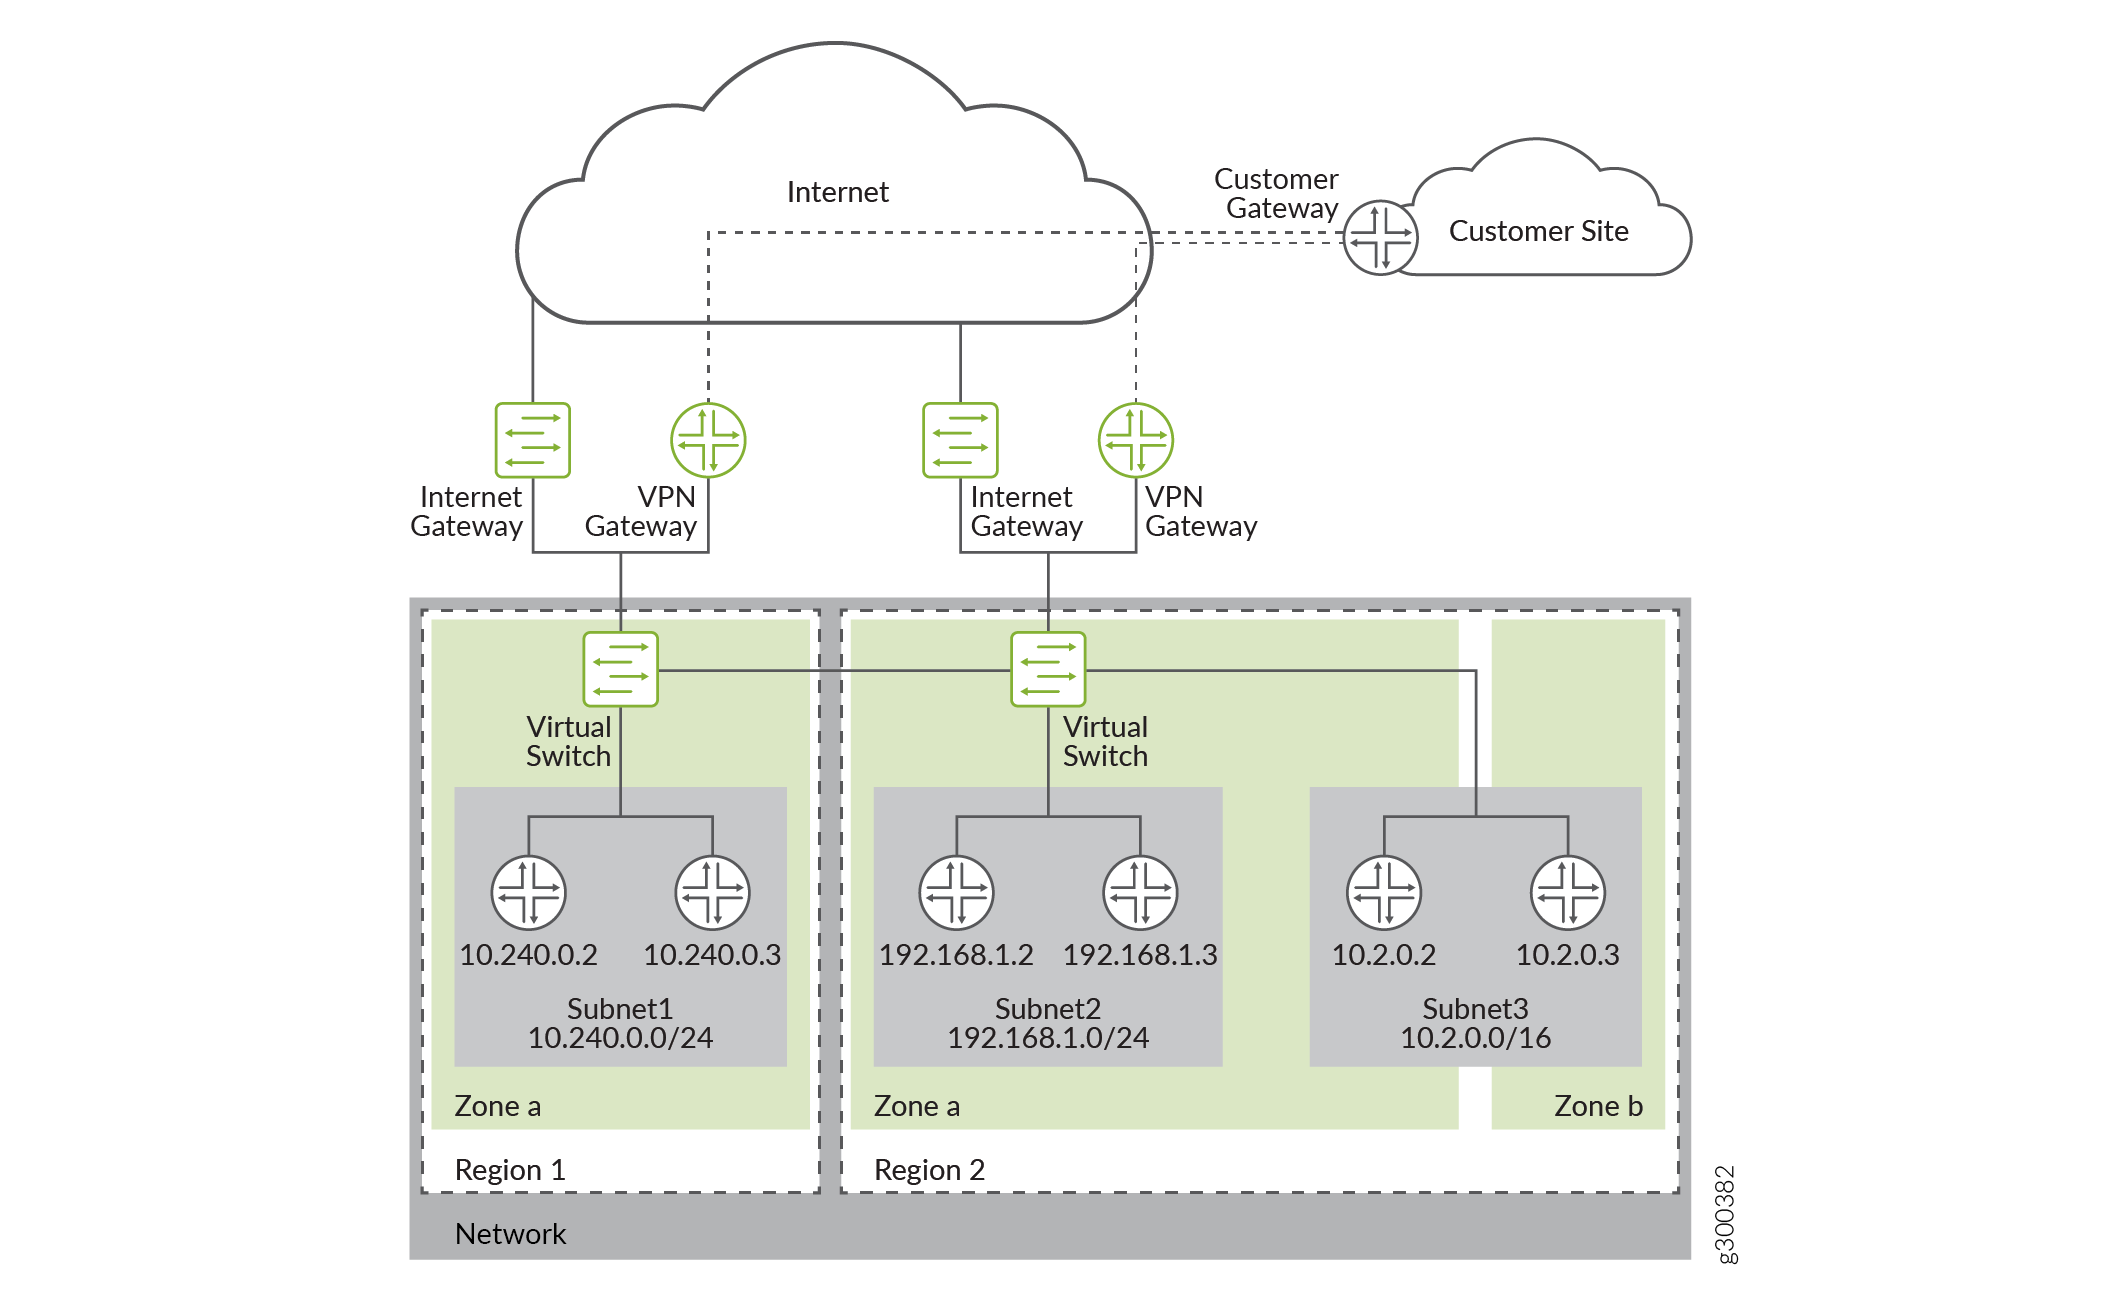
Figure 1 shows an example of how you can deploy vSRX Virtual Firewall to provide security for applications running in a private subnet of Google VPC.
You need to set up the vSRX Virtual Firewall 3.0 Firewall on Google Cloud Platform to deploy a vSRX Virtual Firewall 3.0 firewall on a Google Cloud Computer Engine instance on the Google Cloud Platform (GCP).
Before you deploy vSRX Virtual Firewall 3.0, you must create your project networks and subnetworks, and plan networks and IP address assignments for the vSRX Virtual Firewall interfaces. During the deployment, you must choose from the existing networks and subnetworks.
Subnetworks—You must create subnetworks in each VPC networks in specific region in which you plan to deploy the vSRX Virtual Firewall. A VPC Networks can add subnetworks in different region. These subnetworks are all internal network in GCP.
IP Address—You need to assign IP address ranges when you create interface subnetworks.
Range—The range for a network subnet cannot overlap with others.
-
External IP Address—During vSRX Virtual Firewall deployment you can choose to enable or disable an external IP address when you create a network interface for the vSRX Virtual Firewall, by default, an ephemeral IP address is auto-assigned. You can also specify a static address when creating a network interface.
Management Interface—The first network interface added to a vSRX Virtual Firewall is mapped to fxp0 on the vSRX Virtual Firewall.
Enable IP forwarding
This interface has an external IP address.
On vSRX Virtual Firewall, DHCP is enabled to fxp0 by default.
You can change the ephemeral IP address given during deployment to a static IP address, after you complete the deployment.
Interface Order—First network interface is mapped to fxp0, second network interface is mapped to ge-0/0/0, 3rd network interface is mapped to ge-0/0/1.
Number of vSRX Interfaces
The maximum number of virtual interfaces allowed per vSRX Virtual Firewall instance is 8.
To create a vSRX Virtual Firewall instance, you have to specify the machine type. The machine type specifies a particular collection of virtualized hardware resources available to a VM instance, including the memory size, virtual CPU count, and maximum disk capacity.
Default VPC Network—There is default network in a GCP project, you can delete the default network if unused. By default, 5 networks in a project. You can request additional networks for your project.
Firewall Rules—You must create a GCP firewall rules to allows access for management connection.
Before you begin, ensure to have the following ready:
Google Cloud Platform Account Planning
SSH Key Pair
Virtual Private Cloud (VPC) Network Planning
Step 1: Google Cloud Platform Account Planning
Before you begin deploying vSRX Virtual Firewall VM, review the licensing information and collect the information you'll need for the configuration process.
- Get required permissions for the GCP account.
GCP user account with a linked e-mail address
Identity and access management (IAM) roles as Compute Viewer, Storage Object Viewer,and Monitoring Metric Writer.
Accounts and Permissions—Ensure you have proper accounts and permissions before your deploy vSRX Virtual Firewall 3.0 on a Google Computer Engine instance. Sample account roles and IAM permissions are shown in Figure 2
Figure 2: Sample Account Roles and IAM Permissions
Step 2: Define Network Attributes and Generate SSH Key Pair for Authentication
The procedure below provides you steps to define network attributes and generate your own SSH Key pairs to allow your first time login:
- After choosing the machine type, you must define networking
attributes in the advanced options for the VM.
Click the VM instances tab on the home page and then click the Networking tab as shown in Figure 3. Update the networking attributes and add the required interfaces.
Figure 3: Define Network Attributes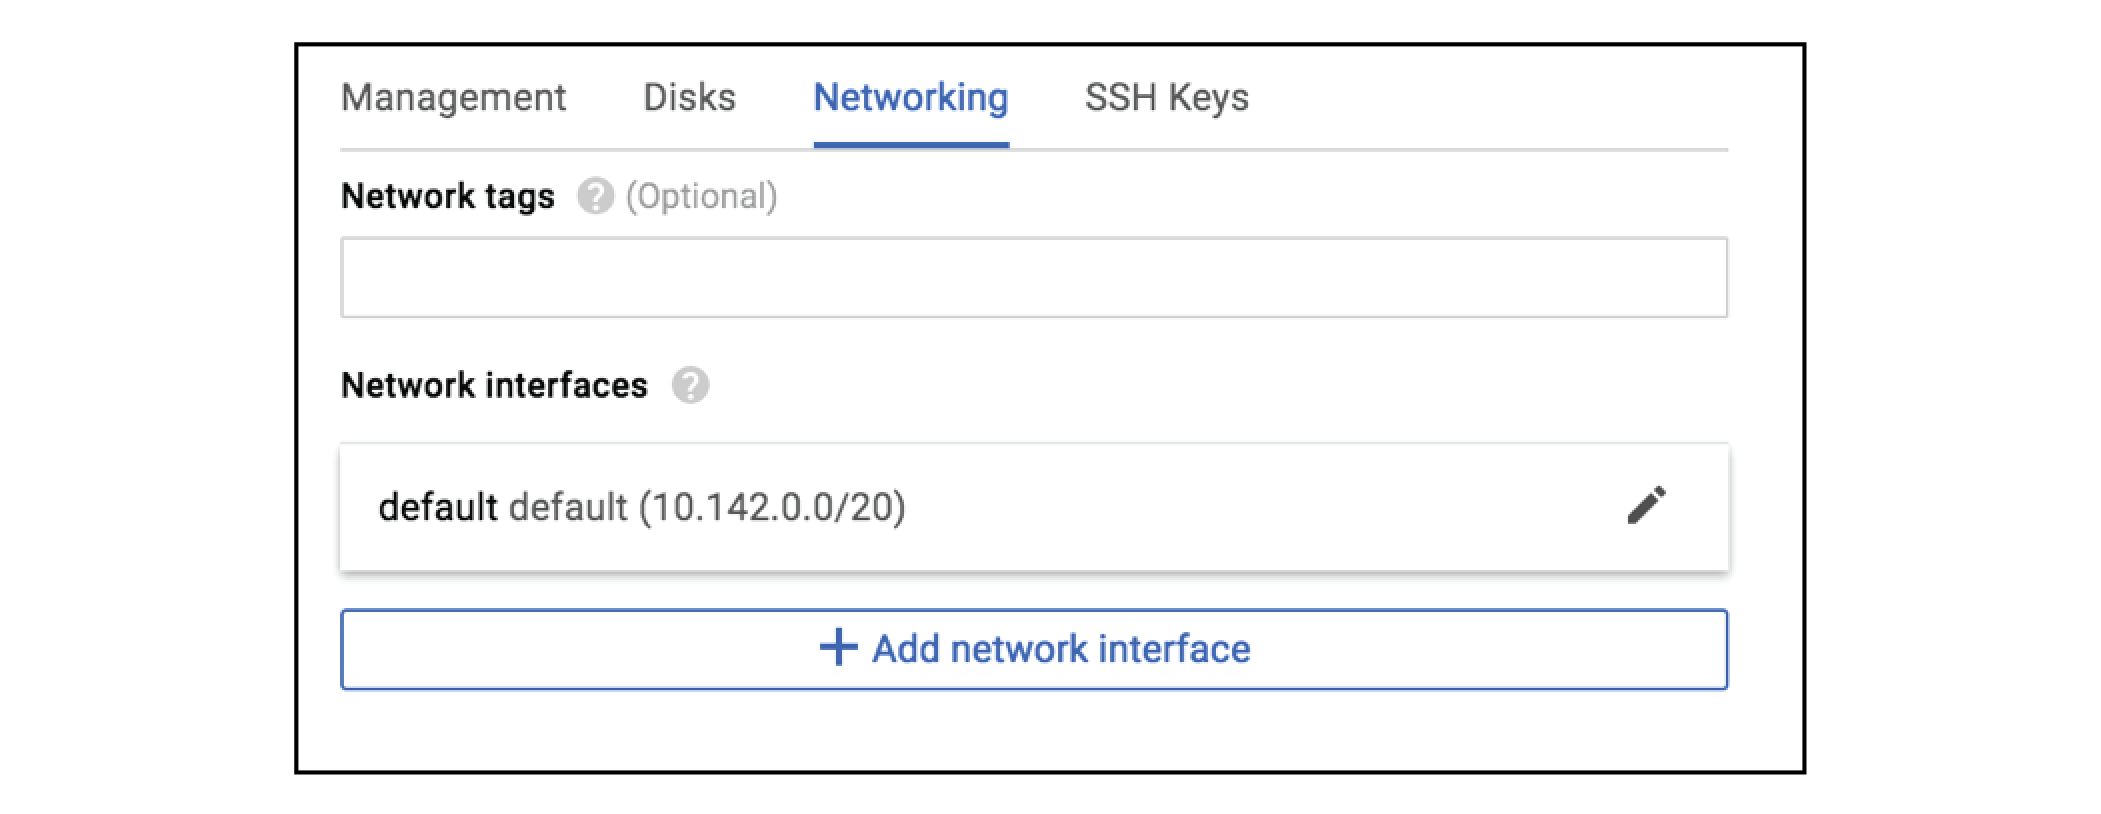
You can add up to 8 interfaces for each vSRX Virtual Firewall instance.
Note:You cannot choose virtual interface type. GCP supports only the VirtIO interface type. SR-IOV is not supported in GCP.
- Block project-wide SSH keys and specify an SSH key for
each vSRX Virtual Firewall instance.
Click the SSH Keys tab on the VM instances page as shown in Figure 4.
Note:The SSH key is used by the public key authentication for the first login. As a security measurement, you must block project-wide SSH keys and specify an SSH key for each vSRX Virtual Firewall instance.
Figure 4: Block Project-Wide SSH Keys
Step 3: Plan Google Virtual Private Cloud (VPC) Network
Prepare the virtual private cloud (VPC) networks in Google Cloud Platform. You must create virtual private networks, rules, and subnetworks and configure interfaces before you start deploying the vSRX Virtual Firewall on GCP which involves: