Help us improve your experience.

Let us know what you think.

Do you have time for a two-minute survey?


Spawn vSRX Virtual Firewall in a Contrail Service Chain

Ensure that you have installed Contrail and have loaded the vSRX Virtual Firewall images with OpenStack Horizon or Glance.

You can use Contrail to chain various Layer 2 through Layer 7 services such as firewall, NAT, and IDP through vSRX Virtual Firewall VMs.

Create a Service Template

To create a service template:

  1. From Contrail, select Configure>Services>Service Templates. The list of existing service templates appears, as shown in Figure 1.
    Figure 1: Contrail Service TemplatesContrail Service Templates
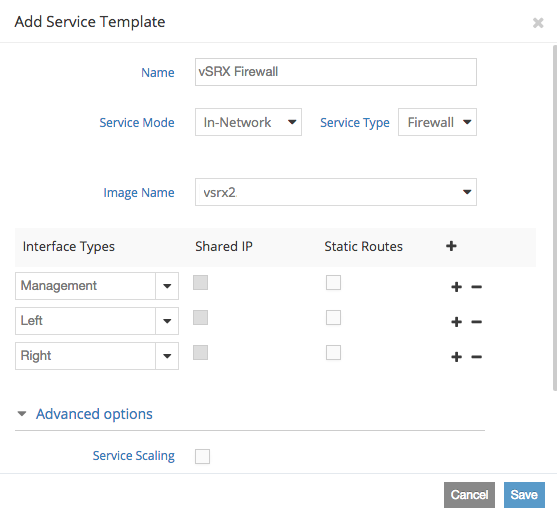
  2. Click + to create a new service template. The Add Service Template dialog box appears, as shown in Figure 2.
    Figure 2: Contrail Add a Service TemplateContrail Add a Service Template
  3. Add a name for the service template in the Name box.
  4. Select the appropriate service mode and service type from the lists.
  5. Select the vSRX Virtual Firewall image from the Image Name list. This is the image you installed previously in the OpenStack image service.
  6. Click + to add three interfaces.
  7. Select Management for the first interface type, Left for the second interface type, and Right for the third interface type. You associate the left and right interfaces with the left and right virtual networks when you create the service instance. Any additional interfaces must be of type Other.
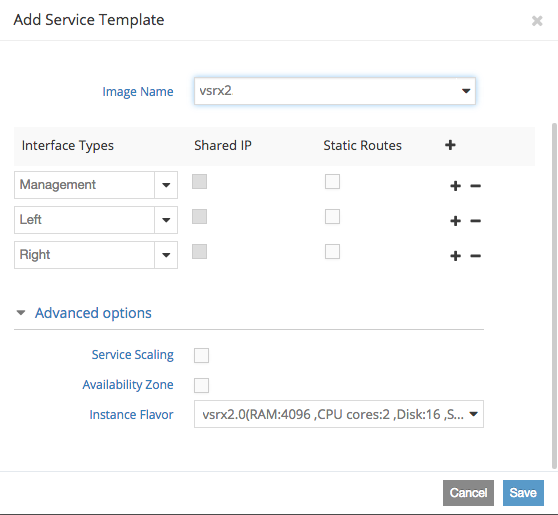
  8. Expand Advanced Options and select an instance flavor from the Instance Flavor list, as shown in Figure 3. You can use an appropriate default flavor from OpenStack or a custom flavor you created previously for vSRX Virtual Firewall.
    Figure 3: Advanced Options - Add Service TemplateAdvanced Options - Add Service Template
  9. Optionally, check Scaling to create multiple identical vSRX Virtual Firewall instances from this service template for load balancing.
  10. Click Save to create this new service template.

Create Left and Right Virtual Networks

Ensure that you have IP Address Management (IPAM) set up for your project.

To create a virtual network:

  1. From Contrail, select Configure>Networking>Networks. The list of existing networks appears.
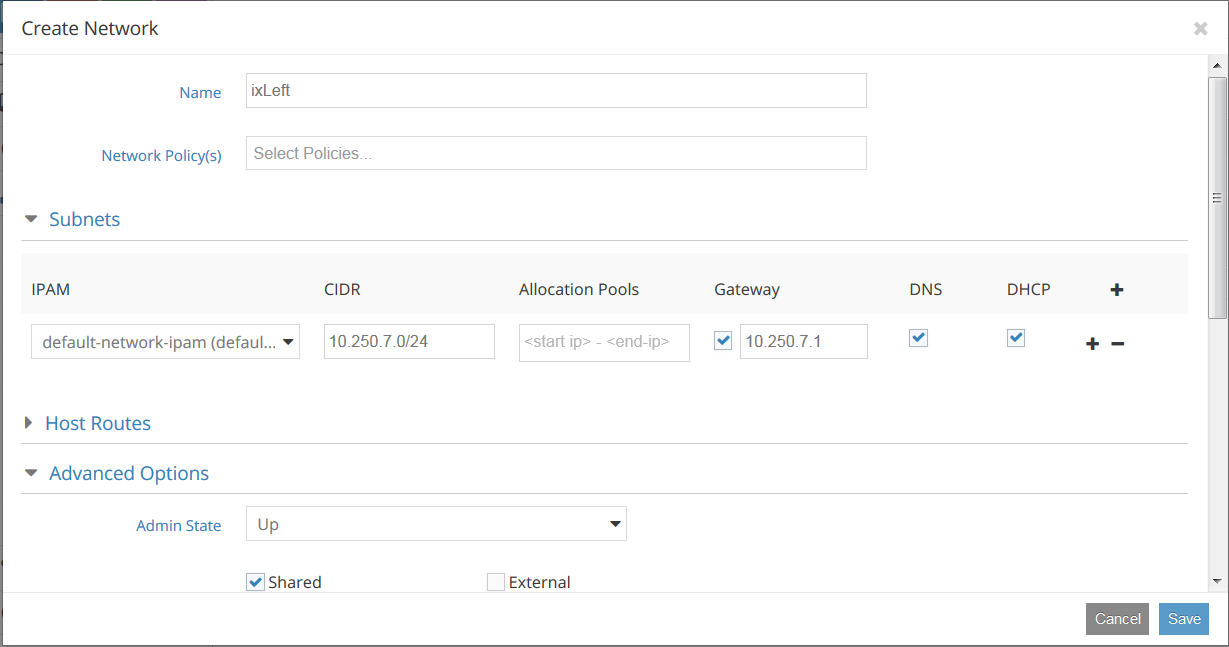
  2. Verify that your project is displayed as active in the upper right Project list, and click + to create a new virtual network. The Create Network dialog box appears, as shown in Figure 4
    Figure 4: Creating a Virtual Network in ContrailCreating a Virtual Network in Contrail
  3. Enter a name for the left virtual network.

    Do not select a network policy yet. You create the network policy after you create the service instance and then you update this virtual network to add the policy.

  4. Expand Subnet and click + to add IPAM to this virtual network.
  5. Select the appropriate IPAM from the list.
  6. Set the CIDR and Gateway fields.
  7. Expand Advanced Options and select appropriate options for your network.
  8. Click Save. The new virtual network appears in the list of configured networks.
  9. Repeat this procedure for the right virtual network.

Create a vSRX Virtual Firewall Service Instance

To create a vSRX Virtual Firewall service instance:

  1. Select Configure>Services>Service Instances. The list of existing service instances appears.
  2. Click + to create a new service instance. The Create Service Instance dialog box appears.
  3. Enter a name for the service instance.
    Note:

    Do not use white space in the service instance name.

  4. Select the service template you created for vSRX Virtual Firewall from the Services Template list. This service template includes the vSRX Virtual Firewall image used to provide the service.
  5. Select Management from the Interface 1 list. Management must be the first interface for vSRX Virtual Firewall service instances.
  6. Select Left from the Interface 2 list, and Right from the Interface 3 list.
  7. Select Auto Configured for the Management interface.
  8. Select the left virtual network for the left interface, and the right virtual network for the right interface.
  9. Click Save to save this service instance. Contrail launches the vSRX Virtual Firewall VM for this service instance.
  10. Optionally, select Configure>Services>Service Instances to view this new vSRX Virtual Firewall instance status. You can expand the row for this instance in the table and click View Console to access the vSRX Virtual Firewall console port.
Note:

You can also view this service instance from the OpenStack Instances table, but you should only use Contrail to delete service instances.

See Contrail - Creating an In-Network or In-Network-NAT Service Chain for more details.

Create a Network Policy

To create a network policy:

  1. Select Configure>Networking>Policies. The table of policies appears.
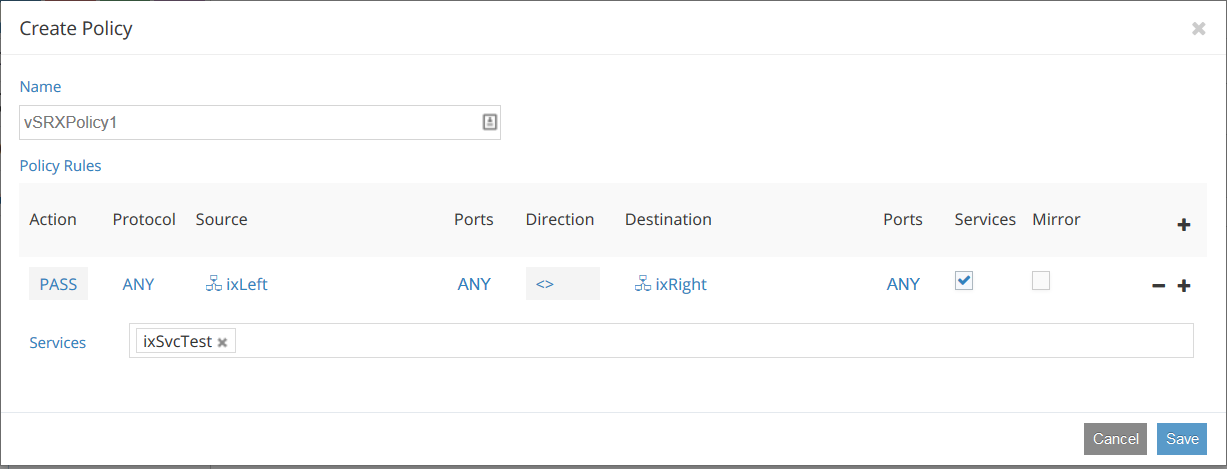
  2. Click + to create a new policy. The Create Policy dialog box appears, as shown in Figure 5.
    Figure 5: Creating a Network Policy in ContrailCreating a Network Policy in Contrail
  3. Name the policy.
  4. Click + to create a new rule for this policy.
  5. Select the left virtual network you created from the Source list and select the right virtual network from the Destination list.
  6. Select the appropriate protocol from the Protocol list and select the source and destination ports for this policy.
  7. Select Services and select the vSRX Virtual Firewall instance you want to apply this policy to.
  8. Optionally, add more policy rules to this policy.
  9. Click Save to create this policy.

Add a Network Policy to a Virtual Network

To add a network policy to a virtual network:

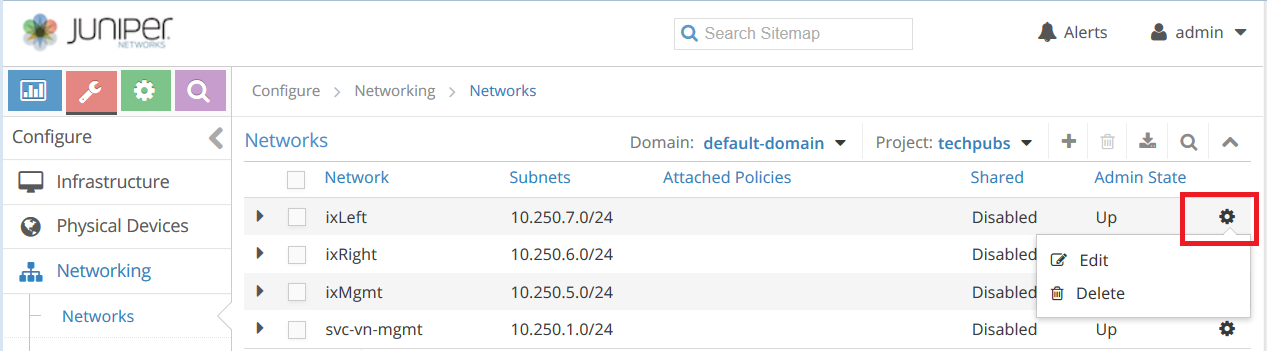
  1. Select Configure>Networking, and select the settings icon to the right of the virtual network you want to add a network policy to, as shown in Figure 6.
    Figure 6: Contrail Virtual NetworksContrail Virtual Networks
  2. Click Edit. The Edit Networks dialog box appears, as shown in Figure 7.
    Figure 7: Adding a Network Policy to a Virtual Network in ContrailAdding a Network Policy to a Virtual Network in Contrail
  3. Select the appropriate policy from the Networks Policy(s) list.
  4. Click Save to save this change.
  5. Repeat this procedure for the other virtual network in this service chain.