Deploy the vSRX Virtual Firewall Image from Azure Marketplace
Starting in Junos OS Release 15.1X49-D91 for vSRX Virtual Firewall, you can deploy the vSRX Virtual Firewall virtual security appliance in your Azure virtual network by selecting the vSRX Virtual Firewall image from Azure Marketplace and customizing the vSRX Virtual Firewall VM deployment settings and dependencies based on your network requirements in Microsoft Azure Cloud.
This deployment approach might be needed if you have a vSRX Virtual Firewall VM deployment scenario that is outside of the use cases offered in the vSRX Virtual Firewall VM solution templates available from Juniper Networks.
Be sure you have an account for and a subscription to Microsoft Azure before deploying the vSRX Virtual Firewall to Azure (see Microsoft Azure).
If you do not have an Azure subscription, then you can create a free account before you begin. See the Microsoft Azure website for more details.
Use the following procedures to deploy and configure a vSRX Virtual Firewall VM into an Azure virtual network from the Azure portal.
Deploy the vSRX Virtual Firewall Image
To deploy and configure a vSRX Virtual Firewall VM into an Azure virtual network using the vSRX Virtual Firewall image from Azure Marketplace:
- Log in to the Microsoft
Azure portal using your Microsoft account user name and password.
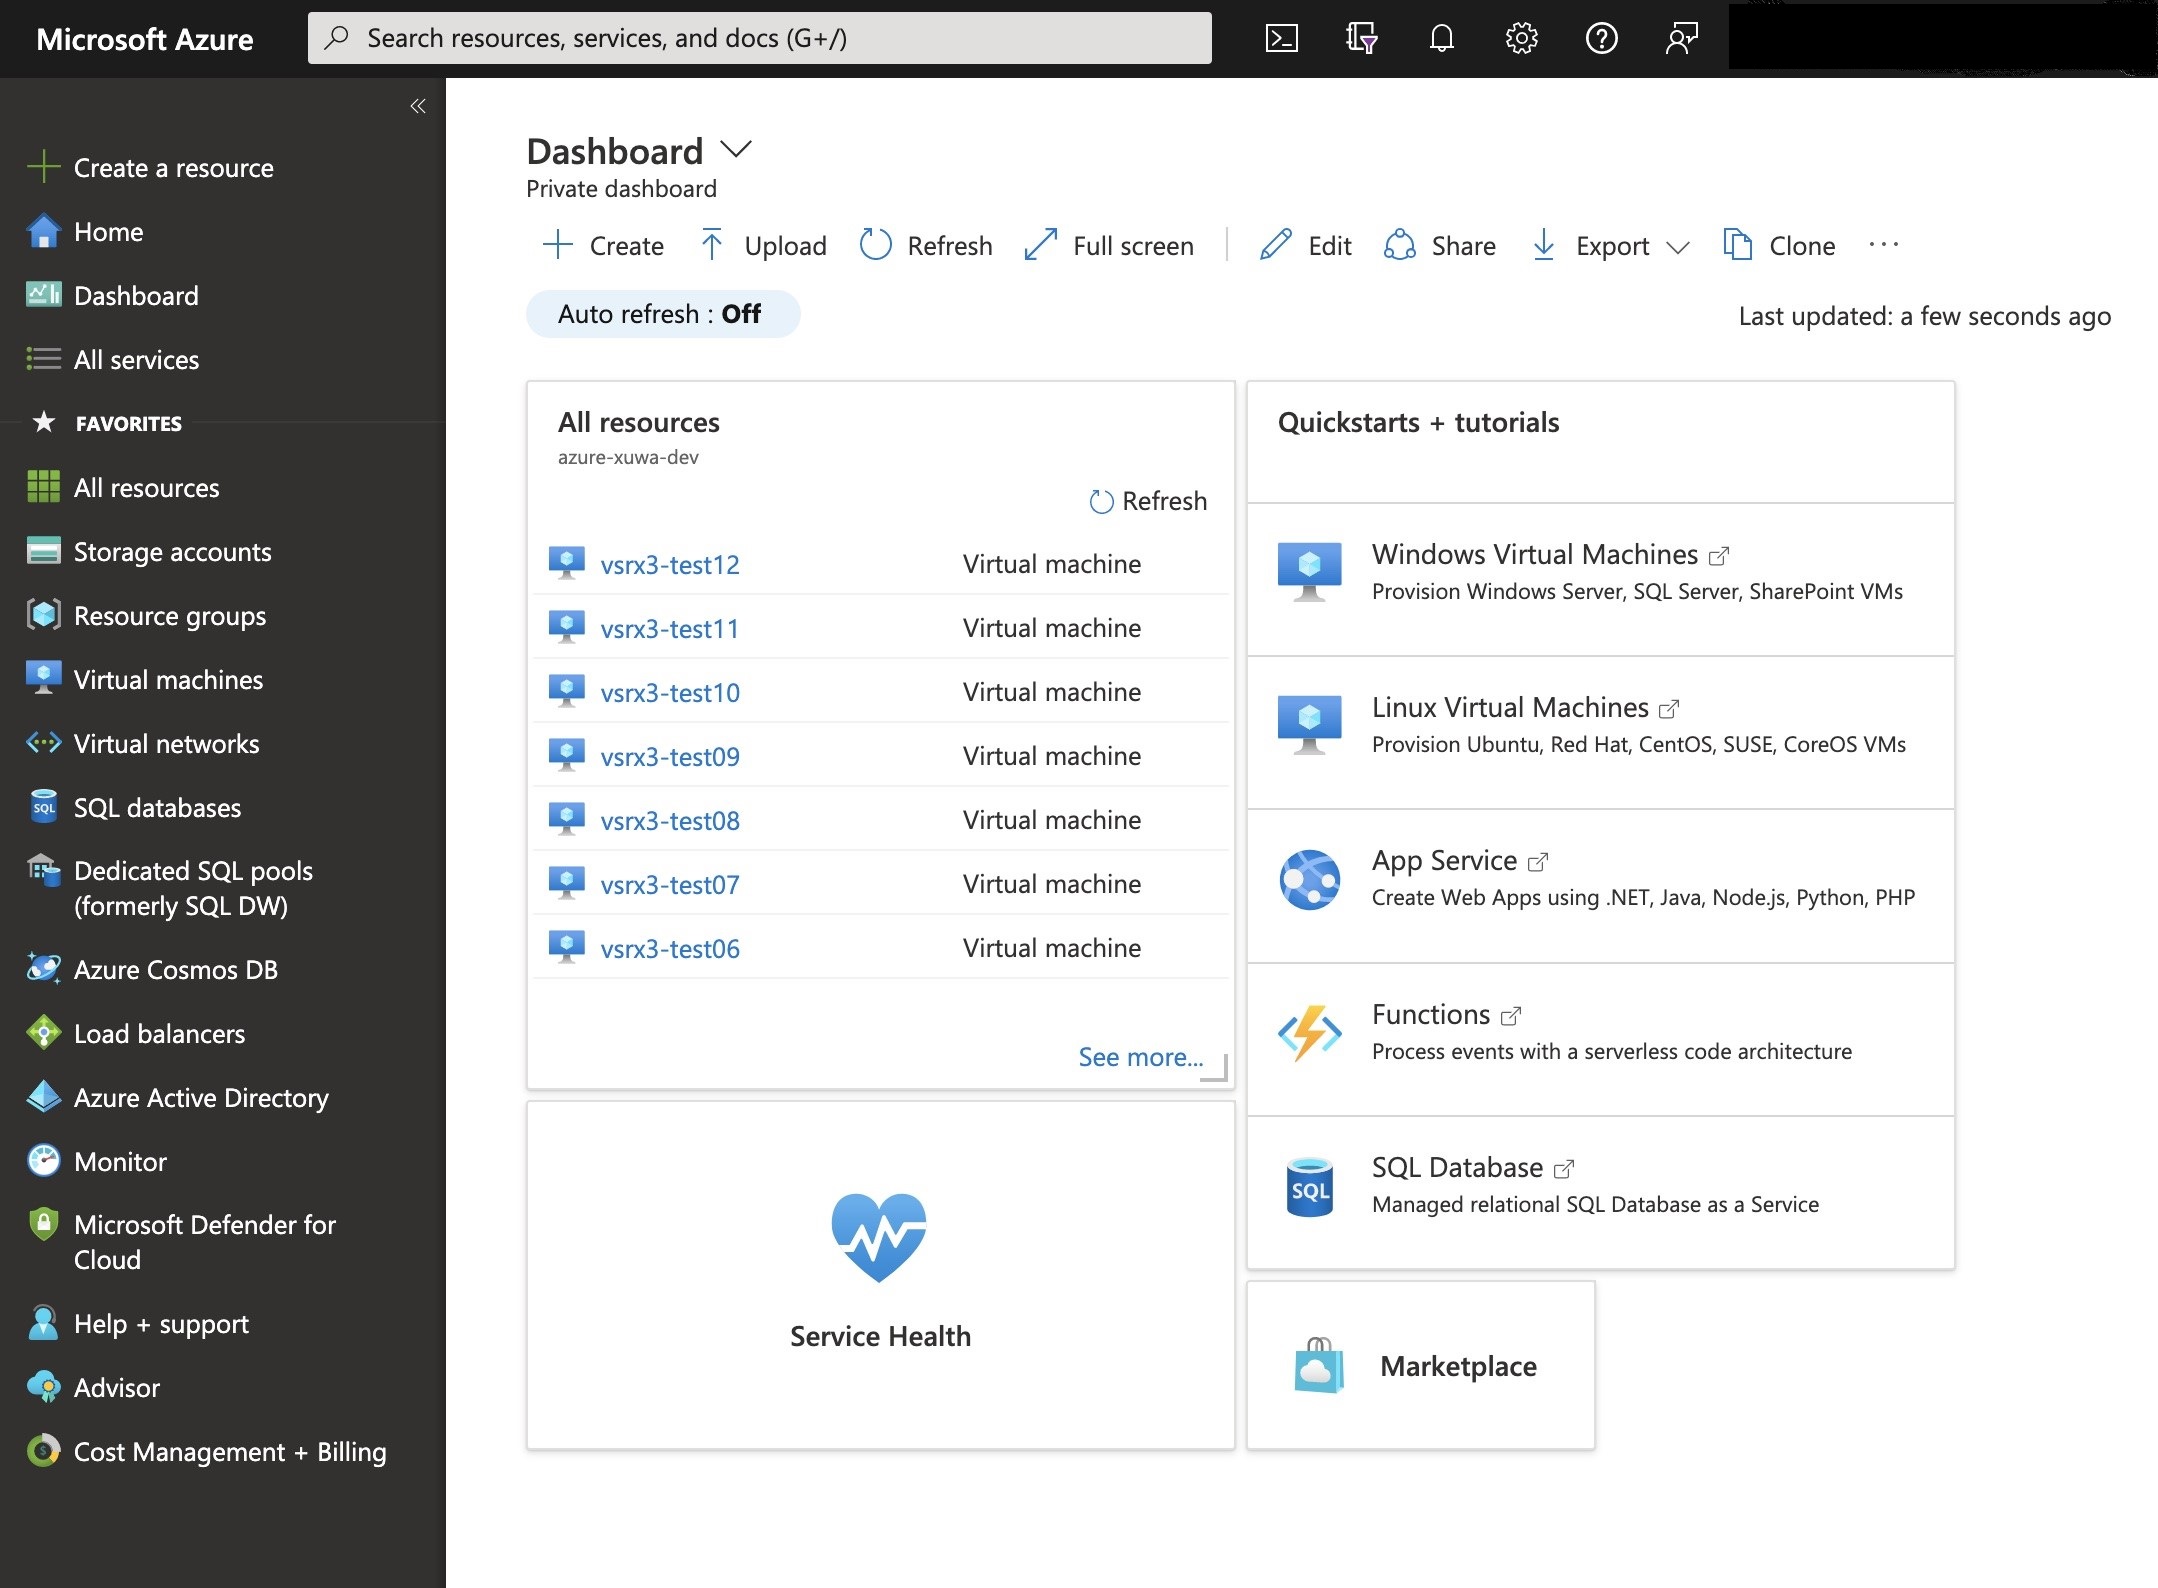
The Dashboard appears in the Azure portal (see Figure 1). You will see a unified
dashboard for all your assets in Azure. Verify that the dashboard
includes all subscriptions to which you currently have access, and
all resource groups and associated resources. Figure 1: Microsoft Azure Portal Dashboard
-
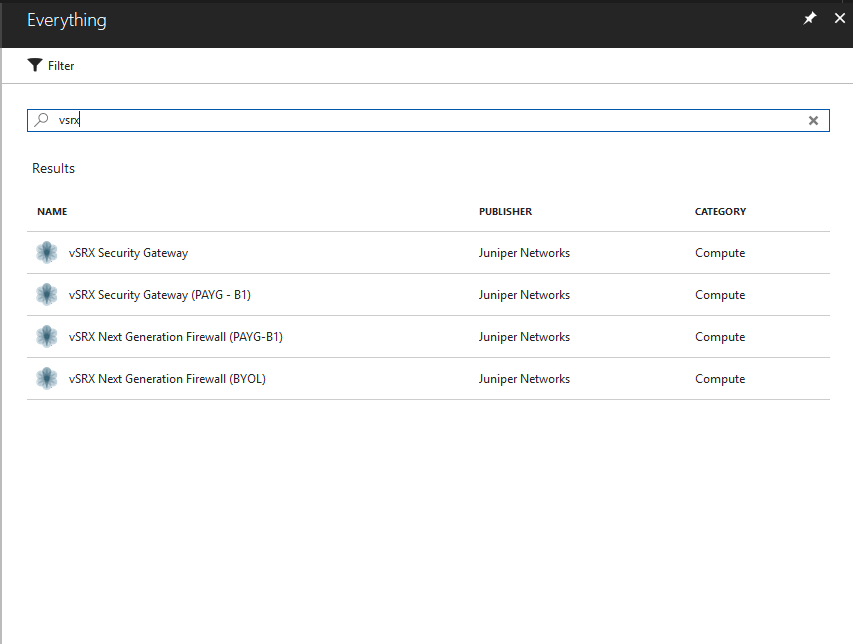
Click Marketplace from the dashboard to access the
Azure Marketplace, and then click Everything (or
click New > Everything). Enter
vsrx to search for the available Juniper Networks
vSRX Virtual Firewall VM images in the Azure Marketplace (see Figure 2). The vSRX
Virtual Firewall image is available as a pay-as-you-go (PAYG) or
bring-your-own-license (BYOL) service.
Figure 2: Locating the vSRX Virtual Firewall VM Image in the Azure Marketplace
-
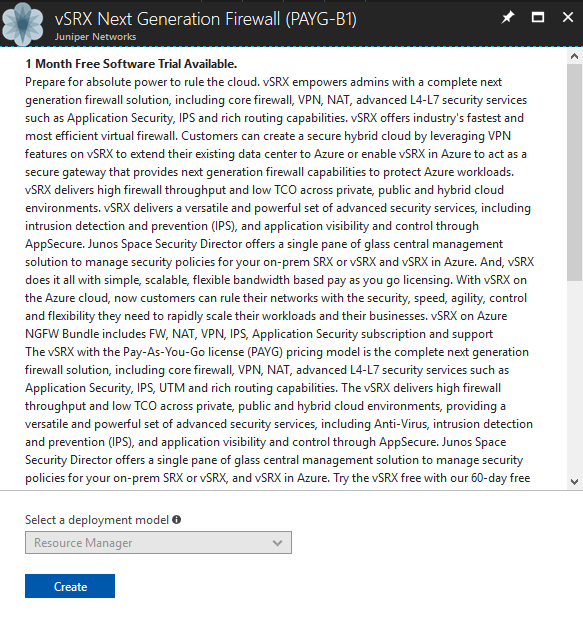
Select the vSRX Virtual Firewall VM image from the list and then click
Create to initiate the vSRX Virtual Firewall VM
deployment process (see Figure 3).
Figure 3: Initiating vSRX Virtual Firewall VM Deployment
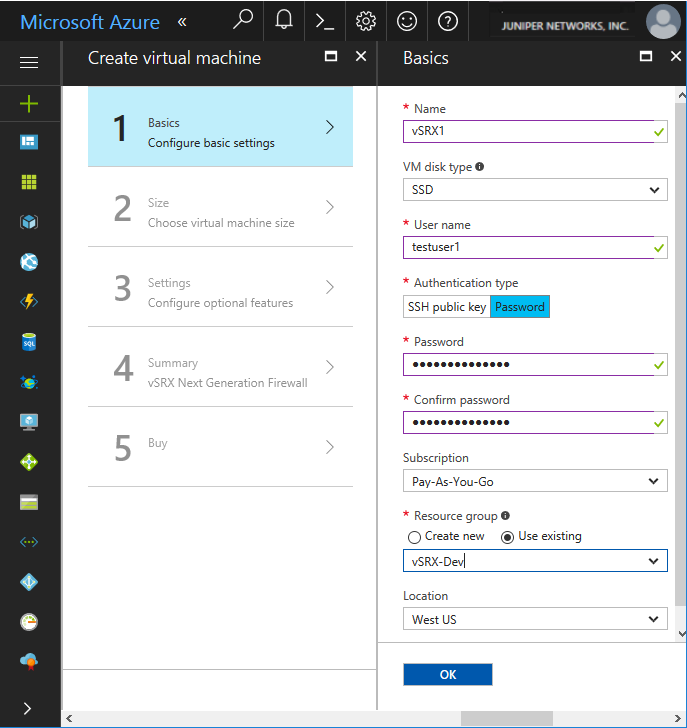
- From the Create Virtual Machine blade, 1 Basics, configure the following parameters (see Figure 4).Figure 4: Create Virtual Machine - Basics
Parameter
Description
Name
Specify a name for your vSRX Virtual Firewall VM. Your vSRX Virtual Firewall VM name cannot contain non-ASCII or special characters.
VM Disk Type
Specify the disk type to use for the vSRX Virtual Firewall VM: SSD or HDD. The default is SSD.
User name
Enter a username to access the vSRX Virtual Firewall VM. The username cannot contain uppercase characters, special characters, or start with a “$” or “-” character.
Authentication type
Select the required method of authentication to access the vSRX Virtual Firewall VM: Password or SSH public key. Select Password as type of authentication and then enter (and confirm) your password.
Note:In Junos OS Release 15.1X49-D91 for vSRX Virtual Firewall, SSH public key is not a supported authentication method. You will need to specify a password to log in to the vSRX Virtual Firewall VM.
Starting in Junos OS Release 15.1X49-D110 for vSRX Virtual Firewall, SSH public key is a supported authentication method.
Password
Enter an appropriate root password used to access the vSRX Virtual Firewall VM.
Subscription
Select your Microsoft Azure subscription.
Resource Group
Select an existing resource group or create a new one (see Create a Resource Group).
Location
Select the Azure geographic region in which you are deploying the vSRX Virtual Firewall VM.
Click OK.
-
From the Create Virtual Machine blade, 2 Size,
select DS3_v2 Standard as the vSRX Virtual Firewall
VM size (see Figure 5).
Click Select.
DS3_v2 Standard is used for a vSRX Virtual Firewall VM deployment. See Requirements for vSRX on Microsoft Azure for the recommended system requirements for a vSRX Virtual Firewall instance in Microsoft Azure.
Figure 5: Create Virtual Machine - Choose a Size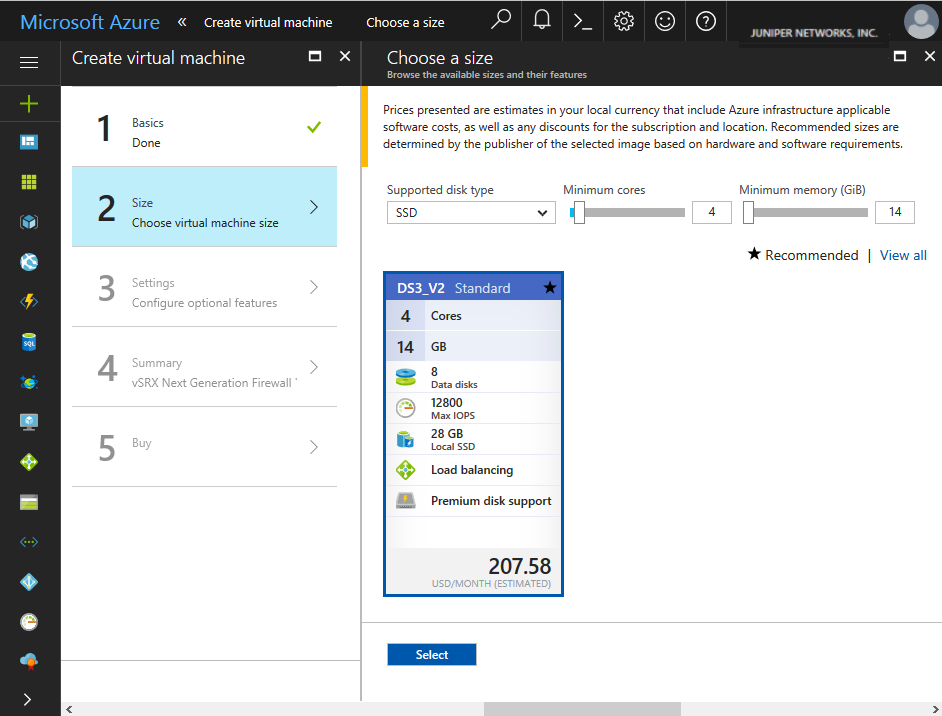
-
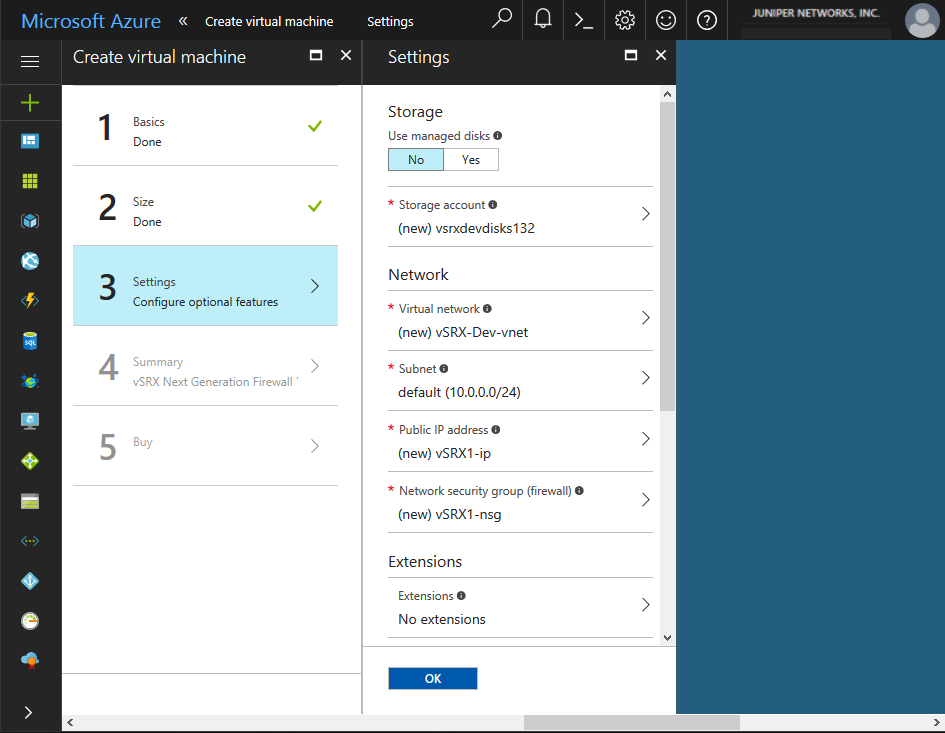
From the Create Virtual Machine blade, 3 Settings,
configure the following parameters to define the storage, networking, and
monitoring settings for the vSRX Virtual Firewall VM (see Figure 6).
Click OK when completed.
Figure 6: Create Virtual Machine - Settings
Parameter
Description
Storage
Used Managed Disks
Specify whether you want Azure to automatically manage the availability of disks to provide data redundancy and fault tolerance without you creating and managing a storage account. Click No.
Storage Account
If you need to change the storage account for the vSRX Virtual Firewall VM, click the right arrow to access the Choose Storage Account blade. Select an existing storage account for the vSRX Virtual Firewall VM, or click Create new (+) to create a new one. See Create a Storage Account for details about creating a new storage account.
Network
Virtual Network
If you need to change the virtual network for the vSRX Virtual Firewall VM, click the right arrow to access the Choose Virtual Network blade. Select an existing virtual network for the vSRX Virtual Firewall VM, or click Create new (+) to create a new one. See Create a Virtual Network for details about creating a new virtual network.
Subnet
Enter a subnet, which is a range of IP addresses in your virtual network to isolate VMs. Public subnets have access to the Internet gateway, but private subnets do not.
A vSRX Virtual Firewall VM requires two public subnets and one or more private subnets for each individual instance group. The public subnets consist of one for the management interface (fxp0) and another for the two revenue (data) interfaces. The private subnets, connected to other vSRX Virtual Firewall interfaces, ensure that all traffic between applications on the private subnets and the Internet must pass through the vSRX Virtual Firewall instance.
To modify the subset for the virtual network, click the right arrow to access the Create Subnet blade.
Configure the following parameters:
-
Subnet name—A unique name for the subnet in the Azure virtual network.
-
Subnet address range—The subnet’s address range in CIDR notation. It must be contained by the address space of the virtual network. Subnet address ranges cannot overlap one another. By default, the address range is 10.0.0.0/24.
Note:The address range of a subnet that is already in use cannot be edited.
Public IP address
Specify the public IP address that allows communication to the vSRX Virtual Firewall VM from outside the Azure virtual network. To modify the public IP address for the vSRX Virtual Firewall VM, click the right arrow to access the Choose Public IP Address blade. Select a public IP address in your Azure subscription and location, or click Create new (+) to create a new one.
Configure the following parameters:
-
Name—A unique name for the public IP address.
-
Assignment—There are two methods in which an IP address is allocated to a public IP resource: dynamic or static. By default, public IP addresses are dynamic, where an IP address is not allocated at the time of its creation. Instead, the public IP address is allocated when you start (or create) the resource. The IP address associated to them may change when the vSRX Virtual Firewall VM is deleted.
To guarantee that the vSRX Virtual Firewall VM always uses the same public IP address, we recommend you assign a static public IP address.
Network security group
Specify a network security group, which is a set of firewall rules that control traffic to and from the vSRX Virtual Firewall VM. Each network security group can contain multiple inbound and outbound security rules that enable you to filter traffic by source and destination IP address, port, and protocol. You can apply a network security group to each NIC in the VM.
To modify the network security group for the vSRX Virtual Firewall VM to filter traffic, click the right arrow to access the Choose Network Security blade. Select a network security group in your Azure subscription and location, or click Create new (+) to create a new one.
Configure the following parameters:
-
Name—A unique name for the network security group.
-
Inbound rules—You can add one or more inbound security rules to allow or deny traffic to the vSRX Virtual Firewall VM.
-
Outbound rules—You can add one or more outbound security rules to allow or deny traffic originating from the vSRX Virtual Firewall VM.
Extensions
Extensions
No extensions are used for the vSRX Virtual Firewall VM.
High Availability
Availability Set
Configure two or more VMs ( in standalone mode) in an availability set to provide redundancy to an application.
Monitoring
Boot Diagnostics
Enables or disables the capturing of serial console output and screenshots of the VM running on the host to help diagnose start-up issues. The default is Enabled.
Guest OS Diagnostics
Enables or disables the ability to obtain metrics every minute for the VM. Choices are: Disabled or Enabled. The default is Disabled.
Diagnostics Storage Account
Click the right arrow to view the details of the diagnostics storage account. Automatically fills in with the name of the diagnostics storage account from which you can analyze a set of metrics with your own tools.
-
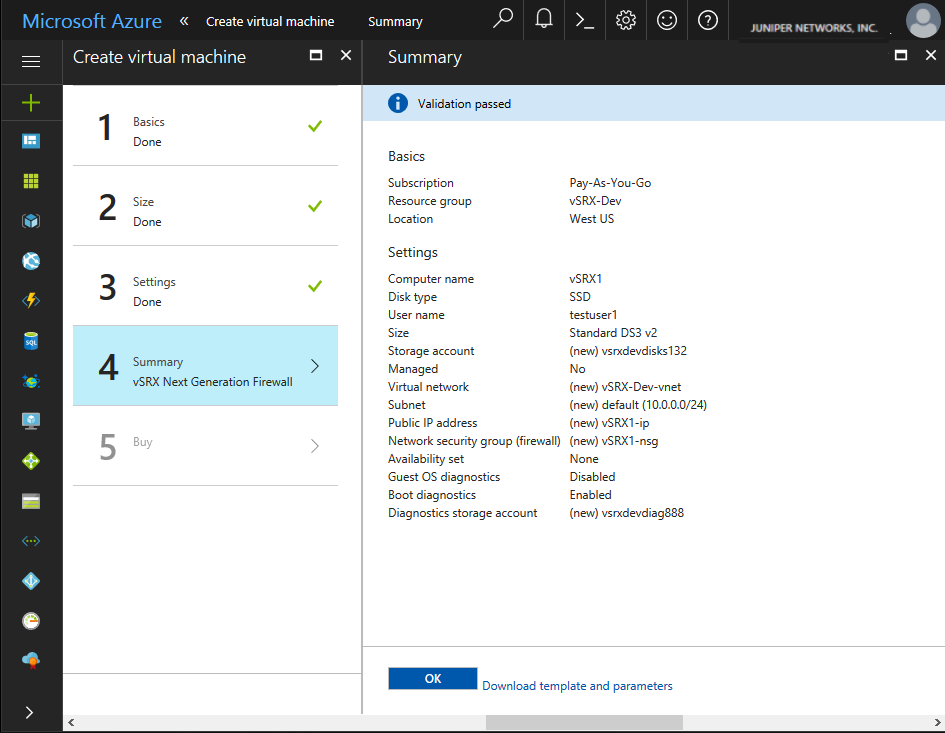
- From the Create Virtual Machine blade, 4 Summary , review the configuration settings (see Figure 7). If you are
satisfied with the configuration settings, click OK.Figure 7: Create Virtual Machine - Summary
- From the Create Virtual Machine blade, 5 Buy review the offer details and the terms of use (see Figure 8). If you are
satisfied with the offer details and terms of use, click Purchase.Figure 8: Create Virtual Machine - Purchase
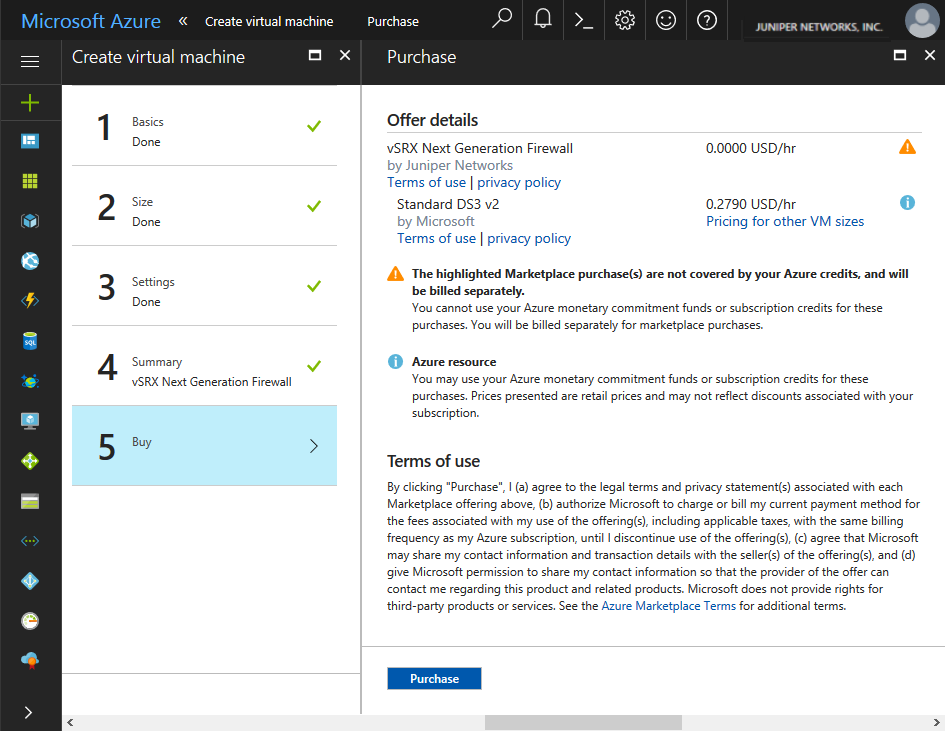
You return to the Azure portal dashboard, and the dashboard displays the deployment status of the vSRX Virtual Firewall VM.
Verify Deployment of vSRX Virtual Firewall to Microsoft Azure
After the vSRX Virtual Firewall VM is created, the Azure portal dashboard lists the new vSRX
Virtual Firewall VM under Resource Groups. The corresponding cloud service and
storage account also are created and listed. Both the vSRX Virtual Firewall VM
and the cloud service are started automatically and their status is listed as
Running
To verify the deployment of the vSRX Virtual Firewall instance to Microsoft Azure:
-
To view details of the vSRX Virtual Firewall VM associated with the
resource group, click the name of the vSRX Virtual Firewall VM. Observe that
the status is
Running.Note:You can stop, start, restart, and delete a vSRX Virtual Firewall VM from the Virtual Machine page in the Microsoft Azure portal.
Figure 9 shows an example of a Resource groups vSRX Virtual Firewall VM in the Microsoft Azure portal.
Figure 9: Microsoft Azure Resource Groups VM Example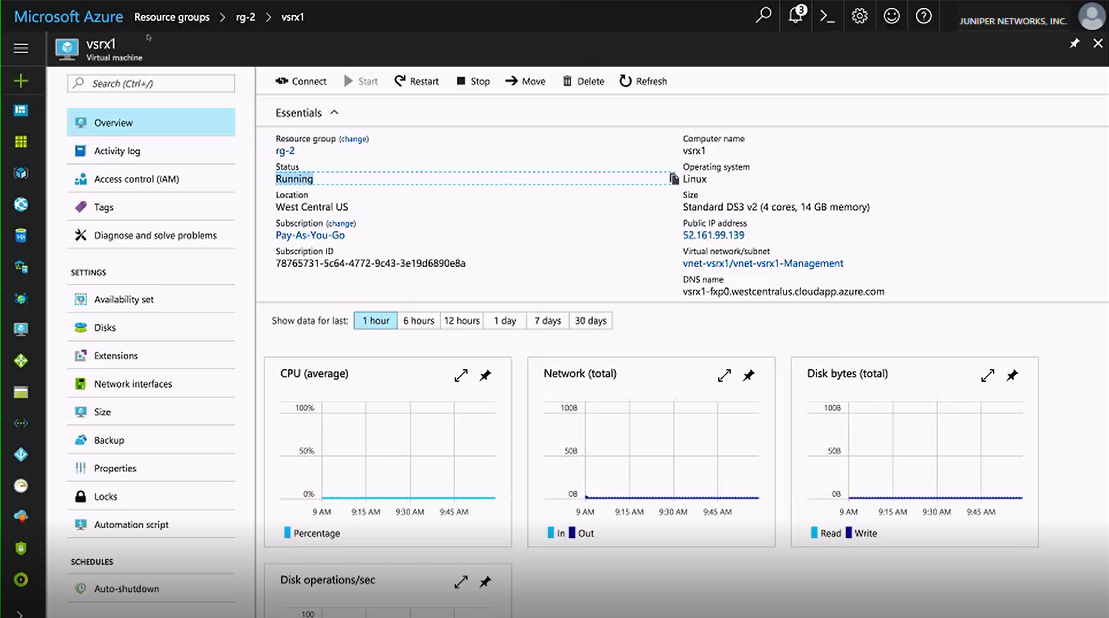
Log In to a vSRX Virtual Firewall VM
After vSRX Virtual Firewall deployment is completed, the vSRX Virtual Firewall VM is automatically powered on and launched. At this point you can use an SSH client to log in to the vSRX Virtual Firewall VM.
In Microsoft Azure, individuals and enterprises can host servers and services on the cloud as a pay-as-you-go (PAYG) or bring-your-own-license (BYOL) service. For the vSRX Virtual Firewall on Microsoft Azure deployment, only the BYOL model is supported.
To log in to the vSRX Virtual Firewall VM:
Change History Table
Feature support is determined by the platform and release you are using. Use Feature Explorer to determine if a feature is supported on your platform.