Configure an Amazon Virtual Private Cloud for vSRX Virtual Firewall
Before you begin, you need an Amazon Web Services (AWS) account and an Identity and Access Management (IAM) role, with all required permissions to access, create, modify, and delete Amazon Elastic Compute Cloud (Amazon EC2), Amazon Simple Storage Service (S3), and Amazon Virtual Private Cloud (Amazon VPC) objects. You should also create access keys and corresponding secret access keys, X.509 certificates, and account identifiers. For better understanding of AWS terminologies and their use in vSRX Virtual Firewall AWS deployments, see Understand vSRX with AWS.
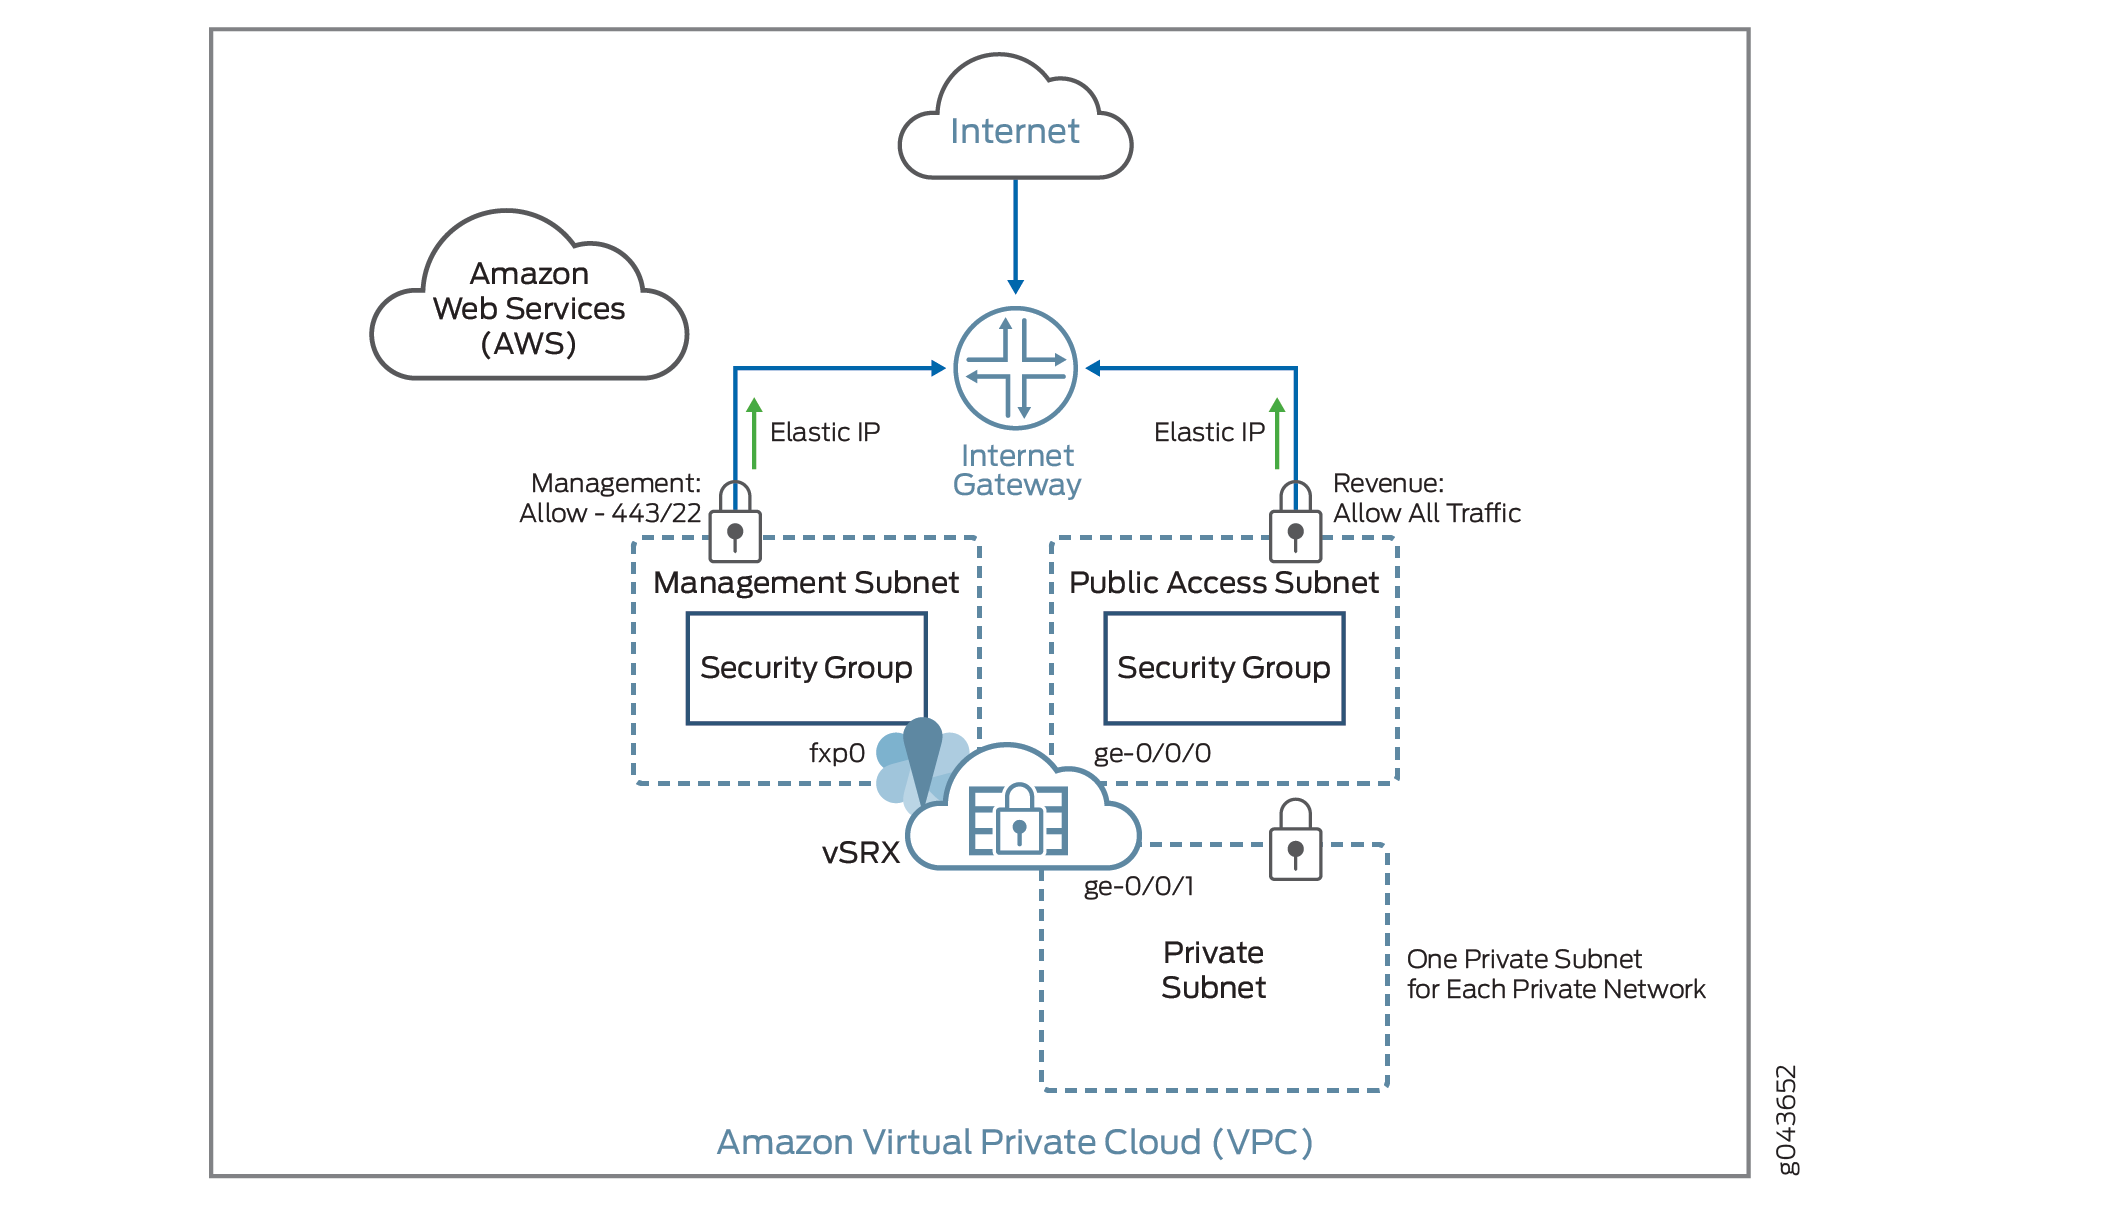
Figure 1 shows an example of how you can deploy vSRX Virtual Firewall to provide security for applications running in a private subnet of an Amazon VPC.
The following procedures outline how to create and prepare an Amazon VPC for vSRX Virtual Firewall. The procedures describe how to set up an Amazon VPC with its associated Internet gateway, subnets, route table, and security groups.
Step 1: Create an Amazon VPC and Internet Gateway
Use the following procedure to create an Amazon VPC and an Internet gateway. If you have already have a VPC and an Internet gateway, go to Step 2: Add Subnets for vSRX Virtual Firewall.
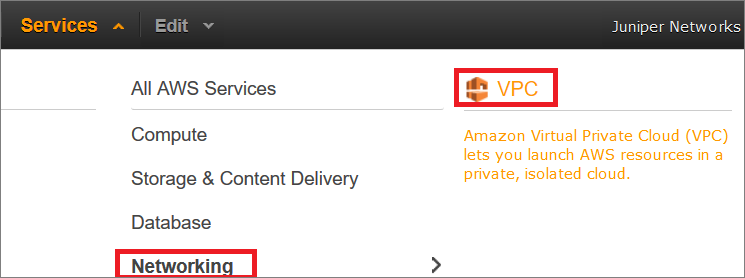
- Log in to the AWS Management Console and select Services
> Networking > VPC.
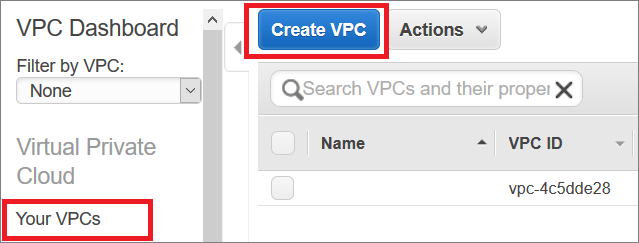
- In the VPC Dashboard, select Your VPCs in the
left pane, and click Create VPC.
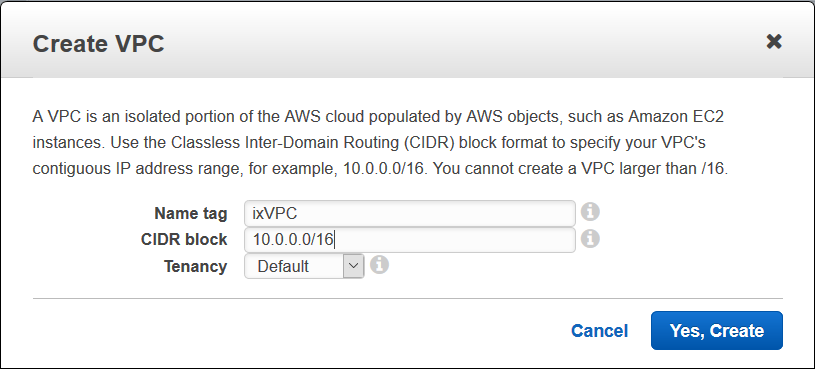
- Specify a VPC name and a range of private IP addresses
in Classless Interdomain Routing (CIDR) format. Leave Default as the
Tenancy.
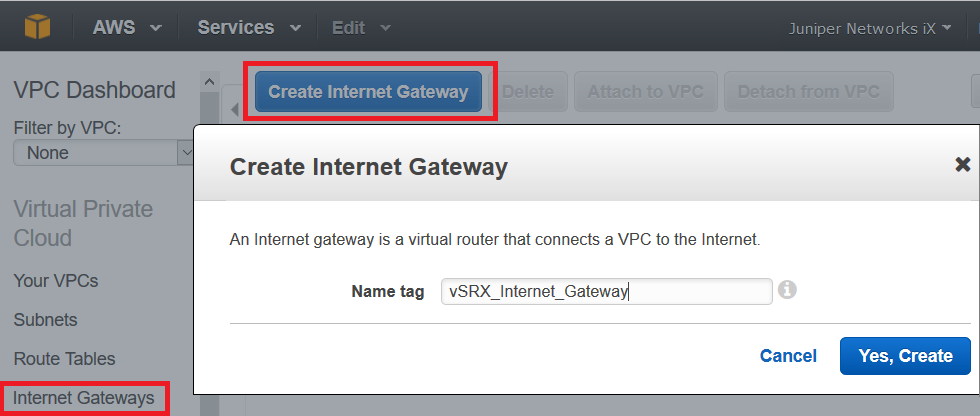
- Select Internet Gateways in the left pane,
and click Create Internet Gateway.
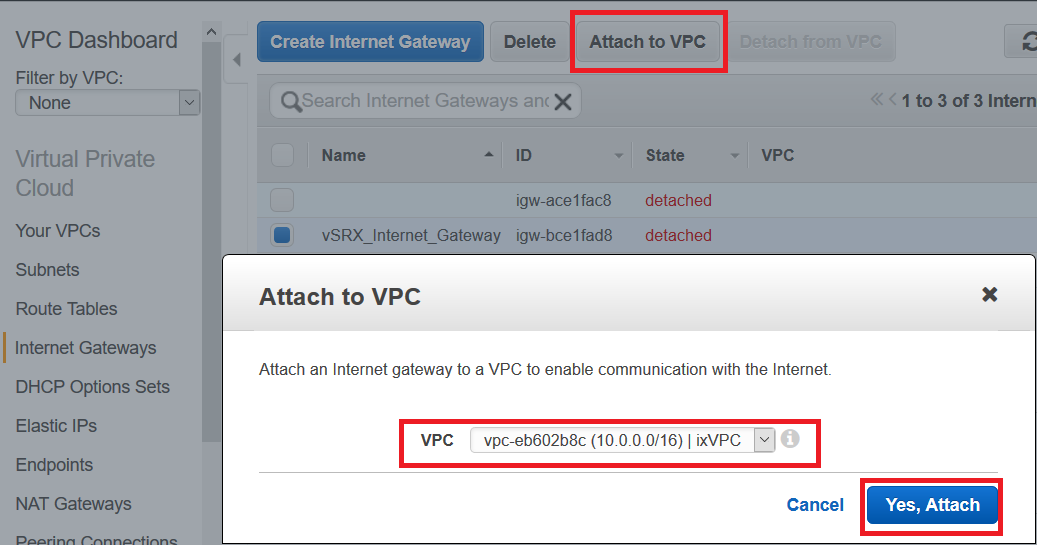
- Select the new Amazon VPC, and click Yes, Attach.
Step 2: Add Subnets for vSRX Virtual Firewall
In the Amazon VPC, public subnets have access to the Internet gateway, but private subnets do not. vSRX Virtual Firewall requires two public subnets and one or more private subnets for each individual instance group. The public subnets consist of one for the management interface (fxp0) and one for a revenue (data) interface. The private subnets, connected to the other vSRX Virtual Firewall interfaces, ensure that all traffic between applications on the private subnets and the Internet must pass through the vSRX Virtual Firewall instance.
To create each vSRX Virtual Firewall subnet:
- Click Yes, Create.
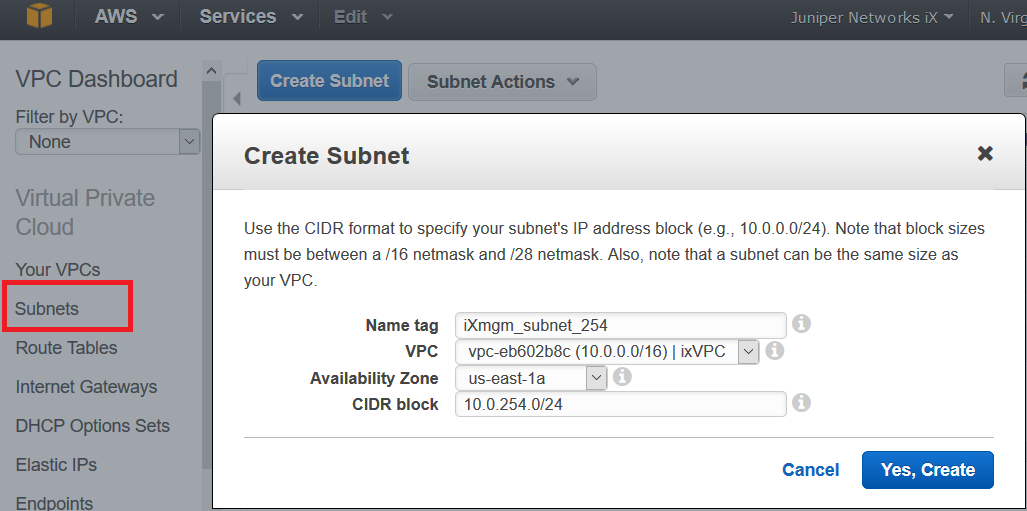
Repeat these steps for each subnet you want to create and attach to the vSRX Virtual Firewall instance.
Step 3: Attach an interface to a Subnet
To attach an interface to a subnet:
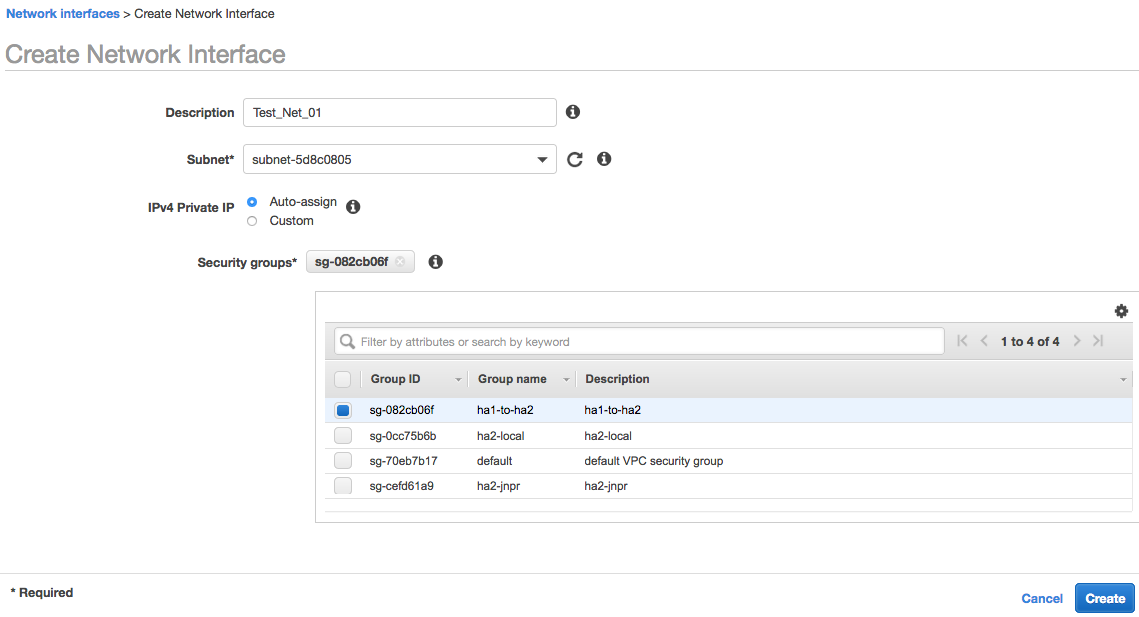
- Create a network interface from the Amazon EC2 home page.
Click the Network Interface option on the EC2 home page and the Create Network Interface page opens.
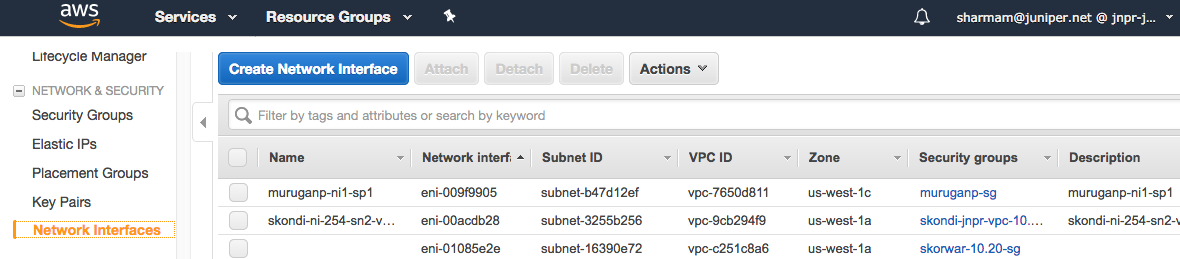
- Click the Create Network Interface option,
fill in the required information in the fields, and then click Create.
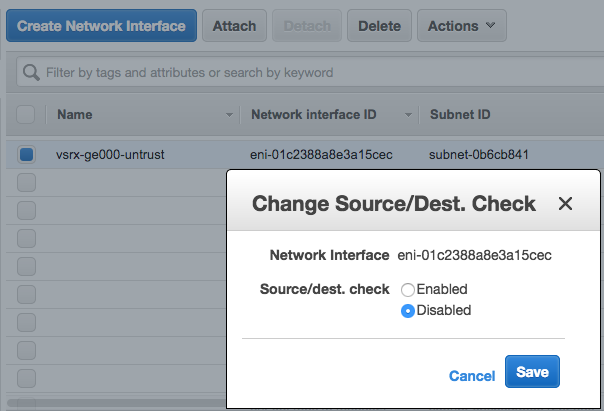
- Find and select your newly created interface.
If this interface is the revenue interface, then select Change Source/Dest.Check from the Action menu, choose Disabled, and click Save. If this interface is your fxp0 interface then skip this disabling step.
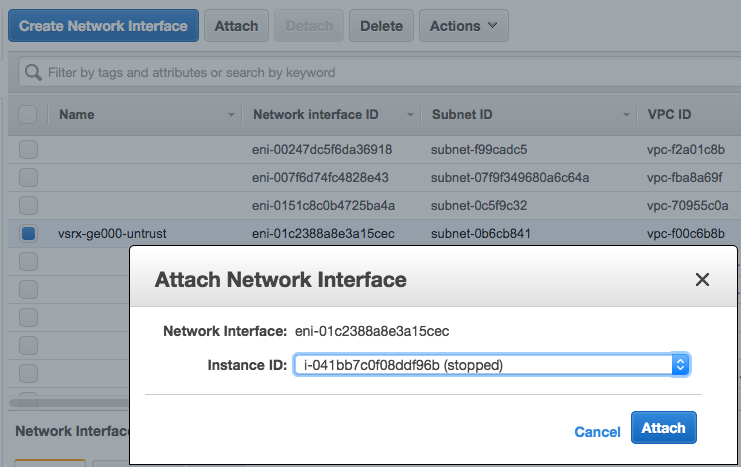
- Click Attach from the menu on top of the screen,
choose the Instance ID of your vSRX Virtual Firewall instance, and click Attach.
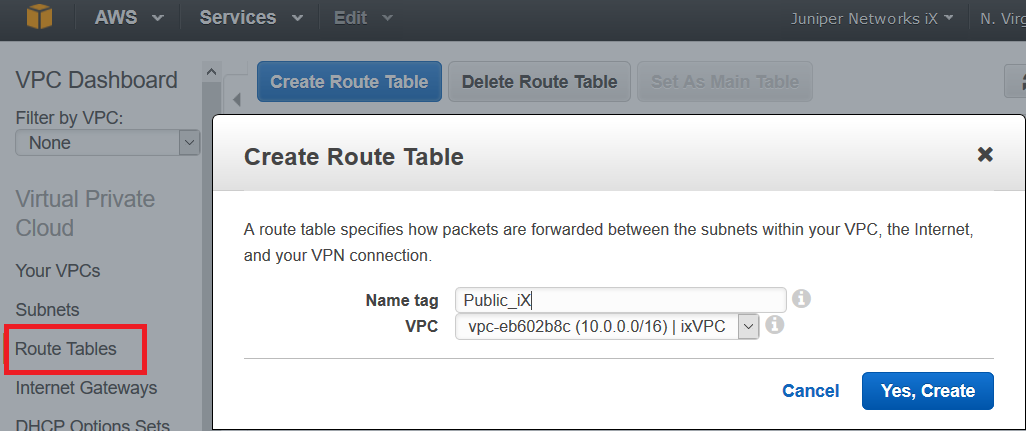
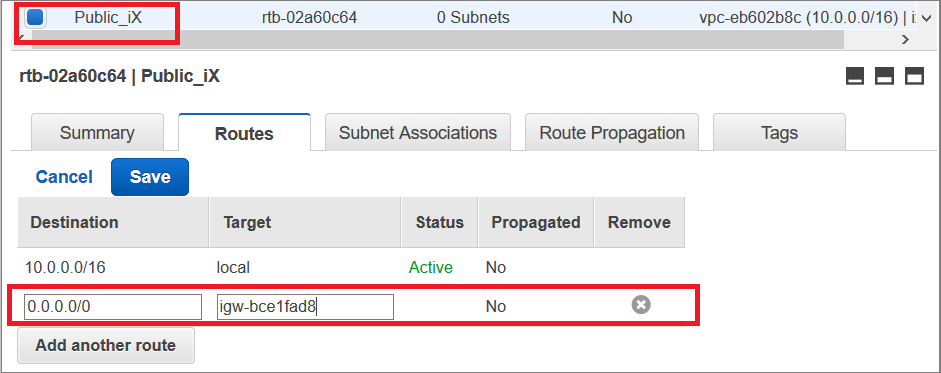
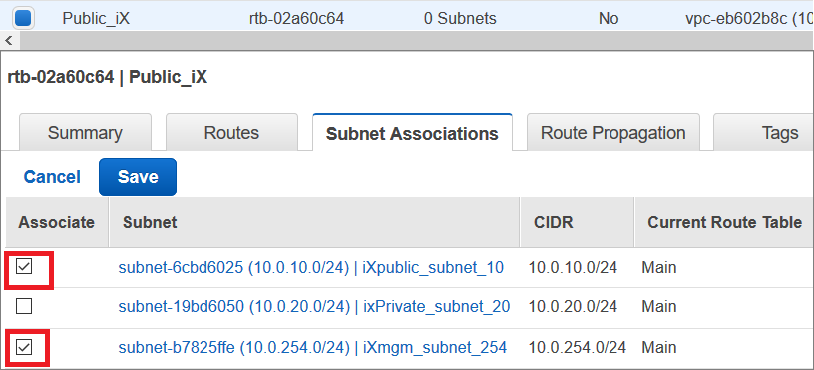
Step 4: Add Route Tables for vSRX Virtual Firewall
A main route table is created for each Amazon VPC by default. We recommend that you create a custom route table for the public subnets and a separate route table for each private subnet. All subnets that are not associated with a custom route table are associated with the main route table.
To create the route tables:
- Specify a route table name, select the VPC, and click Yes, Create.Tip:
As a naming convention best practice for route tables, we recommend including private or public in the name to make it easier to know which route table is public or private.
- Select the route table you created for the public subnets
and do the following:
- Enter 0.0.0.0/0 as the destination, select
your VPC internet gateway as the target, and click Save.
- Select the check boxes for the public subnets, and click Save.
- Enter 0.0.0.0/0 as the destination, select
your VPC internet gateway as the target, and click Save.
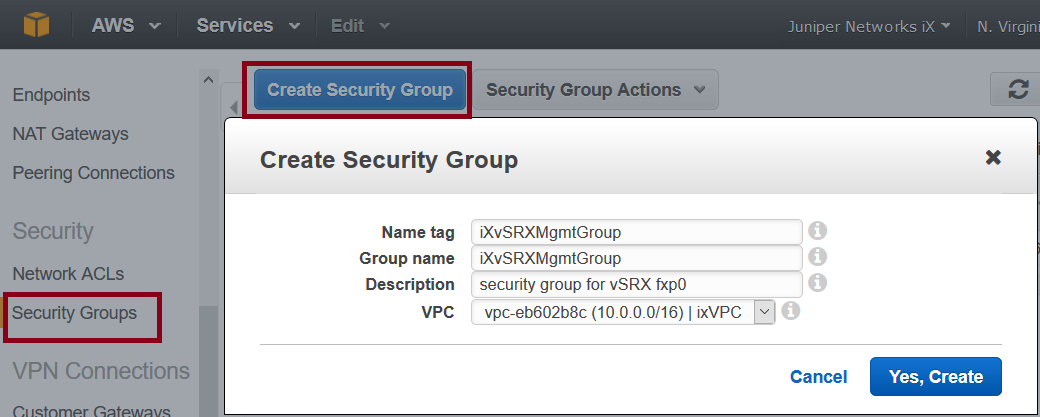
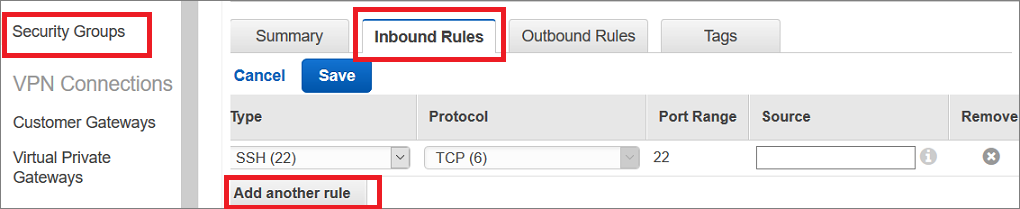
Step 5: Add Security Groups for vSRX Virtual Firewall
A default security group is created for each Amazon VPC. We recommend that you create a separate security group for the vSRX Virtual Firewall management interface (fxp0) and another security group for all other vSRX Virtual Firewall interfaces. The security groups are assigned when a vSRX Virtual Firewall instance is launched in the Amazon EC2 Dashboard, where you can also add and manage security groups.
To create the security groups:
- Click Yes, Create.
- Select the security group you created for the management
interface and do the following:
- Click Save.
- Click Save.