Installing the Virtual Route Reflector Image on KVM
Before you install vRR:
-
Download the vRR software package (vrr-*.tgz) from the Virtual Route Reflector page and uncompress the package in a location accessible to the server.
(For Ubuntu) Prepare the Ubuntu host by disabling APIC virtualization.
Edit the /etc/modprobe.d/qemu-system-x86.conf file and add
enable_apicv=0to the line containingoptions kvm_intel.options kvm_intel nested=1 enable_apicv=0
Reboot the host or unload and reload the kernel module.
-
(For CentOS) Copy the vRR image to the libvirtd directory and rename it with the name of your VM.
cp vrr-image-name vrr-vm-filenameNote:For Junos Releases 15.1 >= Junos Os Releases < 16.1, use the unified package.
Convert the vmdk image to qcow2 format using the
qemu-img convert -f vmdk -O qcow2 vmdk-filename
              qcow2-filename
command. For example:qemu-img convert -f vmdk -O qcow2 junos-x86-64-15.1R1.9.vmdk junos-x86-64-15.1R1.9.qcow2Starting with Junos OS Release 16.1, use the VRR KVM bundle: vrr-bundle-kvm-21.1R1.11.tgz. Only the qcow2 image within the KVM bundle: junos-x86-64-*.img is required to bring up VRR (you don't have to use the metadata.img).
For example, these commands copy the download image to the vrr-VM01.img file in the libvirtd/images directory:
cp jinstall64-vrr-14.2R3.8-domestic.img /var/lib/libvirtd/images/vrr-VM01.imgcp junos-x86-64-17.3R1.10.qcow2 /var/lib/libvirtd/images/vrr-VM01.img
To install vRR, perform these tasks:
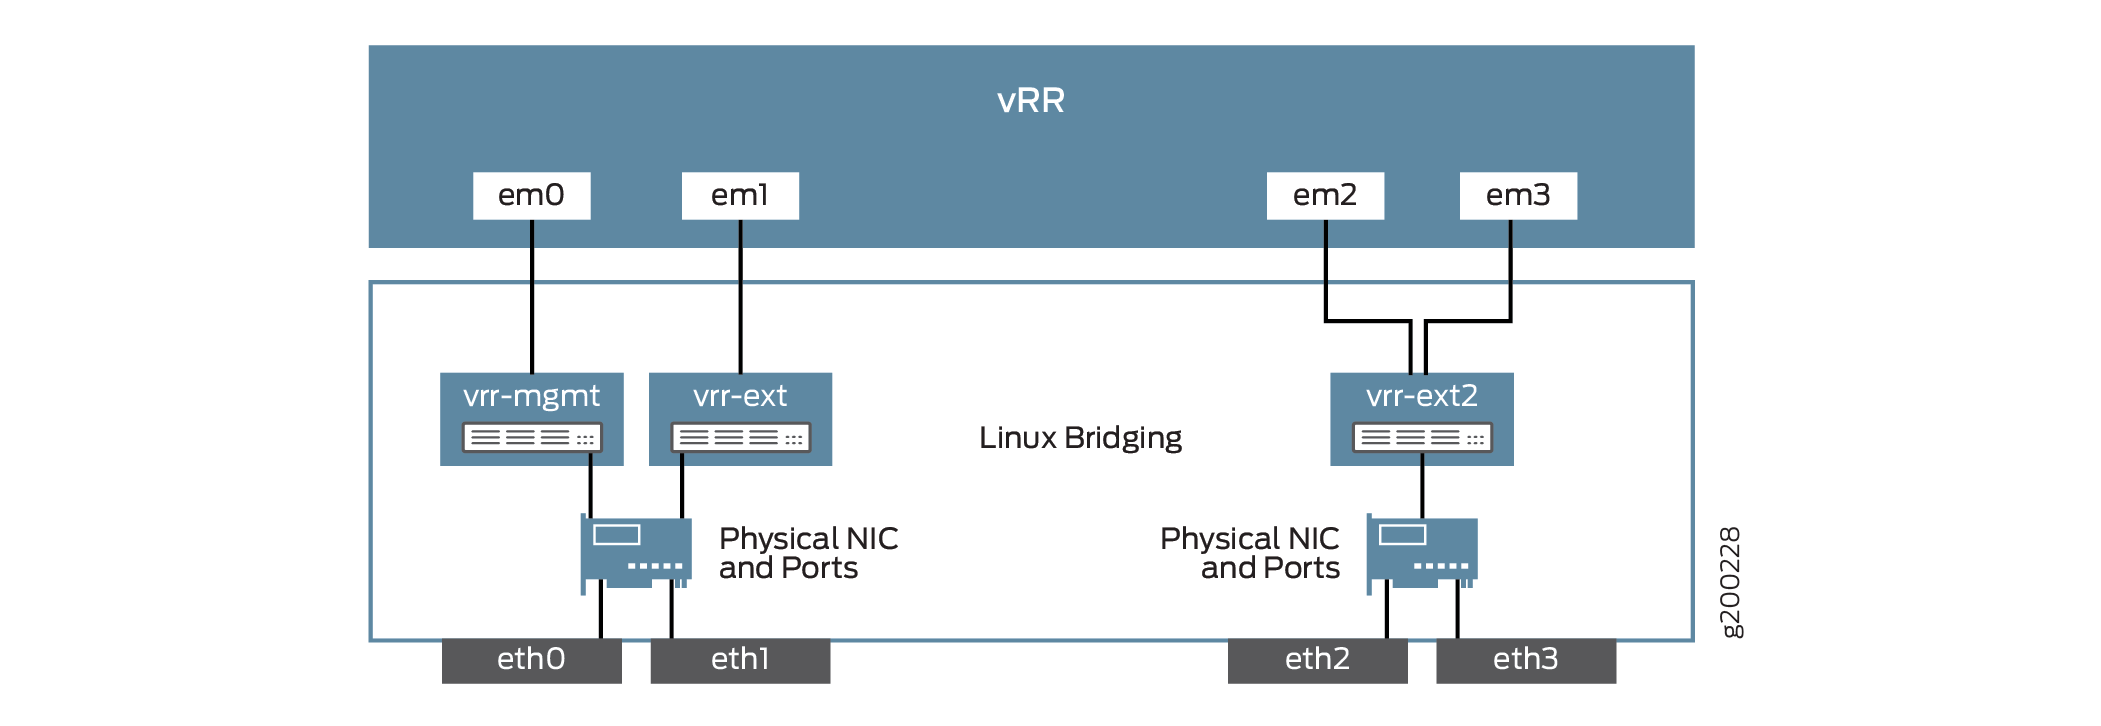
Configuring the Linux Bridges
You must set up these Linux bridges for the vRR interfaces to have proper connectivity.
em0 interface (for example, vrr-mgmt)
em1 interface (for example, vrr-ext)
The em0 interface can only function as a management interface. You cannot use the em0 interface for routing configurations.
For remote connectivity to the vRR instance, you can add physical interfaces from the host.
The bridges are not persistent across reboots. To make them permanent, you must add them to the appropriate configuration files for your Linux distribution.
To configure the bridges:
KVM installations support virtio driver for the em1 and em2 interfaces.
Launching the vRR VM
The physical interfaces are mapped to the VM interfaces
(such as em0) using Linux bridging. Figure 1 illustrates this mapping. You can use an XML template or
the virt-install utility to create this interface mapping
when you launch the vRR VM.
To launch the VRR instance: