Replace an Optical Line Terminal Transceiver
The hot-pluggable integrated 10GbE PON OLT transceivers, with built-in Ethernet-to-10G PON MAC bridging, connect directly to the SFP+ ports on supported ACX Series routers. The OLT SFP+ transceiver is designed to interoperate with a broad range of popular third-party ONU devices. Due to thermal, power, and mechanical considerations, you must insert the OLT SFP+ transceiver only in the upper-row 10GbE ports of the ACX5400 line of routers.
When you insert the OLT SFP+ transceiver on the upper-row ports of the router, the external heatsink fins of the OLT extend above the chassis top plane by 1.9mm and use up rack space above the chassis.
Install an OLT SFP+ Transceiver
The transceivers for Juniper Networks devices are hot-removable and hot-insertable field-replaceable units (FRUs). You can remove and replace them without powering off the device or disrupting the device functions.
-
Slide the transceiver in gently until it is fully seated.
Figure 1: Insert an OLT Transceiver
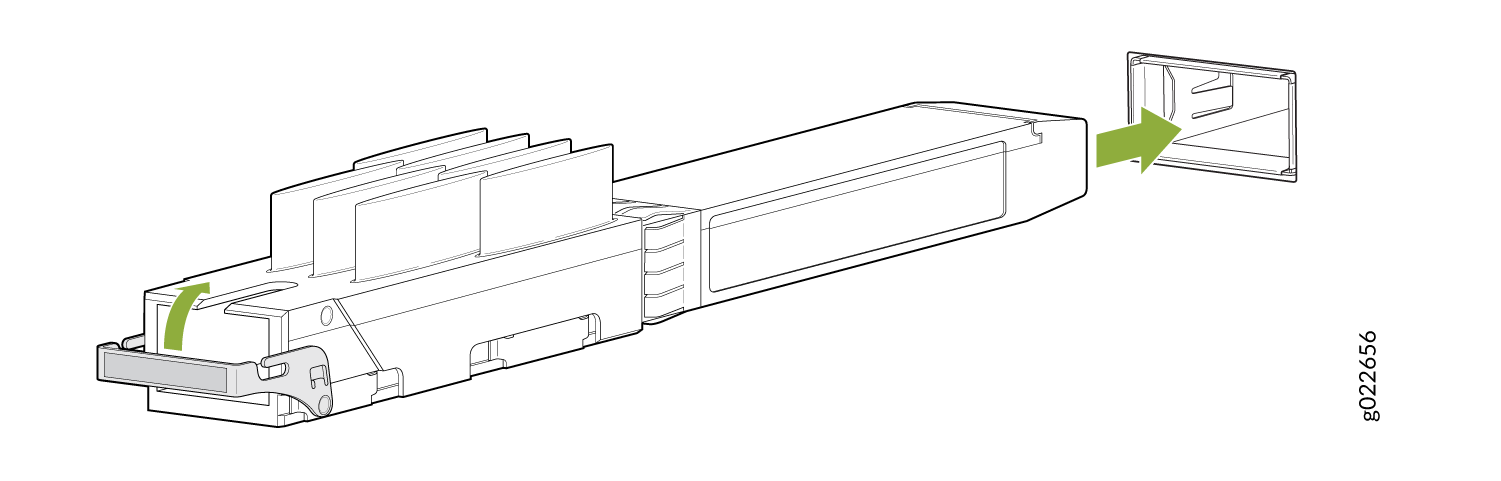
-
If there is a cable management system, arrange the cable in the cable
management system to prevent the cable from dislodging or developing stress
points. Secure the cable so that it does not support its own weight as it
hangs to the floor. Place excess cable out of the way in a neatly coiled
loop in the cable management system. Placing fasteners on the loop helps to
maintain its shape.
CAUTION:
Do not let a fiber-optic cable hang free from the connector. Do not allow fastened loops of cable to dangle, which stresses the cable at the fastening point.
CAUTION:Avoid bending a fiber-optic cable beyond its minimum bend radius. An arc smaller than a few inches in diameter can damage the cable and cause problems that are difficult to diagnose.
Warning:Do not connect the OLT directly to ONUs such as a home gateway (HGW) without proper attenuation. The OLT can get permanently damaged unless it is connected with minimum 16dB attenuation (20dB recommended). A combination of attenuator and splitters can provide the required attenuation.
Figure 2: Combination of Attenuators and Splitters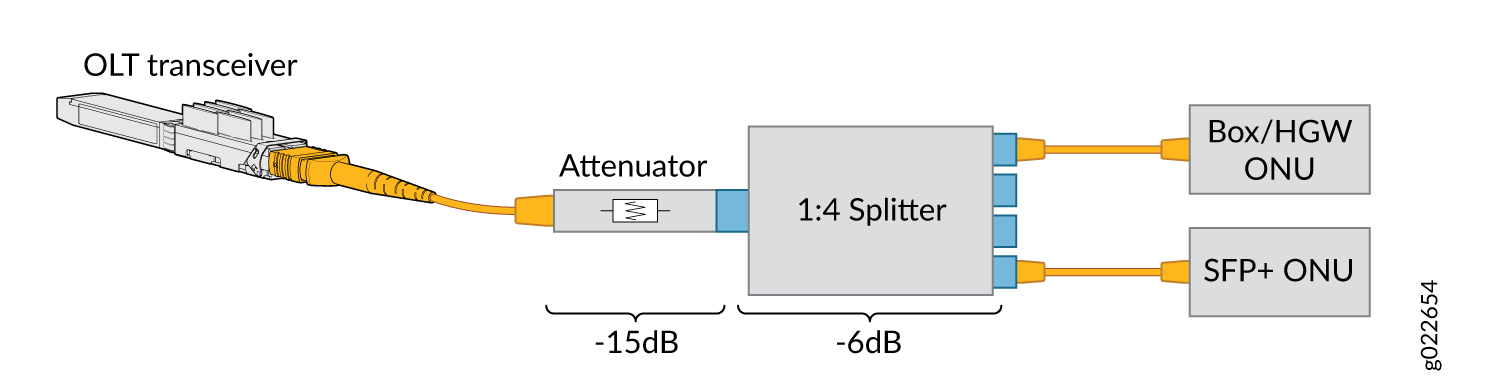 HGW—Home Gateway
Remove an OLT SFP+ Transceiver
Before you begin to remove a transceiver from a device, ensure that you have taken the necessary precautions for safe handling of lasers (see Laser and LED Safety Guidelines and Warnings).
Ensure that you have the following parts and tools available:
- An antistatic bag or an antistatic mat
- Rubber safety caps to cover the transceiver and fiber-optic cable connector
- A dust cover to cover the port or a replacement transceiver
The transceivers for Juniper Networks devices are hot-removable and hot-insertable FRUs. You can remove and replace them without powering off the device or disrupting the device functions.
-
By using your fingers, pull open the ejector lever on the transceiver to
unlock the transceiver.
CAUTION:
Before removing the transceiver, make sure that you open the ejector lever completely until you hear it click. This prevents damage to the transceiver.
Figure 3: Remove an OLT Transceiver