ON THIS PAGE
Adaptive Threat Profiling Overview and Configuration
Overview
Juniper ATP Cloud Adaptive Threat Profiling allows SRX Series Firewalls to generate, propagate, and consume threat feeds based on their own advanced detection and policy-match events.
This feature allows you to configure security or IDP policies that, when matched, inject the source IP address, destination IP address, source identity, or destination identity into a threat feed, which can be leveraged by other devices as a dynamic-address-group (DAG). While this feature is focused on tracking and mitigating threat actors within a network, you can also use it for non-threat related activities, such as device classification.
With adaptive threat profiling, the Juniper ATP Cloud service acts as a feed-aggregator and consolidates feeds from SRX across your enterprise and shares the deduplicated results back to all SRX Series Firewalls in the realm at regular intervals. SRX Series Firewalls can then use these feeds to perform further actions against the traffic.
This feature requires a SecIntel License (Premium model) to function. Additional detection capabilities might require AppID, IDP, and Enhanced Web Filtering licenses to be added to your device if not already present. For information on other licensed features, see Juniper Advanced Threat Prevention Cloud License Types.
Benefits of adaptive threat profiling
-
Enables new deployment architectures, whereby low cost SRX Series Firewalls can be deployed as sensors throughout the network on Tap ports, identifying and sharing intelligence to in-line devices for real-time enforcement.
-
Allows administrators near-infinite adaptability to changing threats and network conditions. Security policies can be staged with adaptive threat profiling feeds, which automatically populate with entries in the event of an intrusion or a malware outbreak.
-
Provides the ability to perform endpoint classification. You can classify endpoints based on network behavior and/or deep packet inspection (DPI) results. For example, you can leverage AppID, Web-Filtering, or IDP to place hosts that communicate with Ubuntu’s update servers into a dynamic-address-group that can be used to control Ubuntu-Server behavior on your network.
Access this page from Configure > Adaptive Threat Profiling.
|
Field |
Guideline |
|---|---|
|
Feed Name |
Name of the adaptive threat profiling feed. |
|
Items |
Number of entries in the feed. |
|
Feed Type |
Content type of the feed. The following options are supported:
|
|
Added to Infected Hosts |
Displays whether the feed content (for example, source or destination IP address) is added to the Infected host feed.
Note:
Currently you can add only IP address feed type to the Infected host feed. |
|
Time to Live (days) |
Defines how long an entry will “live” inside the feed. Once the TTL is reached, the entry is removed automatically. |
-
The feeds can only be used as dynamic-address groups (DAG) /IP filter.
You can perform the following tasks from this page:
-
Add a new feed—See Create an Adaptive Threat Profiling Feed.
-
Modify a feed—Select a feed and click the edit icon (pencil). The Edit <feed-name> page appears, displaying the same fields that were presented when you create a feed. Modify the fields as needed. Click OK to save your changes.
Note:You cannot edit the feed name and feed type.
-
Delete a feed—Select a feed and click the delete icon in the title bar. A pop-up requesting confirmation for the deletion appears. Click Yes to confirm that you want to delete the feed.
-
Filter or Search for a feed—Click the filter icon. Enter partial text or full text of the keyword in the search bar and click the search button or press Enter. The search results are displayed. You can also filter by feed type and Time to Live (days).
-
View detailed information about a feed—Click on a feed name to view the following information:
-
Feed Items—Lists all the IP addresses or User IDs that are associated with the feed. To exclude an IP address or User ID from the feed, select the IP address or User ID and click Add to Excluded Items.
-
Excluded Items—Lists all the IP addresses or User IDs that are excluded from the feed. To remove an IP address or User ID for the excluded items list, select the IP address or User ID and click the Delete icon.
To manually exclude an IP address or User ID from the feed:
-
Click the plus (+) icon in the Excluded Items tab.
The Add to Excluded List page appears.
-
Enter the IP address or User ID that you want to exclude from the feed.
-
Click OK.
The IP address or User ID is listed in the Excluded items page.
-
-
Configure Adaptive Threat Profiling
An SRX Series Firewall that has already been enrolled with Juniper ATP Cloud should include all the necessary configuration to begin leveraging adaptive threat profiling.
To begin, validate that the device already contains a URL for security-intelligence.
-
Check the URL for the feed server.
Your output should look similar to the following:
show services security-intelligence url
https://cloudfeeds.sky.junipersecurity.net/api/manifest.xml
Note:If the URL is not present in the configuration, try re-enrolling the device in Juniper ATP Cloud. See Enroll an SRX Series Firewall using Juniper ATP Cloud Web Portal.
-
Create an adaptive threat profiling feed in Juniper ATP Cloud. Log into Juniper ATP Cloud UI, select Configure > Adaptive Threat Profiling. The Adaptive Threat Profiling page appears as shown in Figure 1. In this example, we will use the feed name High_Risk_Users with a time-to-live (TTL) of seven days.
Figure 1: Add New Feed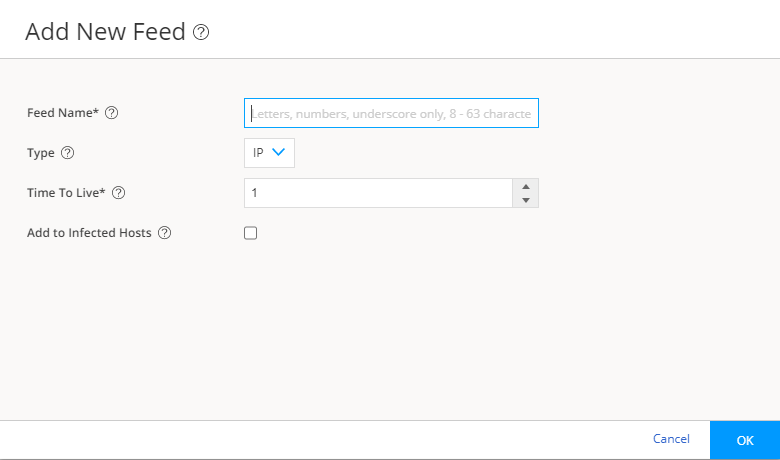
-
Click OK to save changes. For more information, see Create an Adaptive Threat Profiling Feed.
-
Ensure that the feed has been downloaded by your SRX Series Firewall. This is done automatically at regular intervals but can take a few seconds.
A manual download of the security-intelligence database can speed up this process, if necessary.
See Juniper Advanced Threat Prevention Cloud Administration Guide for more information.