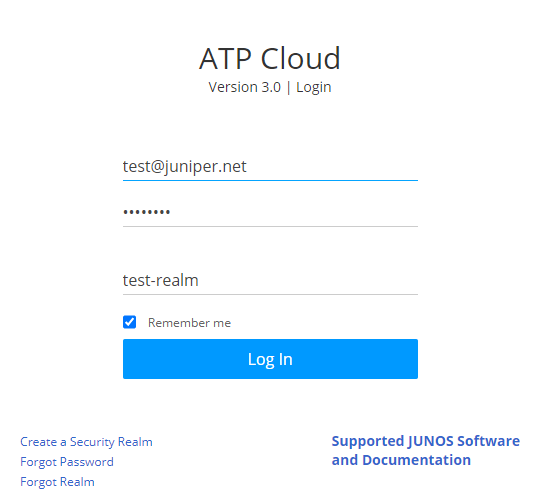
Set Up Single Sign-on with SAML 2.0 Identity Provider
Single sign-on (SSO) is an authentication method that allows you to securely log in to multiple applications and websites with a single set of login credentials.
Security Assertion Markup Language (SAML) is a framework for authentication and authorization between a service provider and an identity provider (IdP). Here, authentication is exchanged using digitally signed XML documents. The service provider agrees to trust the IdP to authenticate users. In return, the IdP generates an authentication assertion indicating that a user is authenticated.
Benefits
-
With SAML authentication, you can easily integrate Juniper ATP Cloud with your corporate IdP to provide SSO. If you are authenticated to your IdP, you are automatically authenticated to Juniper ATP Cloud. You need not remember separate passwords or type in credentials every time you access the Juniper ATP Cloud portal.
-
We support SAML protocol only for service provider-initiated SSO. Juniper ATP Cloud is compatible with SAML 2.0 web SSO profile as a service provider.
Step1: Configure SSO Settings in IdP
Example: Configure SSO with Okta as IdP
This section provides step-by-step instructions to configure SSO with Okta as IdP:
-
The information provided in this section is based on the current SSO with SAML implementation by Okta and is subject to change. For more detailed information, see Okta Documentation.
- You must already have an account with Okta.
- You must log in as administrator to perform the following operations.
- Log in to Okta portal.
- Navigate to Applications and click Applications > Create App Integration.
- In the Sign in method section, select SAML 2.0 and click Next.
- Enter the General settings for your application, such application name, application logo, and application visibility. Click Next.
- Configure the SAML Setting. For guidelines, see Table 1.
- Click Next.
- Choose whether you are a customer or a partner. Click
Finish.
Your application is now added to Okta. Click the Sign on tab. The Okta IdP metadata file is available for download. You can use this metadata file to dynamically import Okta IdP SSO settings to Juniper ATP Cloud.
- Navigate to Directory > Groups > Add Group and add
groups. Create separate groups for each roles. For example, role_administrator,
role_operator, role_observer.
The group names are important. Note down the group names as it will be used for user role mapping in Juniper ATP Cloud Portal. See Table 4
. - Click on a group name and add users and applications to the group.
- Click Manage People and select the users from the list. The user is now added from Not Members list to the Members list.
- Click Save. The user is now assigned to the group.
|
Field |
Description |
|---|---|
|
General Settings |
|
|
Single sign on URL |
The location where the SAML assertion is sent with a HTTP POST. This is often referred to as the SAML Assertion Consumer Service (ACS) URL for your application. Example: https://canada.sky.junipersecurity.net/portal/sso/acs |
|
Audience URI (SP Entity ID) |
The application-defined unique identifier that is the intended audience of the SAML assertion. This is Juniper ATP Cloud's SP Entity ID (a globally unique identifier). Example: https://canada.sky.junipersecurity.net |
|
Default Relay State |
(Optional) Identifies a specific application resource in an IdP-initiated Single Sign-On scenario. In most instances this field is blank. Juniper ATP Cloud does not support IdP-initiated SSO. We recommend you leave this field blank. |
|
Name ID format |
Identifies the SAML processing rules and constraints for the assertion's subject statement. Select the name ID format from the list. Use the default value of 'Unspecified' unless the application explicitly requires a specific format. This field is not used in the Juniper ATP Cloud Web portal, hence retain the default value. |
|
Application username |
Determines the default value for a user's application username. The application username is used for the assertion's subject statement. Select the application username from the list. This field is not used in the Juniper ATP Cloud, hence retain the default value. |
|
Advanced Settings |
|
|
Response |
Determines whether the SAML authentication response message is digitally signed by IDP or not. A digital signature is required to ensure absolute privacy of the information exchanged by your IdP. You must set this field to Signed. |
|
Assertion Signature |
Determines whether the SAML assertion is digitally signed or not. A digital signature is required to ensure that only your IDP generated the assertion. You must set this field to Signed. |
|
Signature Algorithm |
Determines the signing algorithm used to digitally sign the SAML assertion and response. Okta provides RSA-SHA256 signature algorithm. |
|
Digest Algorithm |
Determines the digest algorithm used to digitally sign the SAML assertion and response. Okta provides SHA256 digest algorithm. |
|
Assertion Encryption |
Determines whether the SAML assertion is encrypted or not. Encryption ensures that nobody but the sender and receiver can understand the assertion. You must set this field to encrypted only if you plan to enable Encrypt SAML response on the Juniper ATP Cloud ATP SSO settings. |
|
Enable Single Logout |
Enable SAML Single Logout. This field is not used in the Juniper ATP Cloud, hence retain the default value. |
|
Assertion Inline Hook |
This field is disabled. This field is not used in the Juniper ATP Cloud, hence retain the default value. |
|
Authentication context class |
Identifies the SAML authentication context class for the assertion's authentication statement This field is not used in the Juniper ATP Cloud, hence retain the default value. |
|
Honor Force Authentication |
Prompt user to re-authenticate, if requested by service provider. This field is not used in the Juniper ATP Cloud, hence retain the default value. |
|
SAML Issuer ID |
SAML IdP Issuer ID This field is not used in the Juniper ATP Cloud, hence retain the default value. |
|
Attribute Statements |
When you create a new SAML integration, or modify an existing one, you can define custom attribute statements. These statements are inserted into the SAML assertions shared with Juniper ATP Cloud.
Sample attribute statement is provided in Table 2. |
|
Group Attribute Statements (optional) |
If your Okta org uses groups to categorize users, you can add group attribute statements to the SAML assertion shared with your application. User's groups is mapped to the attribute statement in the SAML Response. The group attribute helps in identifying which user belongs to which group.
You can create group attribute for role_administrtor, role_observer, and role_operator and add users to the group. Sample group attribute statement is provided in Table 3. |
|
Preview the SAML assertion |
Click to view the Xml file that will be used in the assertion. |
| Name | Name Format | Value |
|---|---|---|
| firstname | Unspecified | user.firstName |
| lastname | Unspecified | user.lastName |
| Unspecified | user.email |
The firstname and lastname attributes are optional. In Juniper ATP Cloud SSO SAML Provider Settings, you must set a mandatory field named Username Attribute. Whatever attribute value you have planned to set in Juniper ATP Cloud, you must set the same attribute value in Okta IdP, else SSO will fail.
For example, if you plan to set the Username Attribute value in the Juniper ATP Cloud SSO SAML Provider Settings to user.email, then you must set the same attribute in Okta IdP with the attribute value as user.email.
|
Name |
Name Format |
Filter |
|
|---|---|---|---|
|
role |
Unspecified |
contains |
role |
| Role Mapping in Okta | Role Mapping in Juniper ATP Cloud Portal |
|---|---|
|
role_administrator |
Set Administrator field to role_administrator when you configure SSO settings in Juniper ATP Cloud Portal. |
|
role_operator |
Set Operator field to role_operator when you configure SSO settings in Juniper ATP Cloud Portal. |
|
role_observer |
Set Observer field to role_observer when you configure SSO settings in Juniper ATP Cloud Portal. |
Example: Configure SSO with Microsoft Azure as IdP
This section provides step-by-step instructions to configure SSO with Microsoft Azure as IdP:
-
The information provided in this section is based on the current SSO with SAML implementation by Microsoft Azure and is subject to change. For more detailed information, see Microsoft Azure Documentation.
- You must already have an account with Microsoft Azure.
- You must log in as an administrator to perform the following operations.
- Log in to Azure portal.
- Click Azure Active Directory > Enterprise Applications.
- Click + New application > +Create your own application.
- Enter the application name and click Create.
The new application is listed in the All applications page.
- Click on the application name.
- Click Assign users and groups > Add user/group.
The Add assignment page appears.
- Click None selected. Choose the users and groups from the
Users and groups list and click Select.Note:
When you assign a group to an application, only users directly in the group will have access. The assignment does not cascade to nested groups.
- Click Assign. For sample users and groups, see Table 5
- Navigate to Manage > Single Sign-on > SAML. Configure the settings as per the guidelines provided in Table 6.
- Click Test to check if SSO is working. Note:
You must add users to Users and groups before you can sign in.
- Navigate to Security > Token encryption > Import Certificate and upload the encryption certificate. IdP administrator must generate and upload the certificate to enable token encryption
| Display Name | Object Type | Role Assigned |
|---|---|---|
|
role_administrator |
Group |
User |
|
role_observer |
Group |
User |
|
role_operator |
Group |
User |
|
Field |
Description |
|---|---|
|
Basic SAML Configuration |
|
|
Identifier (Entity ID) |
(Mandatory) The default identifier will be the audience of the SAML response for IDP-initiated SSO. This value must be unique across all applications in your Azure Active Directory tenant Example: https://amer.sky.junipersecurity.net |
|
Reply URL (Assertion Consumer Service URL) |
(Mandatory) The default reply URL will be the destination in the SAML response for IDP-initiated SSO. The reply URL is where the application expects to receive the authentication token. This is also referred to as the “Assertion Consumer Service” (ACS) in SAML. Example: https://amer.sky.junipersecurity.net/portal/sso/acs |
|
Sign on URL |
(Optional) This URL contains the sign-in page for this application that will perform the service provider-initiated SSO. Leave it blank if you want to perform IdP initiated SSO. |
|
Relay State |
(Optional) The relay state instructs the application where to redirect users after authentication is complete, and the value is typically a URL or URL path that takes users to a specific location within the application. The value in this form only takes effect in an IdP-initiated SSO flow. Juniper ATP Cloud does not support IdP-initiated SSO. We recommend you leave this field blank. |
|
User Attributes & Claims Parameters that define which access control groups to associate with ATP. The access control groups are mapped to Juniper ATP roles. |
|
|
Unique User Identifier |
(Optional) Provide the Name ID. Example: user.userprincipalname [nameid-format:emailAddress] |
|
+Add new claim |
Define the claims used by Azure AD to populate SAML tokens issued to Juniper ATP Cloud. To add a new claim:
See Table 7. Note:
The givenname and surname attributes are optional. In Juniper ATP Cloud SSO SAML Provider Settings, you must set a mandatory field named Username Attribute. Whatever attribute value you have planned to set in Juniper ATP Cloud, you must set the same attribute value in Azure IdP, else SSO will fail. For example, if you plan to set the Username Attribute value in the Juniper ATP Cloud SSO SAML Provider Settings to emailaddress, then you must set the same attribute name in Azure IdP with the attribute value as user.mail. |
|
+ Add a group claim |
Define the group claims used by Azure AD to populate SAML tokens issued to Juniper ATP Cloud. To add a new group claim:
|
|
SAML Signing Certificate |
|
|
Status |
Displays the status of the SAML certificate used by Azure AD to sign SAML tokens issued to your application. |
|
Thumbprint |
Displays the thumbprint of the SAML certificate. |
|
Expiration |
Displays the expiration date of the SAML certificate. |
|
Notification Email |
Displays the notification e-mail address. |
|
App Federation Metadata Url |
Displays the Azure IdP metadata URL for SAML. Example: https://login.microsoftonline.com/ff08d407-69c4-4850-9af0-29034d31ab36/federationmetadata/2007-06/federationmetadata.xml?appid=6915f8ab-640a-4e1c-bb67-5e81a14f7898 |
|
Certificate (Base64) |
(Optional) Click to download the Base64 certificate. |
|
Certificate (Raw) |
(Optional) Click to download the Raw certificate. |
|
Federation Metadata XML |
(Optional) Click to download the federation metadata document. |
| Signature Algorithm |
Determines the signing algorithm used to digitally sign the SAML assertion and response. Azure provides RSA-SHA256 signature algorithm. |
|
Set up Application (Juniper ATP Cloud) |
|
|
Login URL |
Displays the login URL for Microsoft Azure. You will be redirected to login URL for authentication. Example: https://login.microsoftonline.com/ff08d407-69c4-4850-9af0-29034d31ab36/saml2 |
|
Azure AD Identifier |
Displays the intended audience of the SAML assertion. It is the Entity ID (a globally unique identifier) of Azure IdP. Example: https://sts.windows.net/ff08d407-69c4-4850-9af0-29034d31ab36/ |
|
Logout URL |
Displays the logout URL for Microsoft Azure This field is not yet supported in Juniper ATP Cloud. |
| Attribute Name | Source Attribute Value | Description |
|---|---|---|
| givenname | user.givenname | The givenname attribute will be used to map last name of the user in ATP Cloud. |
| surname | user.surname | The surname attribute will be used to map last name of the user in ATP Cloud. |
| emailaddress | user.mail | |
| The emailaddress attribute will be used to map email address of the user in ATP Cloud. |
Step 2: Configure SSO Settings in Juniper ATP Cloud Web Portal
Step 3: Activate SSO Configuration
To activate SSO configuration, log in to Juniper ATP Cloud portal, navigate to and click Activate.
Step 4: Test SSO Configuration
SSO initiated by Service Provider (Juniper ATP Cloud)—Log in to Juniper ATP Cloud Web portal with SSO. If you log into the Juniper ATP Cloud Web Portal before authenticating with IdP SSO, then based on the ATP Cloud organization, you will be redirected to the IdP portal for authentication. After authentication with IdP, you are logged in to Juniper ATP Cloud Web portal.
-
Identity Provider—When you log in to the IdP SSO account, it provides a list of applications that are integrated with IdP and you can access any of the applications. For example, if you click the Juniper ATP Cloud application, you are directed to Juniper ATP Cloud Web portal.
Troubleshoot SSO Configuration
Use the following information to troubleshoot errors and issues when using SAML 2.0 with Juniper ATP Cloud.
- Organization
-
The SSO setting is configured per organization. Both local and SAML users can co-exist in an organization. By default, the organization creator (administrator) is the local user.
-
If SSO fails due to incorrect configuration and SSO user is unable to login, then contact the organization creator (administrator), who has local login access to the organization. Administrator can login with the ATP Cloud customer portal URL and fix the SSO configuration for the organization.
-
- Role mapping
-
Juniper ATP Cloud has the 'admin', 'operator', 'observer' roles set as part of the user profiles creation use case.
-
To authenticate ATP users with IdP, you need to have at least one group in IdP that defines ATP users, which will eventually be mapped to ATP roles.
-
Users can create an IdP group for each ATP role type: 'admin', 'operator', 'observer' and map the roles appropriately during IdP configuration.
-
If the user group doesn’t match with the mapping on IdP, an error message is displayed to the user.
-
- Multifactor authentication
-
If IdP provides its own step-up authentication capability, SSO user will be redirected to the SSO site for the step-up authentication. Multifactor Authentication on Juniper ATP Cloud is disabled if single-sign-on is enabled.
-
Local users on the same organization can continue to use ATP’s multifactor authentication (MFA).
-
- Password
-
SSO users who have forgotten the password must log in to the IdP site to reset the password. When a user tries to SSO by providing the organization name, ATP Cloud portal will redirect the user to IdP site for the authentication. If user authentication fails in the IdP site. then the user must reset the password from the IdP site.
-
The Forgot password option in Juniper ATP Cloud portal is for the organizations that are not configured with SSO.
-