Onboarding Slack Enterprise applications
This section outlines the procedure for onboarding a Slack enterprise cloud application. For these applications, you can choose several protection modes including API Access, which provides expanded access controls that go beyond user IDs, such as denial of logins from non-compliant or compromised devices and from users with patterns of risky behavior.
A non-enterprise Slack application is also available with a smaller number of protection modes.
Onboarding steps
-
Go to Administration > App Management.
-
In the Managed Apps tab, click Add New.
-
Select Slack Enterprise and click Next.
-
Enter a Name (required) and a Description (optional). Then click Next.
-
Select one or more protection modes.
-
API Access
-
Cloud Data Discovery
-
Enter the information for the selected protection modes.
-
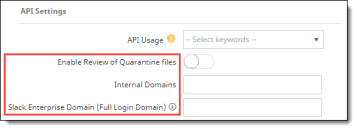
For API Settings – Enter or select the following information:
-
The API Usage type -- Defines how this application will be used with API protection. Check Monitoring & Content Inspection, Receiving Notifications, or Select All.
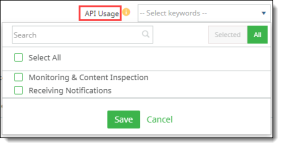
If you select only Receiving Notifications, this cloud application is not protected; and will be used only to receive notifications.
-
Enable Review of Quarantine Files -- Click this toggle to enable reviewing of tombstoned files through the Slack channel.
-
Internal Domains – Enter any internal domains applicable for this application.
-
Slack Enterprise Domain (Full Login Domain) -- Enter the full domain for your organization. Example: https://<name>.enterprise.slack.com
-
Click Authorize. Enter Slack credentials when prompted.
-
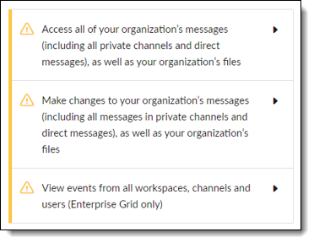
Slack displays a prompt requesting that you confirm permissions to access your organization’s messages, modify messages, and view elements from workspaces, channels, and users in your organization.
Click Allow to confirm these permissions.
-
Authorize one or more workspaces. Click Authorize next to the workspace name to authorize it. At least one workspace must be authorized.
-
When prompted to install the app in the workspace, click Allow.
Note
If you want to enable additional functionality, each workspace must be onboarded (authorized) separately. If the workspaces are not authorized separately, the following actions will not be supported:
-
Encrypt
-
Watermark
-
Removed external shared link
-
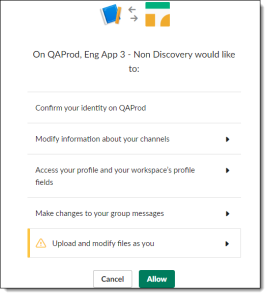
In response to the prompt for non-discovery access, click Allow.
-
Click Next. The Key Management page is displayed.

-
To request a new key now, click Request New Key. The administrator will be notified, and a key will be assigned. Then, click Save. If you want to request a new key later, click Save.