Configure a Notification Profile
Configure a notification profile to define the delivery method used for sending notifications.
To configure a notification profile from the Paragon Automation graphical user interface (GUI):
-
Enter the following information in the Add Notification
Setting page:
Table 1: Configure Notification Profile Attributes
Description
Name
Enter a name for the notification.
Description
Enter a description for the notification.
Notification Type
Select a notification type:
-
Web Hook
-
Slack
-
Kafka Publish
-
AMQP
-
Microsoft Teams
-
EMails
The notification attributes vary based on the notification type selected.
-
If you have selected Web Hook notification type, enter the following information:
-
URL Enter the URL where the Web Hook notification must be posted.
-
Username Enter the username for basic HTTP authentication.
-
Password Enter the password for basic HTTP authentication.
-
-
If you have selected Slack notification type, enter the following information:
-
URL Enter the URL where the Slack notification must be posted.
This is different from your Slack workspace URL. To create a Slack API endpoint URL, click https://slack.com/services/new/incoming-webhook and sign in to your Slack workspace.
-
Channel Enter the channel on which the notification must be posted.
-
-
If you have selected Kafka Publish notification type, enter the following information:
-
Bootstrap Servers Enter Kafka host:port pairs to establish the initial connection to the Kafka cluster.
-
Use Hash Partitioner Select this check box to store messages in consistent partitions based on a partitioning scheme (key).
-
Topic Enter the name of the Kafka topic in which data must be published.
By default, the Kafka topic naming convention for device group alarm notifications is device-group.device-id.topic.rule.trigger.
-
Depending on the authentication protocols being used, the required authentication parameters are listed here:
Protocol
Required Parameters
SASL/SSL
Username, password and certificate
SASL/Plaintext
Username and password
SSL
Certificate
Plaintext
None
-
Username Enter username for SASL/SSL or SASL/plaintext authentication.
-
Password Enter password for SASL/SSL or SASL/plaintext authentication.
-
Certificate Select Kafka server’s CA certificate from the drop-down list.
-
Upload Certificate Click Choose files and navigate to the location of the file that you want to upload. The file must be in Privacy Enhanced Mail (.pem) format.
-
-
-
If you selected AMQP Publish notification type, enter the following information:
-
Host Enter the hostname or IP address of the AMQP server.
-
Port Enter the port number of the AMQP server.
-
Exchange Enter the AMQP exchange name (routing agent name).
-
Virtual Host Enter the virtual host that you configured in RabbitMQ management portal.
-
Routing Key Enter the AMQP routing key that helps exchange decide how to route the message.
-
Username Enter the username for the SASL/SSL authentication.
-
Password Enter the password for the SASL/SSL authentication.
-
CA Profile Select the CA certificate of AMQP server.
You can configure the CA profile in Settings > Security.
-
Local Certificate Select the local certificate of the AMQP server.
You can configure the local certificate in Settings > Security
-
Server Common Name Enter the common name used while creating the server certificate.
-
-
If you have selected Microsoft Teams notification type, enter the following information:
-
Channel Paste the web hook URL generated by Teams.
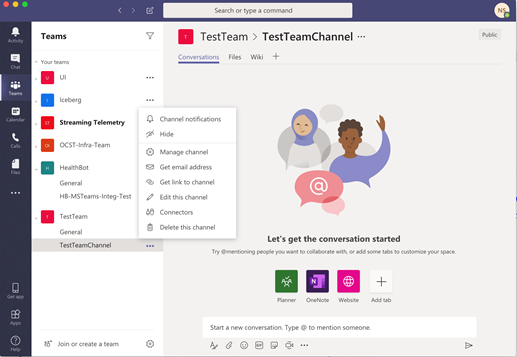
To generate a web hook URL from Teams:
-
Select the desired channel and click the ellipsis (...).
-
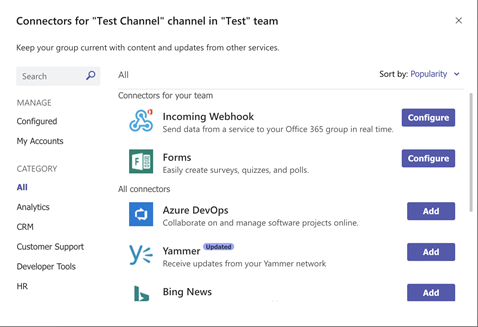
Click Connectors in the displayed menu.
-
Use the Incoming Webhook option and click Configure.
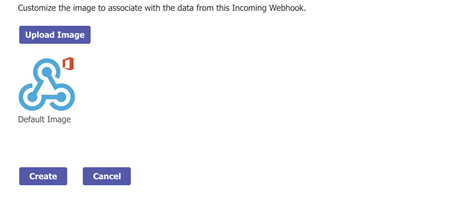
-
Click Create.
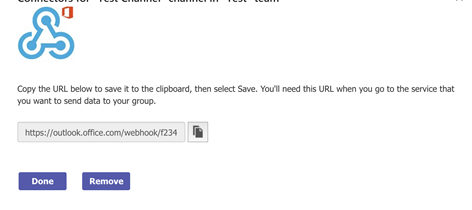
-
Once the web hook is successfully created, copy the displayed URL.
-
-
If you selected EMails notification type, enter the following information:
-
Email Addresses Enter an email address and click Add <email-address> . You can add one or more email addresses.
-
Rule Filters Enter a filter and click Add <rule-filters> to define a rule filter. You can add one or more than one rule filter.
Define a rule filter to narrow the scope of what triggers an email.
Examples of rule filters are:
-
interface.statistics/check-interface-flaps—sends notifications only for the rule check-interface-flaps.
-
system.processes/.* , system.cpu/.* , and interface.statistics/.* sends notifications for all rules under the topics system.processes, system.cpu, and interface.statistics.
Note:Paragon Insights includes its own mail transfer agent (MTA), so no other mail server is required.
-
-
-
Apply the notification profile to a device group or network group as shown in Enable Alert Notifications for Device Groups and Network Groups.