Configuring the L3 Plug-in
Juniper L3 plug-in supports the following features:
L3 routing
Adding static routes
Provides router High Availability via VRRP
Routed external networks
Supported Devices
EX, QFX, SRX, and vSRX series devices.
Plug-in Configuration
To configure the L3 plug-in:
Update the configuration file
/etc/neutron/neutron.confas follows:[DEFAULT] service_plugins = neutron.services.juniper_l3_router.dmi.l3.JuniperL3Plugin
Restart neutron-server for the changes the take effect.
Login to OpenStack GUI, create networks, and assign to a router. On the device configured as router, you can view the routing instance and the routing virtual interface (RVI) corresponding to the networks assigned to the routing instance.
Configuring the L3 VXLAN Plug-in with EVPN
The Juniper VXLAN EVPN ML2 plug-in uses VXLAN tunnels along with the Neutron hierarchal port binding design to provide L2 networks in OpenStack.
The default L3 service plug-in present in OpenStack implements virtual router using Linux network name spaces.
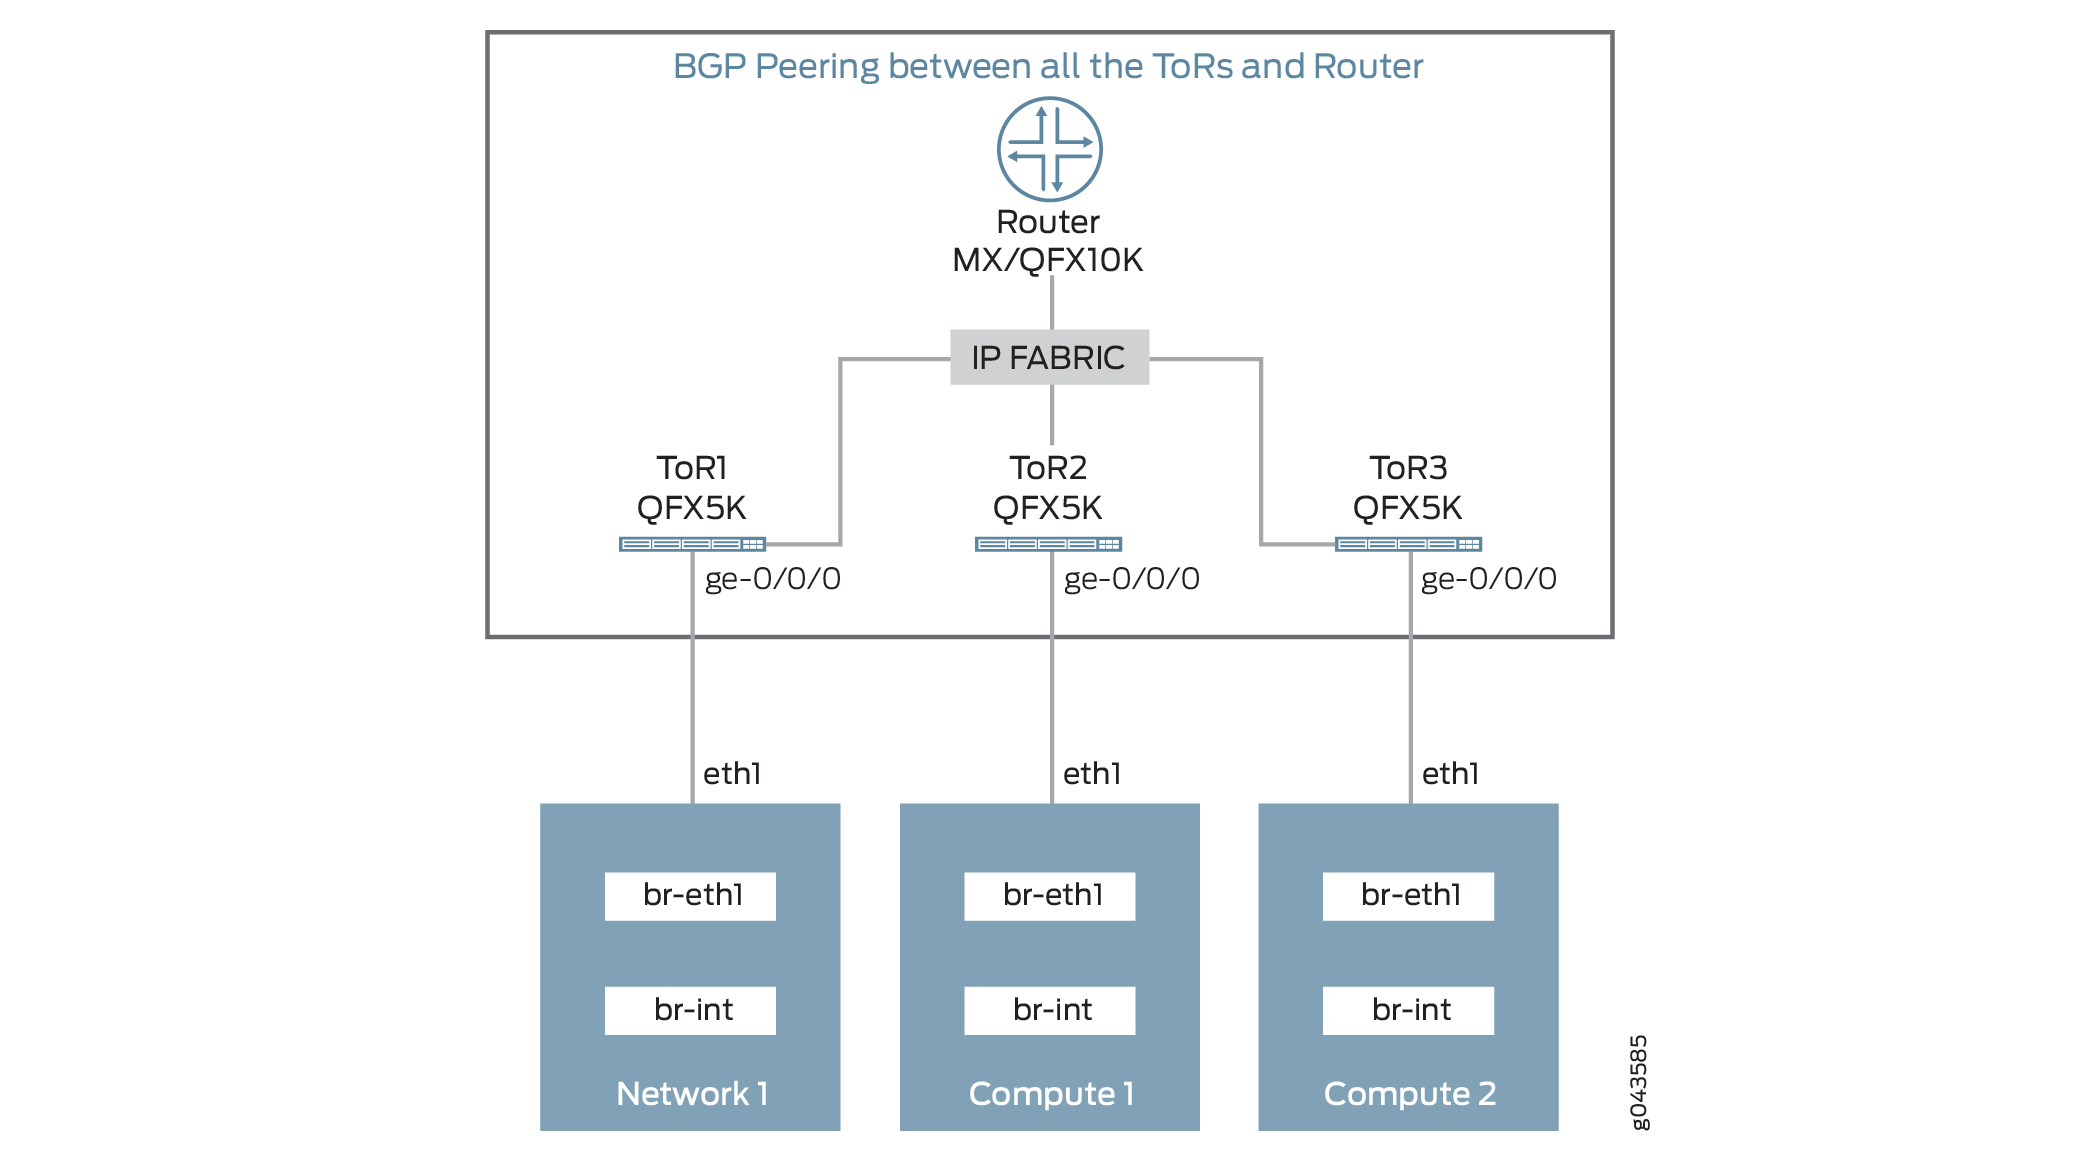
This release of Neutron Plug-ins from Juniper Networks adds support for L3 routing for VXLAN networks. This is done by creating a VTEP on MX and QFX10000 series devices to convert the VXLAN to VLAN based network and configuring routing Instances to route packets between these VLANs.
This feature works in conjunction with Juniper Networks VXLAN EVPN ML2 plug-in, whereas the VXLAN EVPN ML2 plug-in is used to provide L2 connectivity, the VXLAN EVPN L3 service plug-in provides L3 routing between the VXLAN based virtual networks.
Supported Devices
The VXLAN EVPN L3 service plug-in can orchestrate MX and QFX10K devices to provide L3 based routing between VLAN based networks.
EVPN is supported on version 14.2R6 on MX and QFX10K.
Plug-in Configuration
The EVPN L3 plug-in depends on the VXLAN EVPN ML2 plug-in for orchestration of layer 2 ports. Configuration of ML2 VXLAN EVPN plug-in is a pre-requisite for this plug-in. To configure the ML2 VXLAN EVPN plug-in , refer to Configuring ML2 VXLAN Plug-in with EVPN.
To configure the VXLAN EVPN L3: