Configuring OpenStack Extension for Physical Topology
Physical Topology extension provides a dashboard for the OpenStack administrator to manage physical network connections. For example, Host NIC to Switch Port mapping. The Physical topology API exposes these physical network connections.
Juniper neutron plug-in currently manages topology information
by using the jnpr_switchport_mapping command.
admin@controller:~$ jnpr_switchport_mapping list
+---------------+------+---------------+-----------+-----------+
|      Host     | Nic  |     Switch    |    Port   | Aggregate |
+---------------+------+---------------+-----------+-----------+
| 10.107.65.101 | eth1 | 10.107.52.136 | ge/0/0/10 |           |
| 10.107.65.102 | eth1 | 10.107.52.136 | ge/0/0/20 |           |
| 10.107.65.105 | eth2 | 10.107.52.137 | ge/0/0/20 |           |
| 10.107.65.106 | eth1 | 10.107.52.137 | ge/0/0/30 |           |
| 10.108.10.100 | eth1 | 10.107.52.137 |  ge/0/0/5 |           |
+---------------+------+---------------+-----------+-----------+
Plug-in Configuration
To configure the physical topology extension:
- After the installation is complete, the physical topology
dashboard is available at Admin > System > Physical
Networks.
From the Physical Networks dashboard, you can perform the following tasks:.
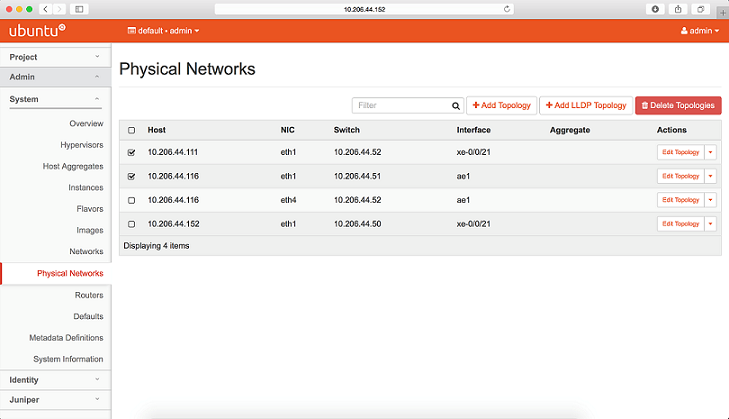
Figure 1 shows how to view physical topologies.
Figure 1: View Physical topologies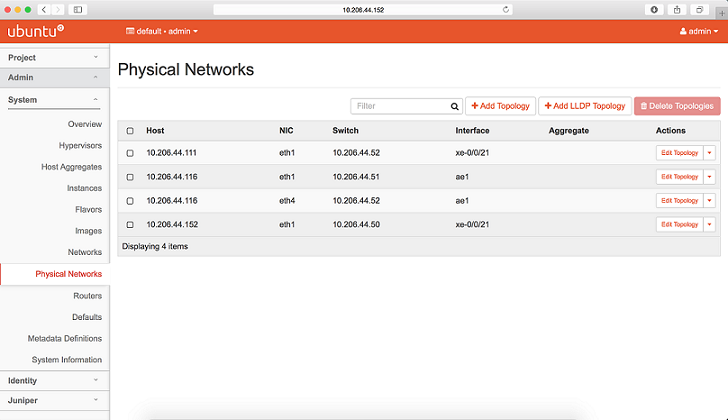
Figure 2 shows how to add a physical topology.
Figure 2: Add Physical Topology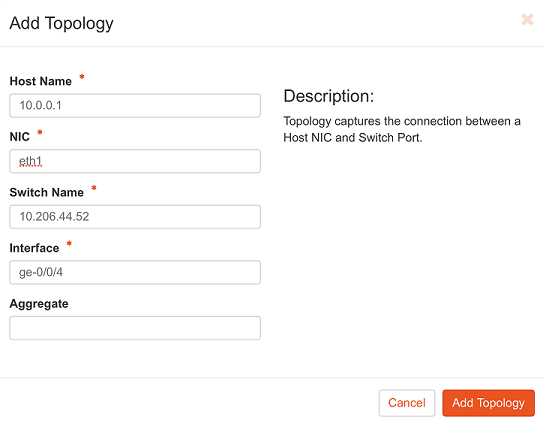
Figure 3 shows how to add a physical topology from LLD.
Figure 3: Add Topology from LLDP
Figure 4 shows how to edit a physical topology.
Figure 4: Edit Physical Topology
Figure 5 shows how to delete a physical topology.
Figure 5: Delete a Physical Topology
Figure 6 shows how to delete multiple physical topologies.
Figure 6: Delete Multiple Physical Topologies