Apply, Modify, or Add BGP Polices
Applying Policies
-
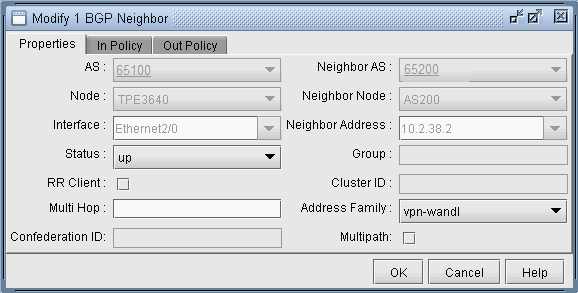
BGP policies that have already been defined at a router
can be applied as an in policy or as an out policy. To bring up the
Modify BGP Neighbors window, first switch to the Modify action mode.
Then select the Modify > Protocols > BGP > BGP Neighbors ... function
to bring up the BGP Neighbors window, from which a row can be selected.
Double-click on a selected row or click on the Modify button to bring
up the Modify BGP Neighbors window as shown in the following figure.
Figure 1: Modify BGP Neighbors
-
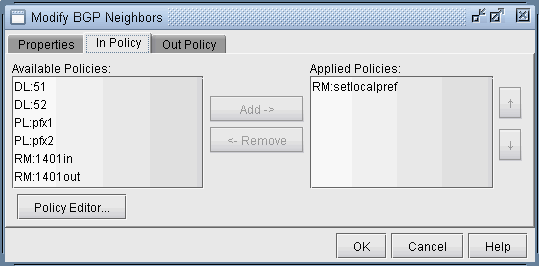
Select either the In Policy tab or the Out Policy tab
to see the Available Policies at that node and the Applied Policies
lists. Selected policies in the Available Policies list can be moved
to the Applied Policies list by clicking on the Add-> button and,
vice versa, selected policies in the Applied Policies list can be
moved to the Available Policies list by clicking on the <-Remove
button. The following figure shows an example of a BGP policy (setlocalpref)
that has been moved to the router’s Applied Policies list.
Figure 2: Applying an In Policy
In some cases, abbreviations are used to describe the policies, in the format Match Type: Match Name, where the Match types are interpreted as follows:
-
AC–Access List
-
AL–AS-path access list
-
CL–Community List
-
CL–Community List
-
PL–Prefix List
Modify BGP Policy
-
To modify a BGP policy at the router, click on the Policy Editor... button to bring up the Routing Policy Editor window as shown in the following figure. Then select a particular policy from the left pane to display corresponding policy commands in the right pane.
-
The + button expands a selection, while the - button collapses it. Dropdown menus and text fields allow you to modify the policy. The following figure shows an example of a BGP policy that is used to set the local-preference to a value of 80.
Figure 3: Modifying a BGP Policy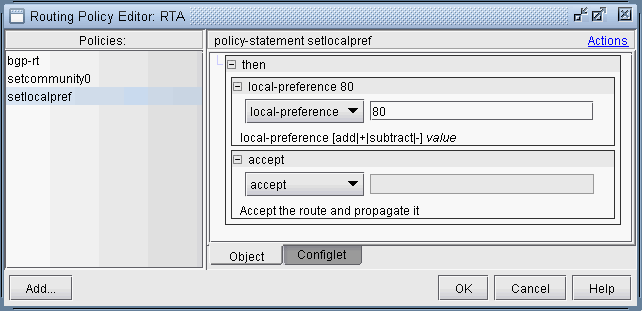
-
To see the generated configlet for the BGP policy, click on the Configlet tab. The following figure shows the generated configlet corresponding to a BGP policy (setlocalpref).
Figure 4: The Generated Configlet for a BGP Policy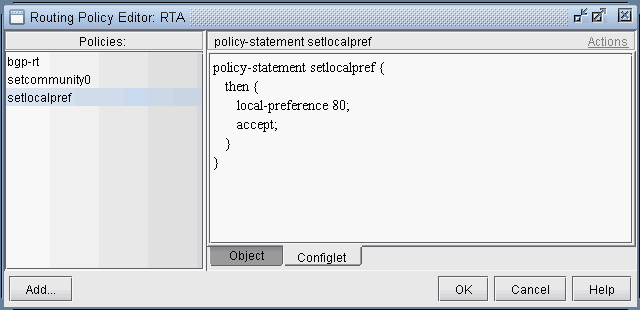
-
The right-click menu or the Actions menu offers further options for modifying the routing policy. To add a new term to a policy, first select the policy. Then from the right pane, select New from either the Action menu or the right-click menu. Note in the following figure that after selecting New, a new item was added to the policy.
Figure 5: Adding a term to a policy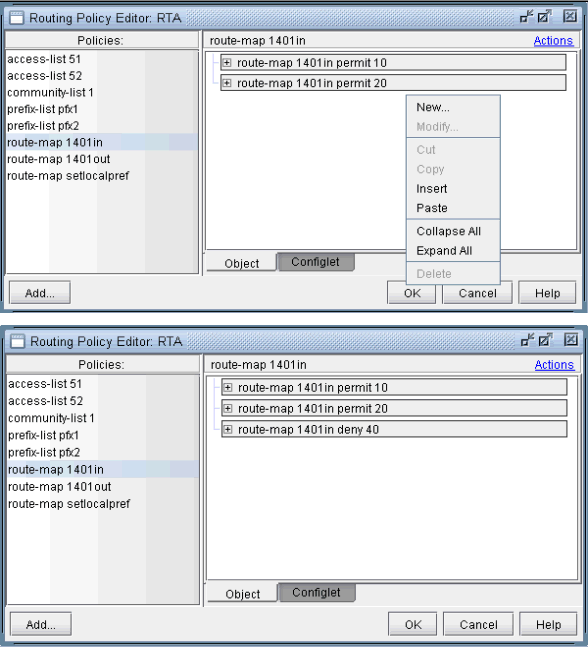
-
For route map policies, you can add commands underneath a particular term. Highlight the term, right-click, and select New... to open up the following dialog. Add “match” or “set” commands as shown in the following figure. Note that to deselect an item, simply click on a white space in the right pane.
Figure 6: Adding a match command to a term of a route-map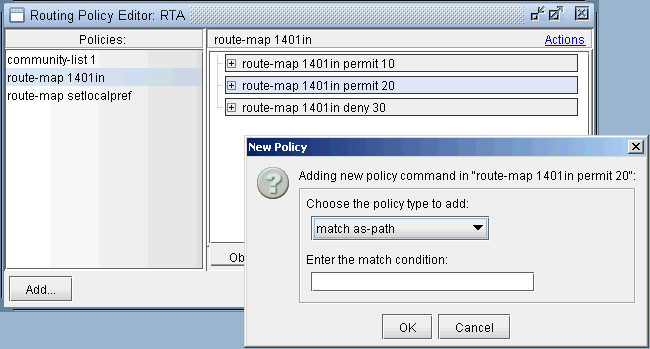
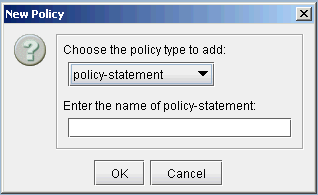
Adding a BGP Policy
To add a new BGP policy, click on the Add... button in the lower left hand corner of the window to bring up the New Policy window (shown in the following figure), and proceed the same way as is done in modifying a BGP policy. Here you have a choice of five different types of policies: route-map, access-list, as-path access-list, community-list, and prefix-list. Note that the options may vary depending on the policy type.