Creating User Groups and Permissions
An admin user can create any number of NorthStar Planner user groups and assign to each of these group a custom set of permissions. Select the group type and enter in the group name.
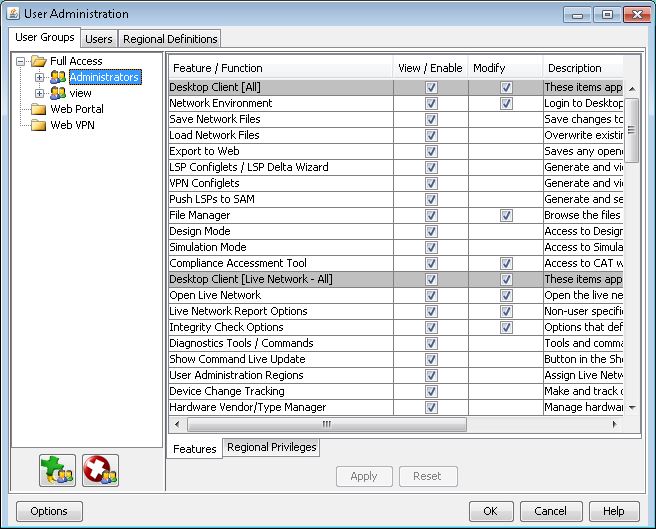
Setting Permissions
Once a user group has been created, you can assign permissions to that user group. Some features allow both View/Enable and Modify permissions, while others are turned completely on or off with just the View/Enable permission.
Note that enabling some features may require additional features to be enabled as well. This is because certain features are dependent on other features to be enabled before they can be accessed. When selecting the check box for such a feature, the checkbox(es) of the additional required feature(s) will automatically be checked as well.
To select all View/Enable or Modify items within a category, check the corresponding checkbox in the gray row indicating a category. Click the gray checkbox again to deselect all items under that category. Individual items within a category can also be turned on and off.
Changes made to a user group’s permission checkboxes are saved when clicking “Apply” or “OK.”
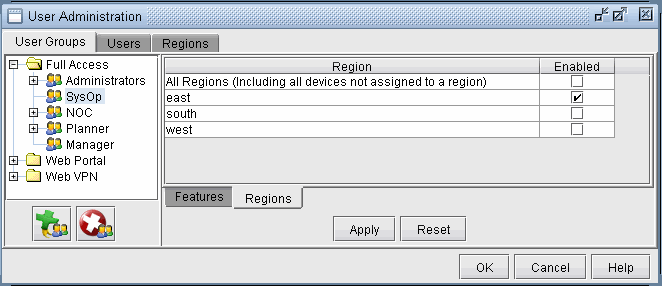
Regional Permissions
For the live network view, Full Access and Web Portal users can be restricted to being able to directly access the routers only for particular region(s). For devices outside of the permitted regions, which are grouped into the OUTSIDE_REGION group, view-only access is provided, and features such as ping, traceroute, show config, and hardware inventory are disabled. To limit the region(s), first define the regions in the top Regions tab. Note that you need to have run a live network task in order to define regions based on routers collected in the task.
Defining Regions
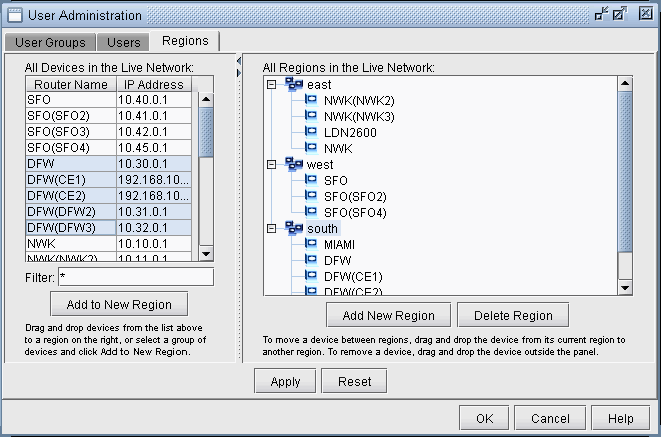
Select the routers to add to a region from the left pane and then click Add to New Region to create a new region with these selected routers. Alternatively, click Add New Region in the right pane and then select multiple routers (using <Shift> and <Ctrl> keys), and drag them from the left pane to the right pane. Note that you must drag them over a group name and not over a group member to add them to a group. To move a router from one group to another, select the router, and drag it to another group. To remove the router from the group, drag it outside of the right pane. Click Apply to save your changes.
Setting Regional Permissions
Once the region has been added, select the User Groups tab.at the bottom of the right pane and select the Regions tab. Here, you can limit the permissions for accessing the router live by unchecking the All Regions checkbox and then checking the corresponding region(s) to which the user can have access.